Do you want to connect and chat with your users directly? Do you wish to increase productivity and work smarter by providing chat support for your users? You have come to the right place because the Swiftspeed app creator can help you create your own inbox app so you can easily connect with your users. The inbox feature displays all your conversations in one place and allows you to provide customer support in real time. Kindly follow the steps below to learn how to integrate the Inbox feature into your own app. If you have any difficulty following the steps, watch this video.
Step 1:
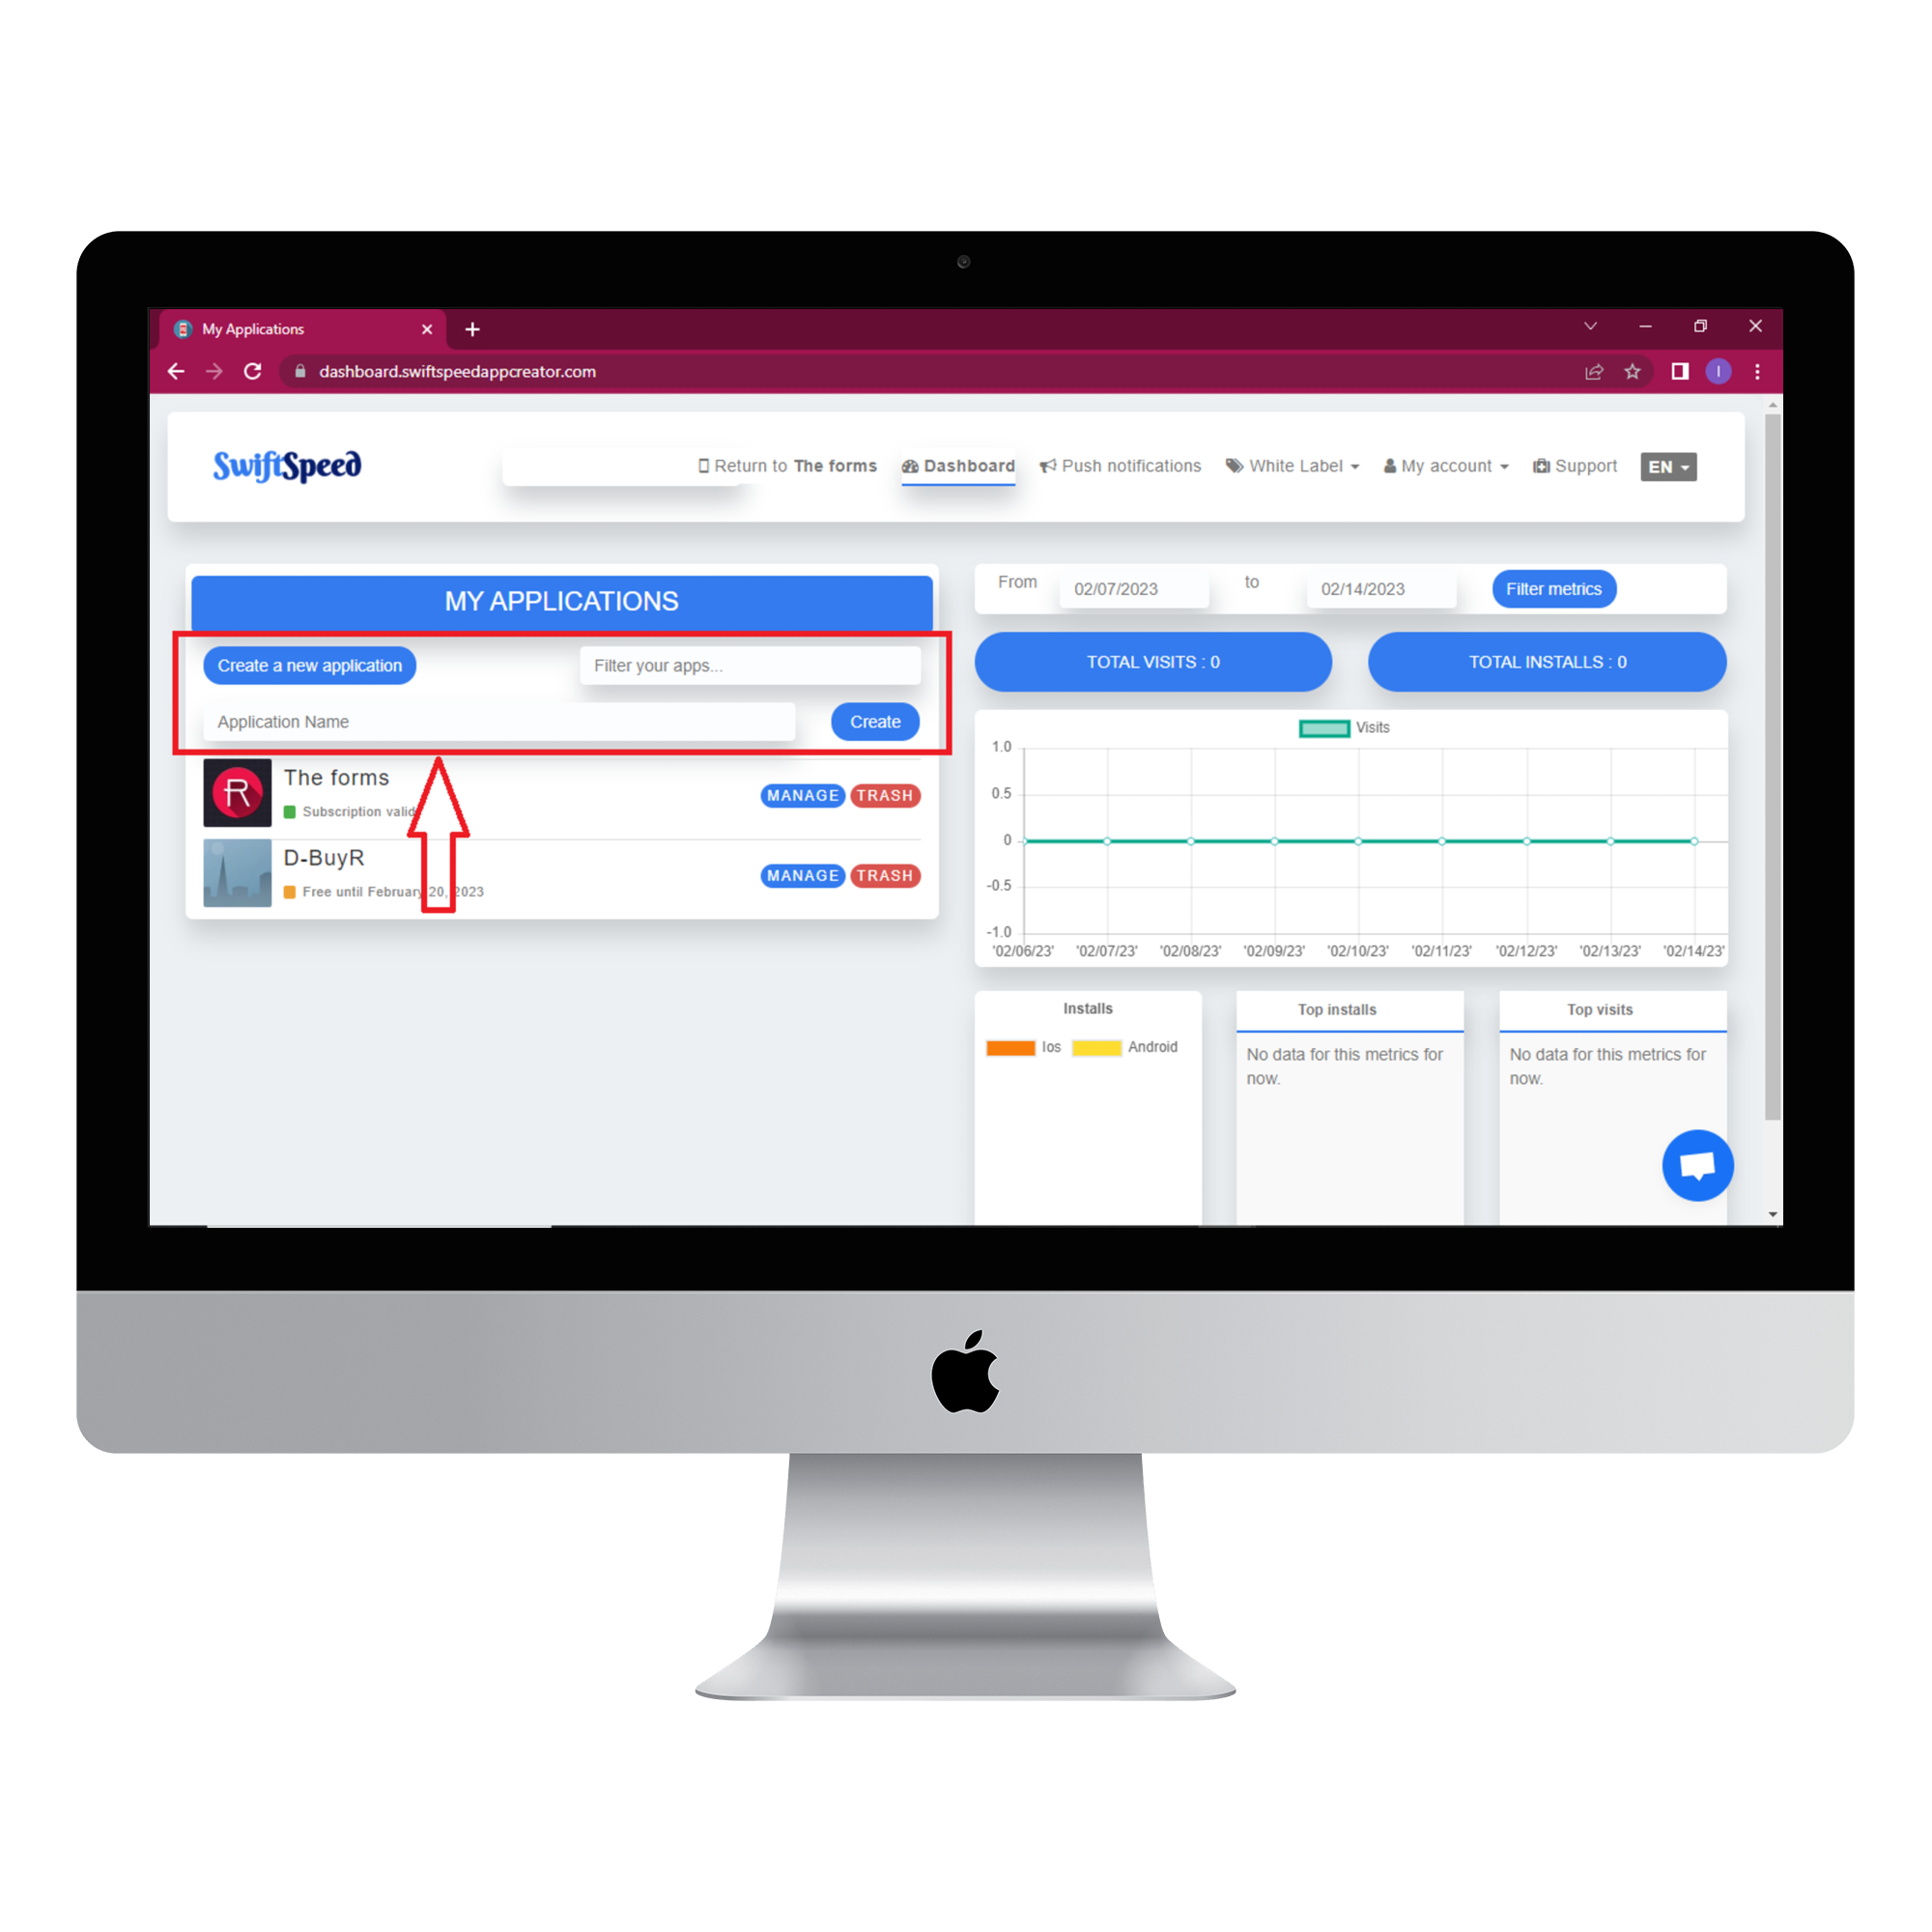
Go to the Swiftspeed homepage, log in, and you will be taken to the app creator dashboard. Click on “Create a new application” or select a pre-existing app. If you selected “Create a new application,” you will have to type in the name of your app and click “Create.” If you are not familiar with the app creation process, please read our article on how to create an app on our platform.
Step 2:
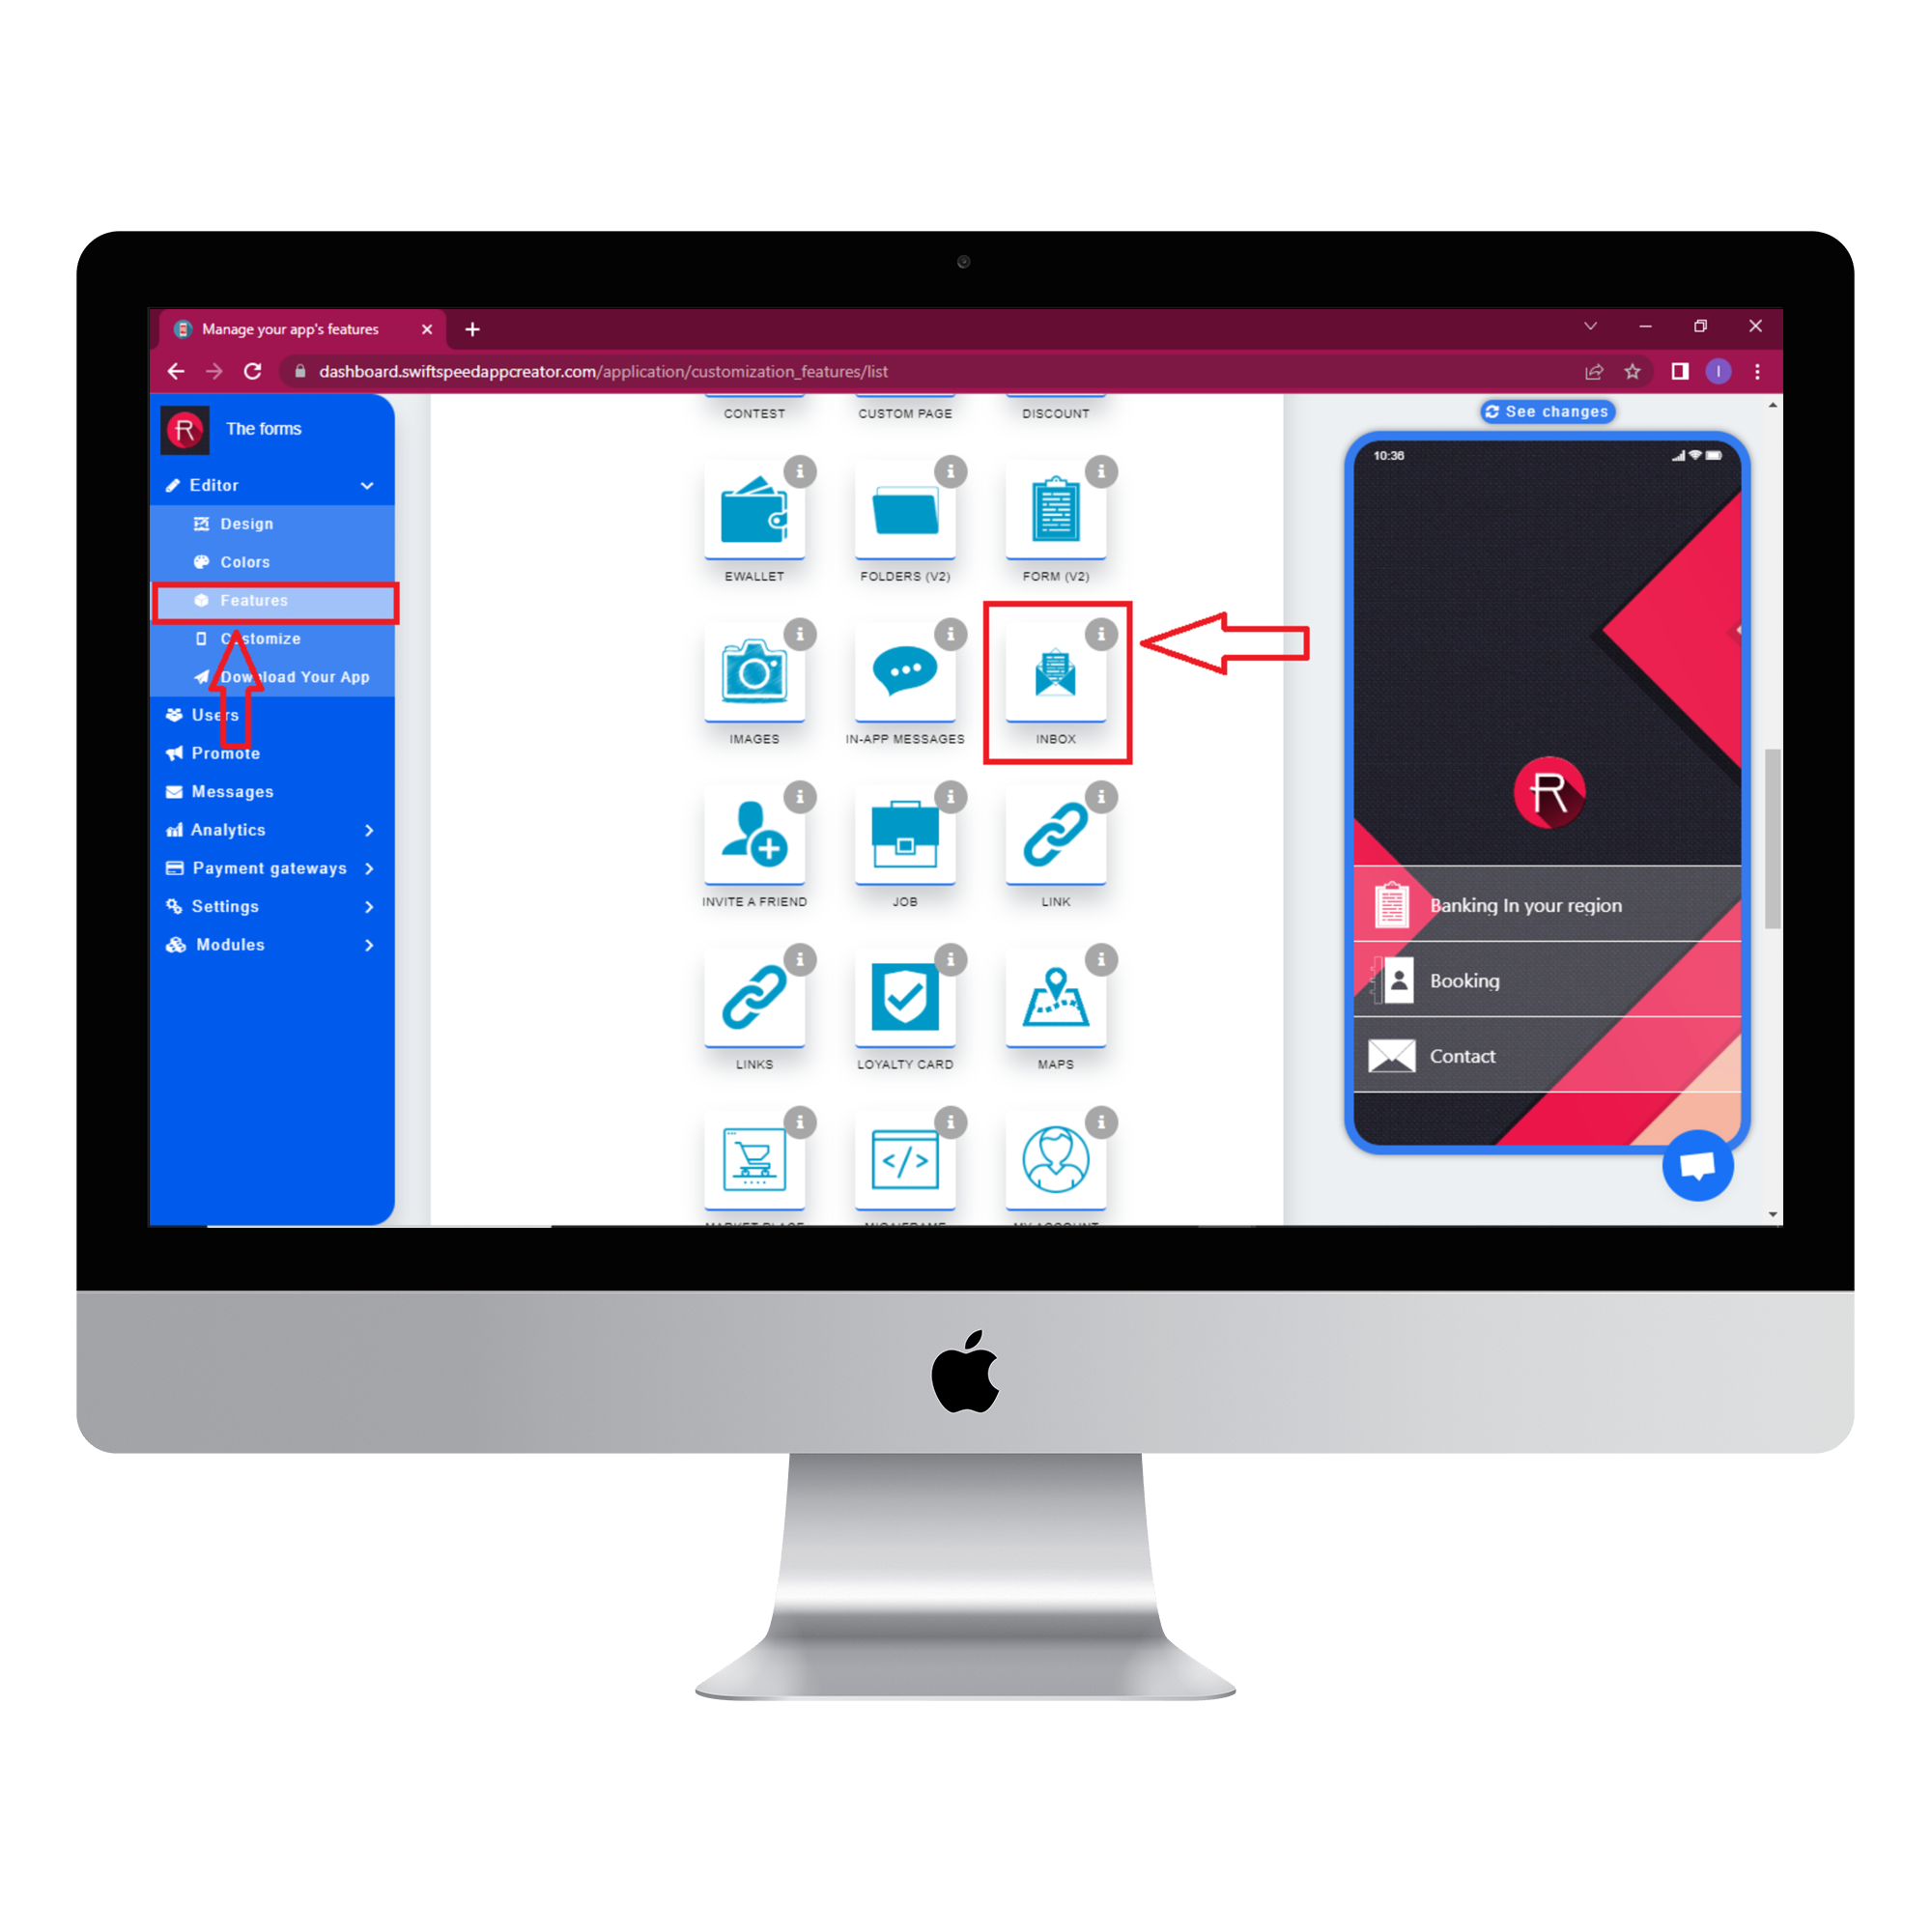
Select “Features” from the side menu on the left side of your screen. Choose the “Inbox” feature from the list of features and click on “Add feature” when the popup window appears. If you find it difficult to locate the “Inbox” feature, you can use the search box to find it. Just type in “Inbox” and press “Enter” on your keyboard.
Step 3:
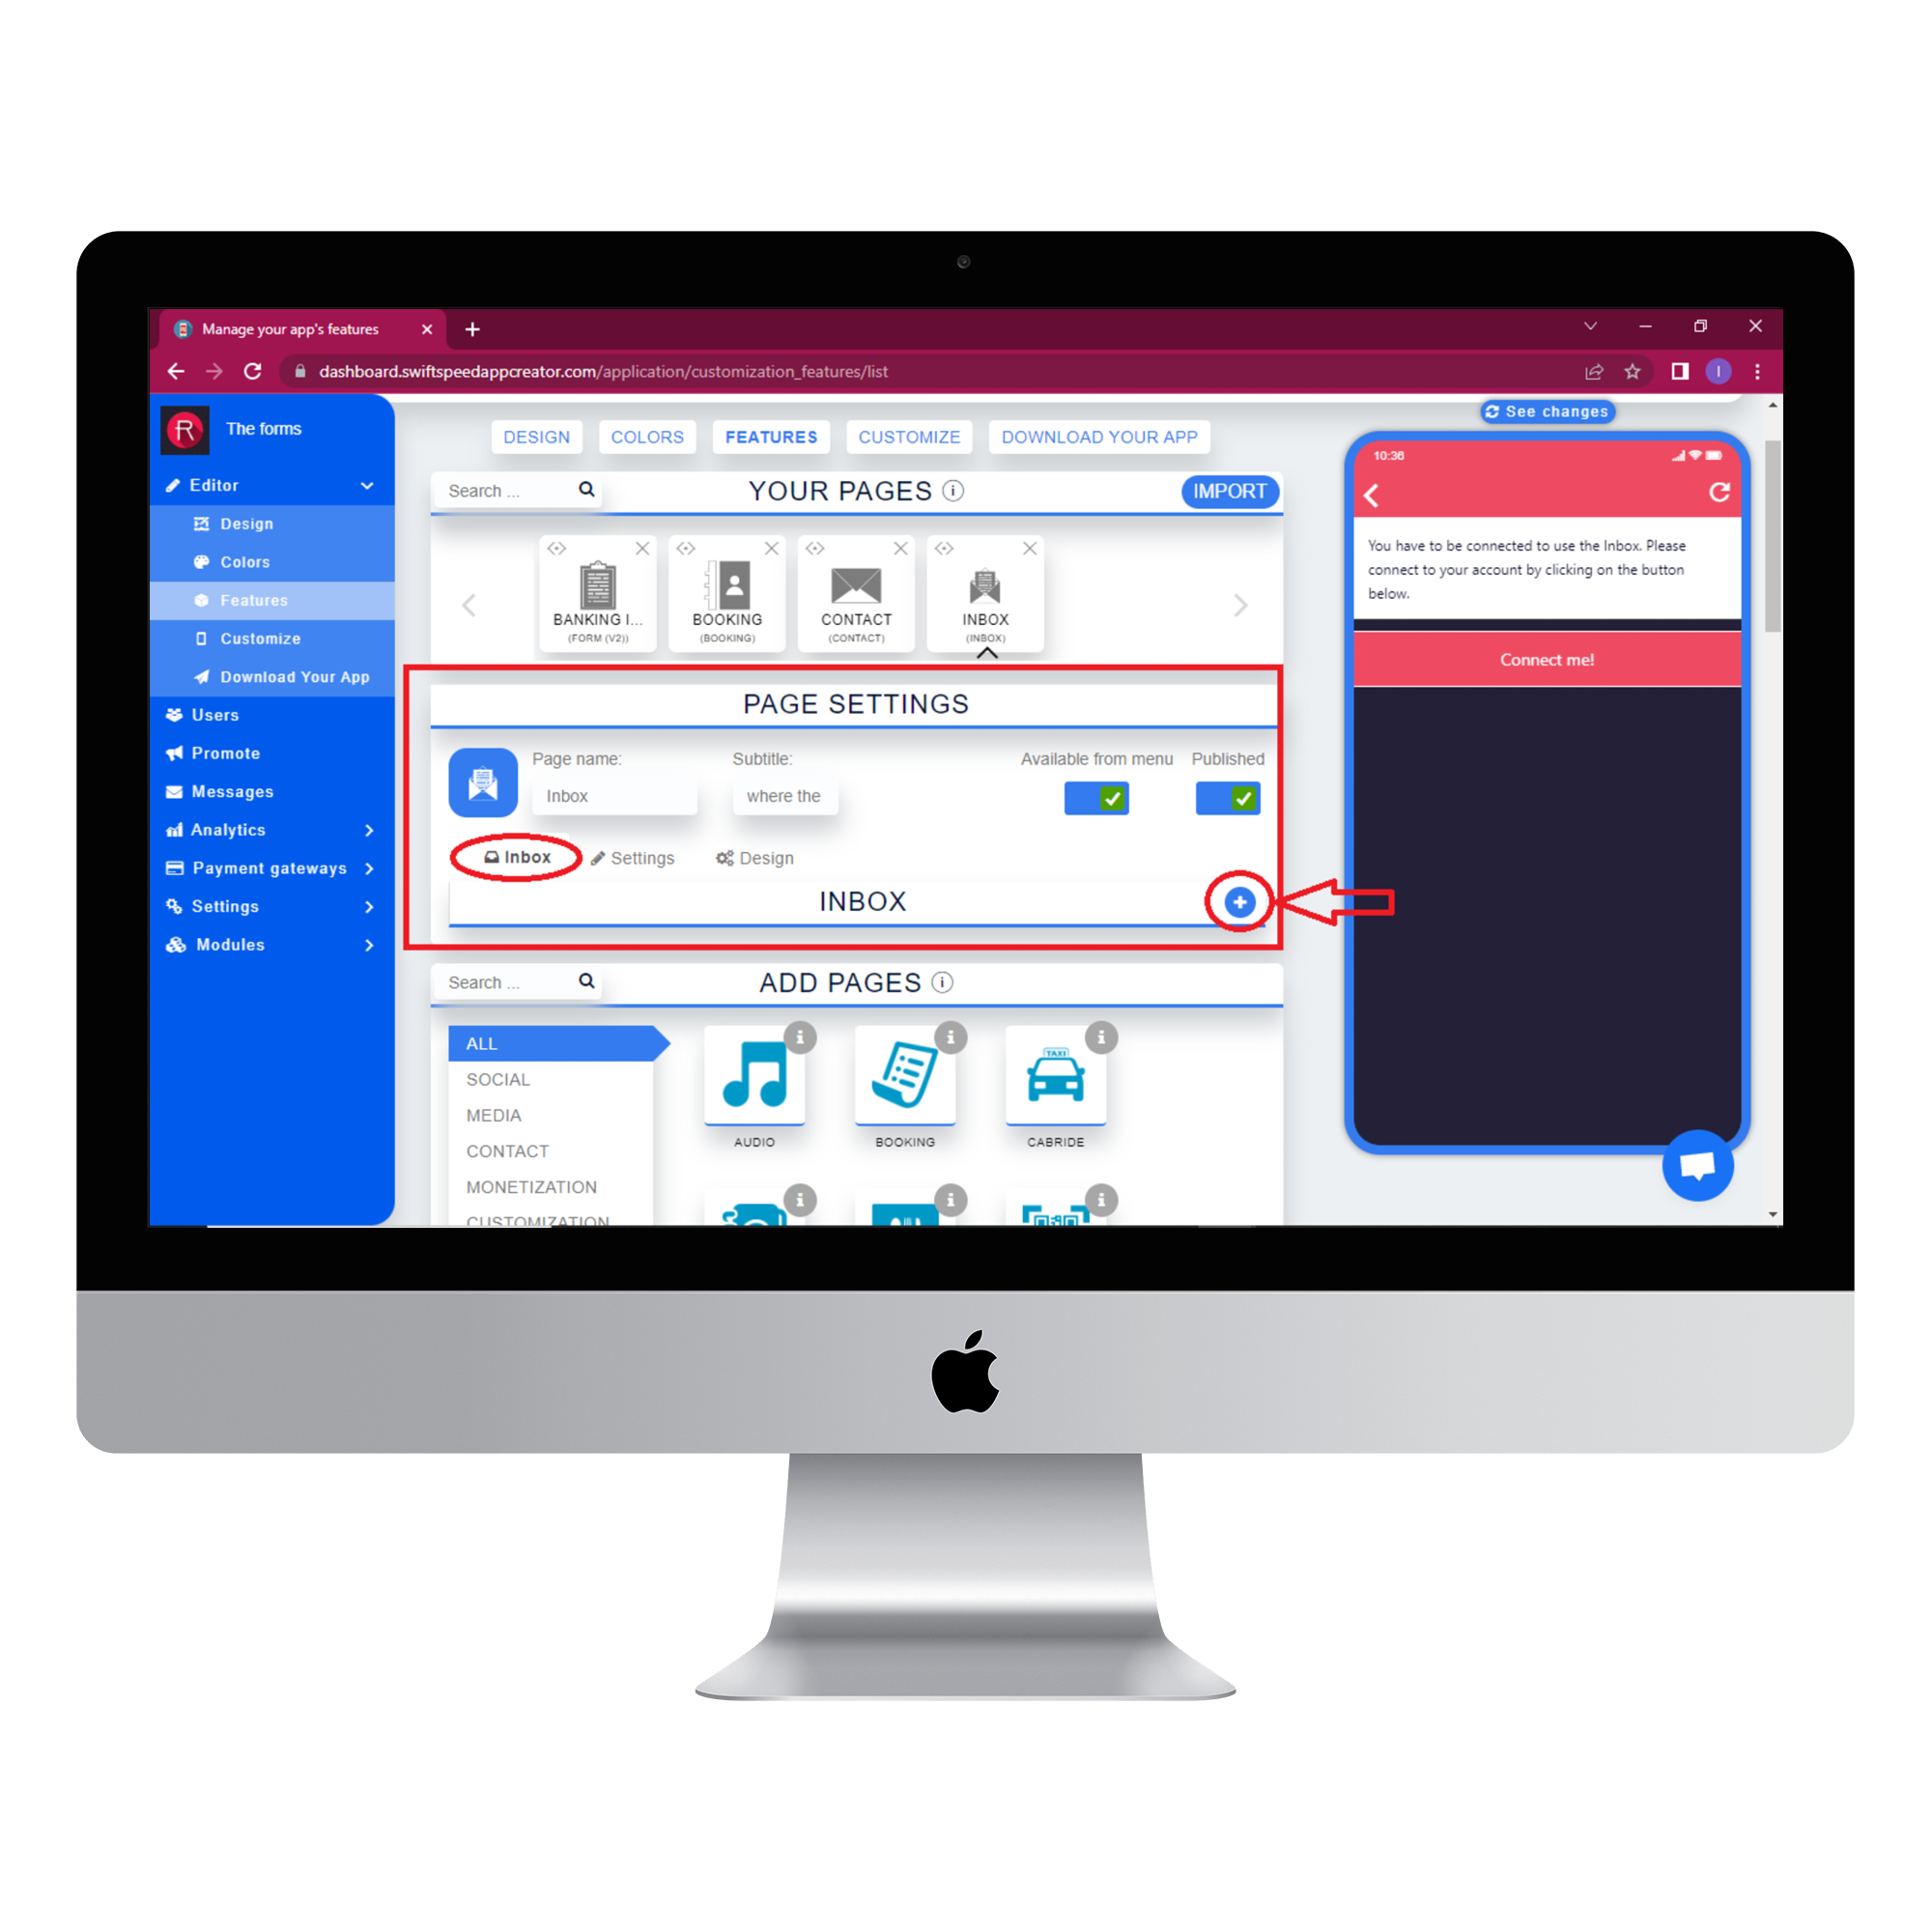
In the “Page Setting” section, type in a name for the page name and an appropriate subtitle, then click on the (+) button in the inbox section to add a message to your inbox
Step 4:
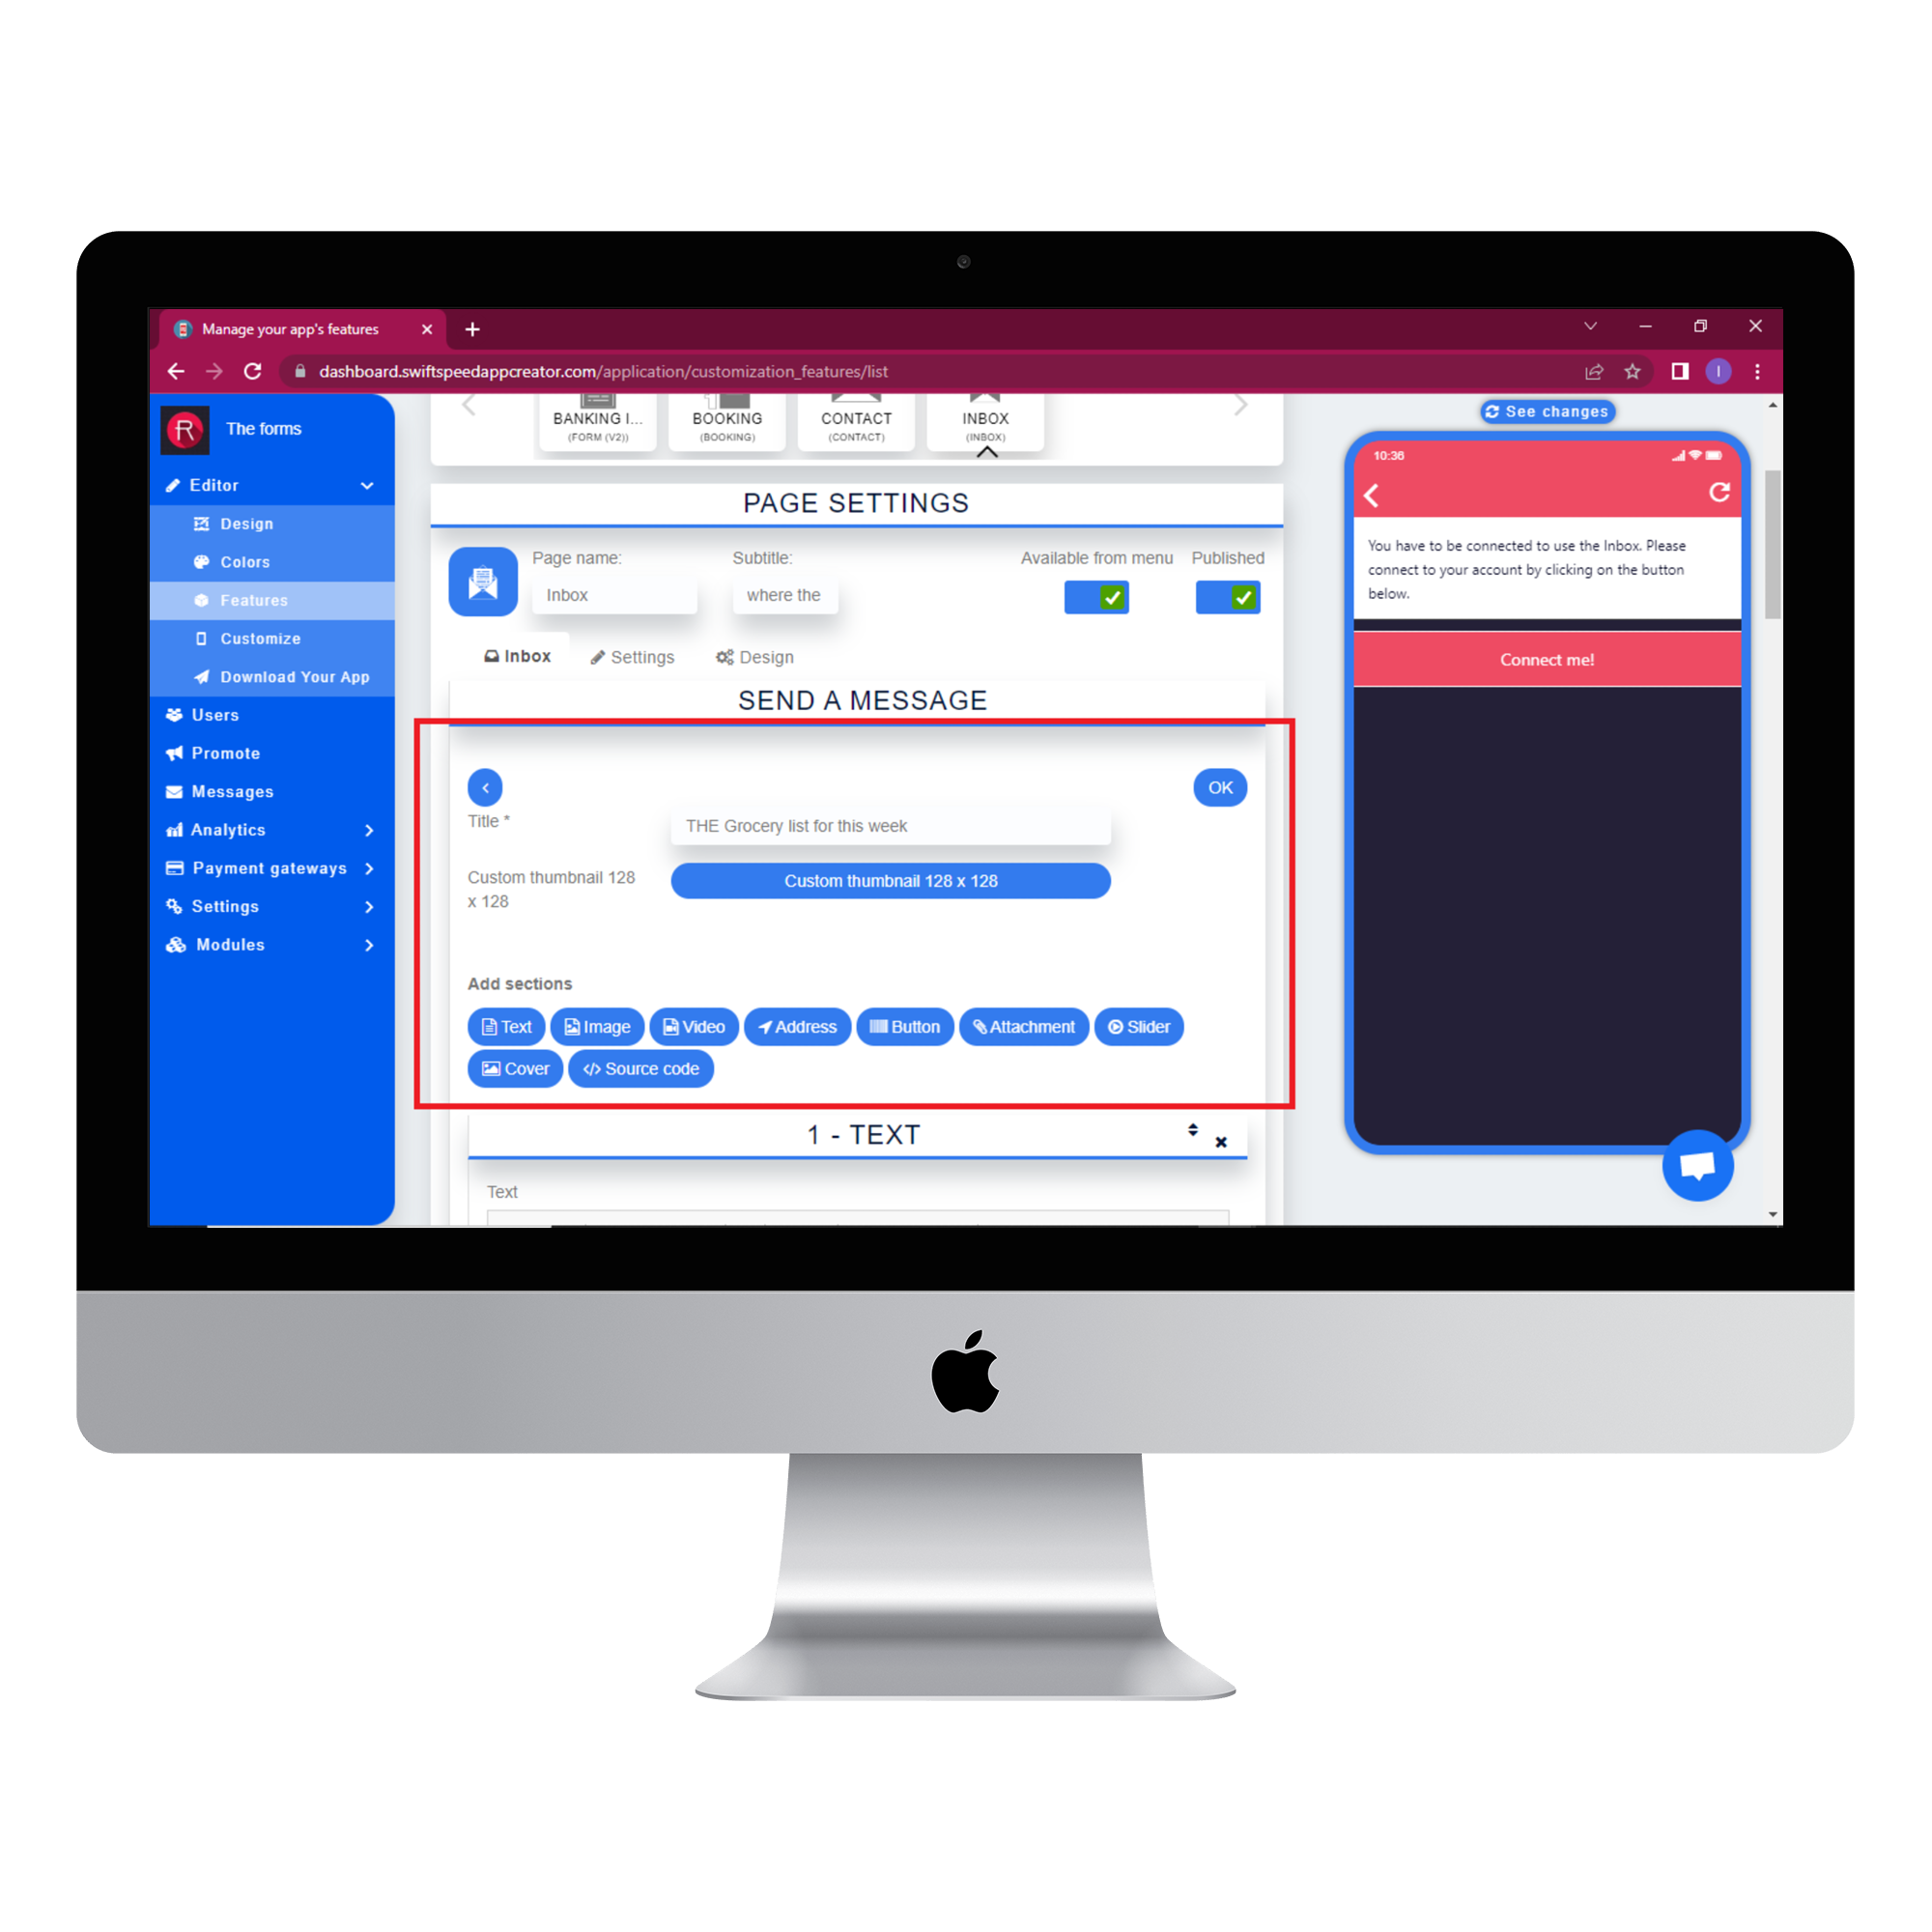
Select the Inbox tab and go to the “Send a message” section. Enter the title of your message and choose a thumbnail image. Below the thumbnail image is the “Add section” box, where you can add more sections to your message. The default message section is a Text but you can add images, videos and even source codes as separate sections of your message.
Step 5:
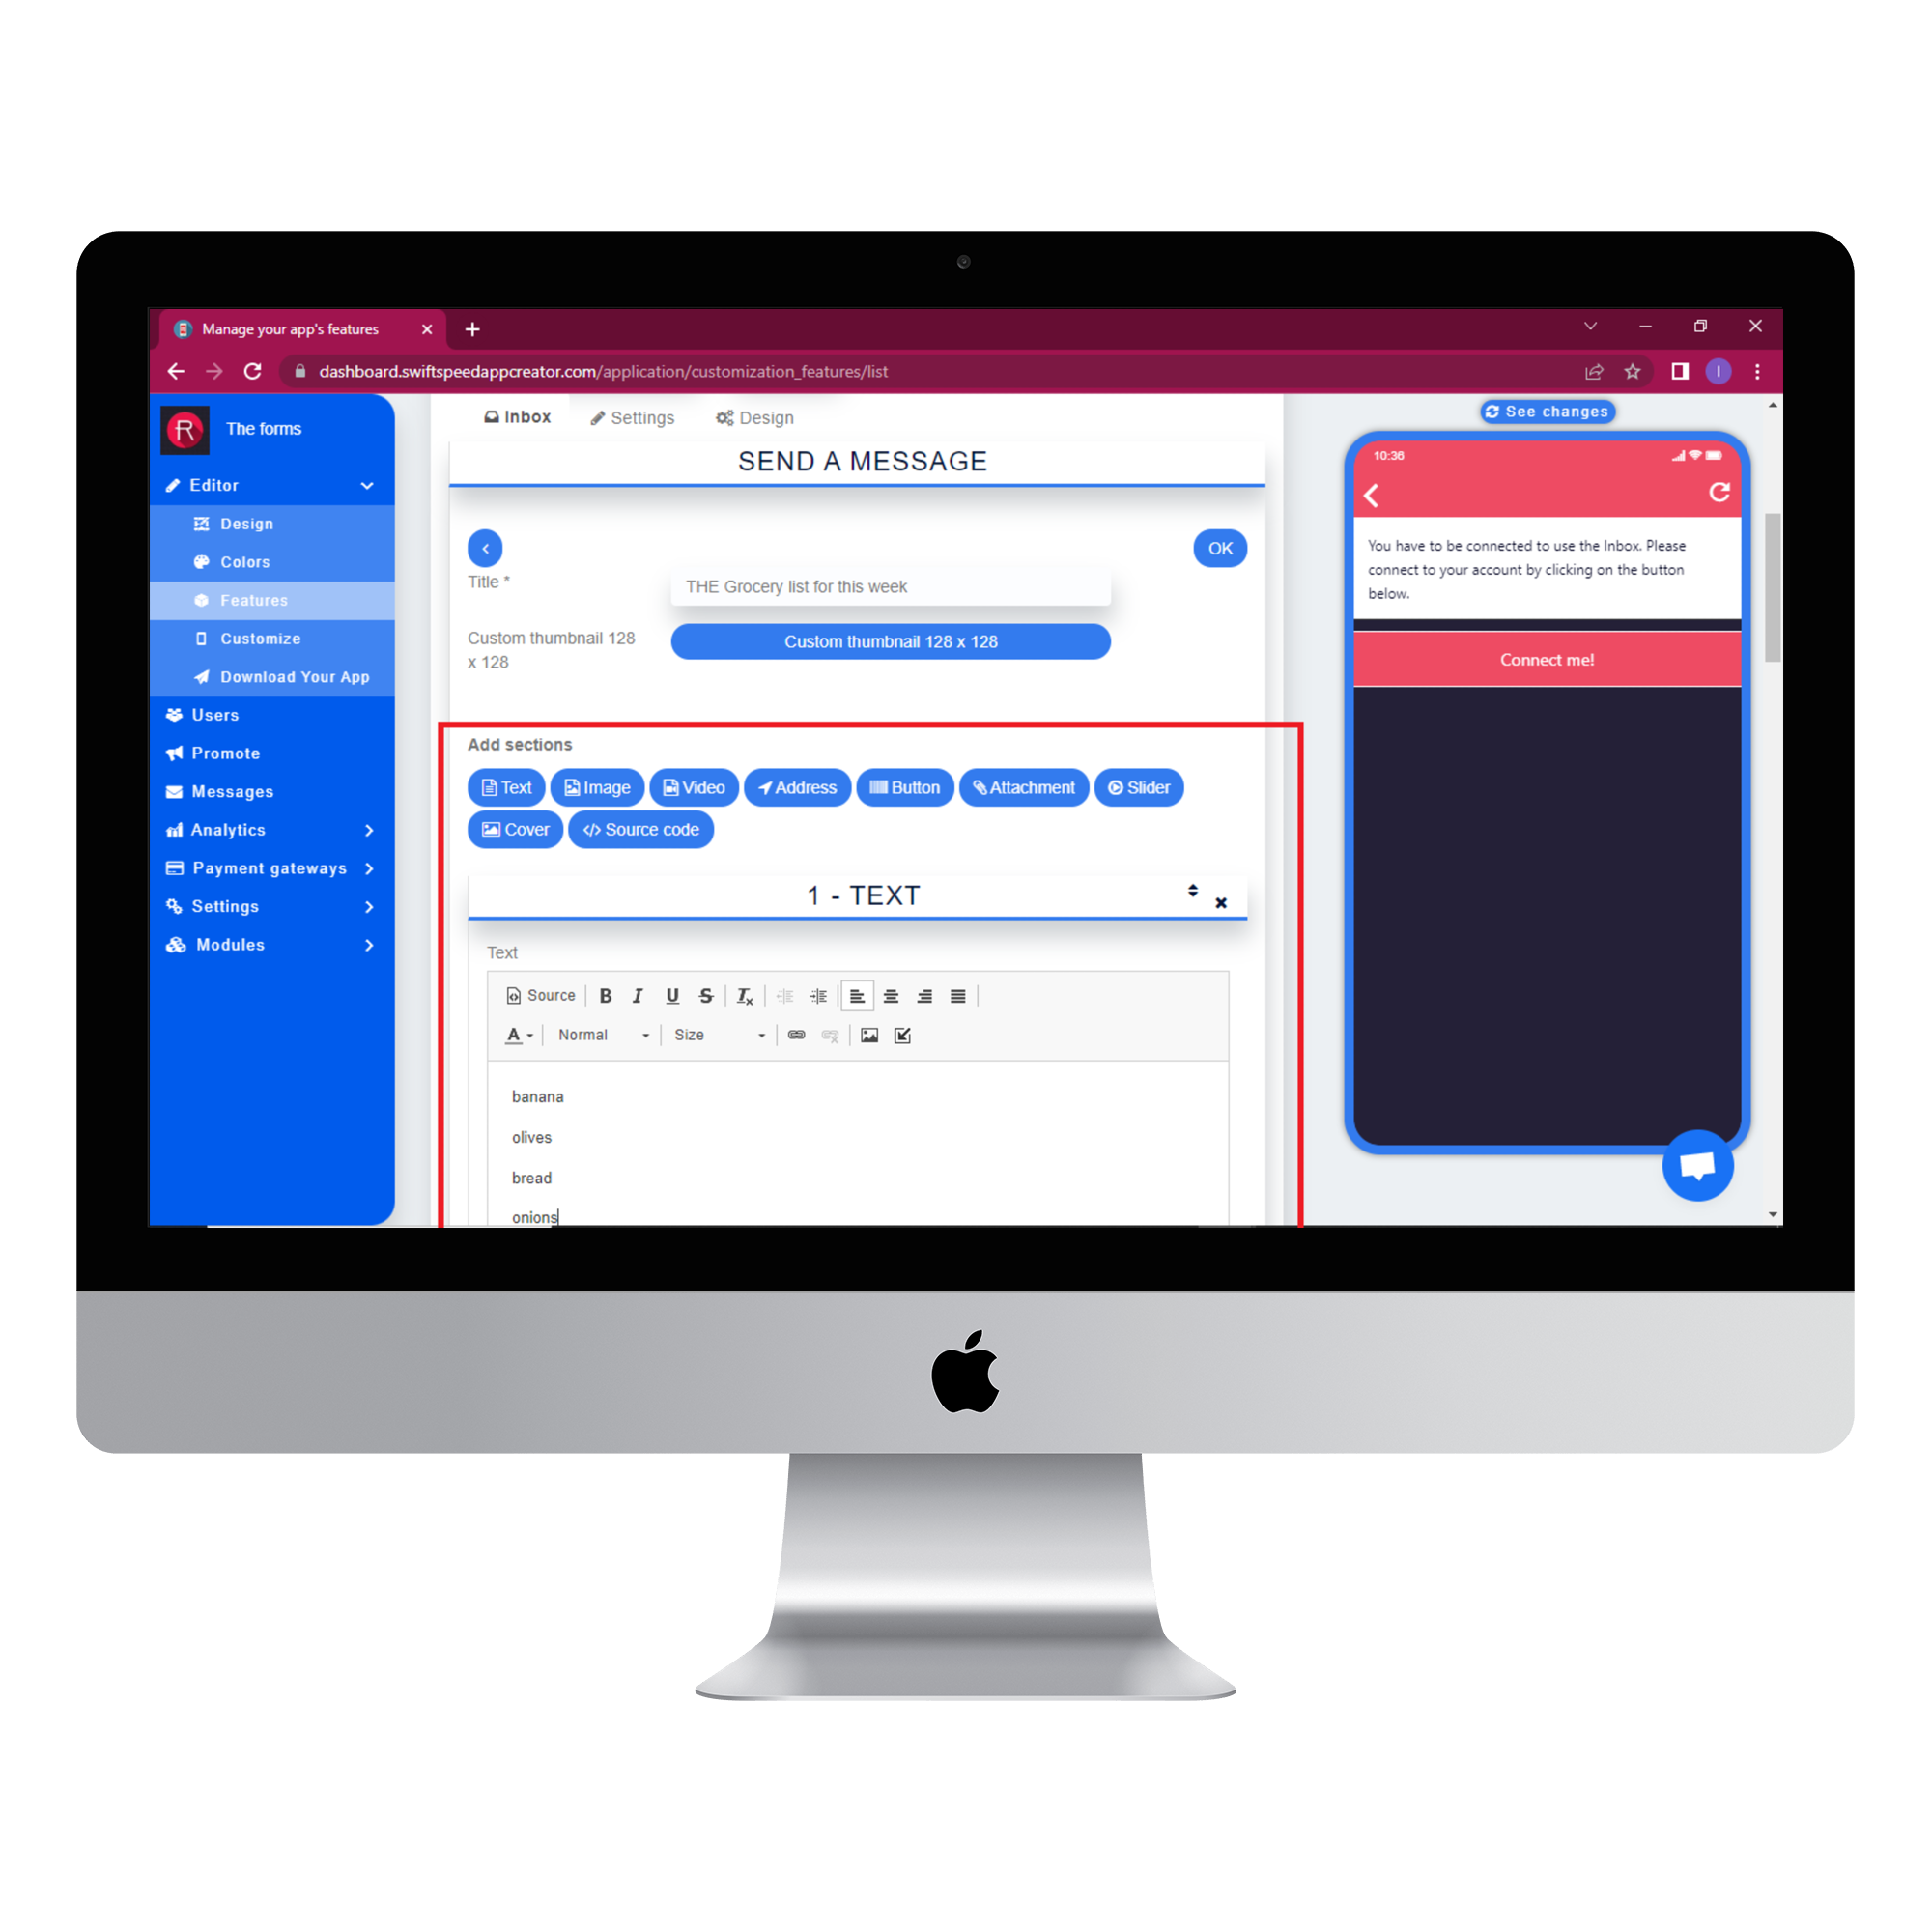
Scroll down to the “Text” section, type in your message and fill out any other sections you might have added. Scroll down and click save when you have completed all the sections of your message.
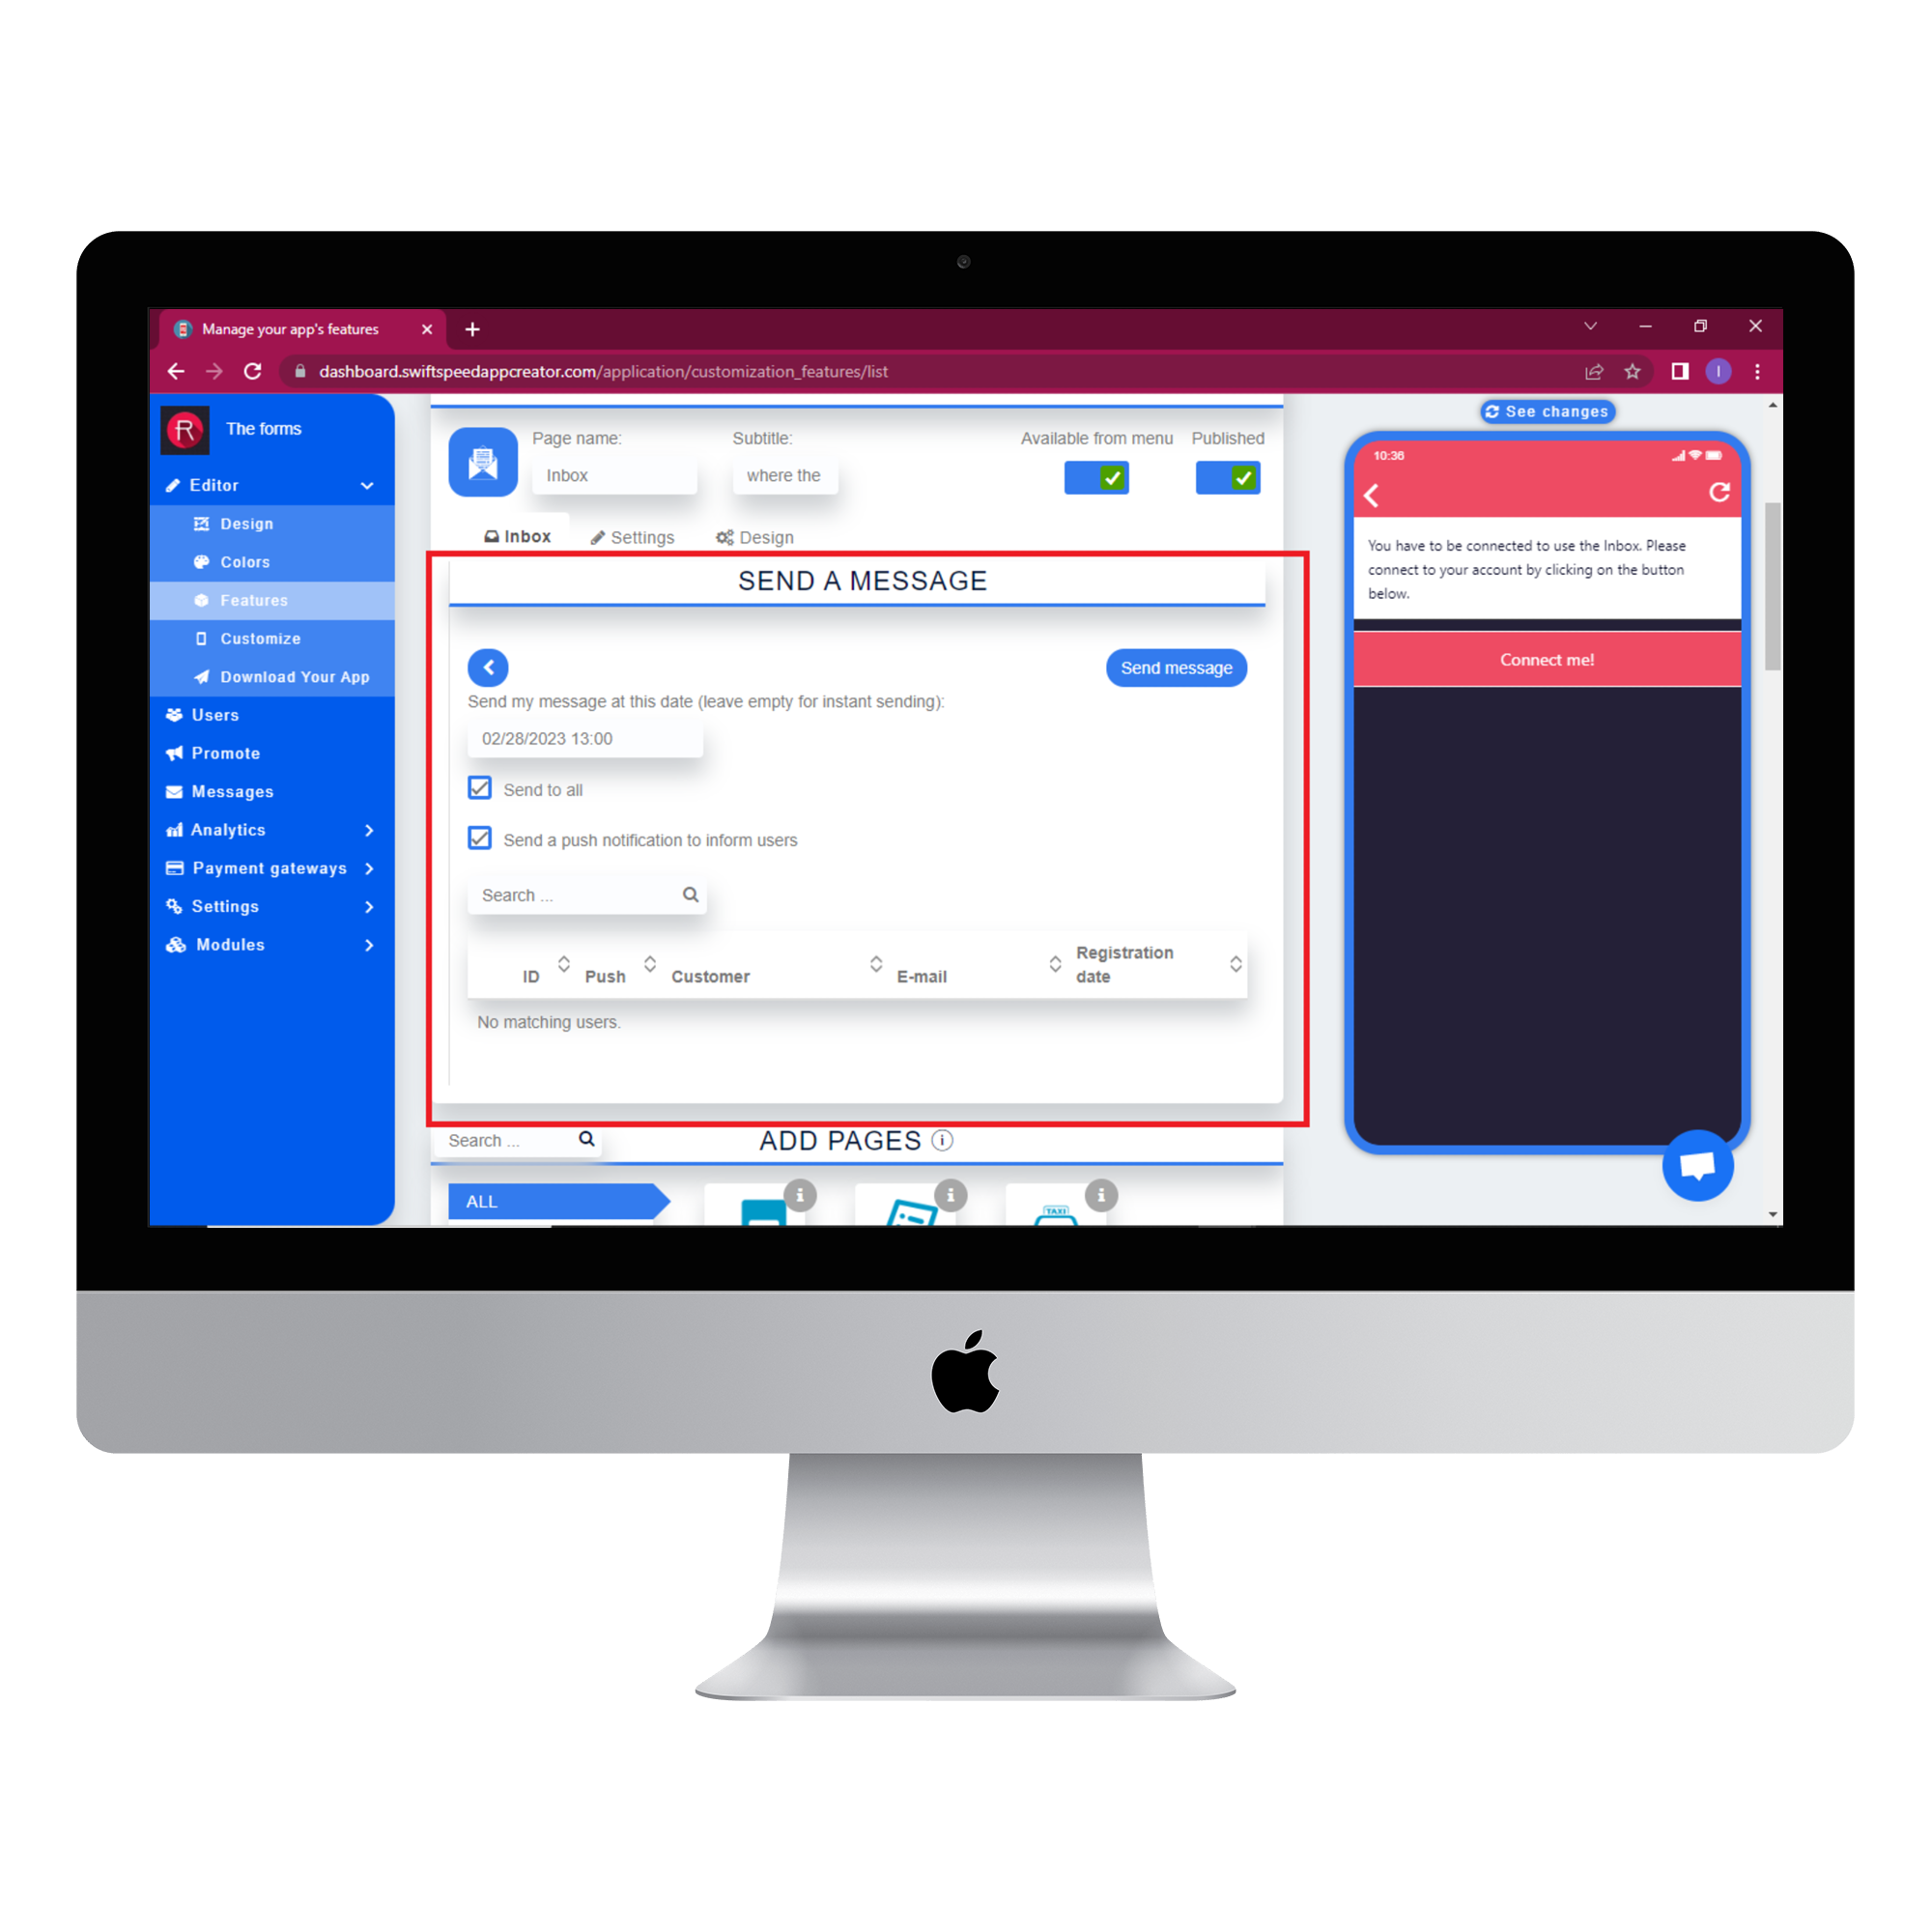
After clicking on save, the “Send a message” section will become visible. You can select a date to send your message by clicking on the textbox below the “Send my message at this date” label. Leave the text box empty to send the message immediately. Click the “Send to all” checkbox to select all your users as recipients quickly. Click the “Send a push notification to inform users” checkbox to enable push notifications for all your users. Click on the “Send message” button to save these changes.
Step 6:
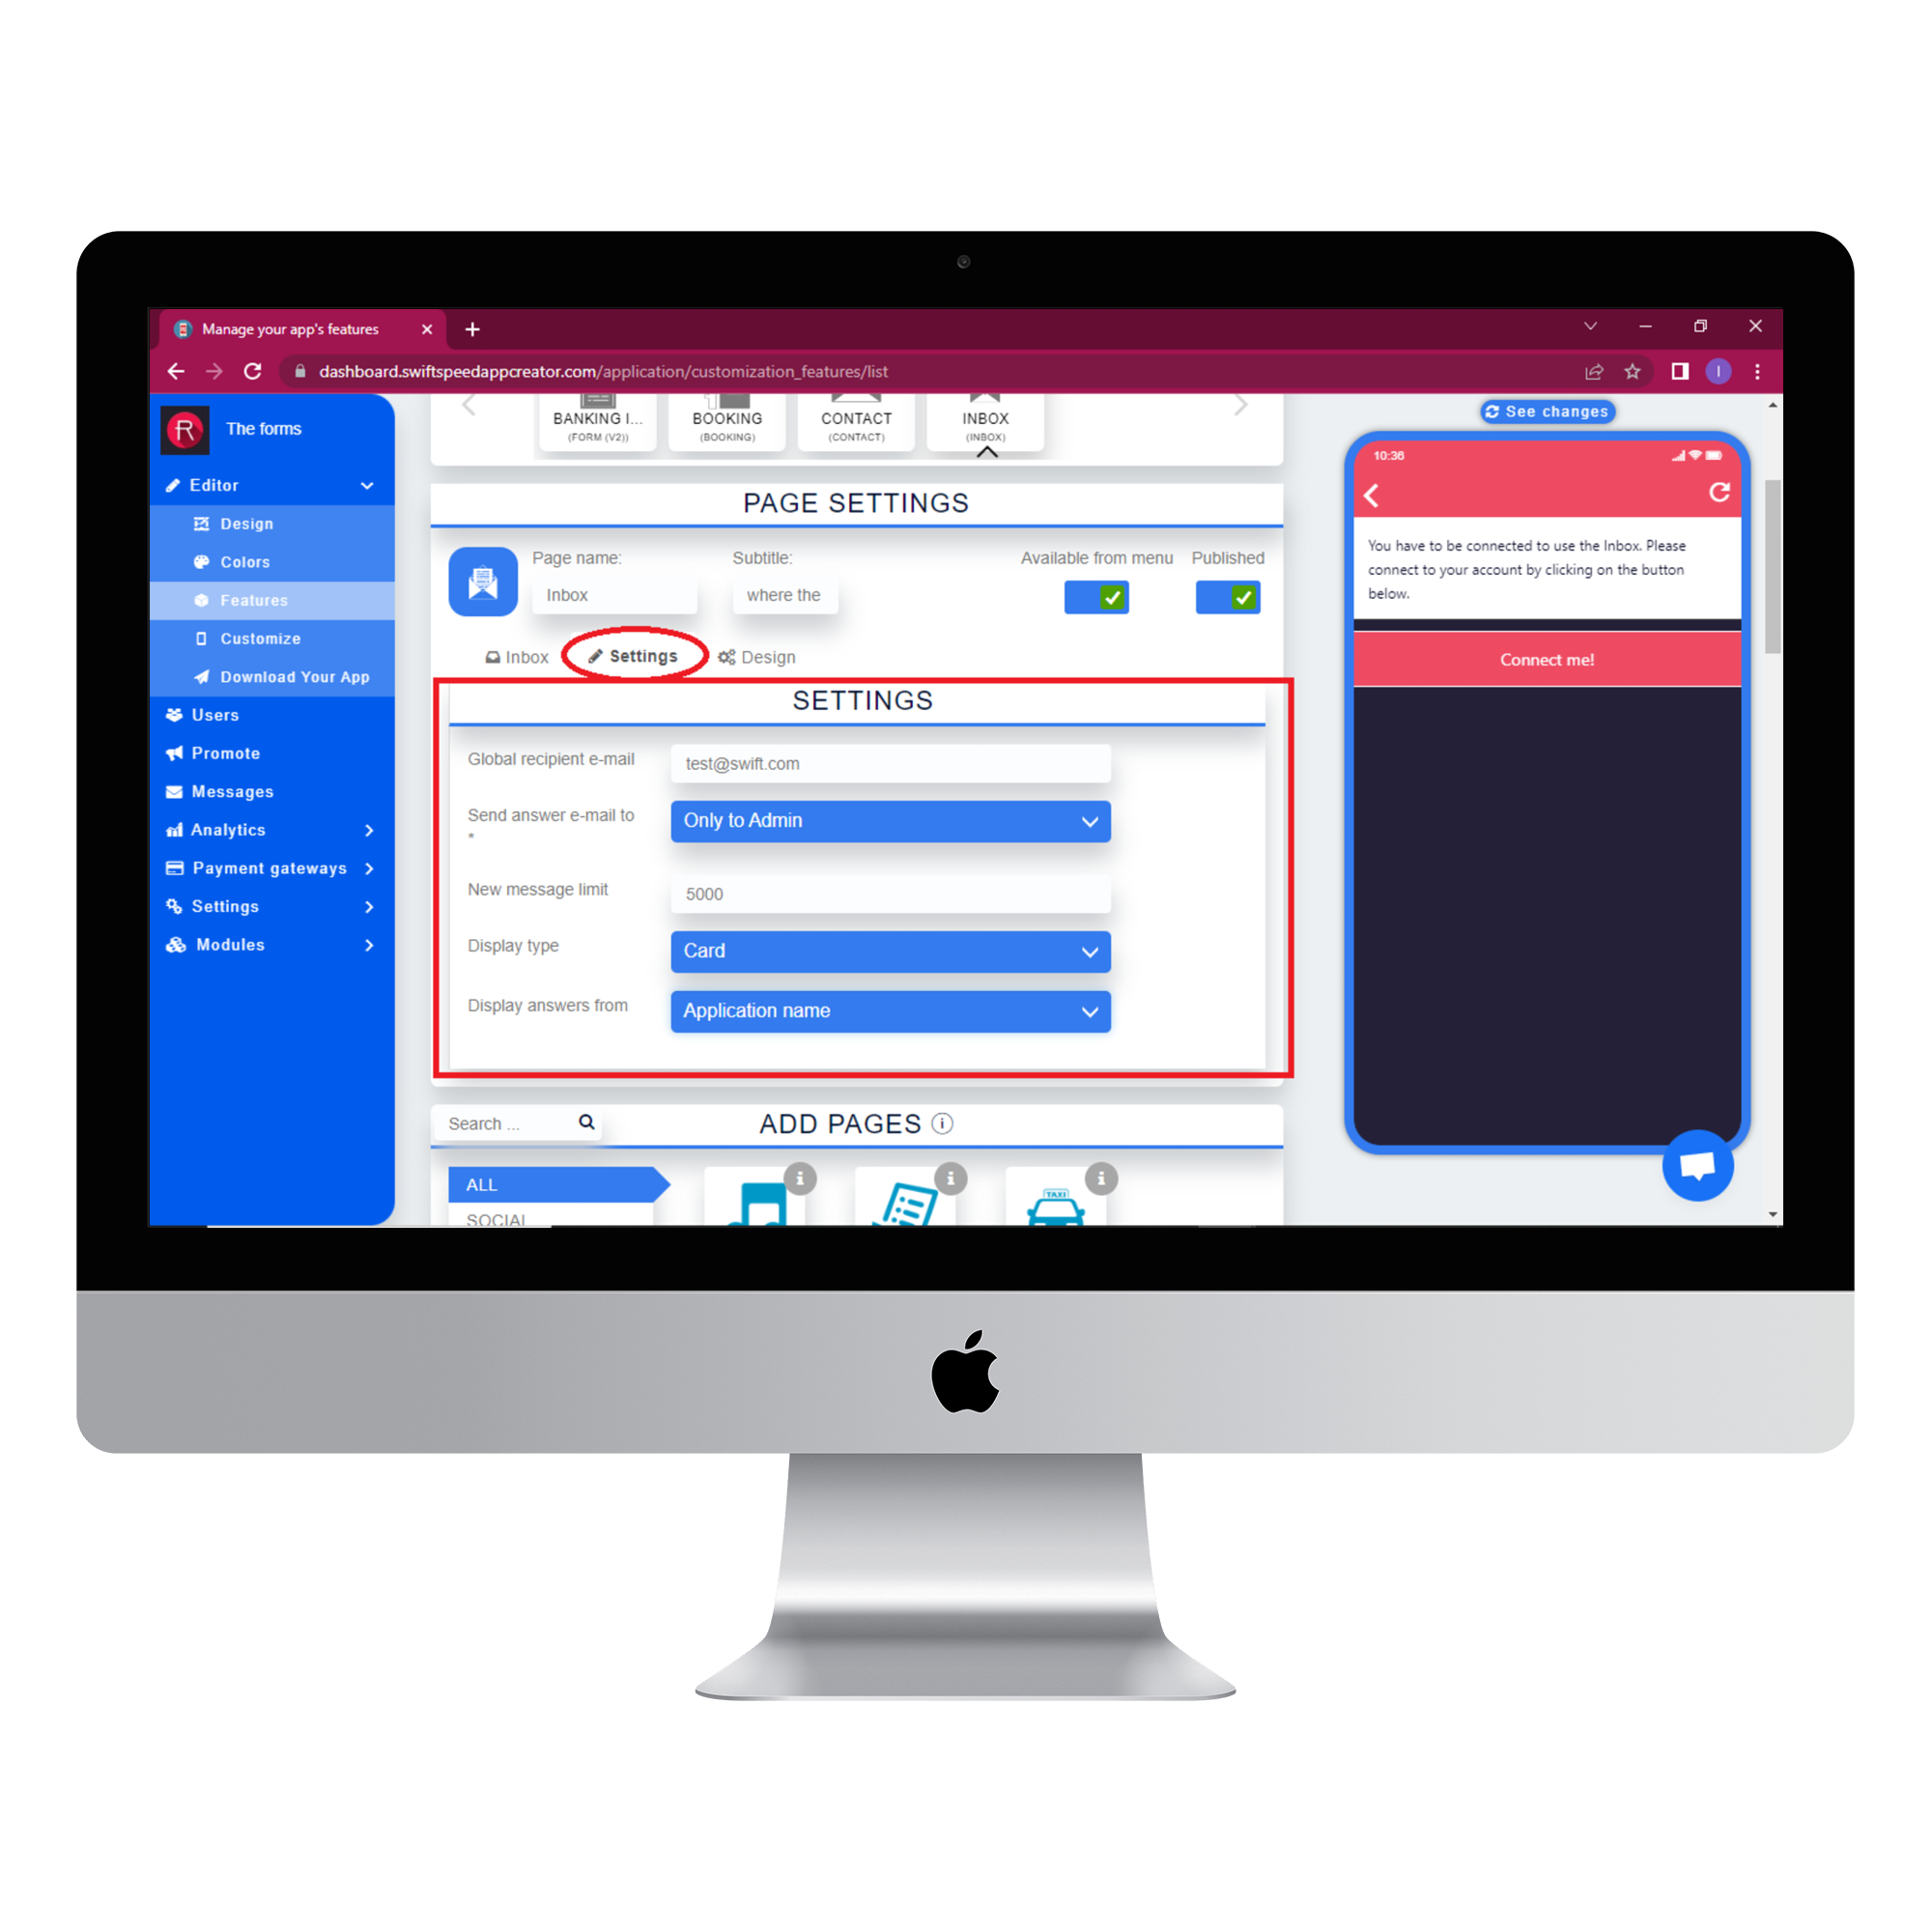
Click on the settings tab and fill in the required information. Choose “Card” as the display type.
Step 7:
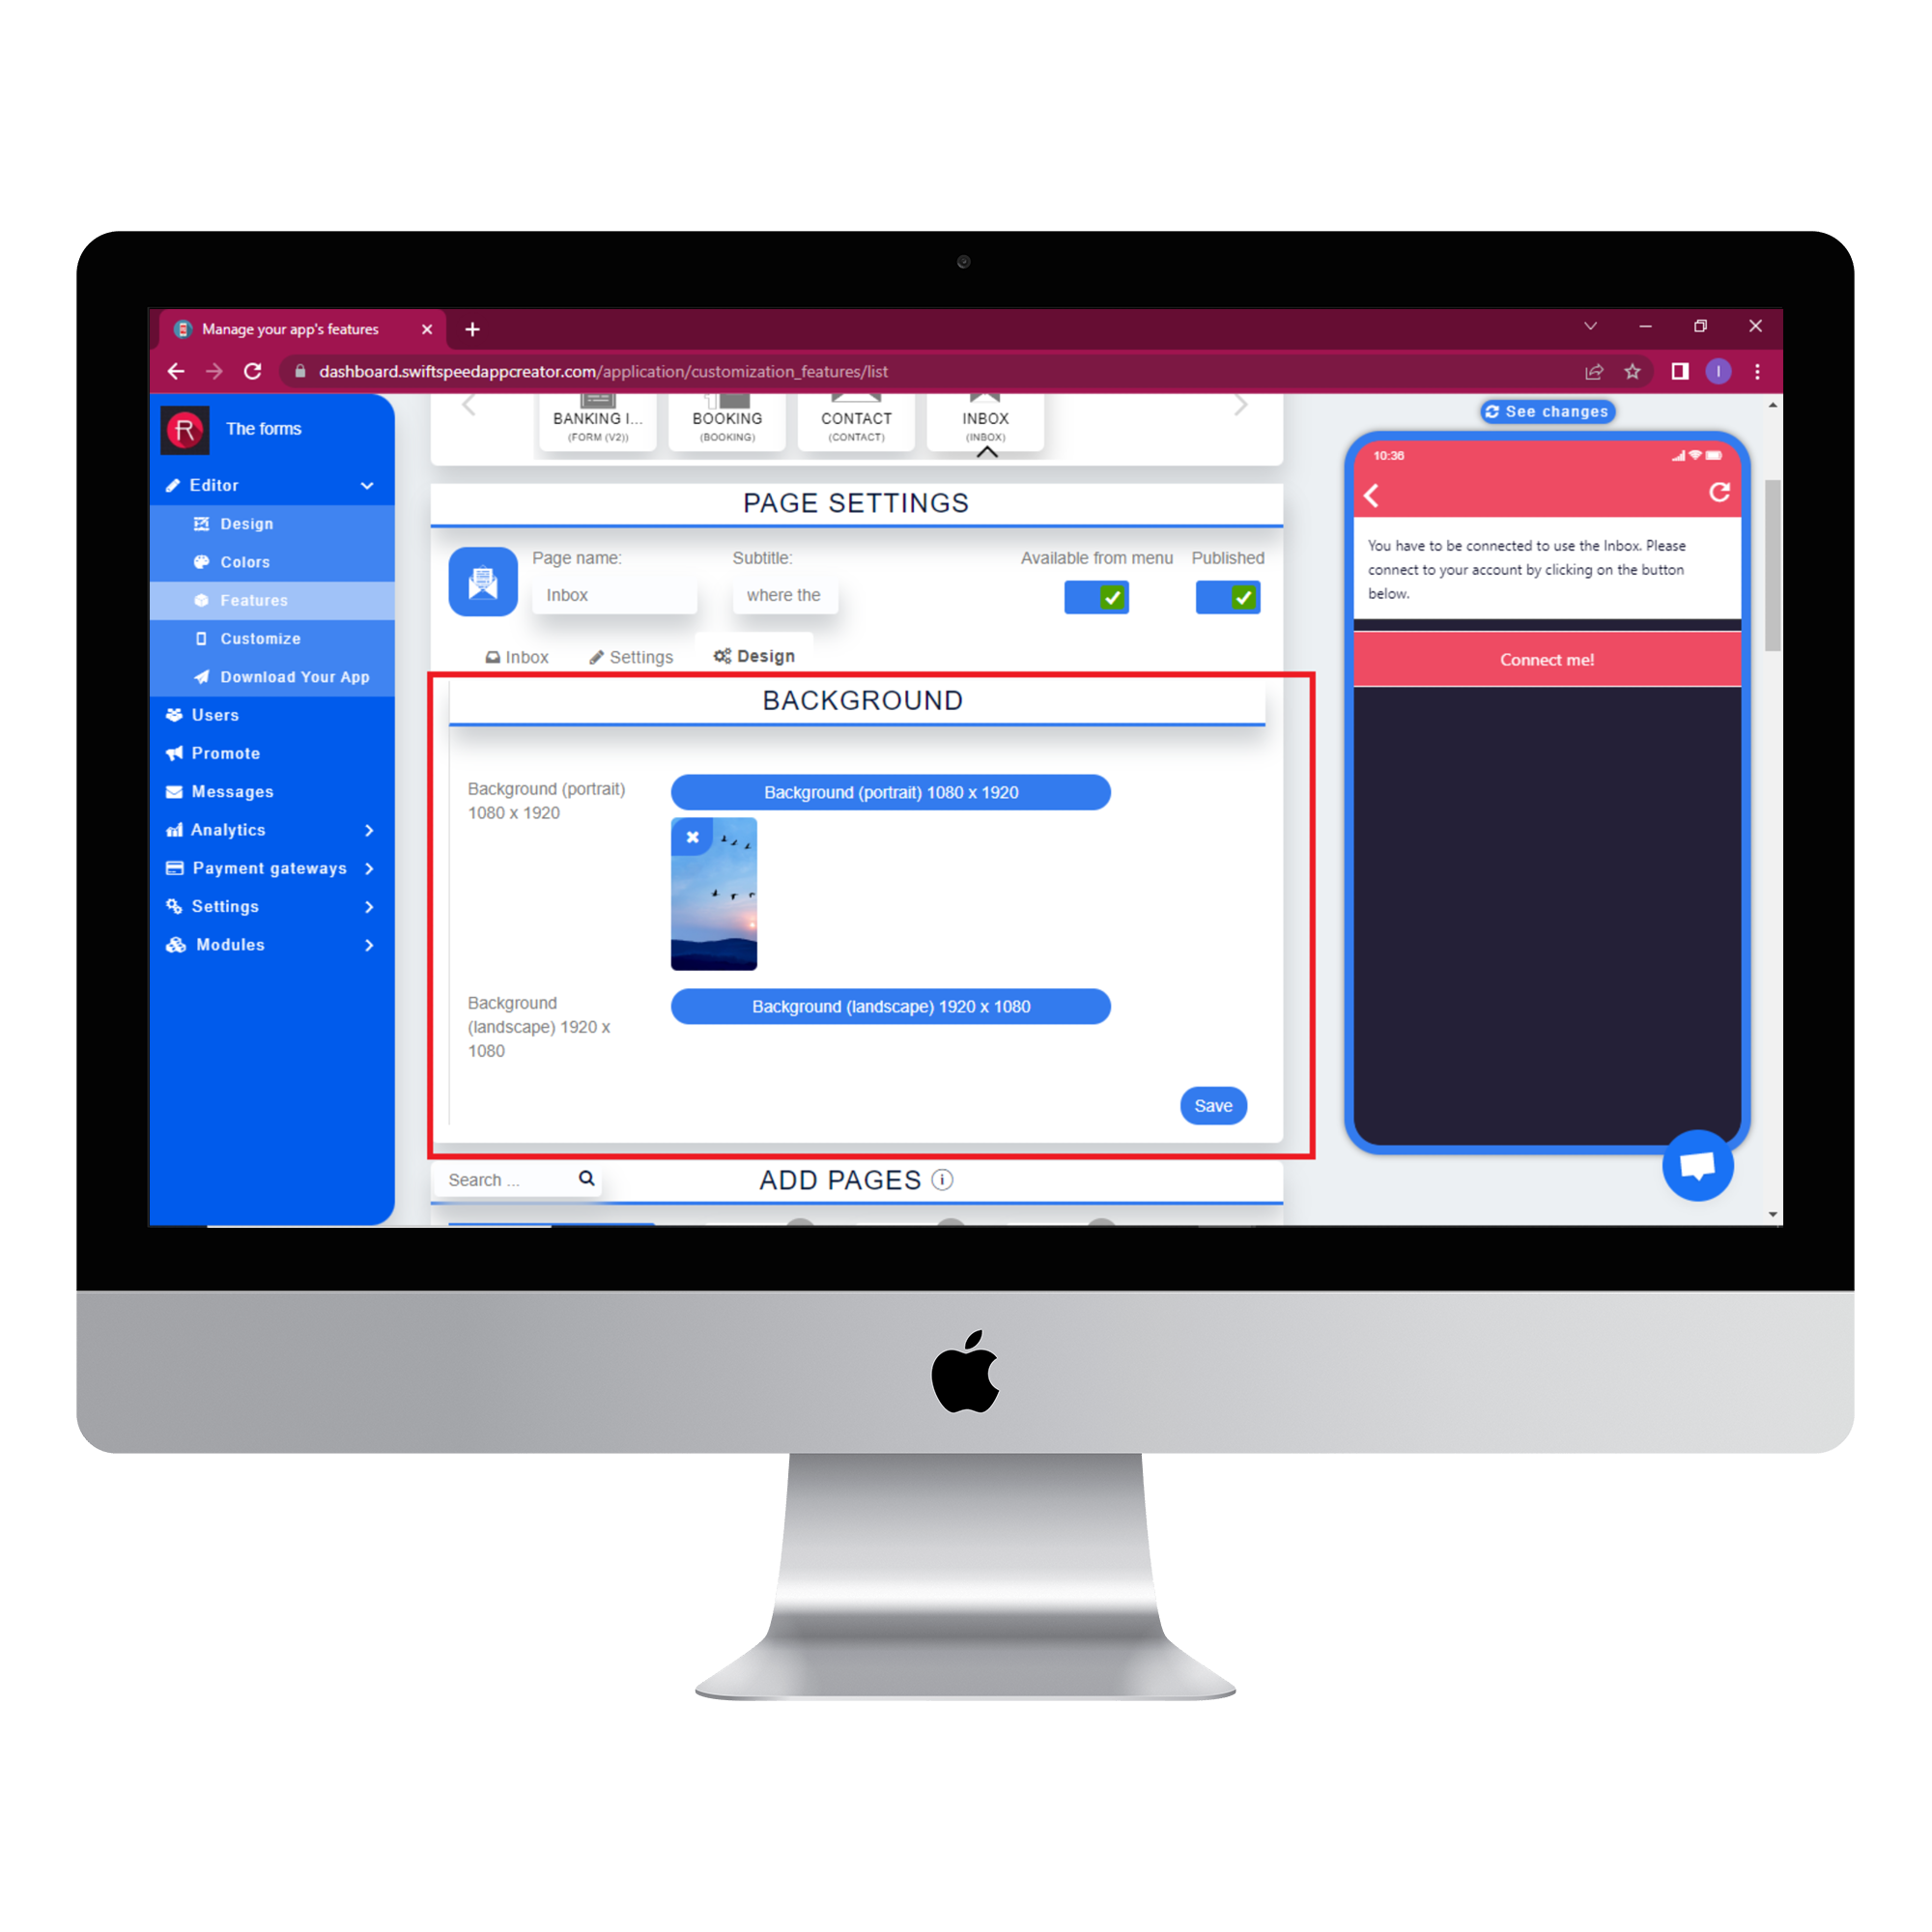
Click on the design tab and select a background image for your app. When you have chosen an appropriate image, click Save.
Step 8:
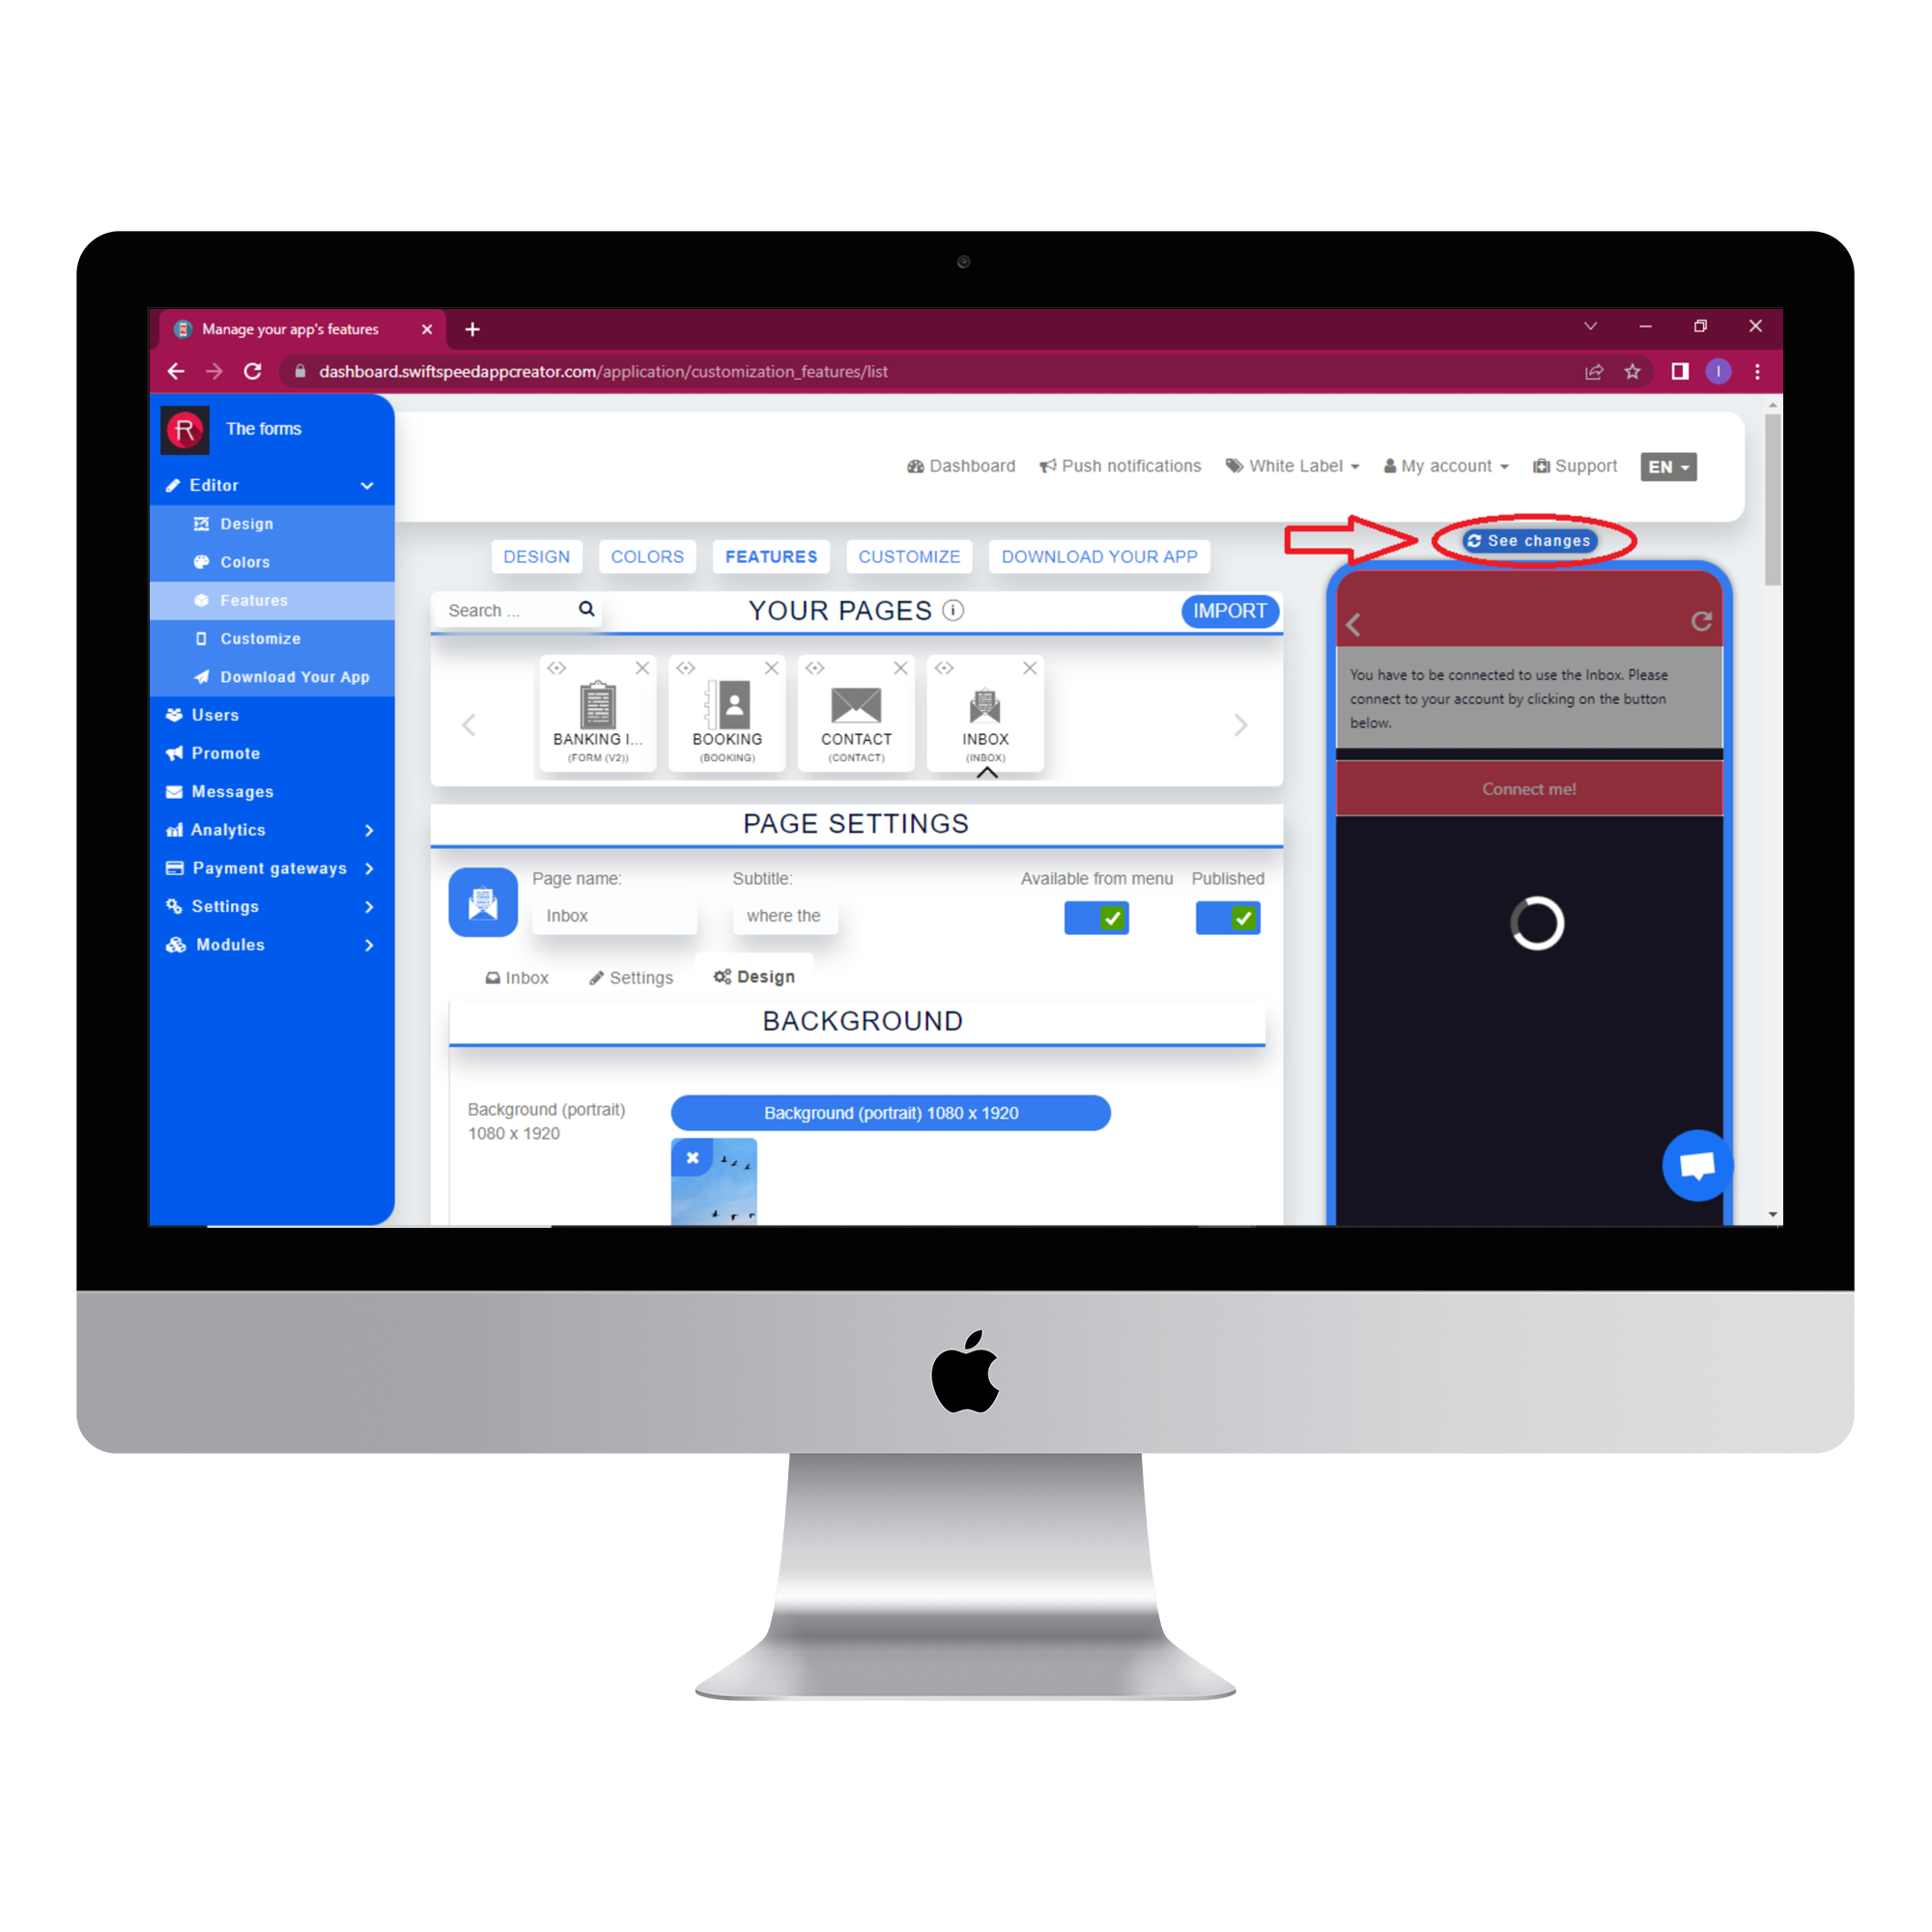
Click on the “see changes” button above the virtual device to see what your app would look like on an actual device. To generate an Apk of your app, click on “Download your app” from the side menu, scroll down, and click on “Generate Apk.” Choose a subscription plan, and the Apk will be sent to your email address when the build is complete. Here is an example of what your new inbox app would look like.
Congratulations!!! You just integrated the inbox feature into your app. You can now easily connect with your customers from anywhere in the world.
You may want to check our complete app maker features for other essential features to integrate into your store.

