In this article, we will learn how to use the discount feature in a few easy steps. Discounts are a kind of incentive used to motivate payments and drive up sales. It usually involves reducing the price of a product by a certain percentage for a certain period of time. The primary purpose of a discount is to increase short-term sales and reward valuable customers. With the discount feature, you’ll be able to create as many discounts as you want and display them in your application. The YouTube tutorial for this article is available here.
Step 1:
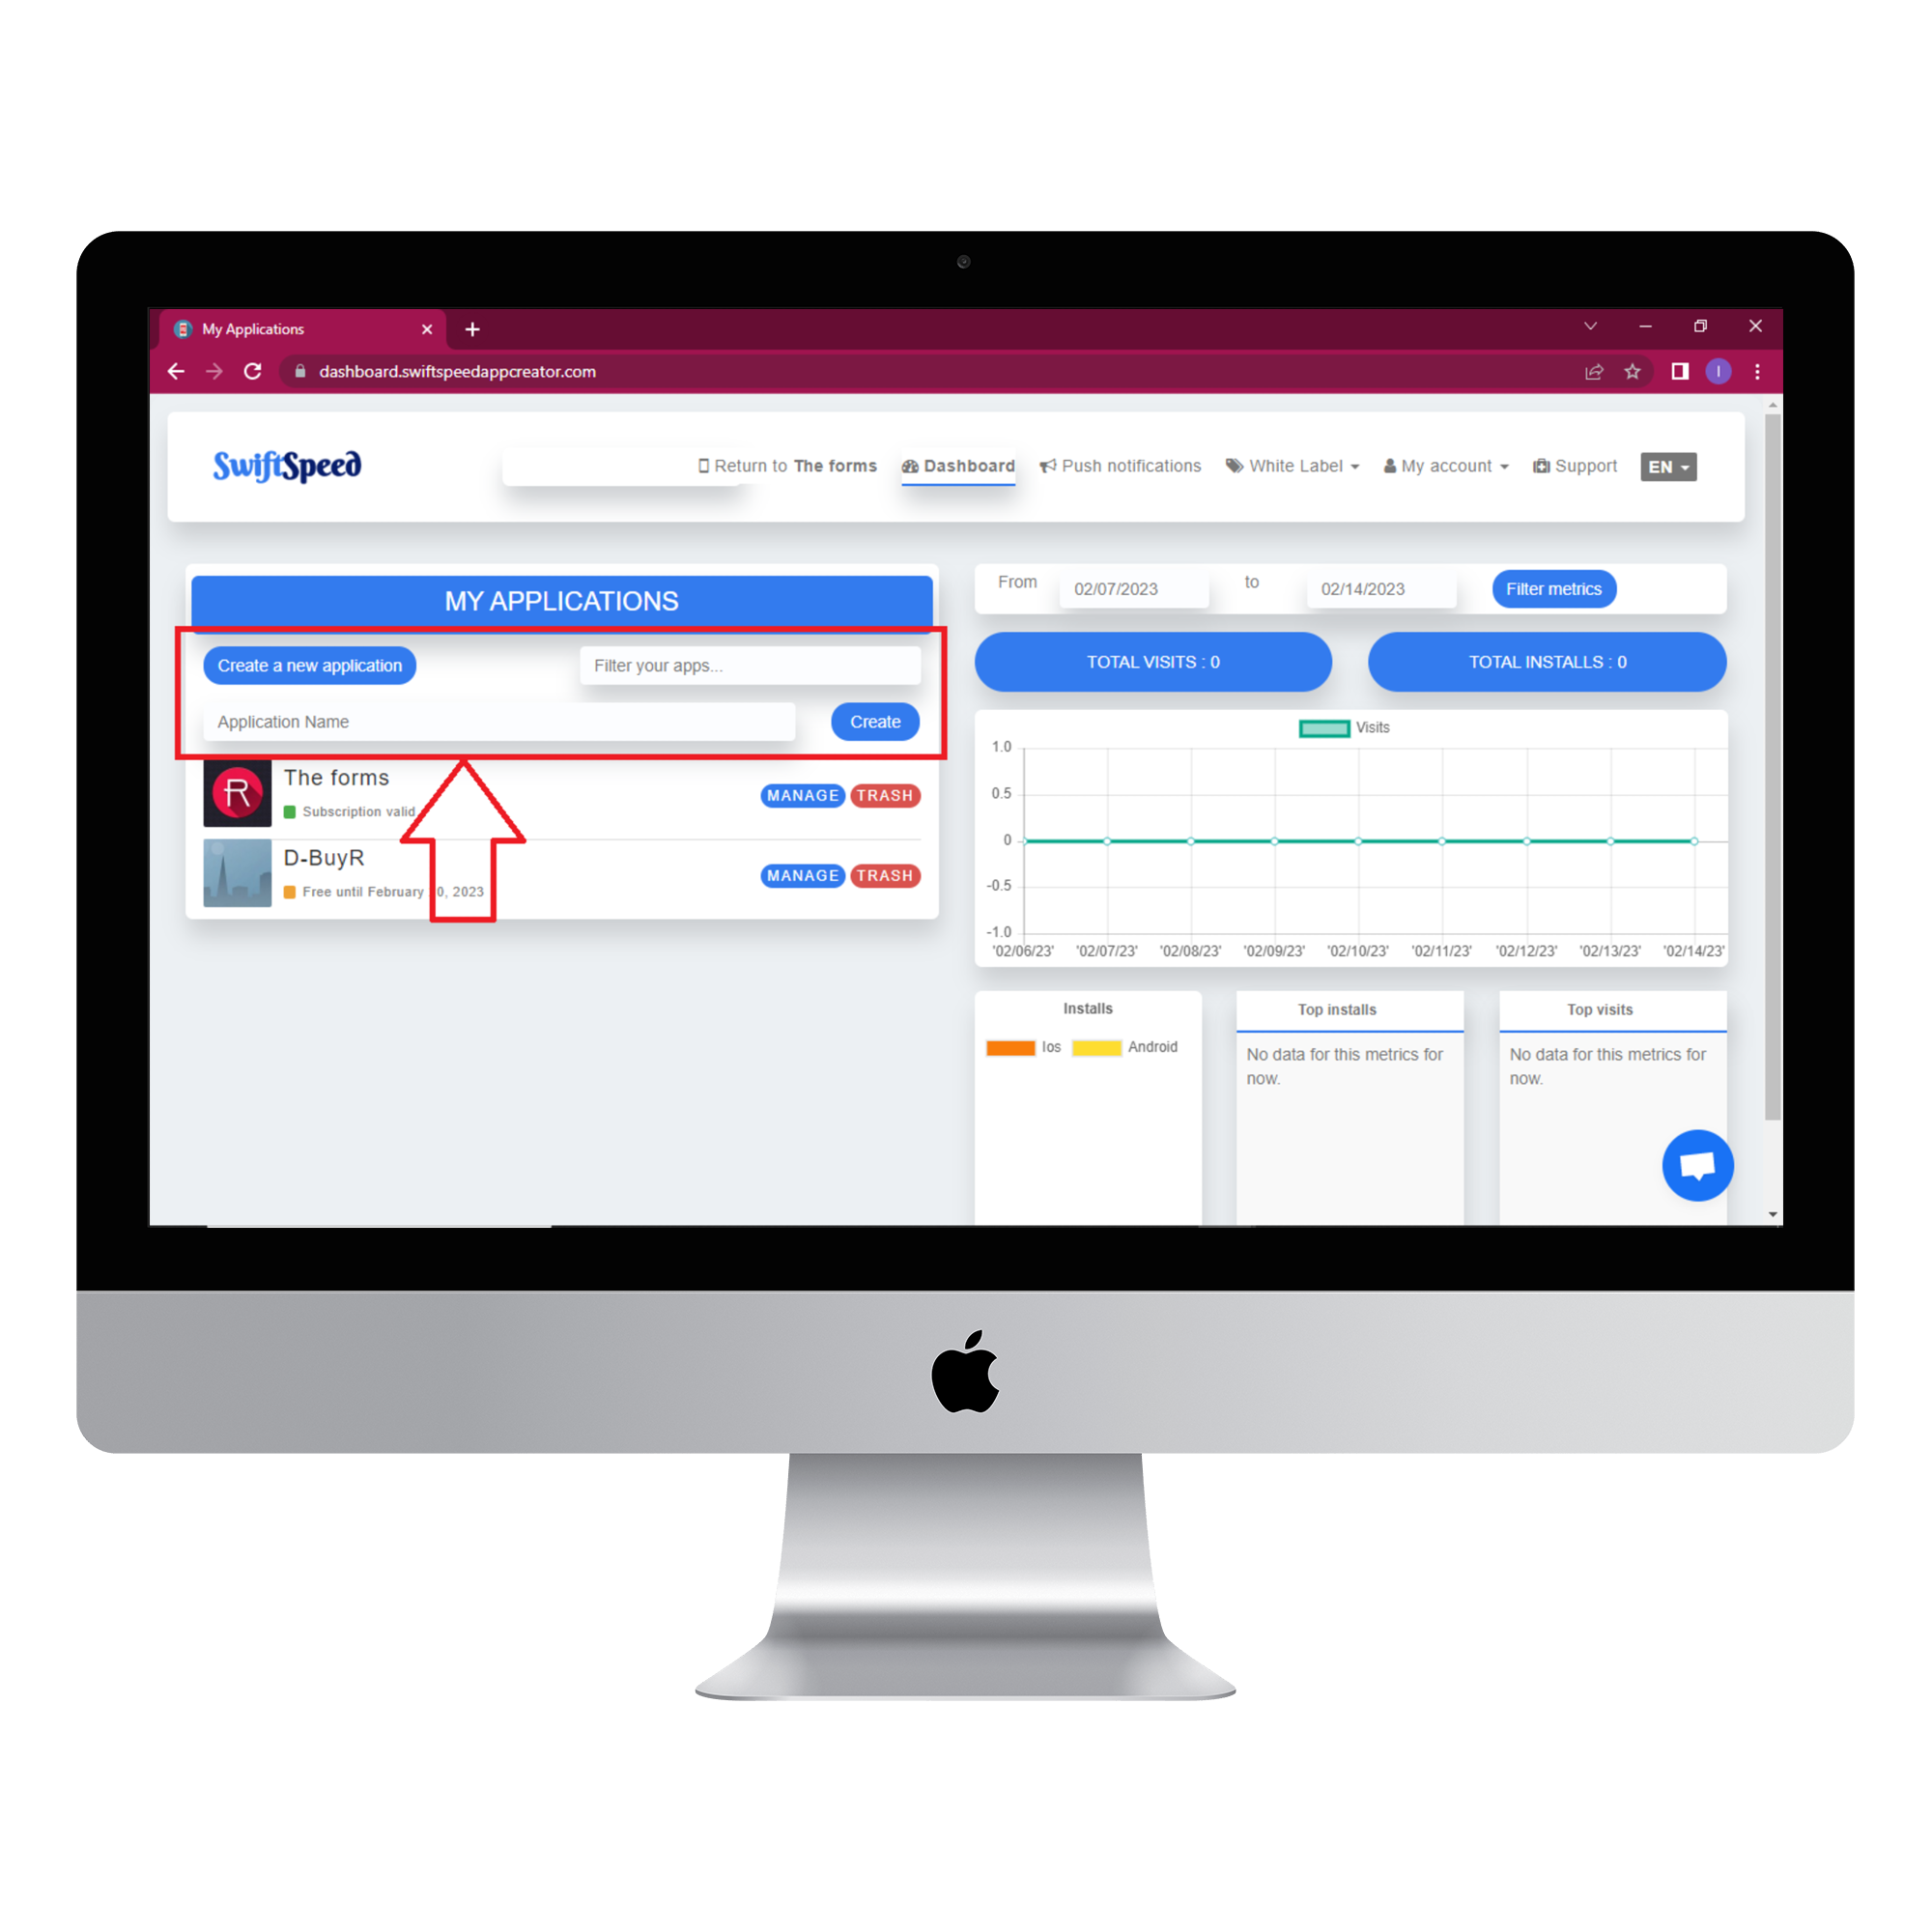
Click on “create a new application” or select a pre-existing app ( if you have one ). If you select “Create a new application,” you will have to type in the name of your app and click “Create.” If you are not familiar with the app creation process, please read our article on creating an app on our platform.
Step 2:
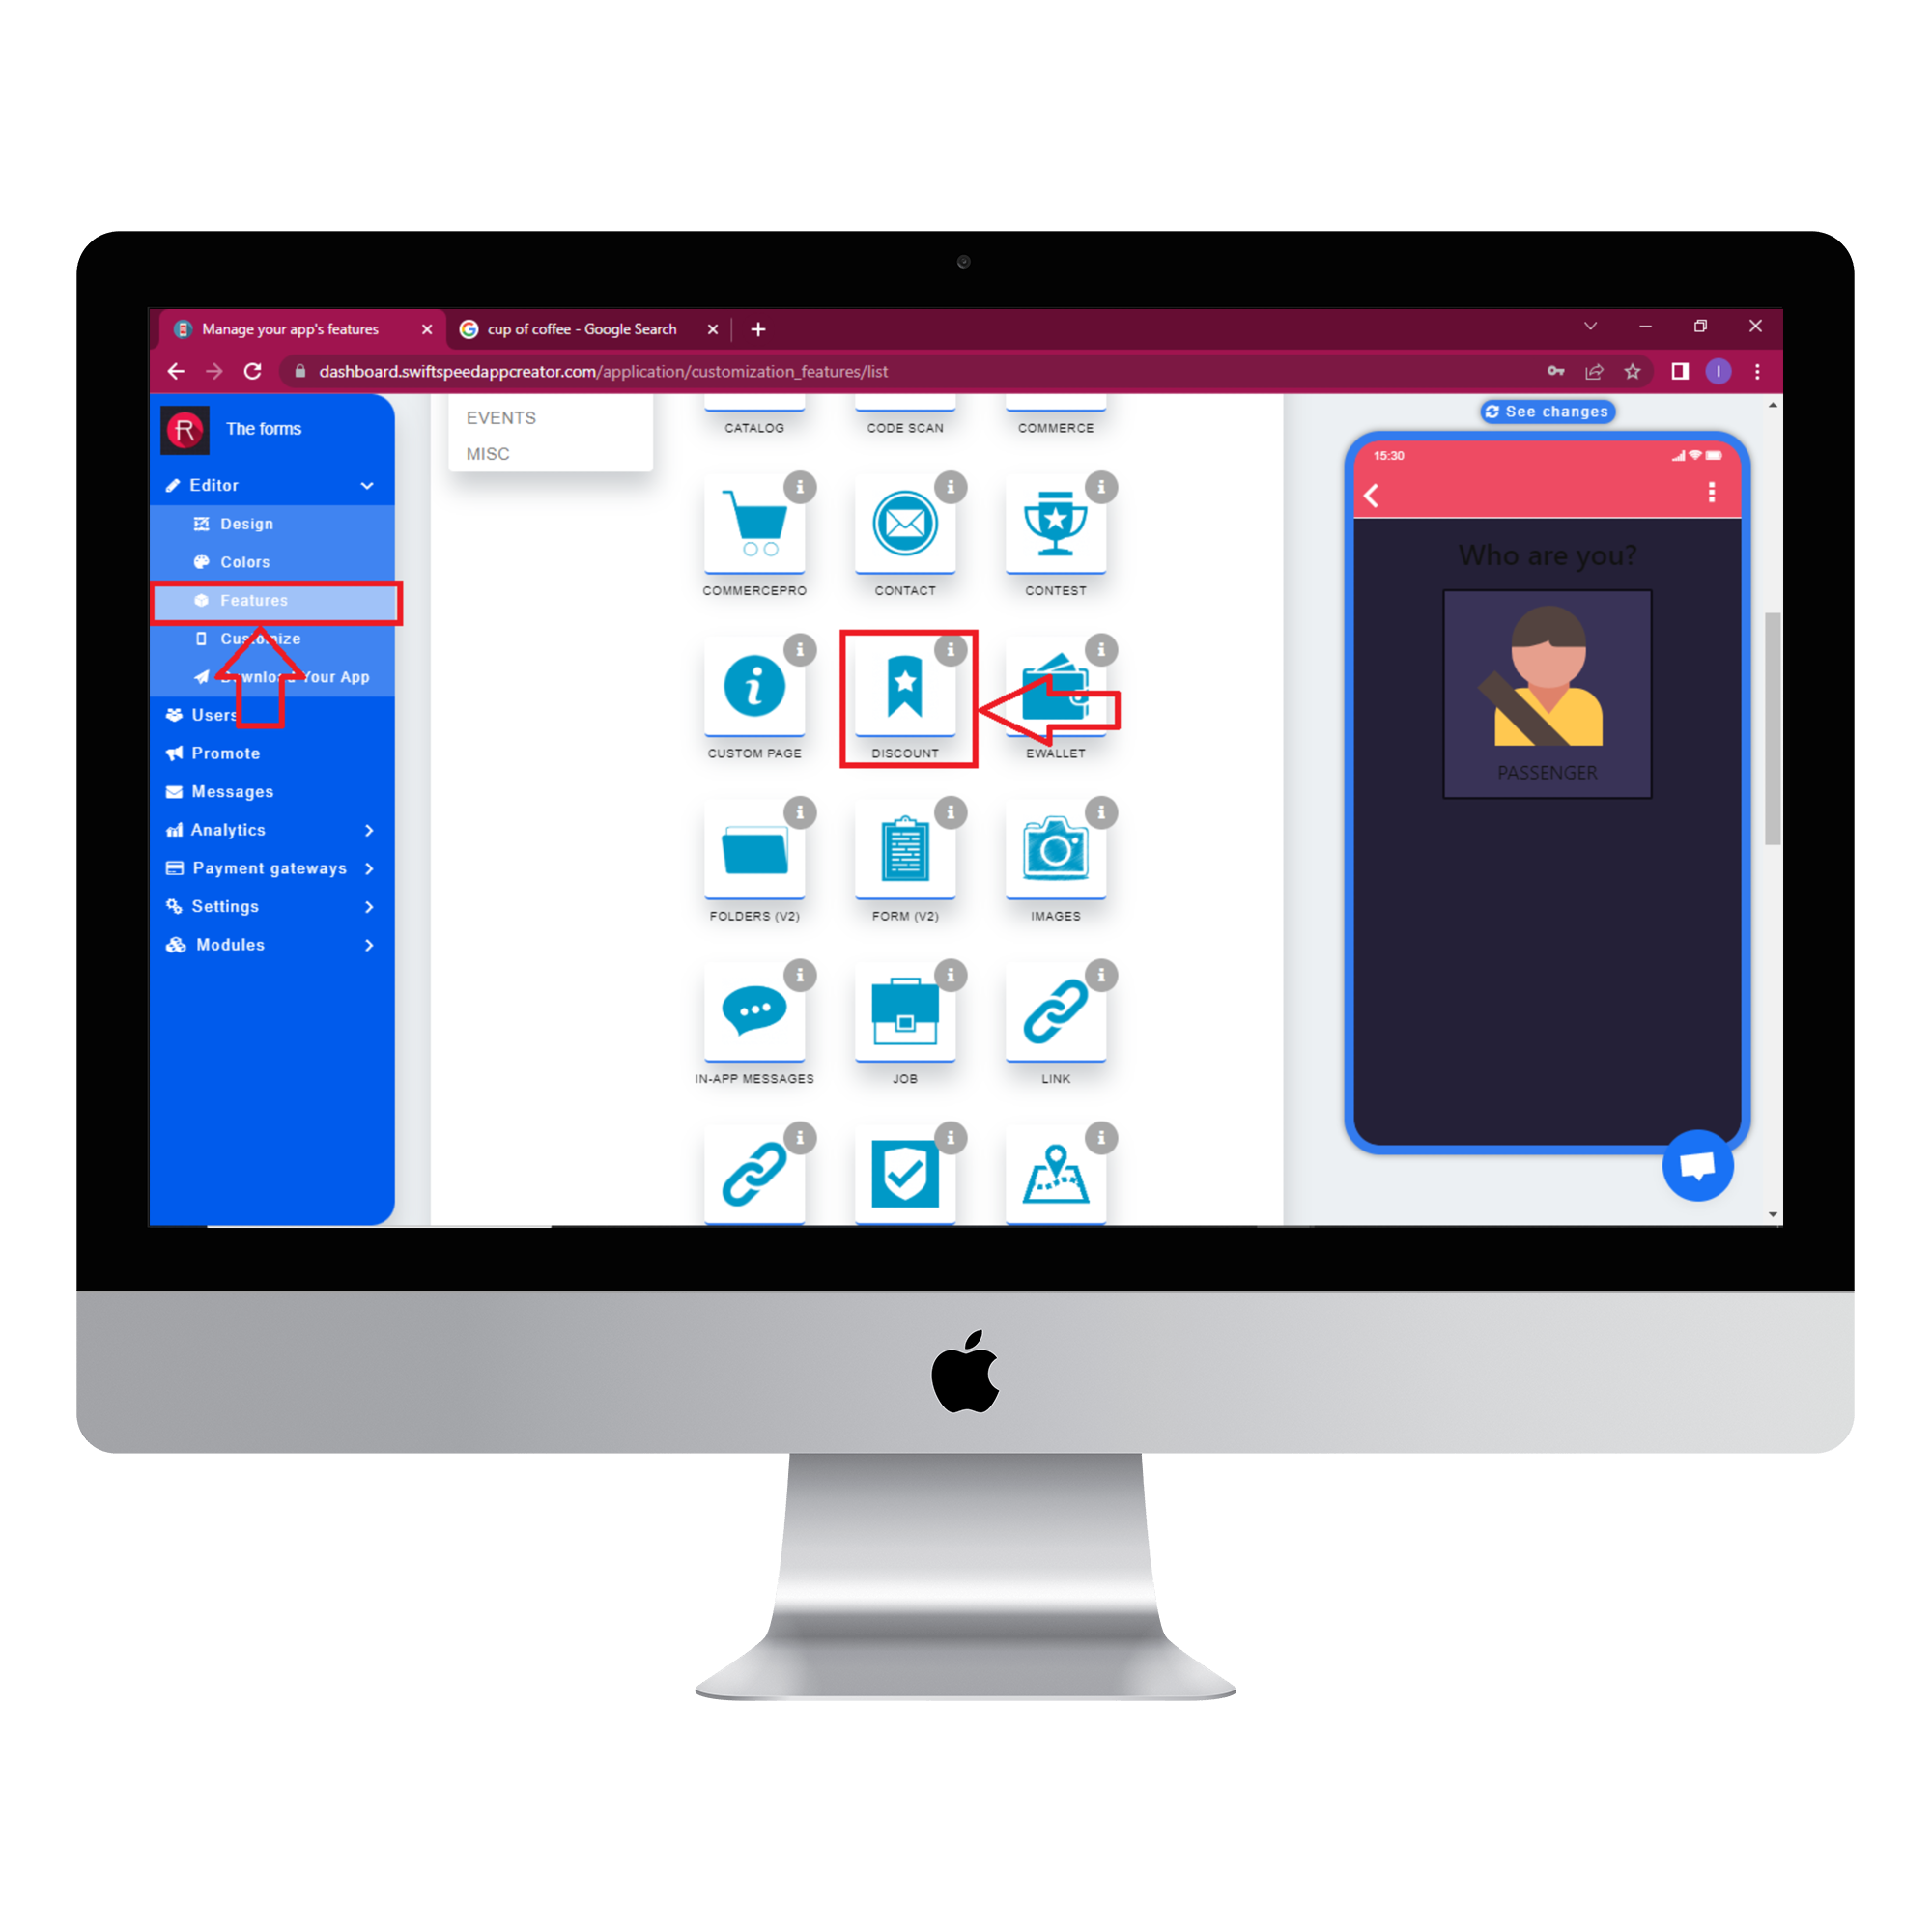
Select “Features” from the side menu on the left side of your screen. Choose the “discount” feature from the list of features and click on “Add feature” when the popup window appears. If you find it challenging to locate the “discount” feature, you can use the search box to find it. Just type in “discount” and press “Enter” on your keyboard.
Step 3:
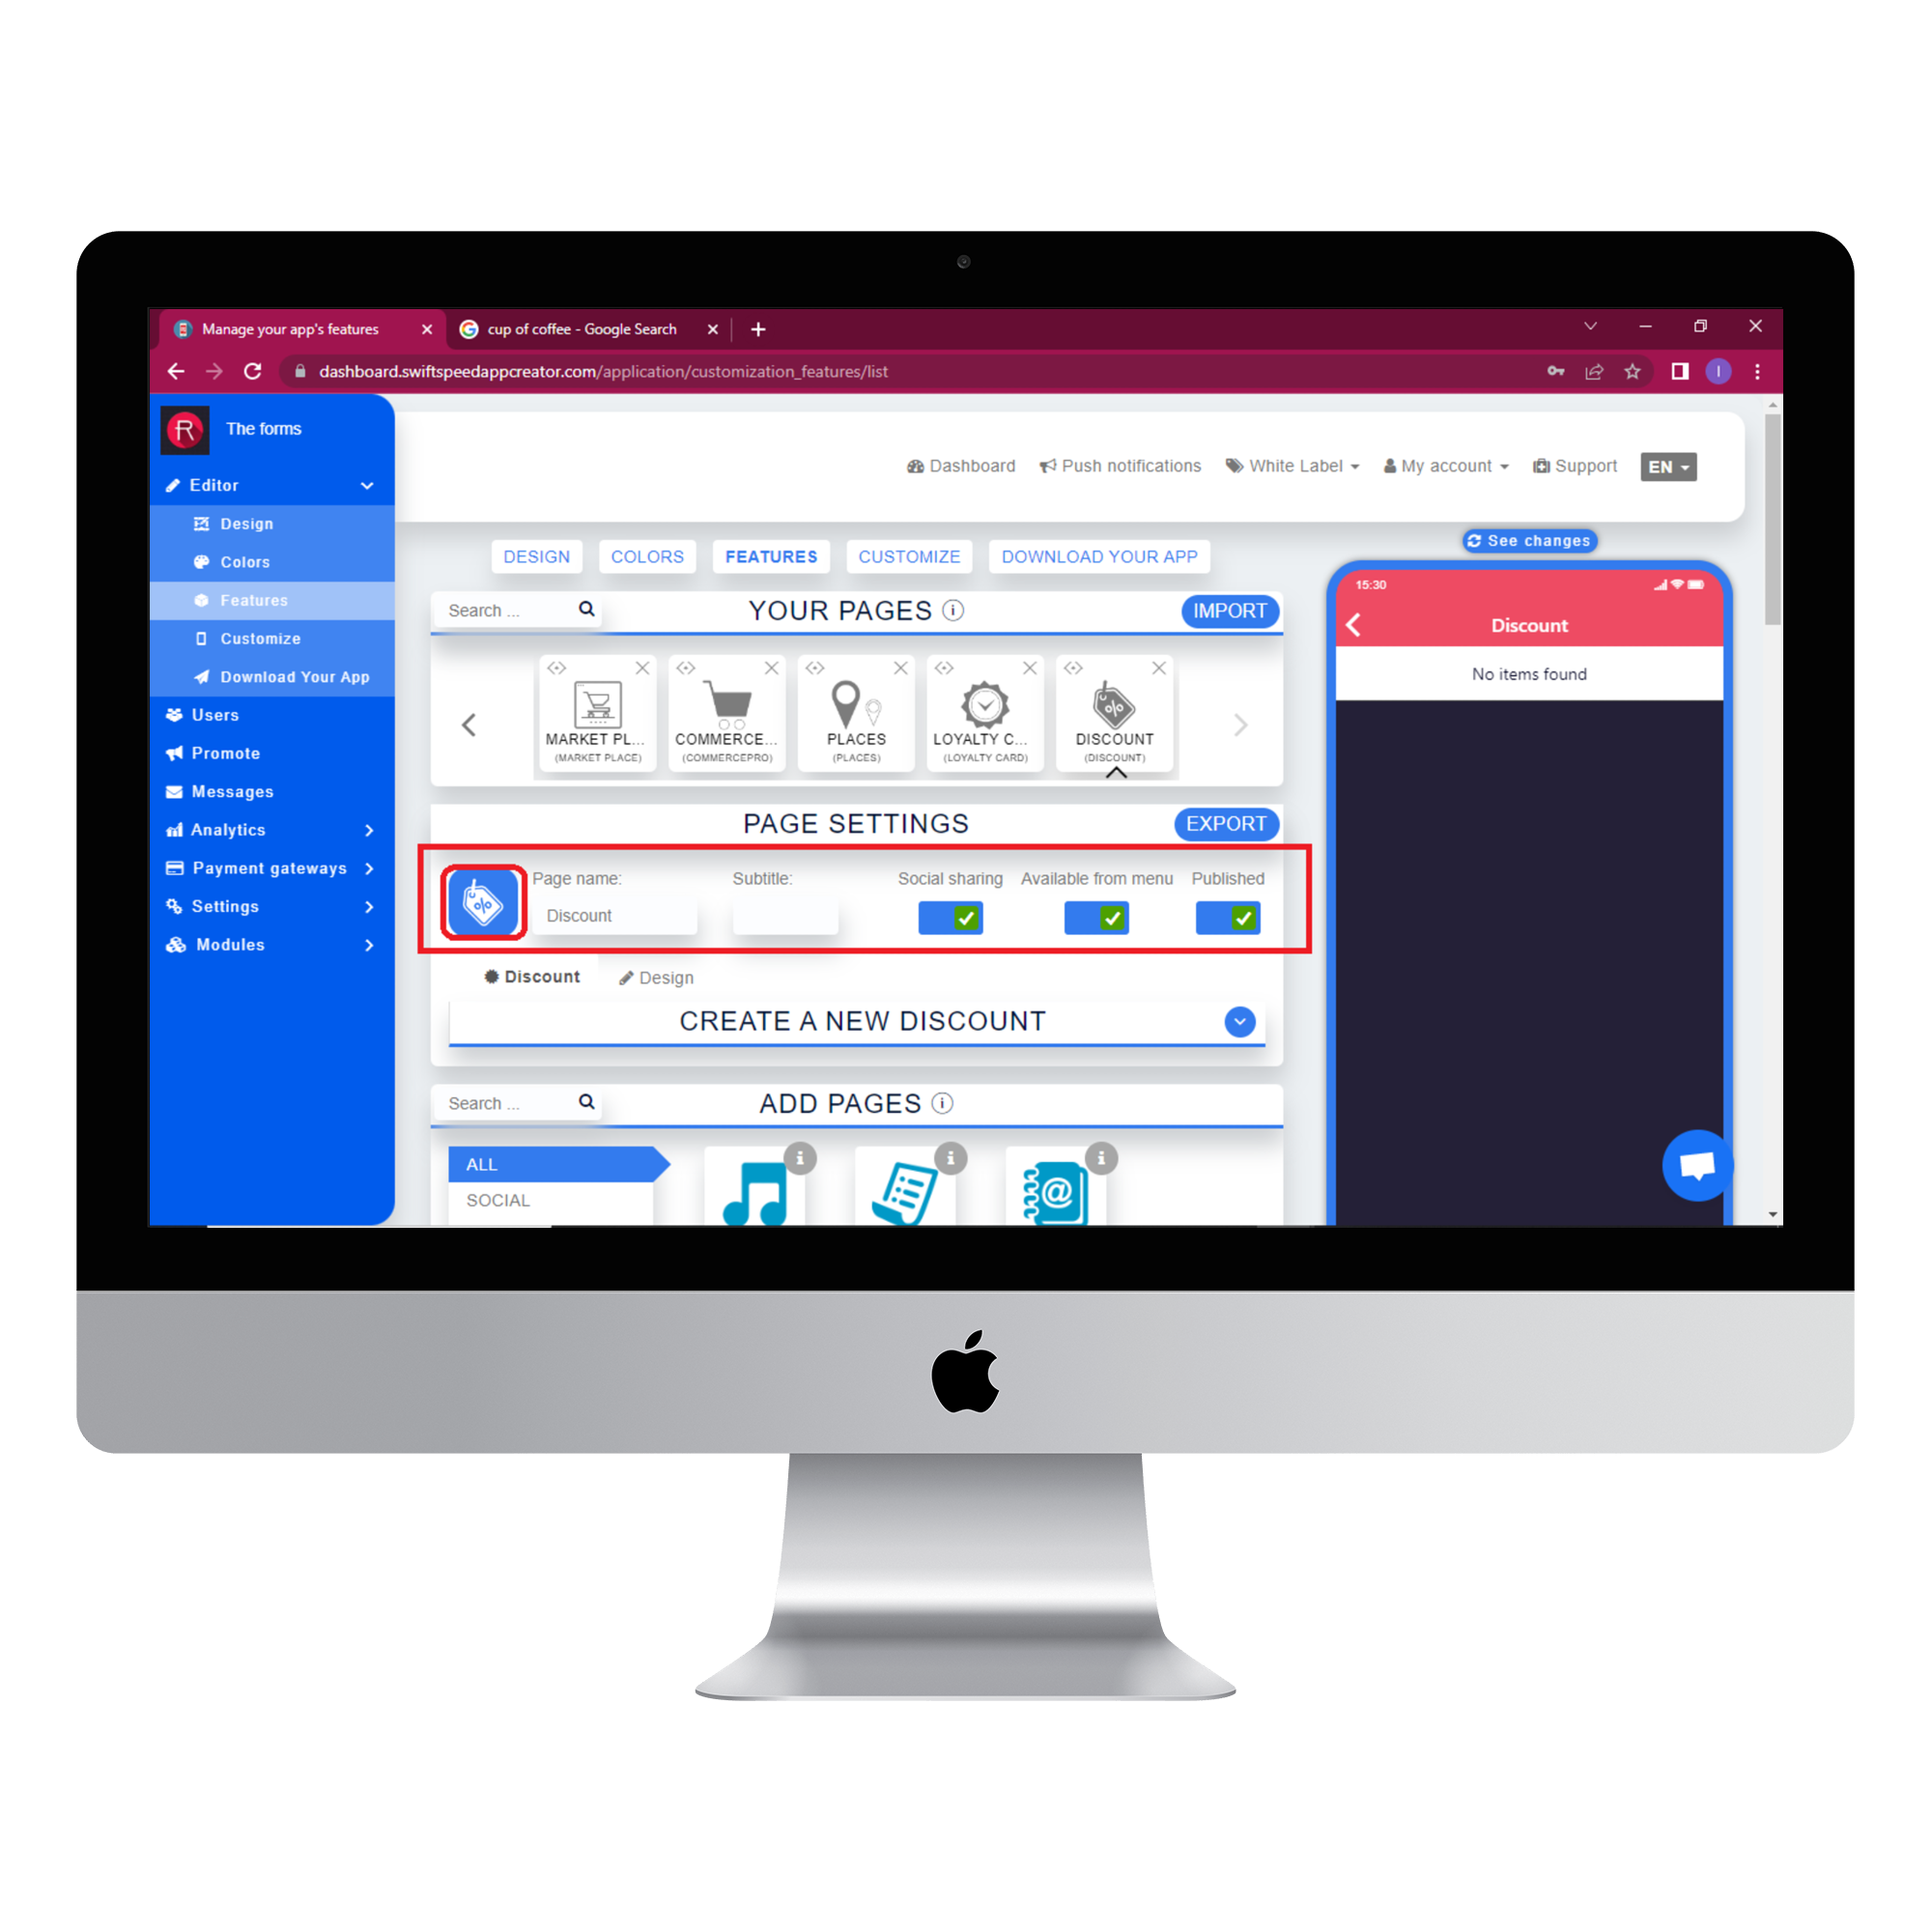
In the Page settings section, you can change the feature icon by clicking on the image button to the left of the “Page name” label. Choose your new feature icon, and it will be saved automatically.
Step 4:
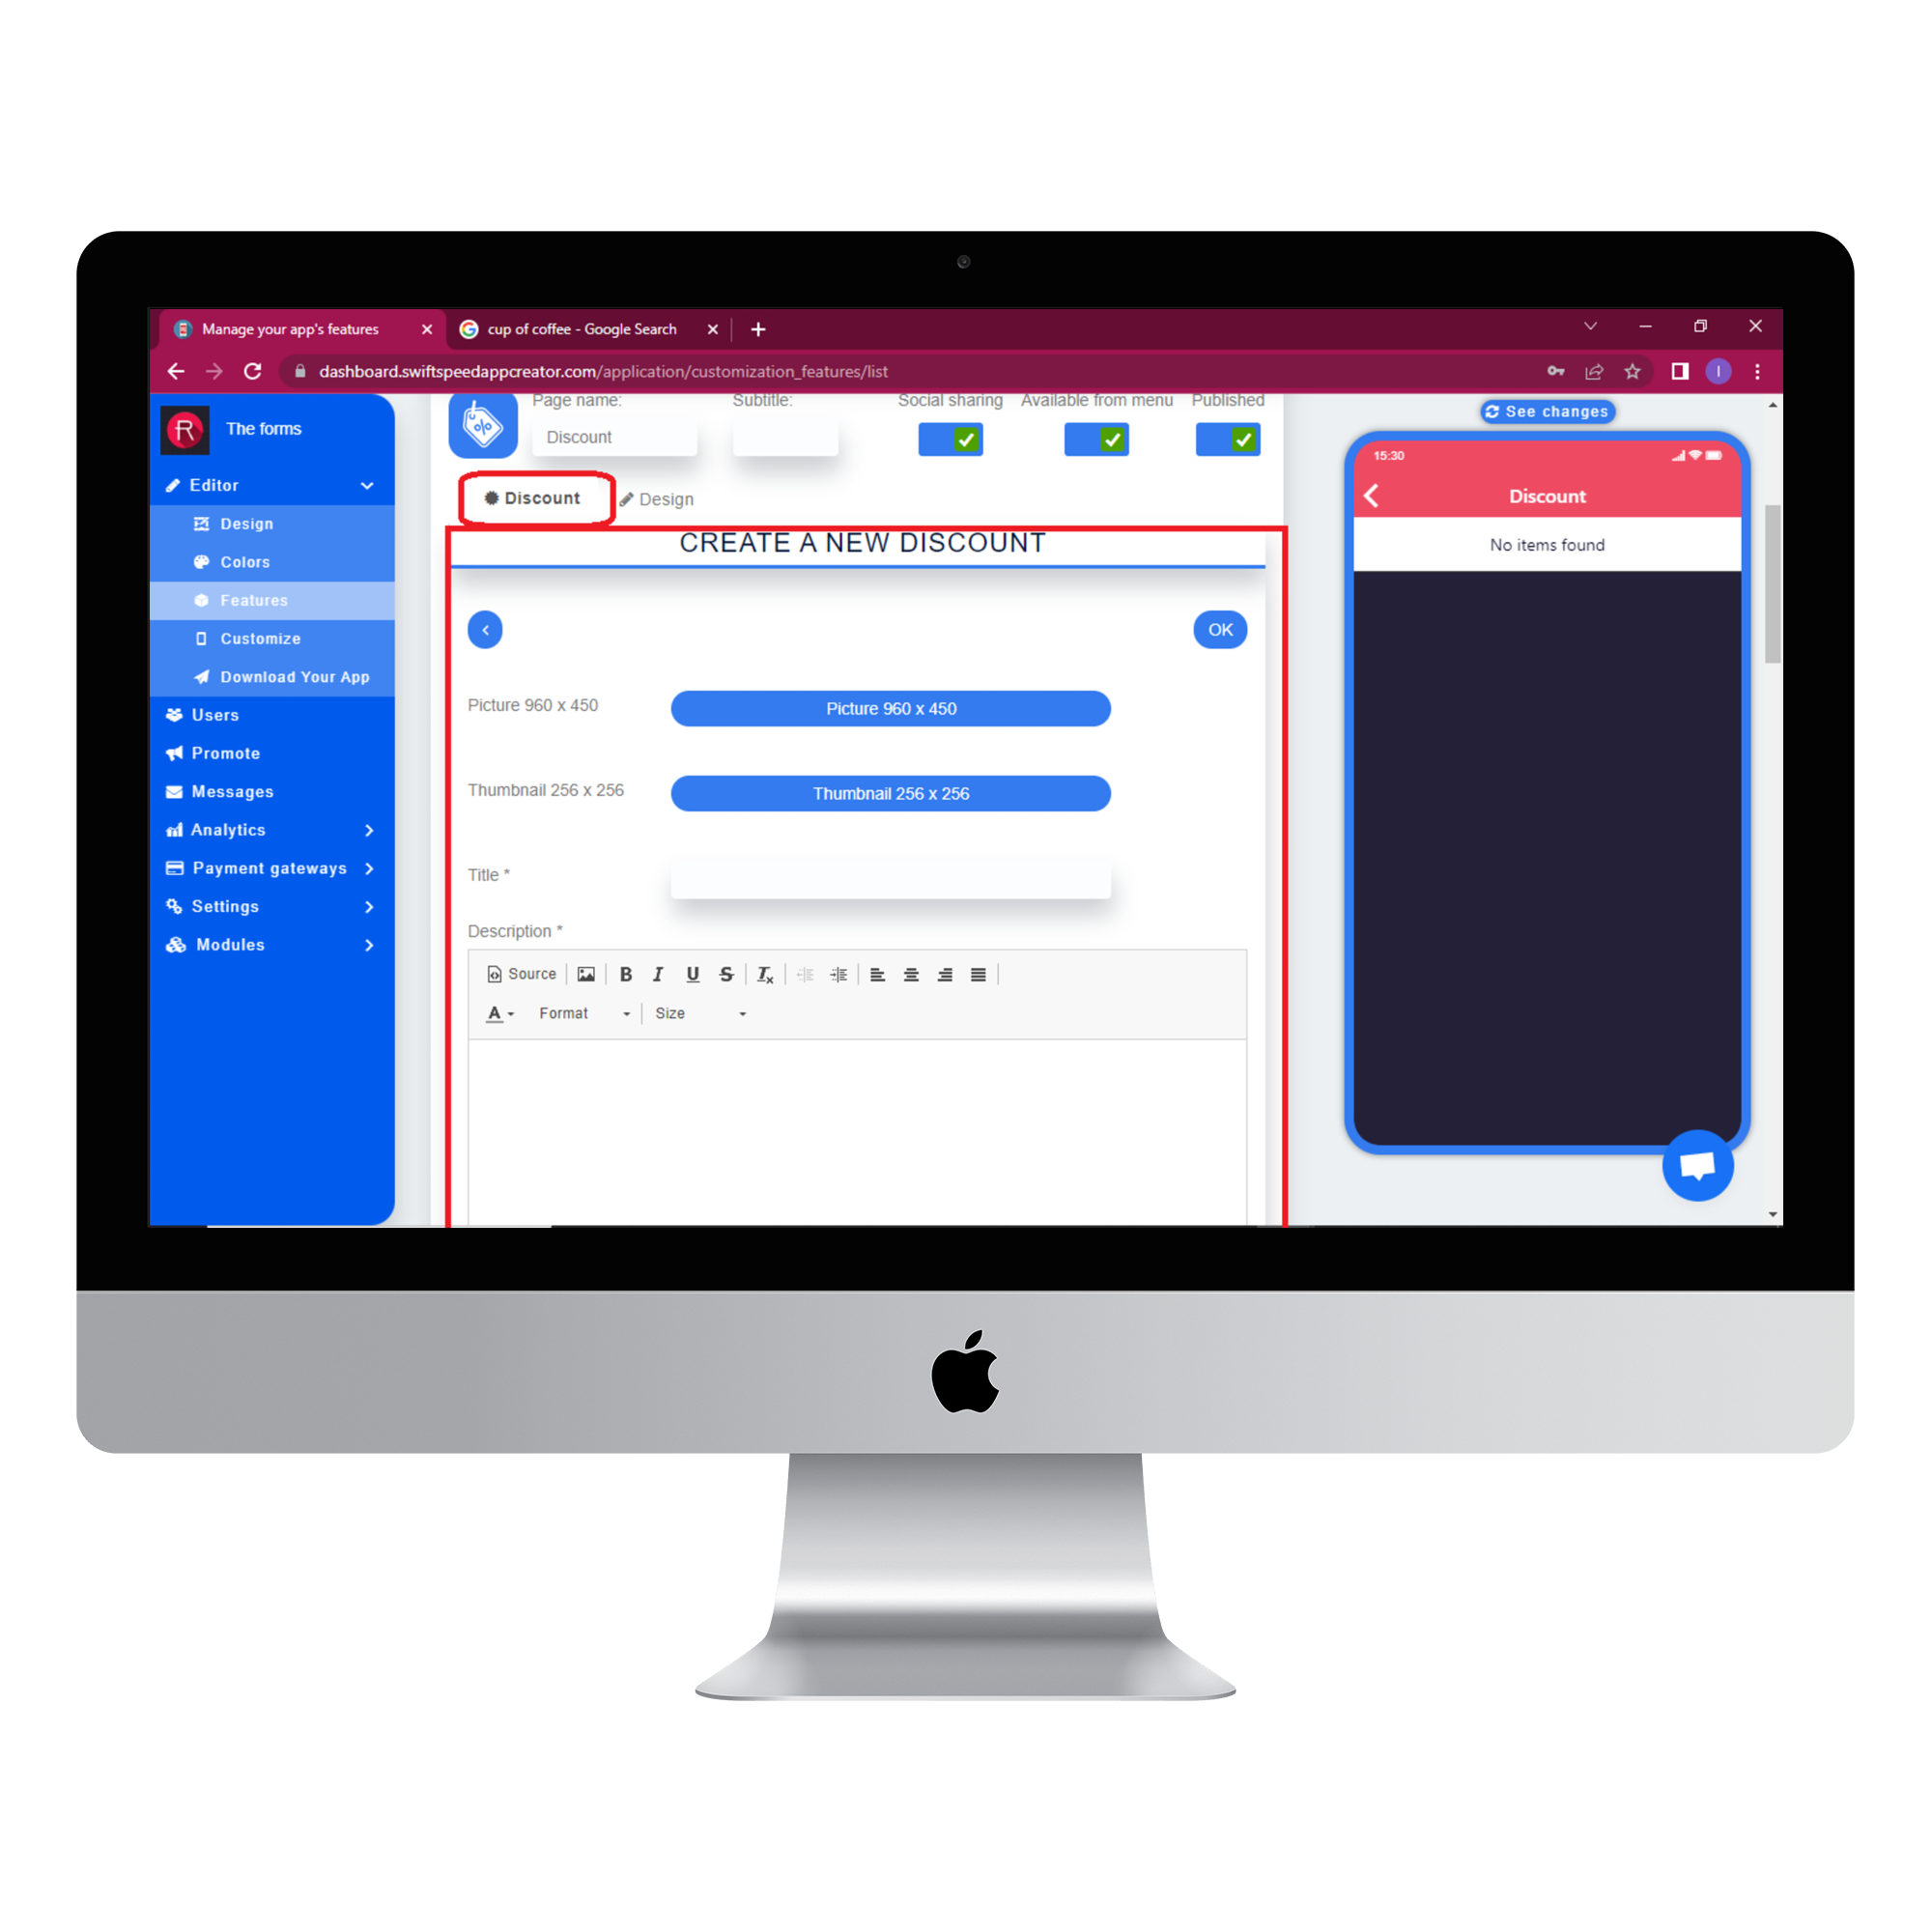
Select the discount tab and create a new discount. Add a picture and thumbnail to make your discount identifiable to users. Type in a title and description for the discount. Type in the discount condition ( example: “Available for purchases above $100” ) and tick the “Use only once” checkbox if you want the discount to be used only once. For short-term discounts, you will need to type in the end date in the textbox provided. Click “Ok”, and your discount will be saved and added.
Step 5:
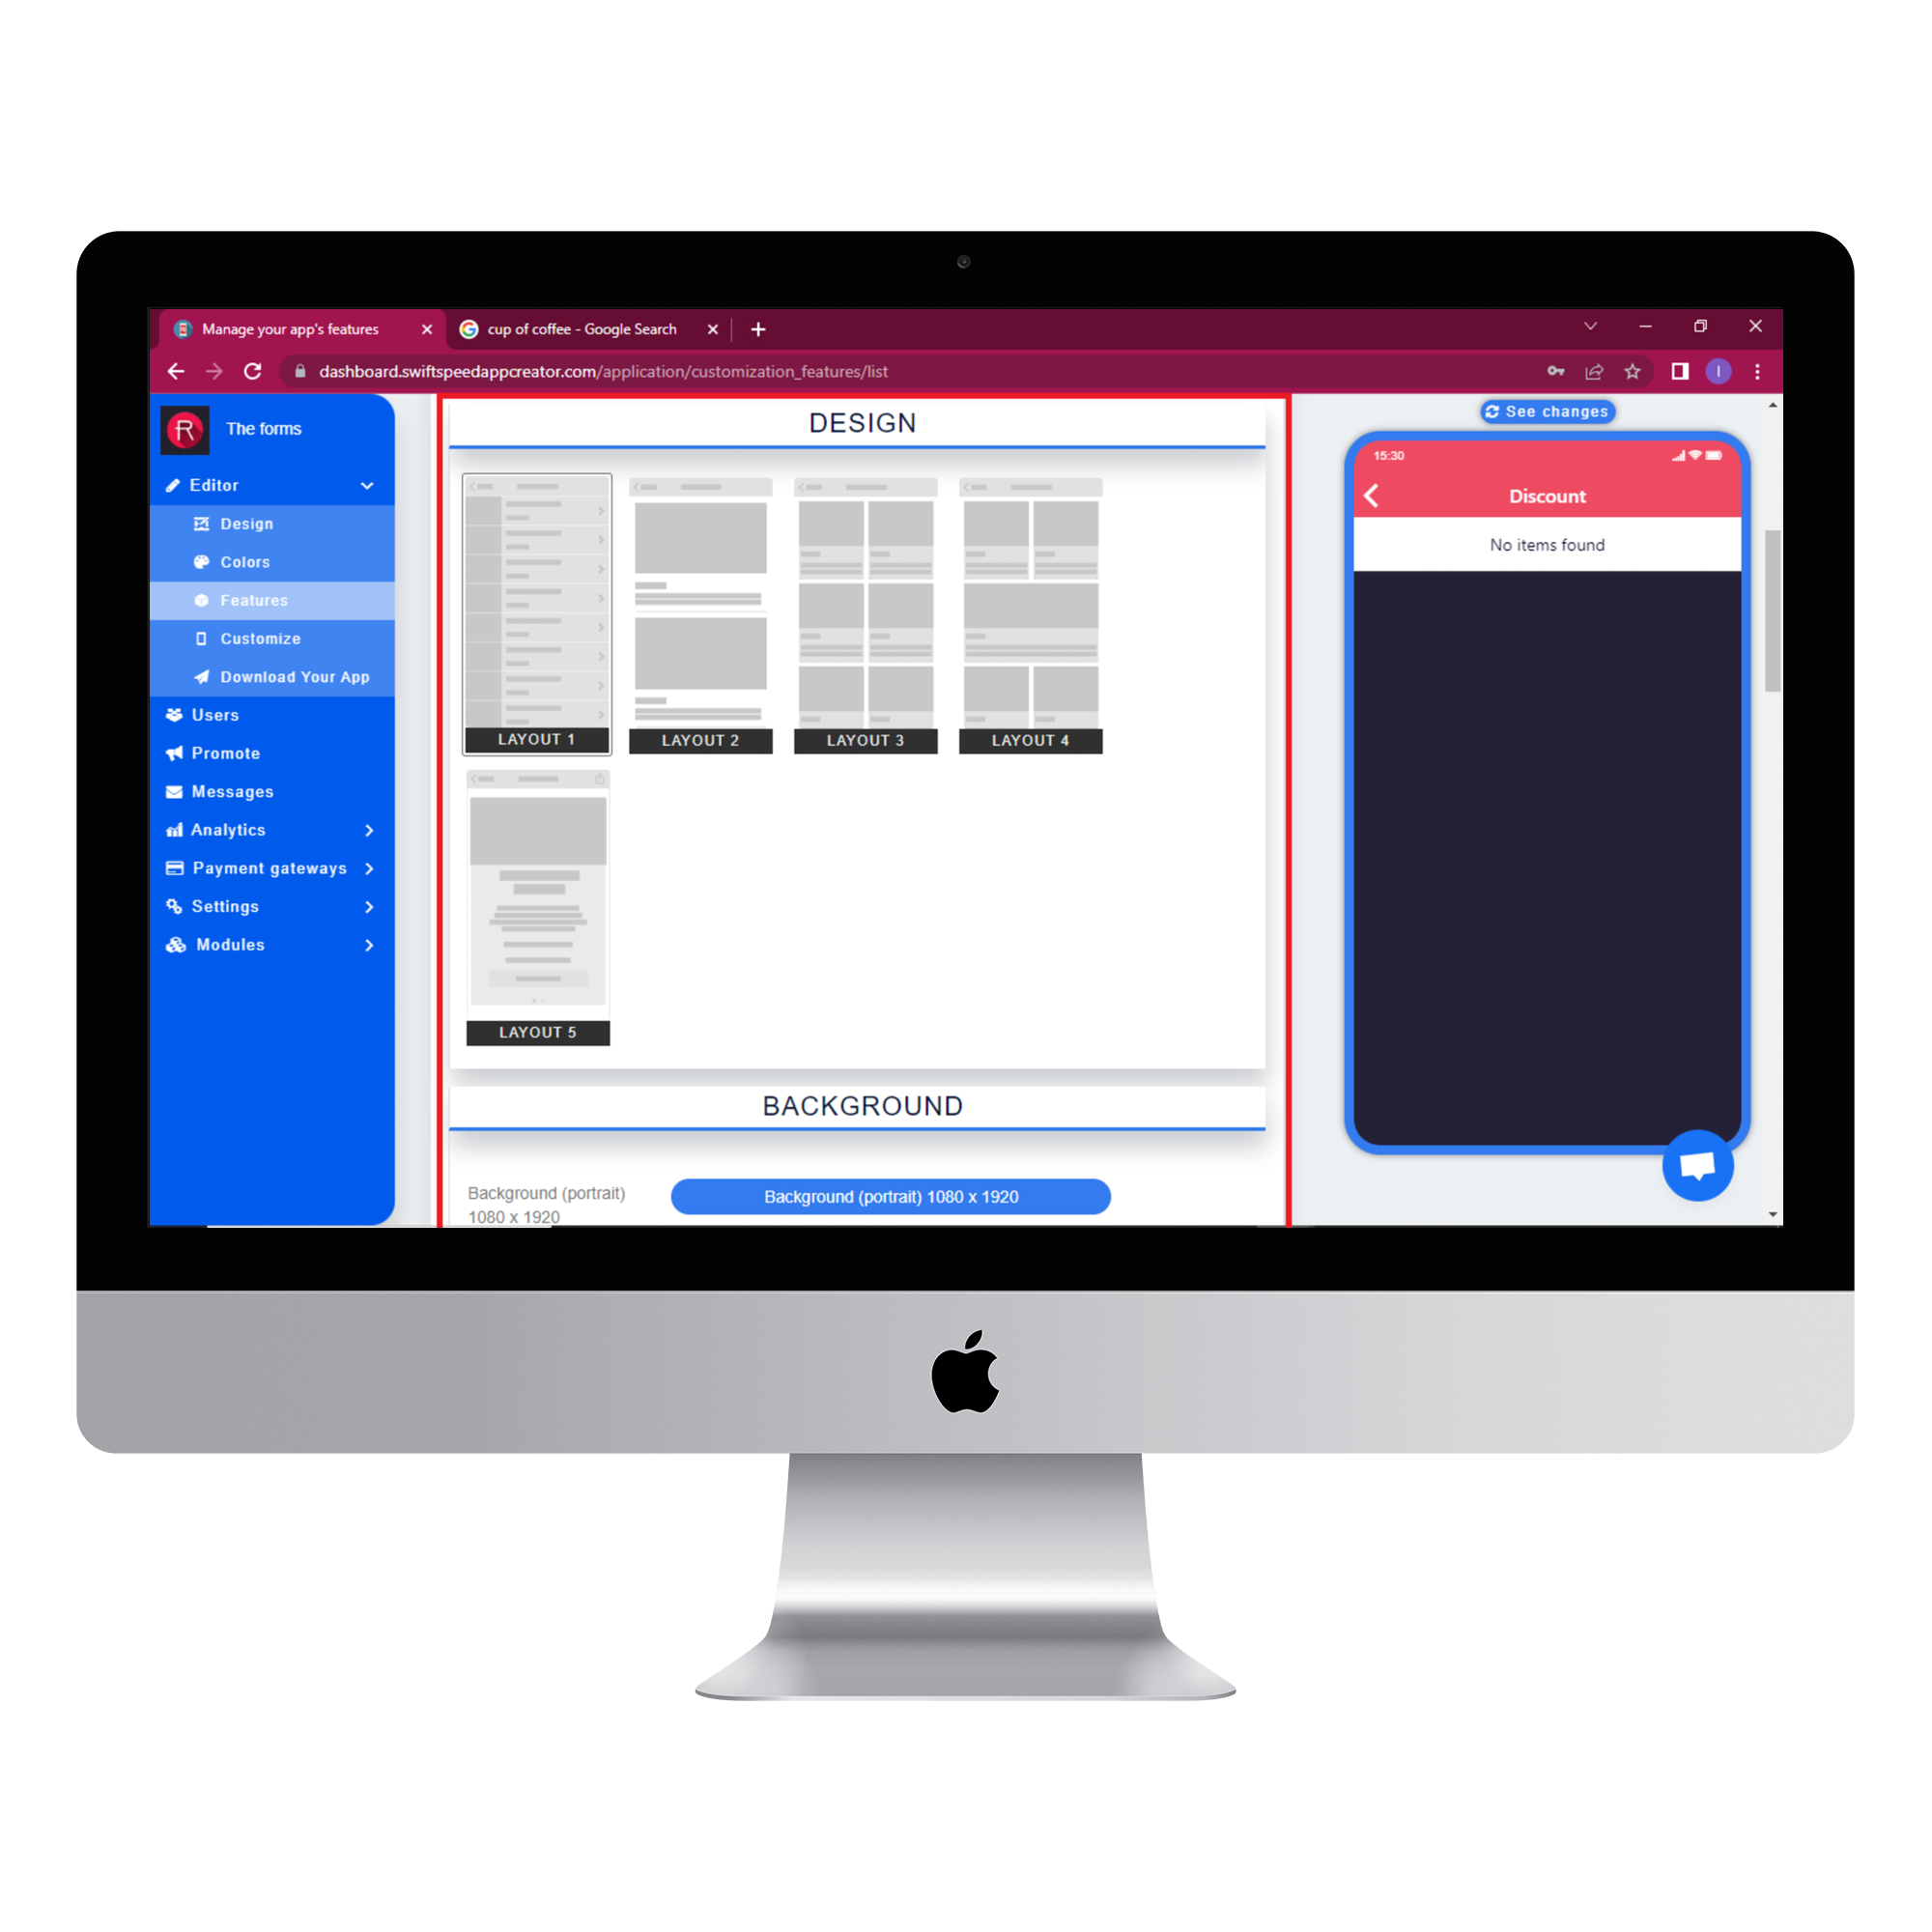
Select the design tab and choose a layout arrangement. Your selection will be saved automatically.
Step 6:
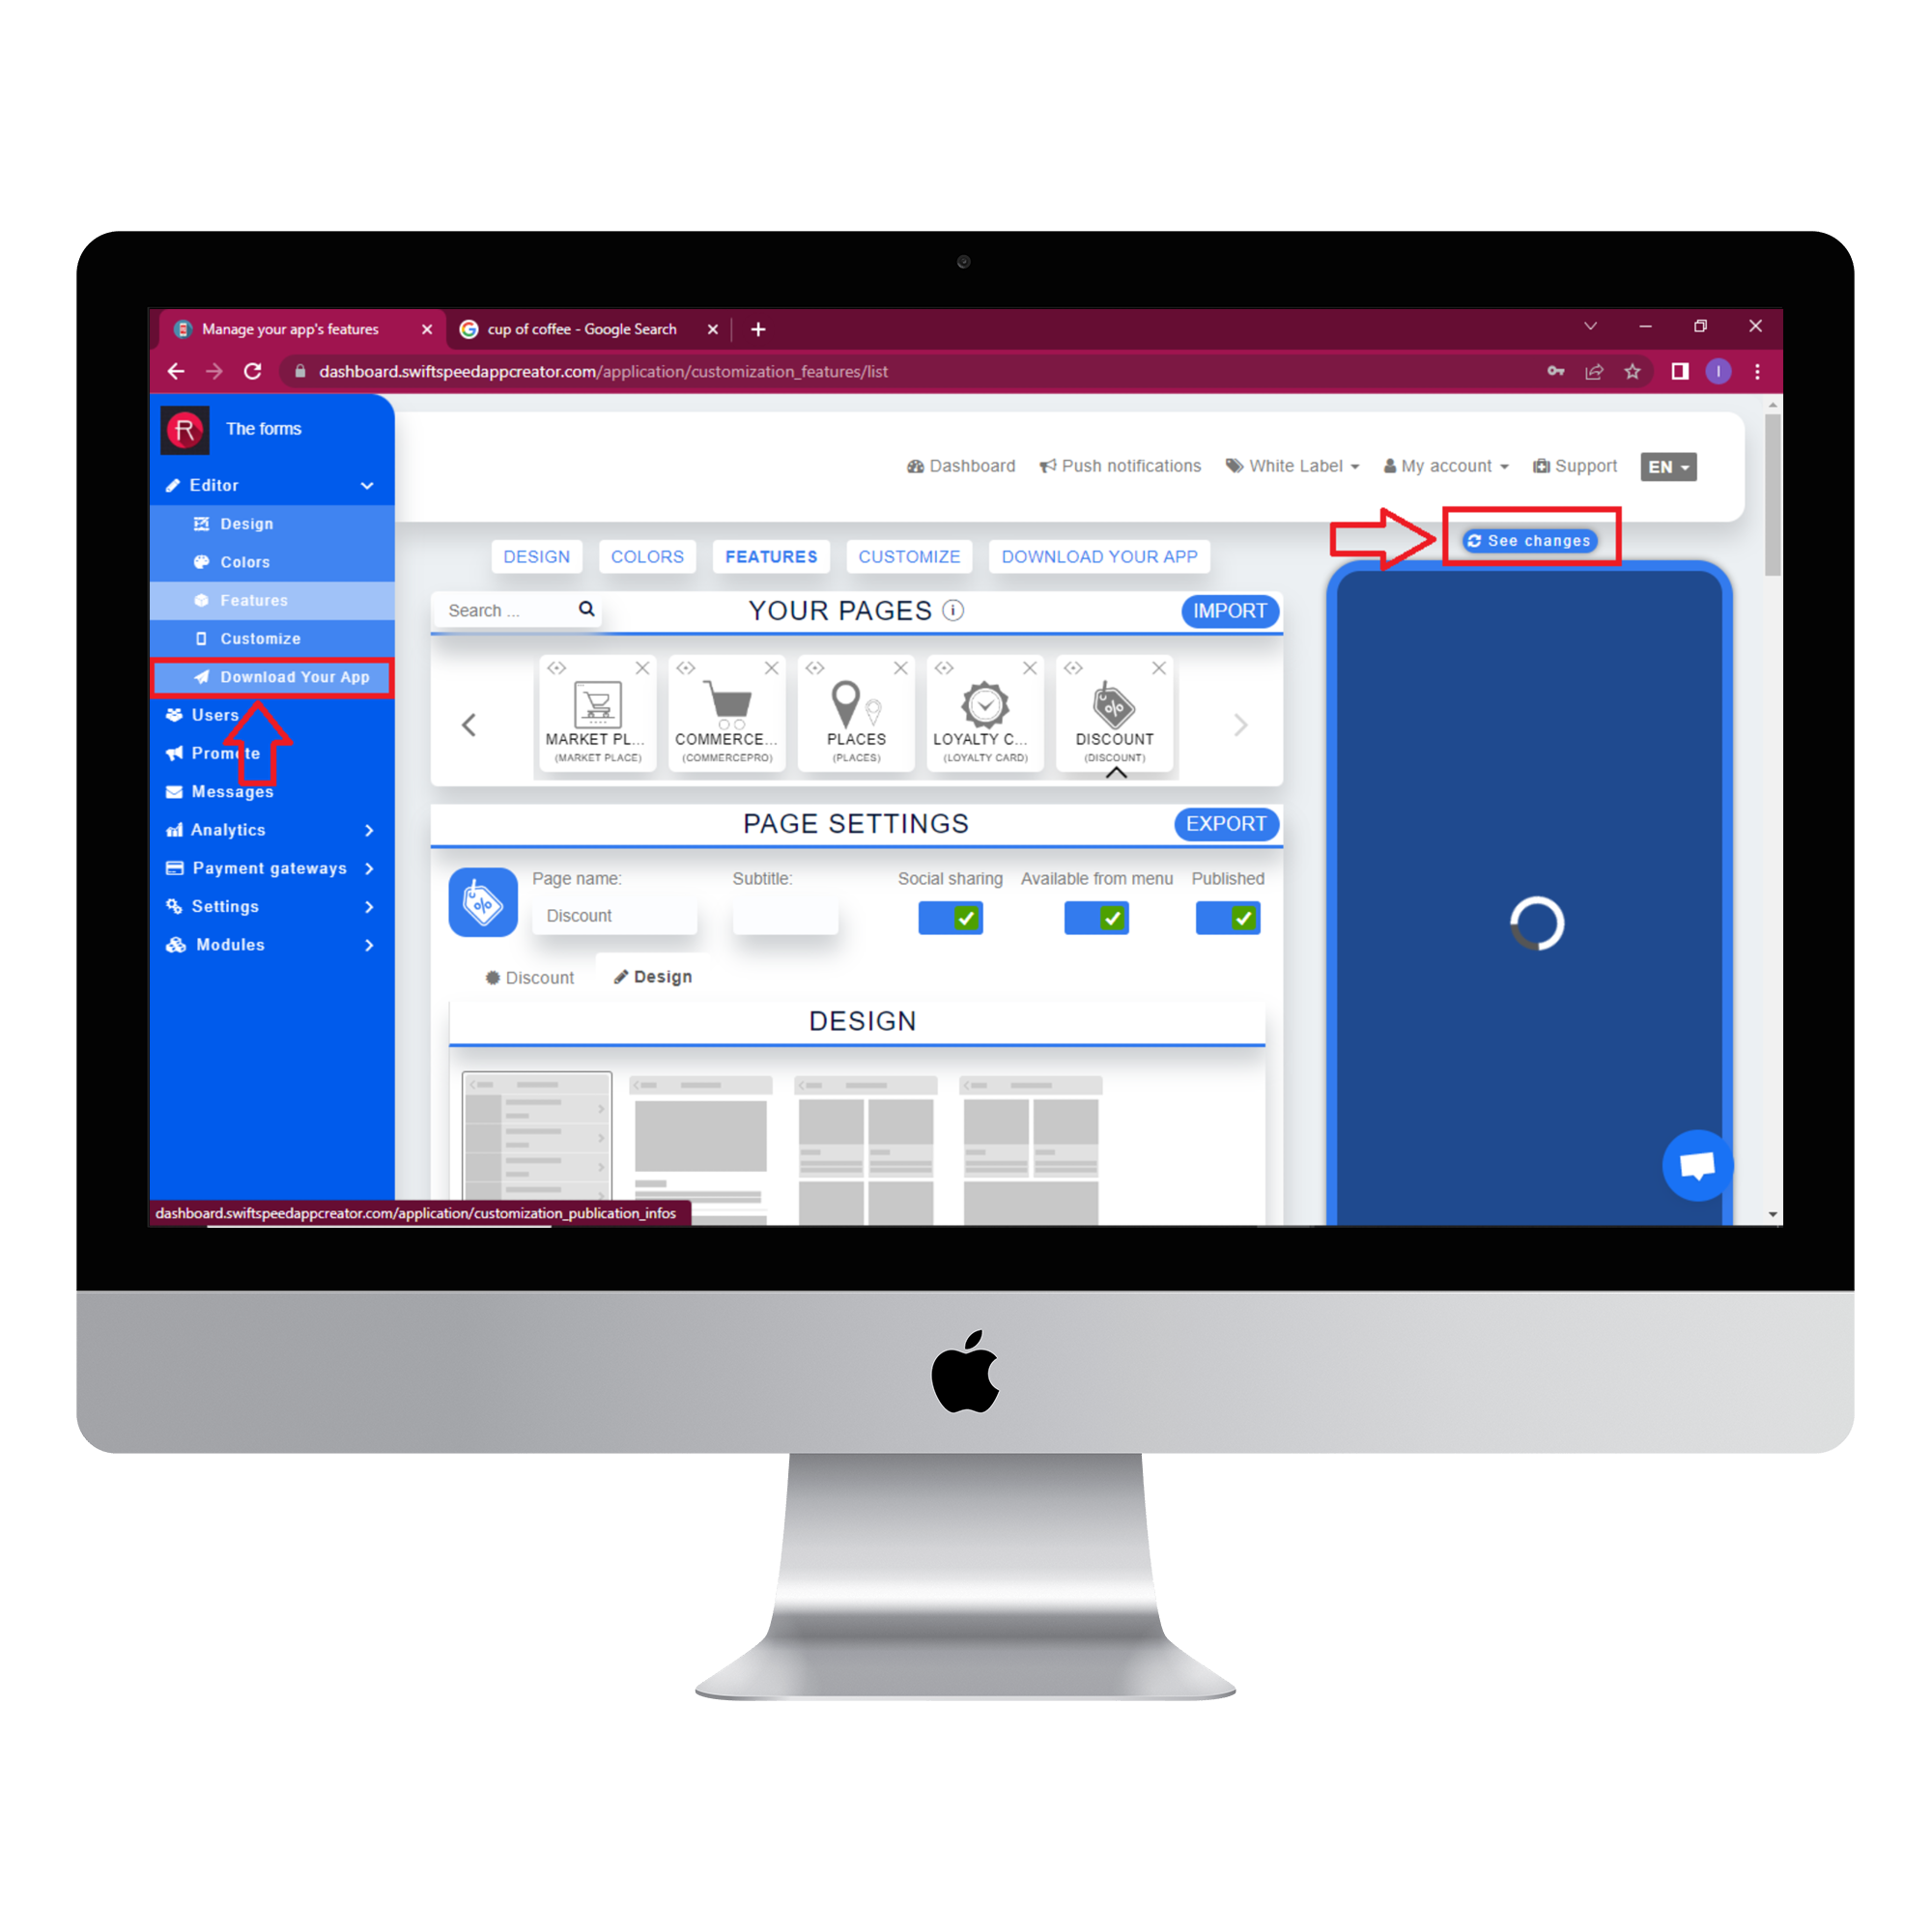
Click on the “see changes” button above the virtual device to see what your app would look like on an actual device. To generate an Apk of your app, click on “Download your app” from the side menu, scroll down and click on “Generate Apk.” Choose a subscription plan, and the Apk will be sent to your email address when the build is complete. Here is an example of what your app would look like.
Good job on making your own discount app.
There are many more amazing features available on the Swiftspeed platform. Click here to check them out

