The Swiftspeed app creator gives you a wide choice of features to promote your products and activities.
The custom page is one of those features. It allows you the freedom to decide the layout of your app. Your app can be structured in many creative ways to enlighten users about your business. You can write an article with pictures, publish a photo gallery or publish a video directly on this page. “One-touch call” buttons and links to external websites can also be added to give your app an extra flare of sophistication. Kindly follow the steps below to learn how to integrate this feature into your application seamlessly.
Step 1:
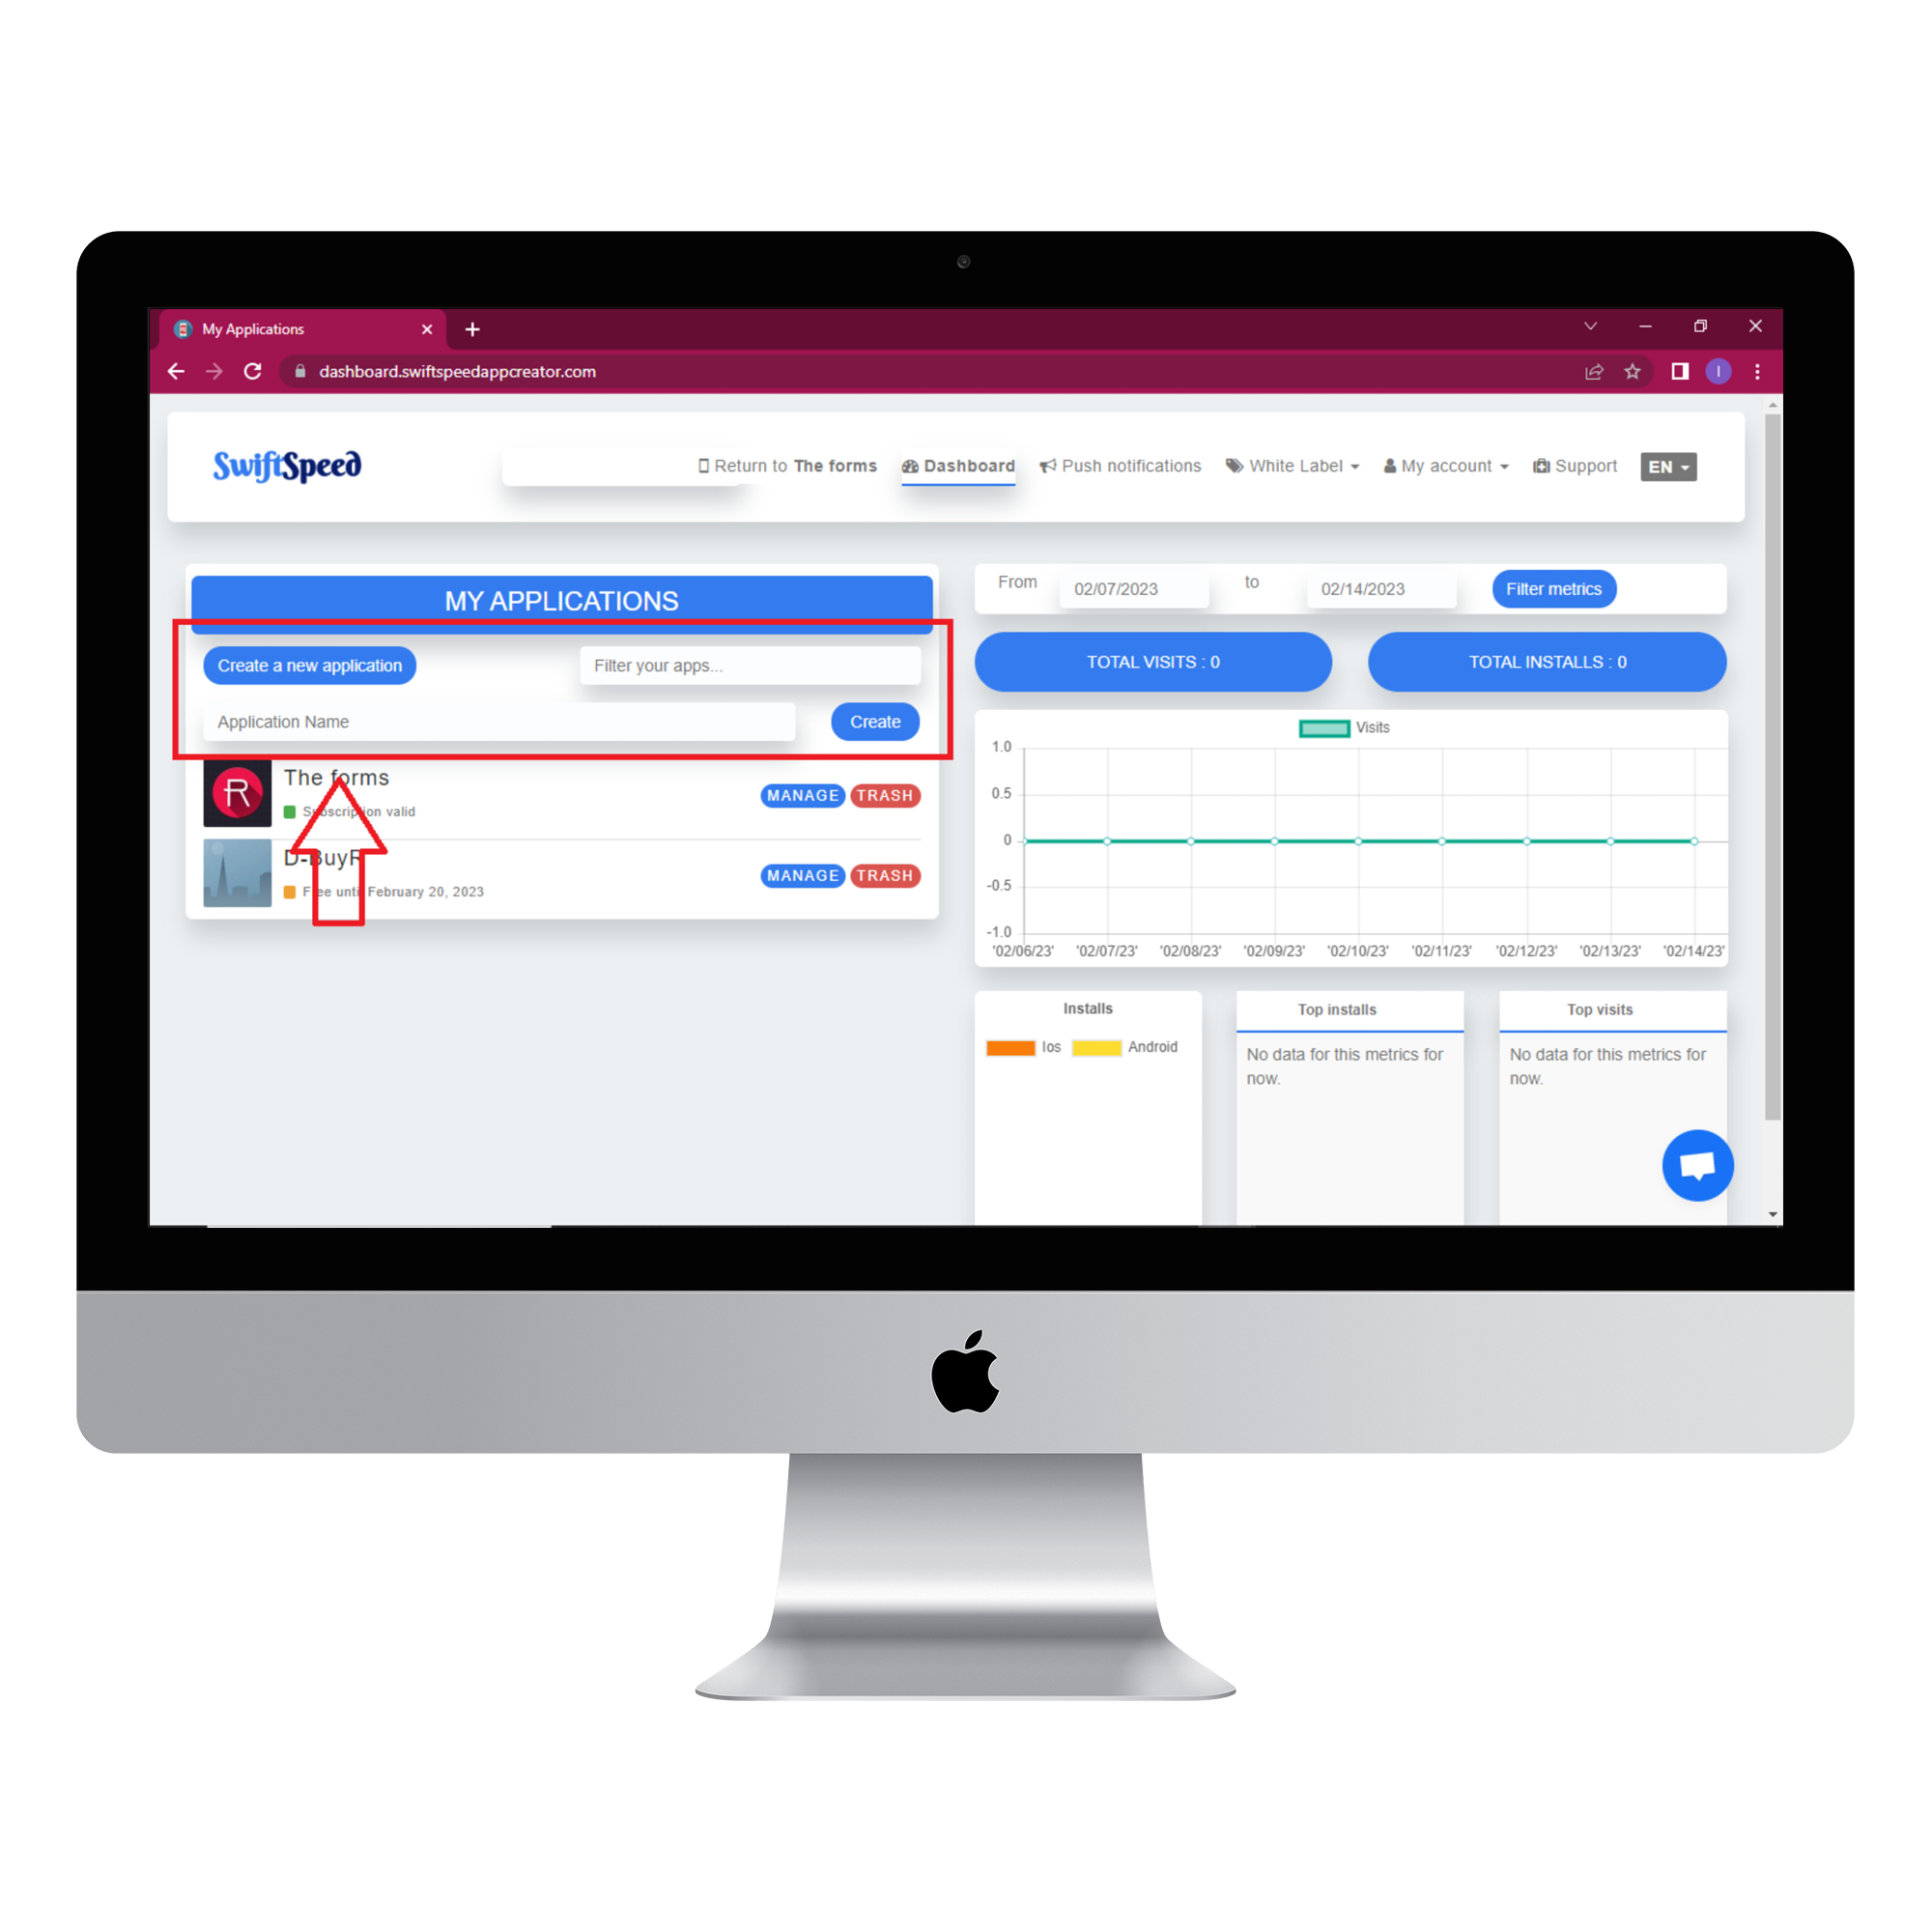
Go to the Swiftspeed homepage, log in, and you will be taken to the app creator dashboard. Click on “create a new application” or select a pre-existing app ( if you have one ). If you selected “Create a new application”, you will have to type in the name of your app and click “Create”. If you are not familiar with the app creation process, please read our article on creating an app on our platform.
Step 2:
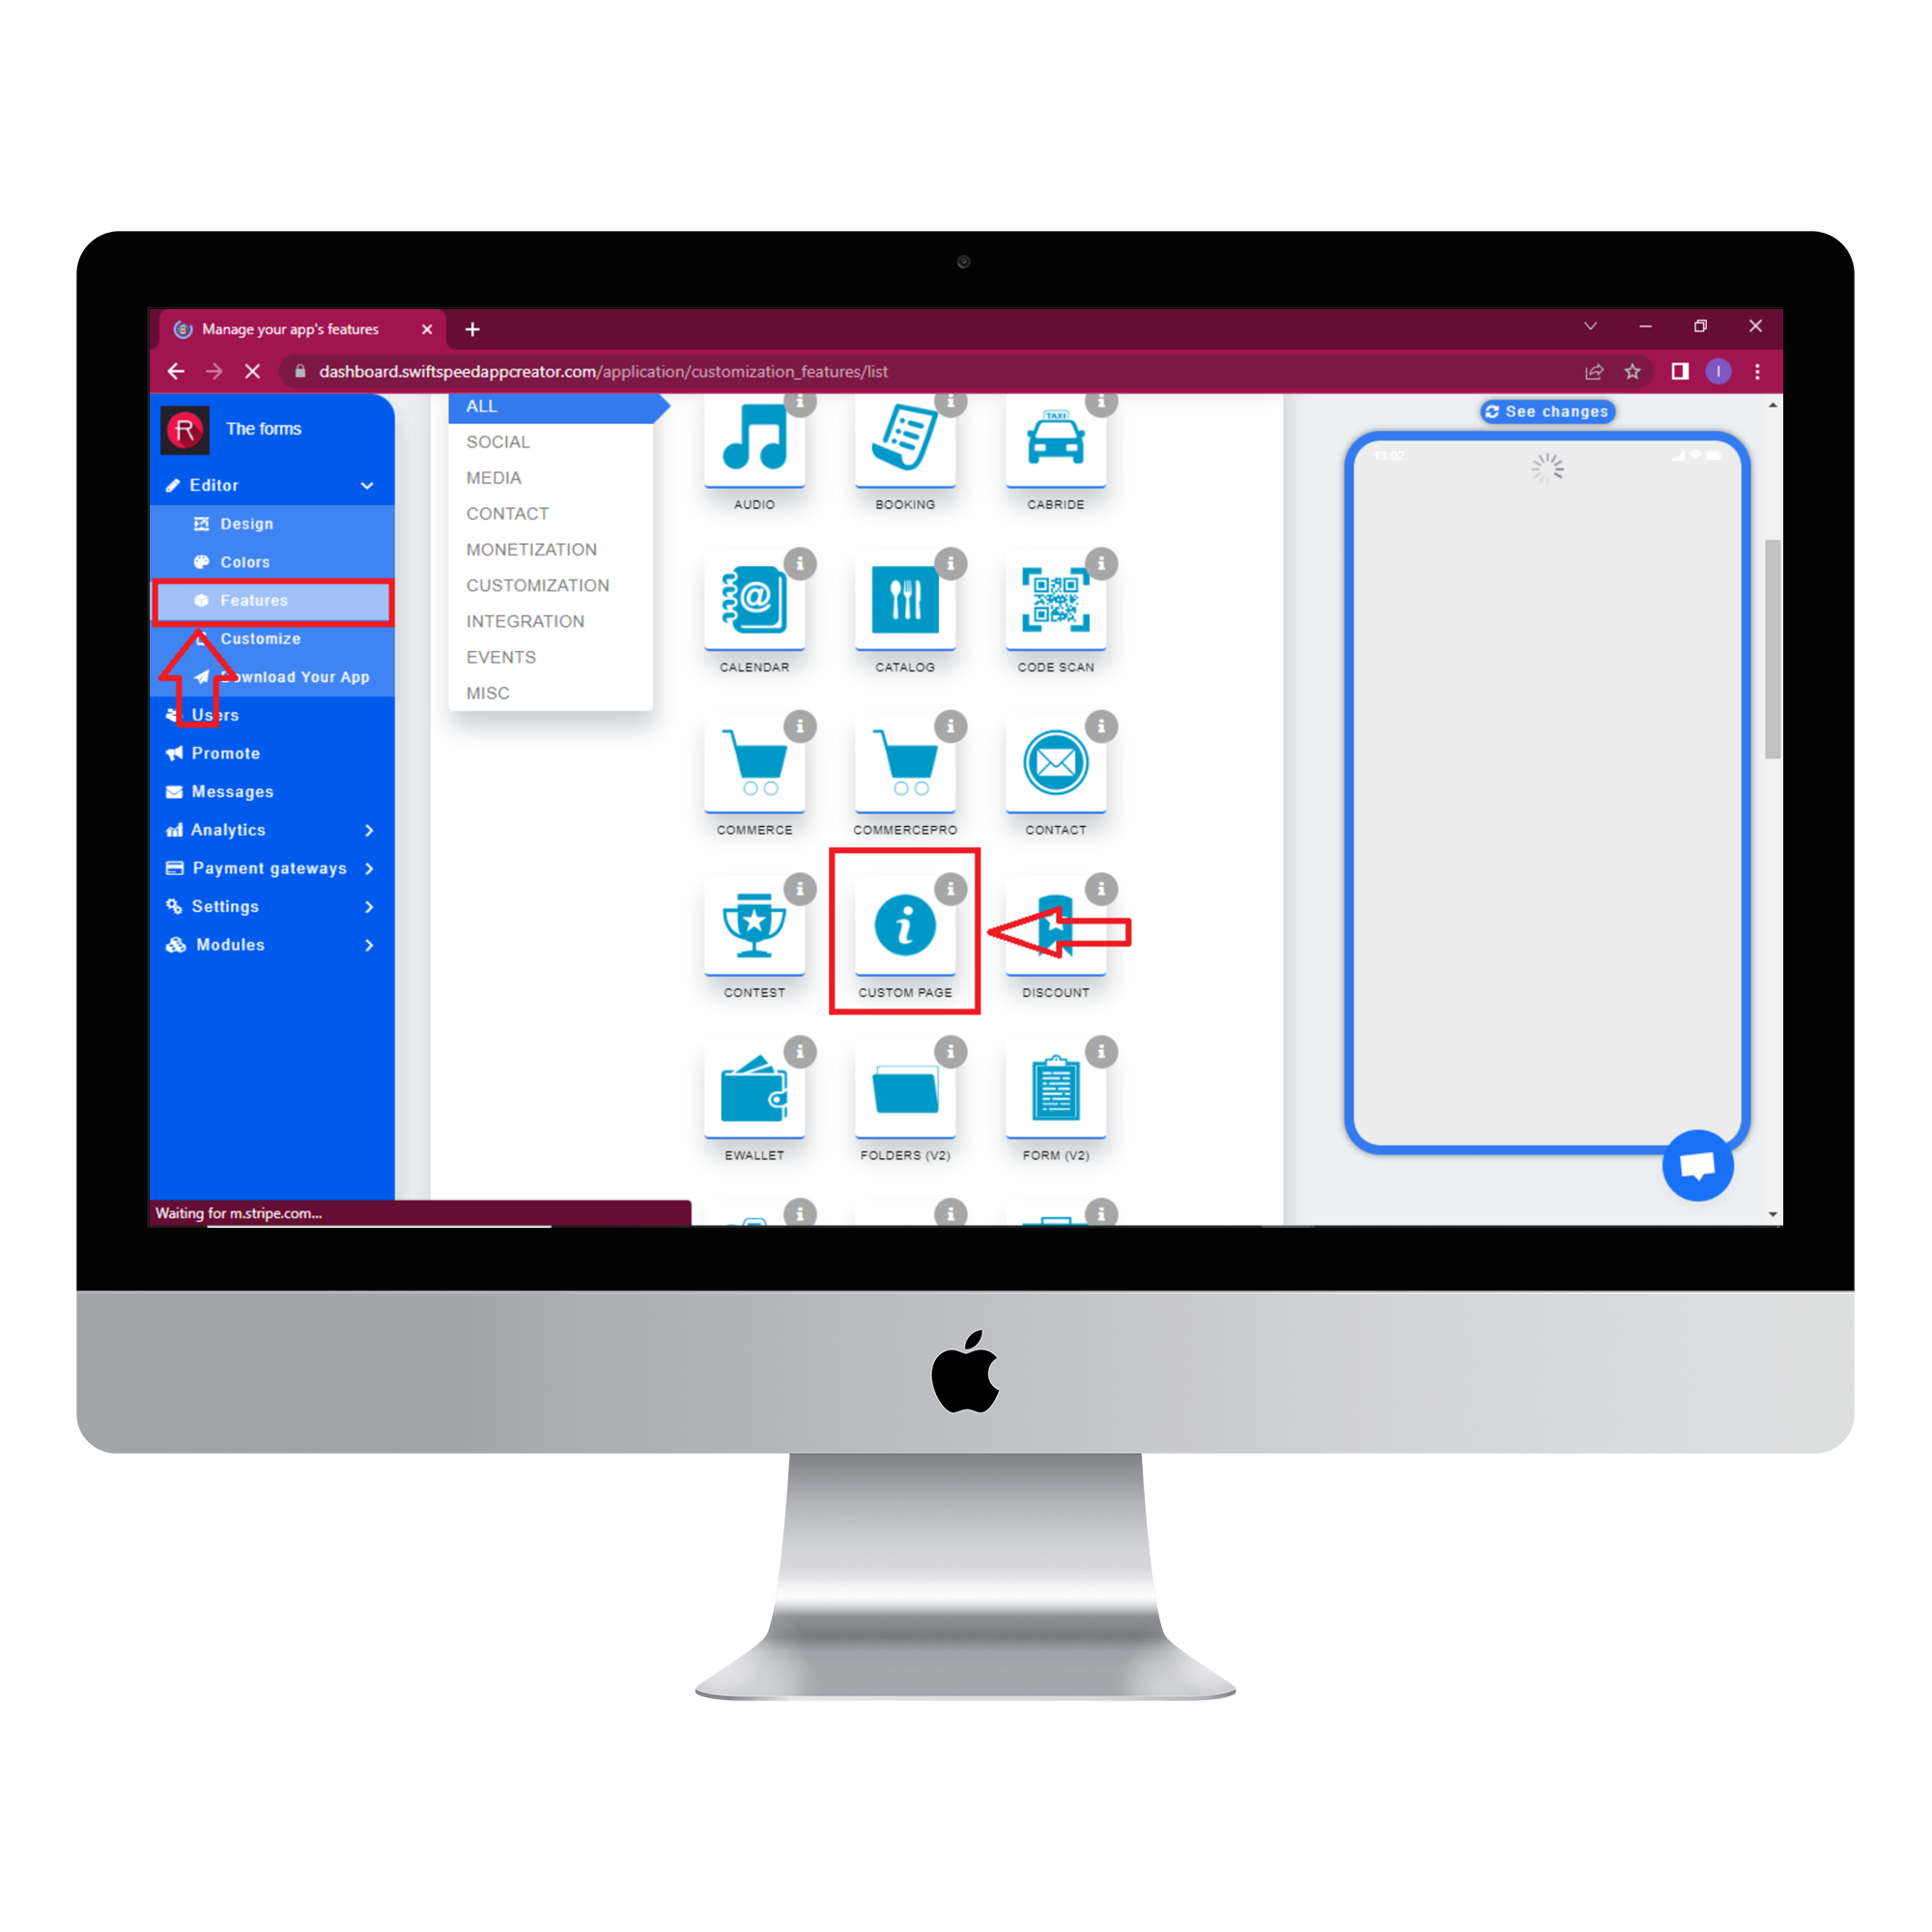
Select “Features” from the side menu on the left side of your screen. Choose the “Custom pages” feature from the list of features and click on “Add feature” when the popup window appears. If you find it challenging to locate the “Custom pages” feature, you can use the search box to find it. Just type in “Custom” and press “Enter” on your keyboard.
Step 3:
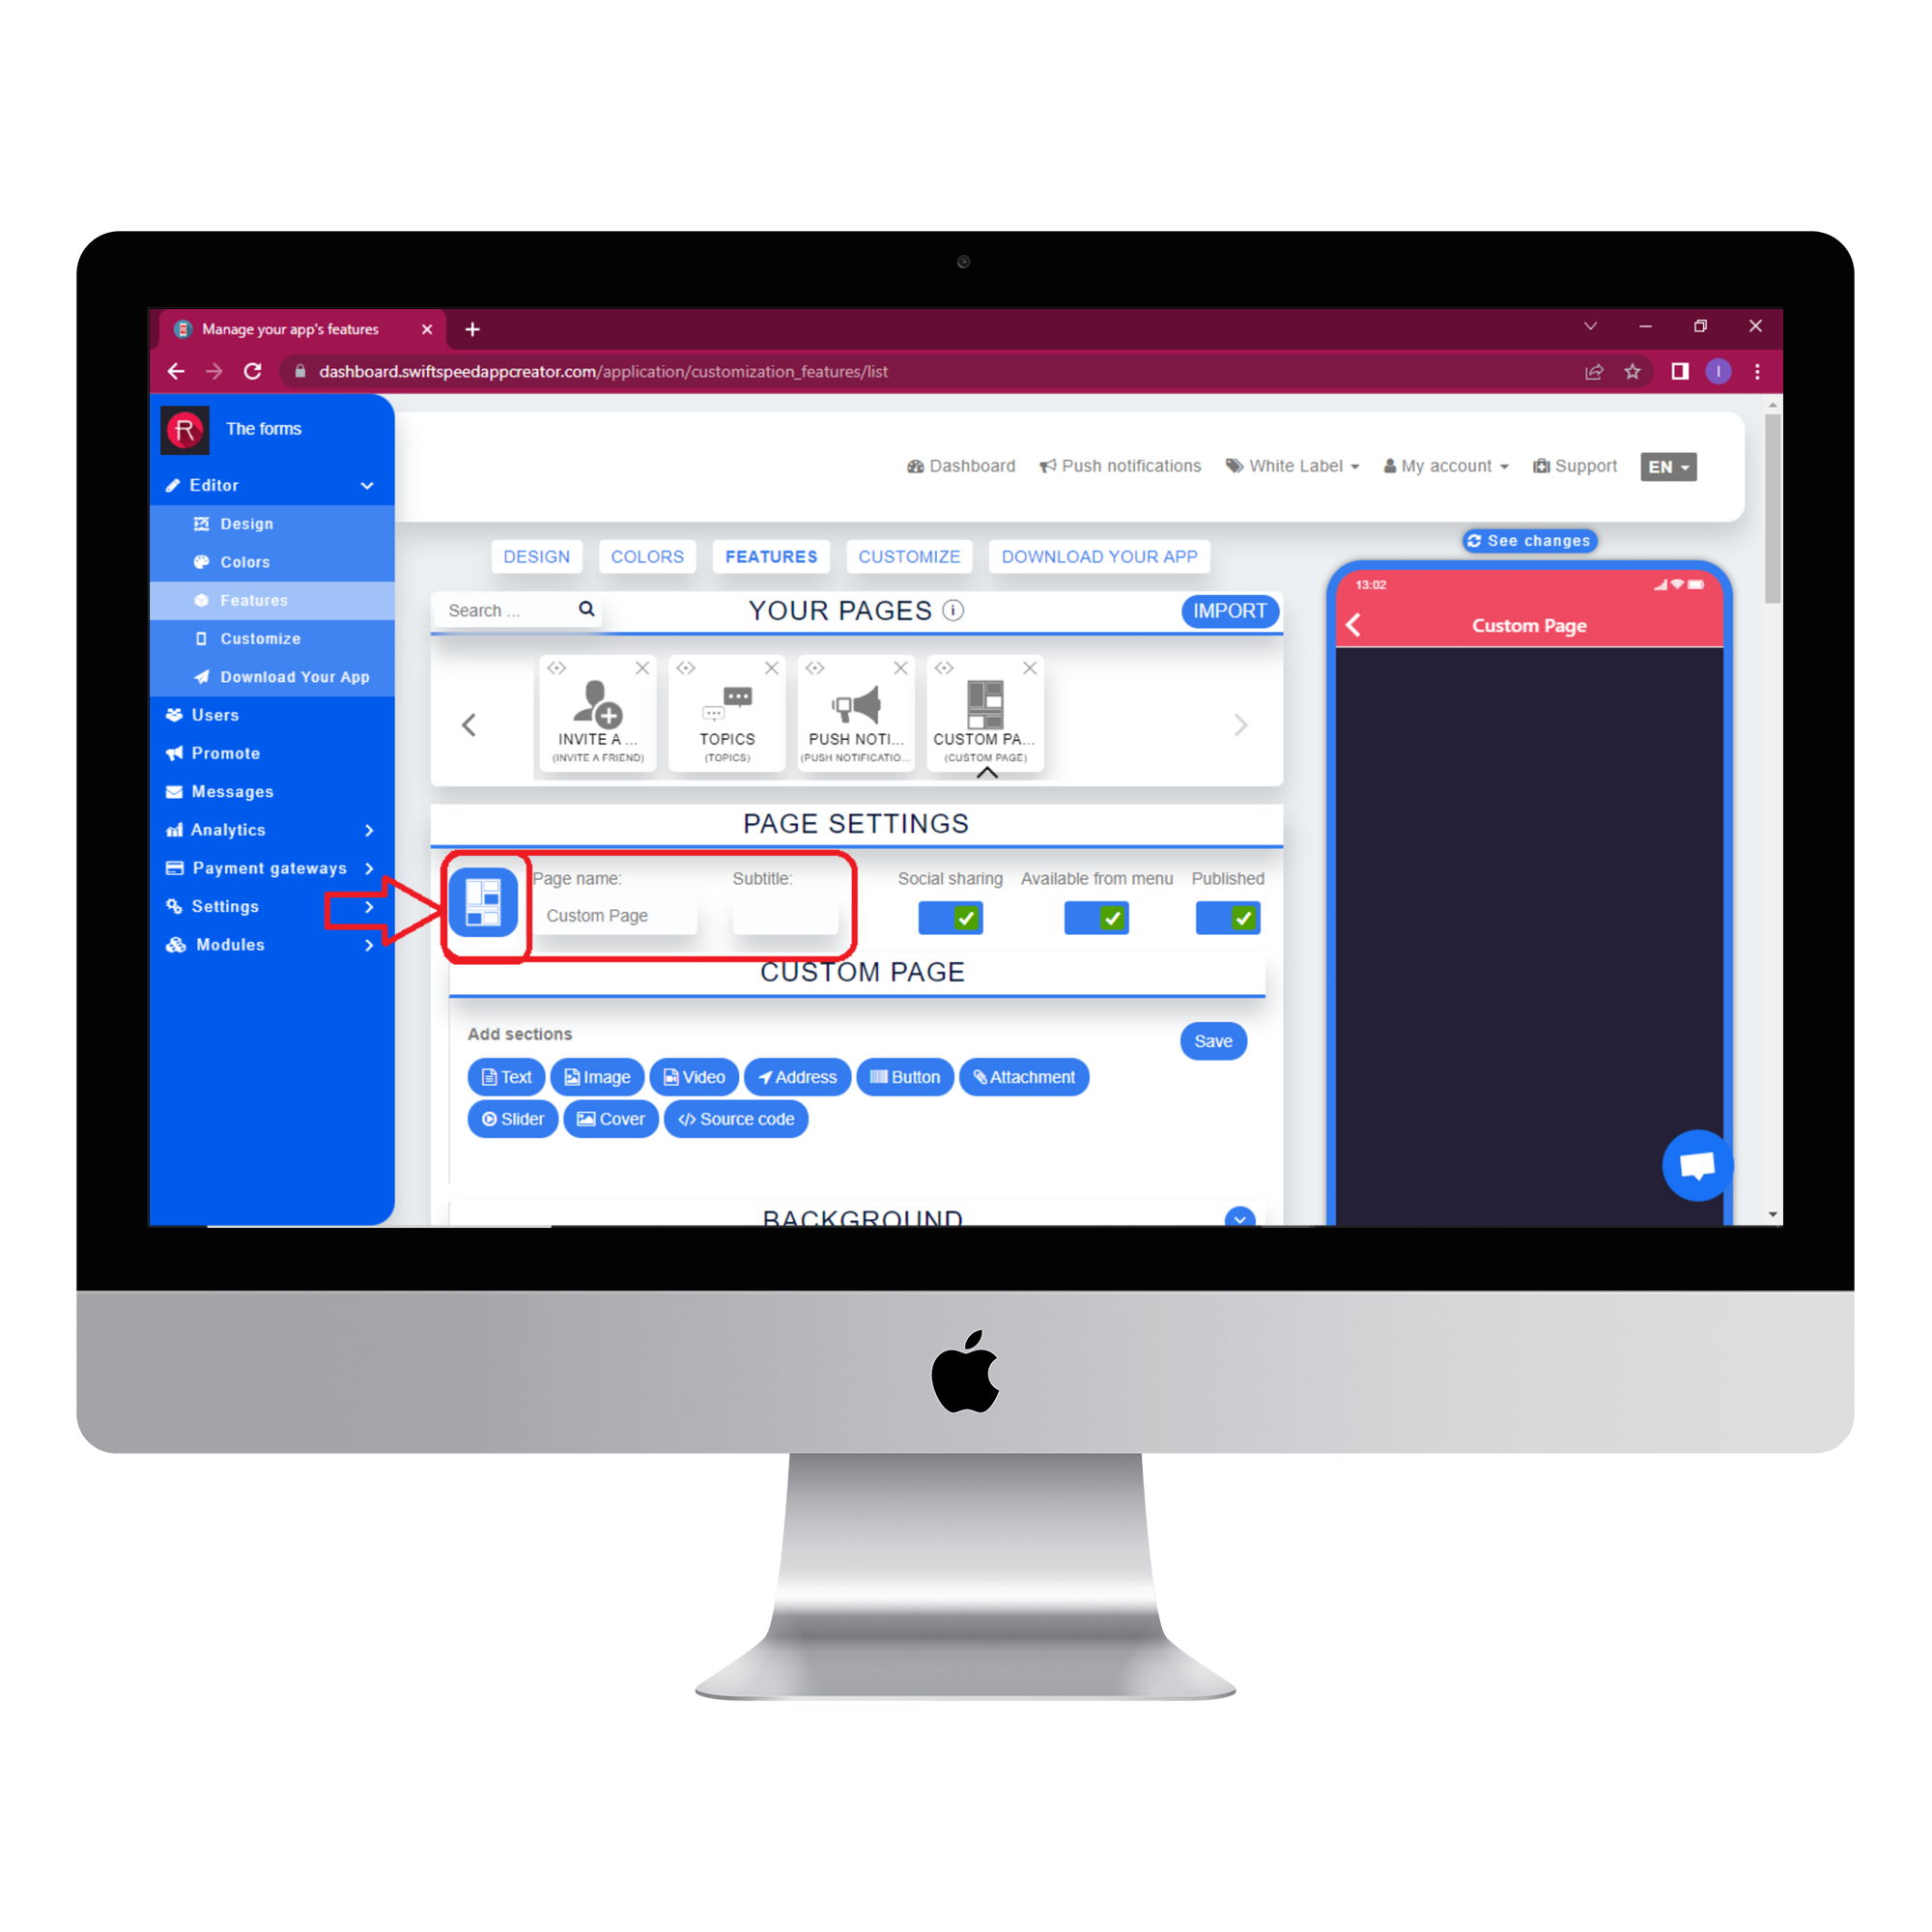
In the Page settings section, you can change the feature icon by clicking on the image button to the left of the “Page name” label. Choose your new feature icon, and it will be saved automatically.
Step 4:
In the custom page section, there are several types of sections you can add to your page. Each section has a dedicated button. Just click on the section you want, and it will become a new section of your page.
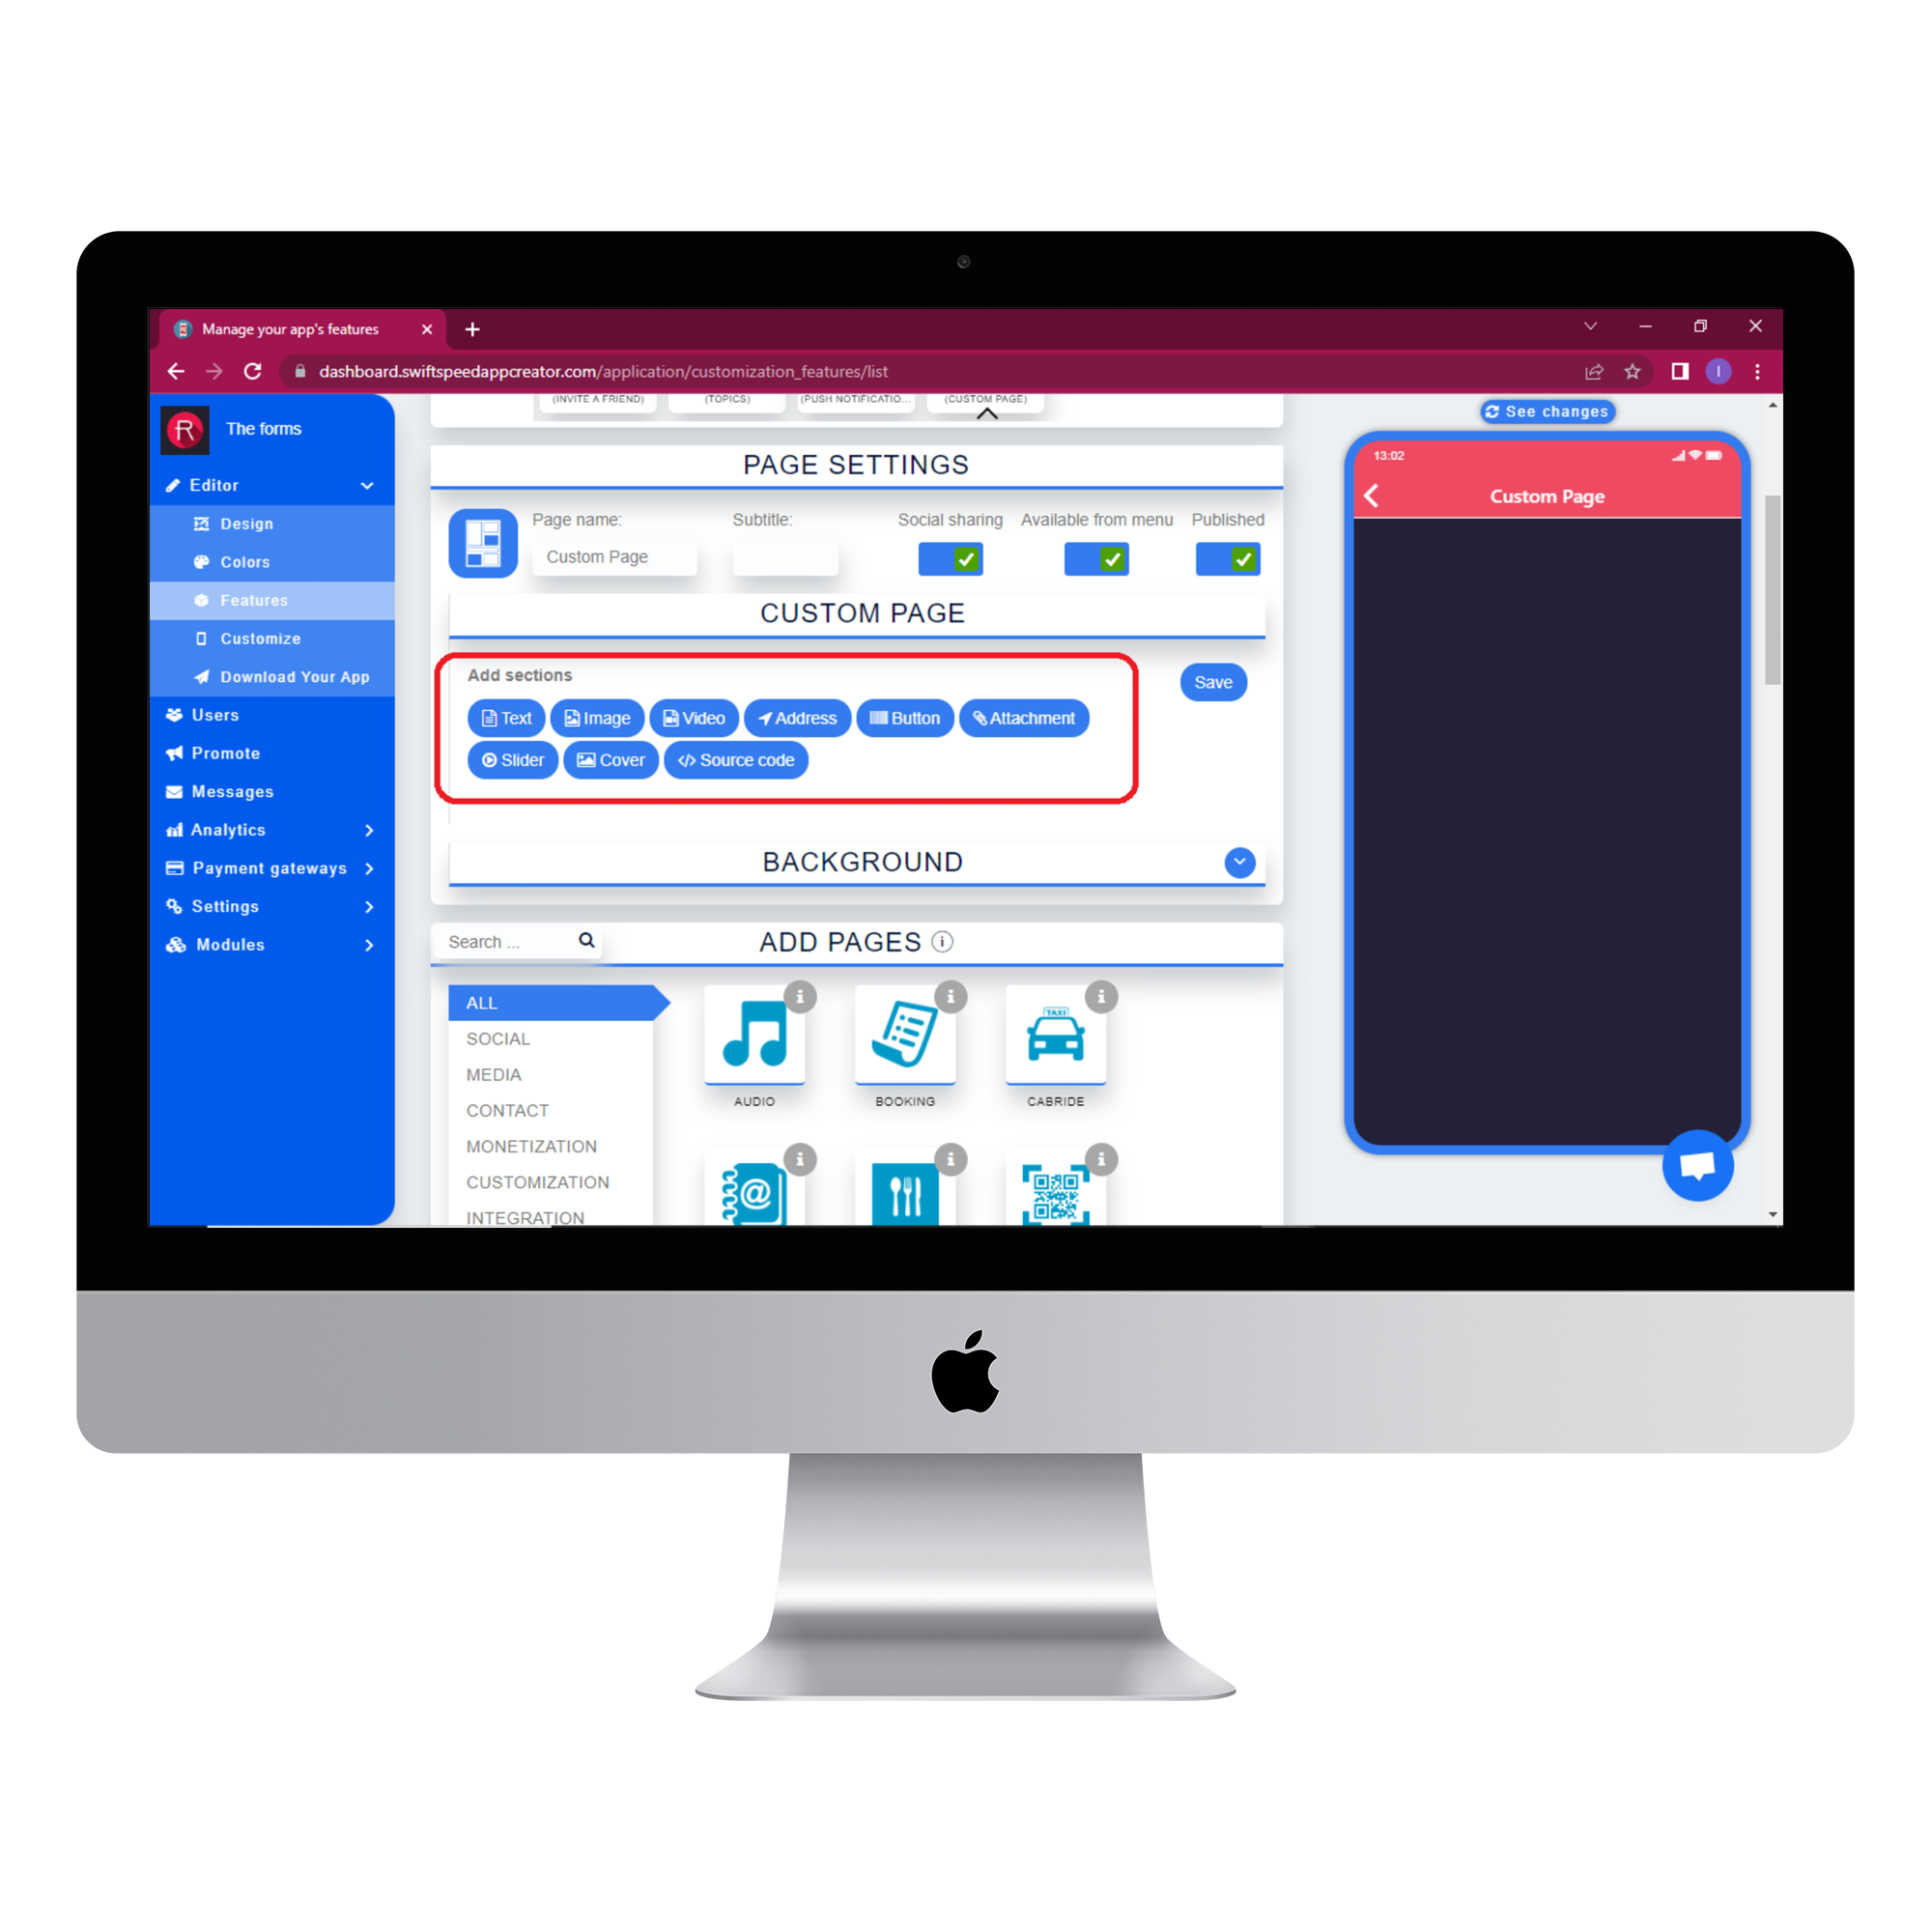
Here is a brief explanation of how each of the sections works.
Text: The text section can be used to add a body of text to your page. The text can be formatted and styled in any way you like. You can add this section as many times as required by simply clicking on the “text” button.
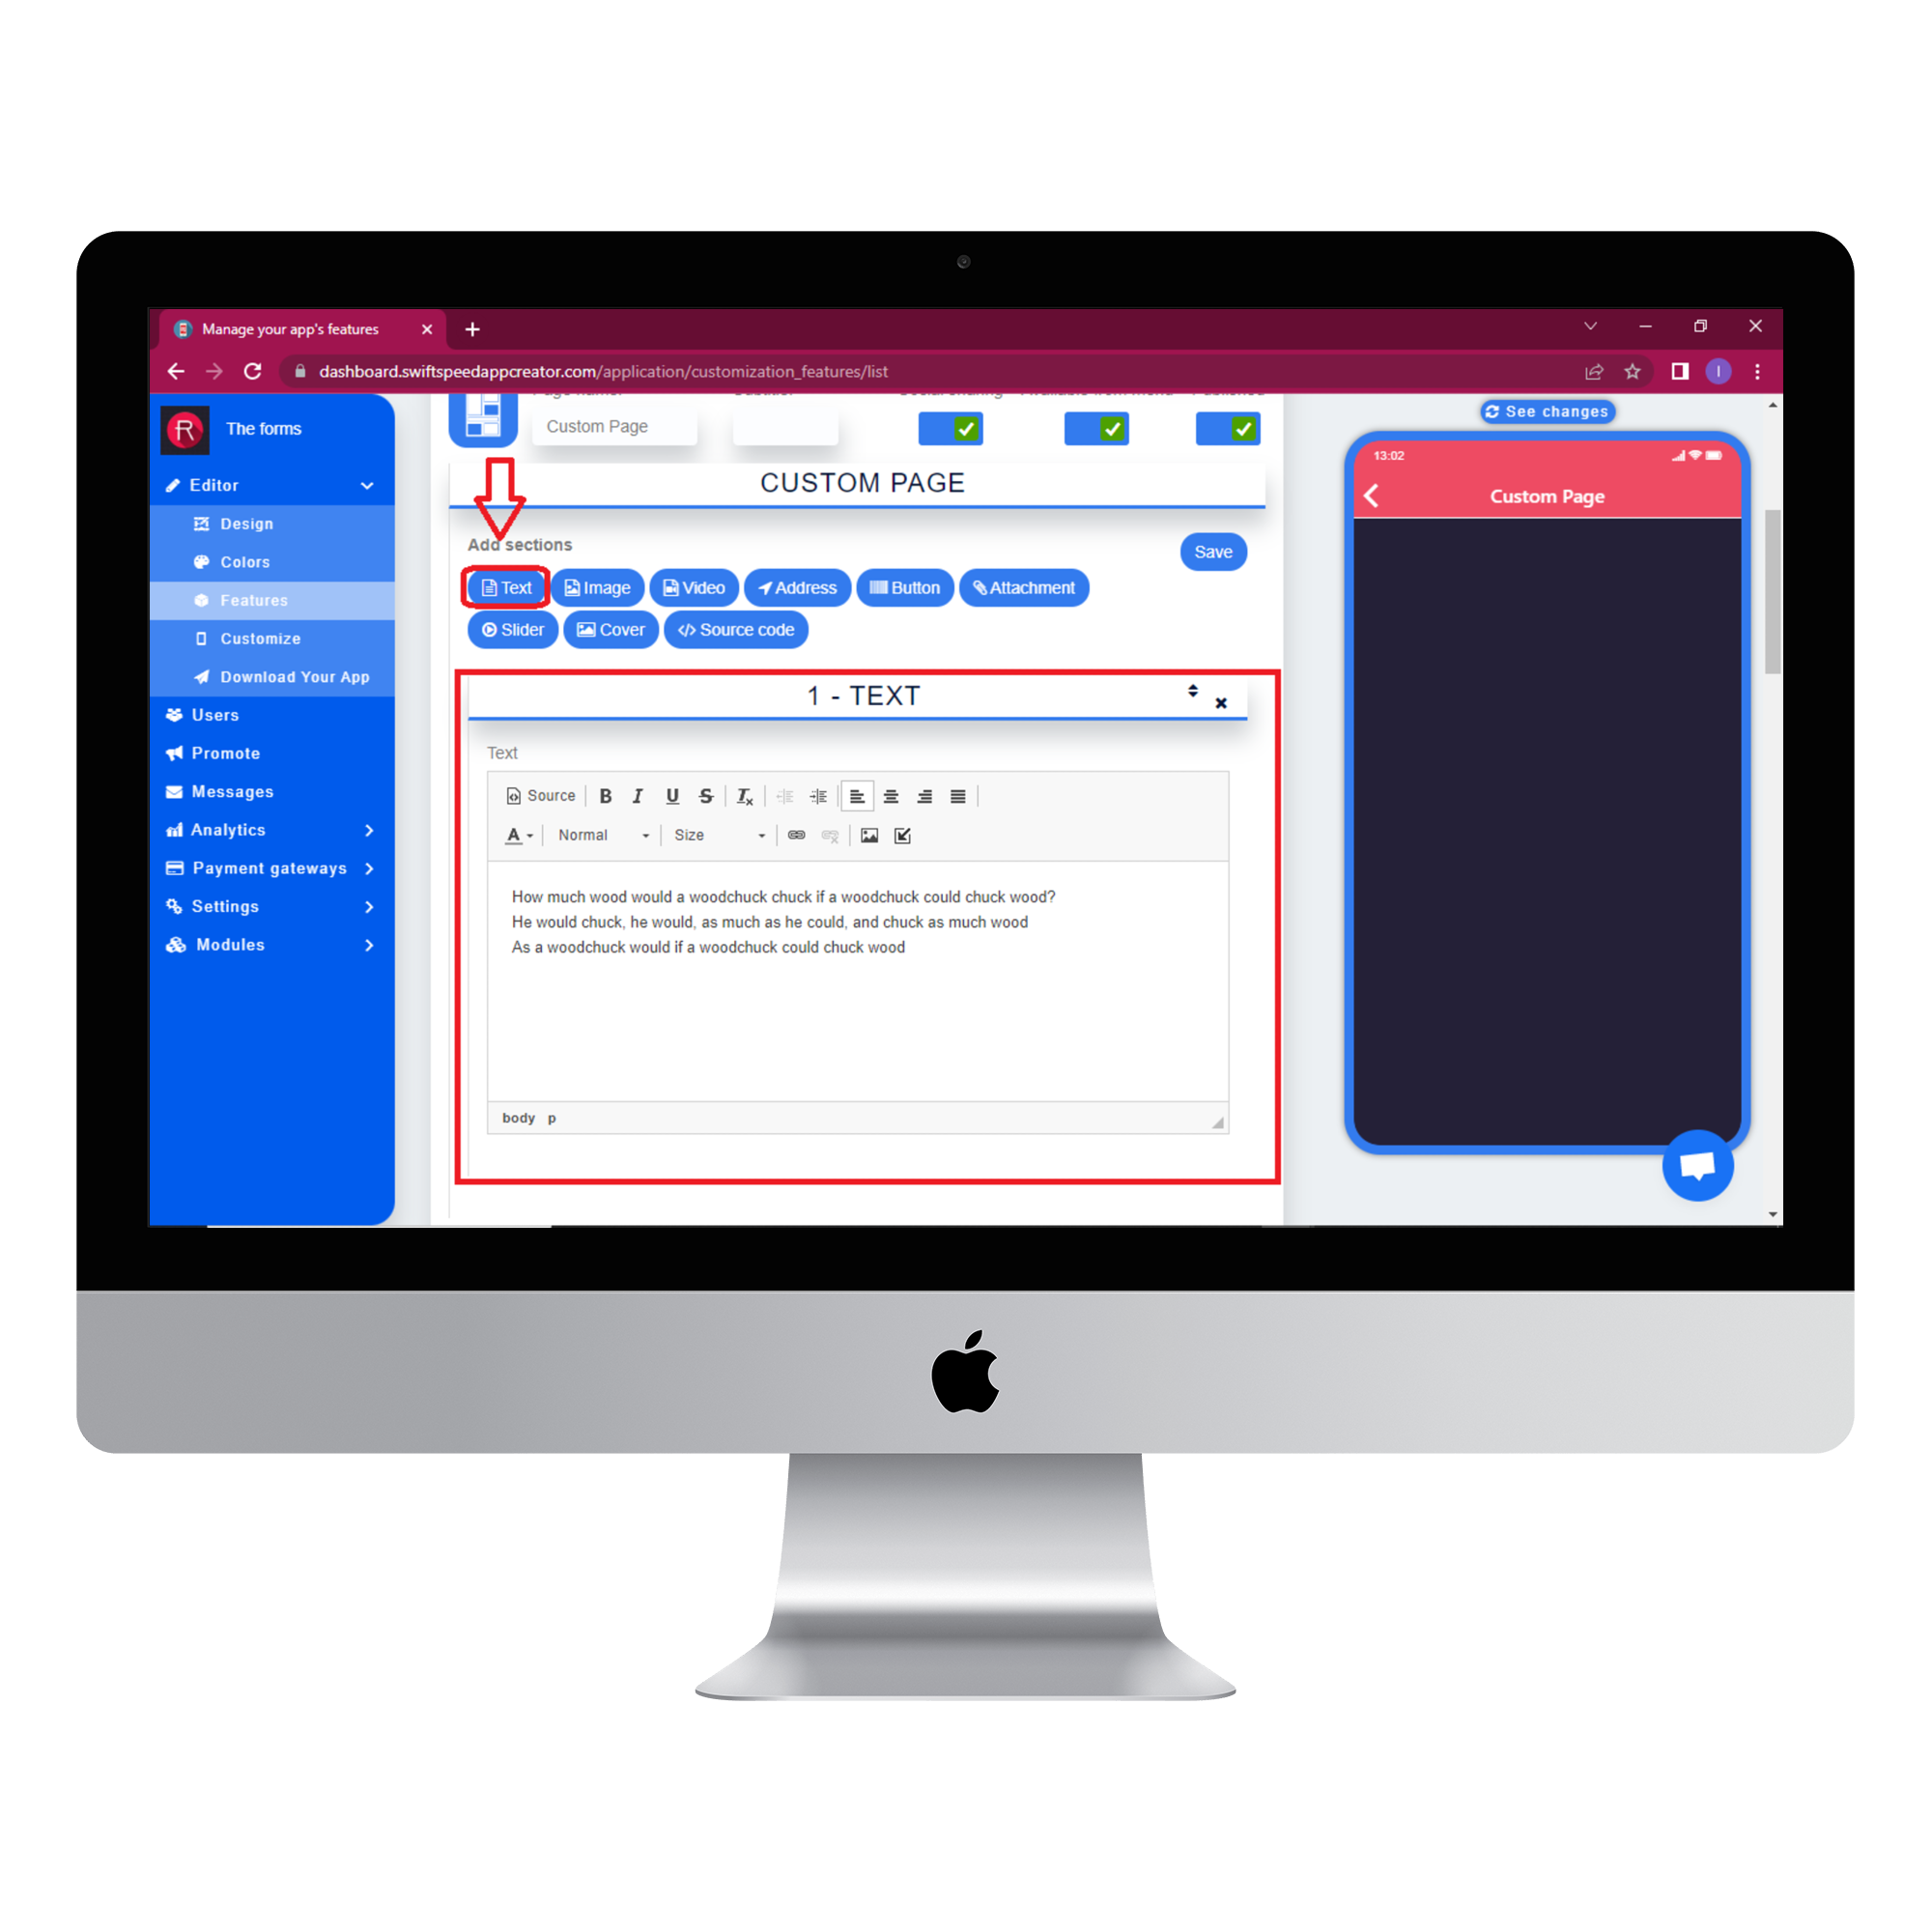
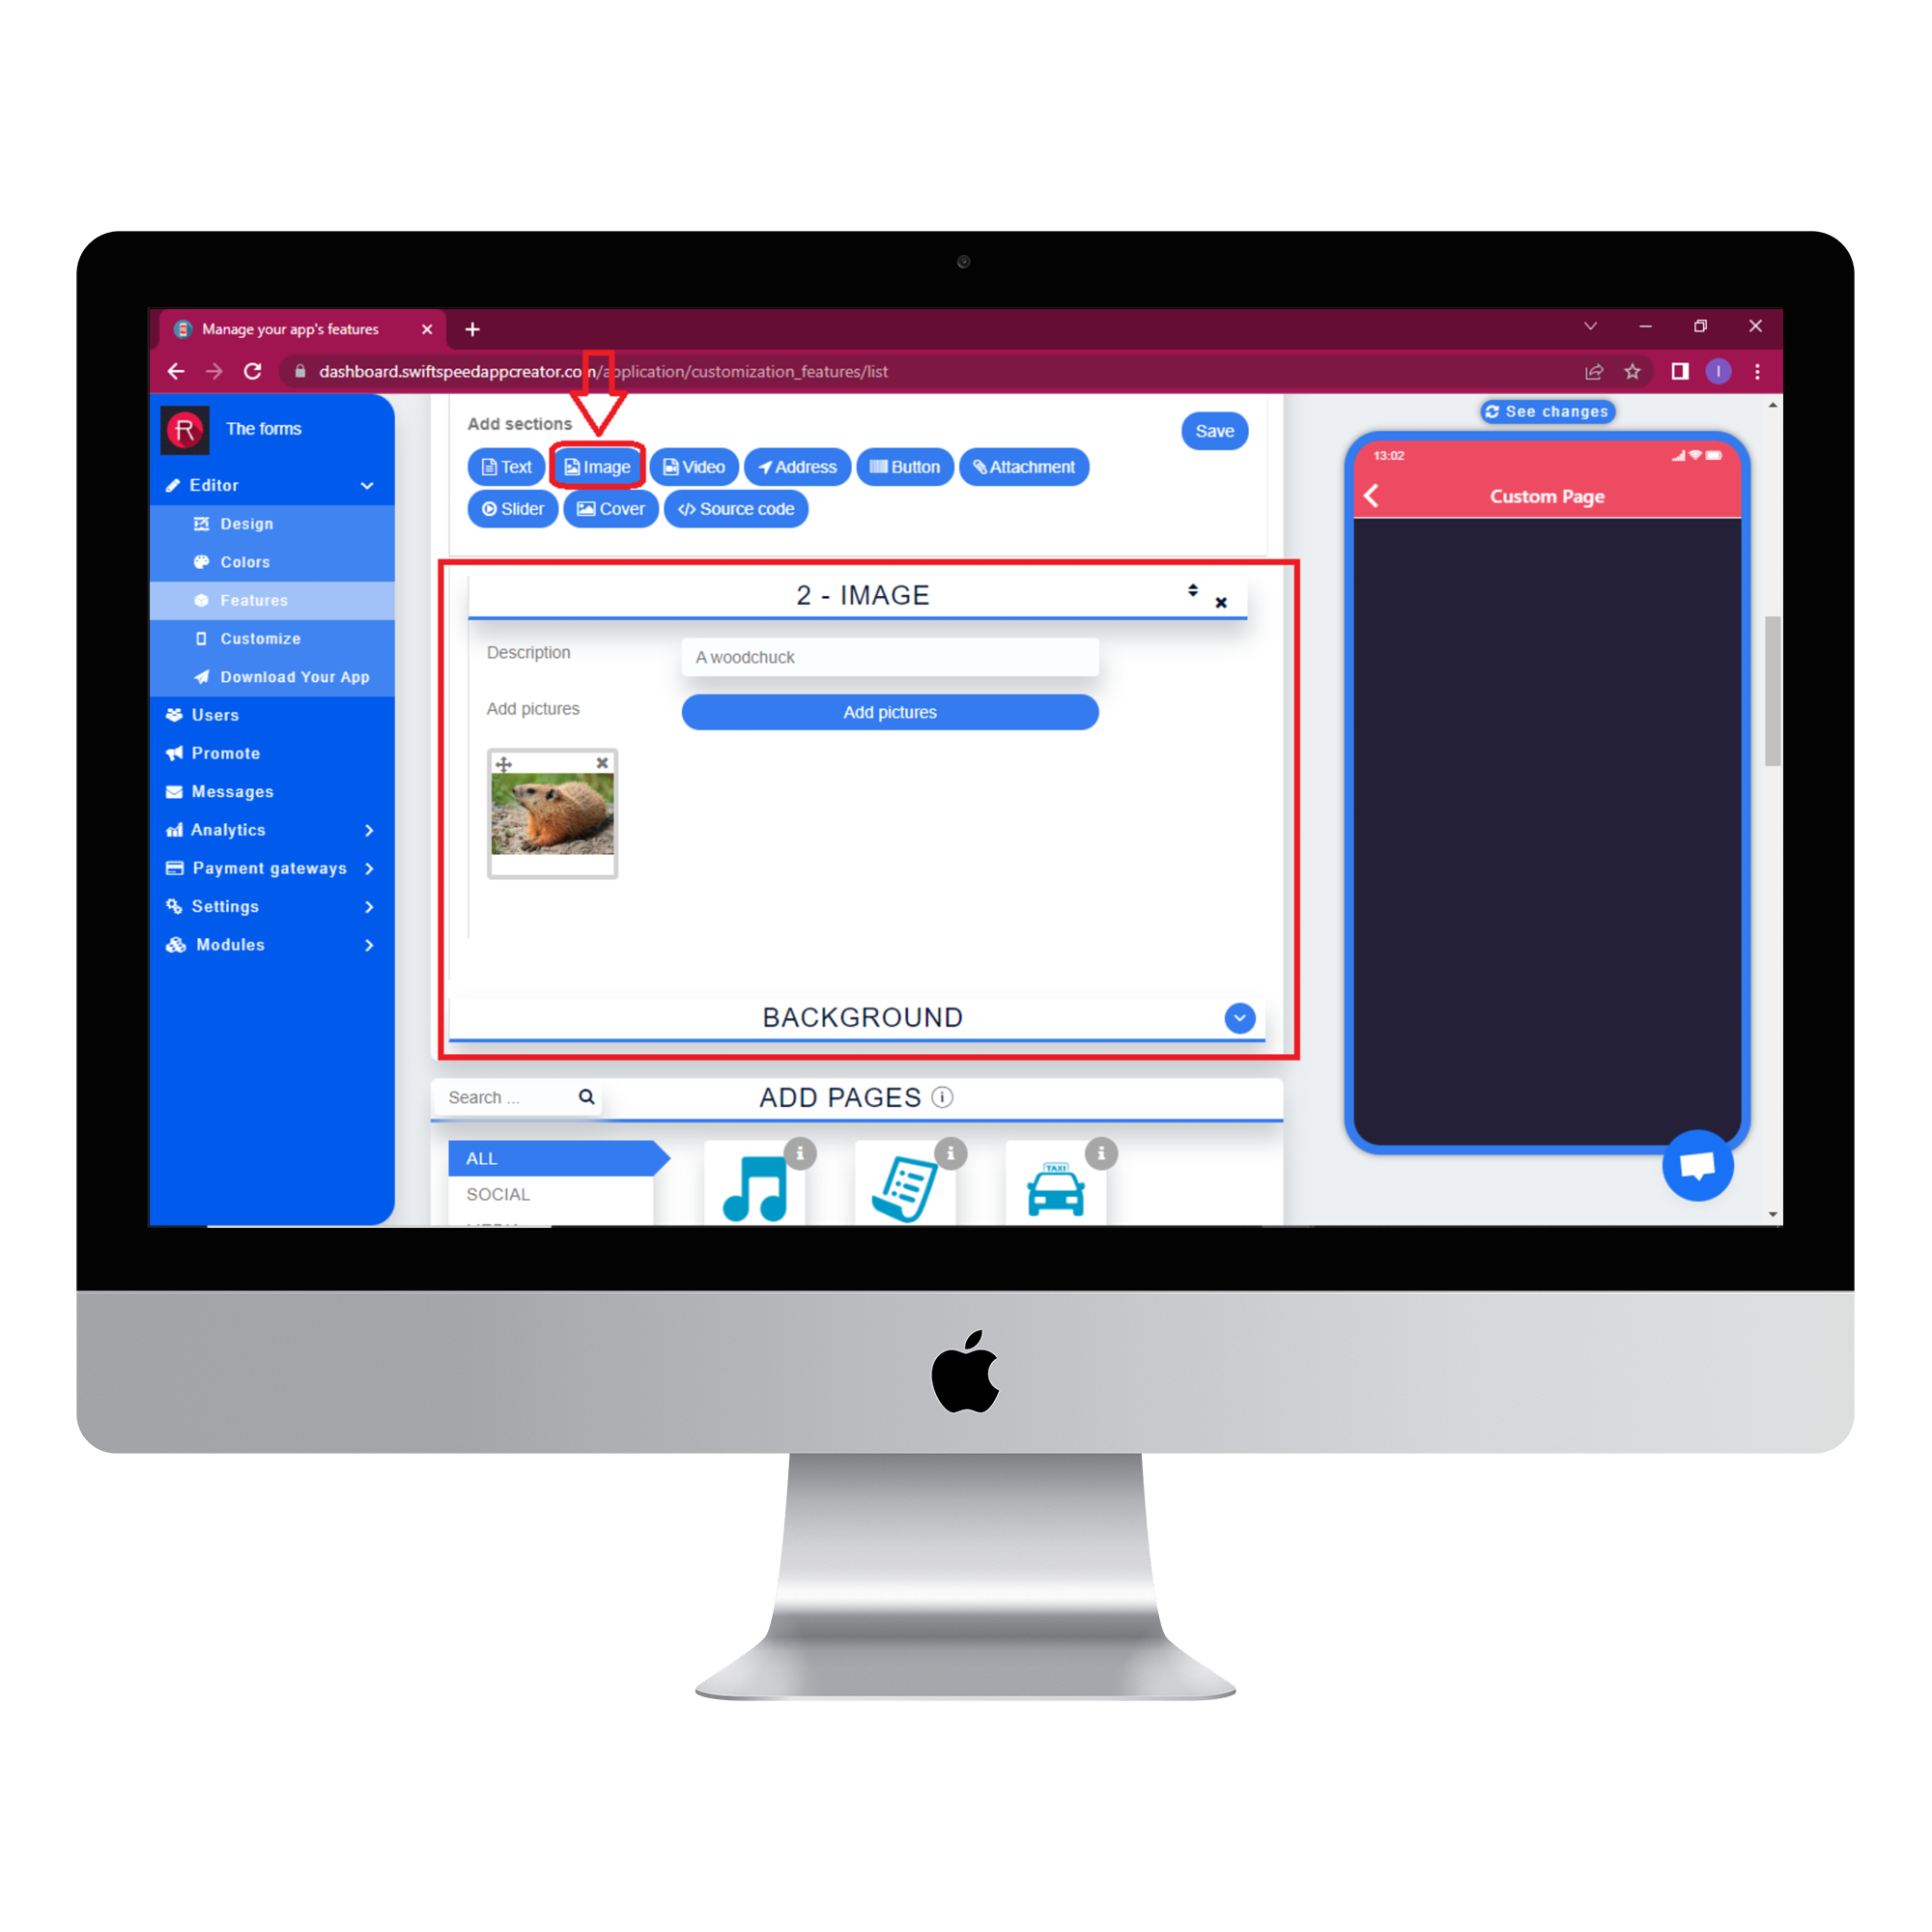
Image: The images button allows you to add a section of images with descriptions to your custom page. The description can be left blank if you just want to add the image alone. You can add as many images as you require by simply clicking the “Add pictures” button.
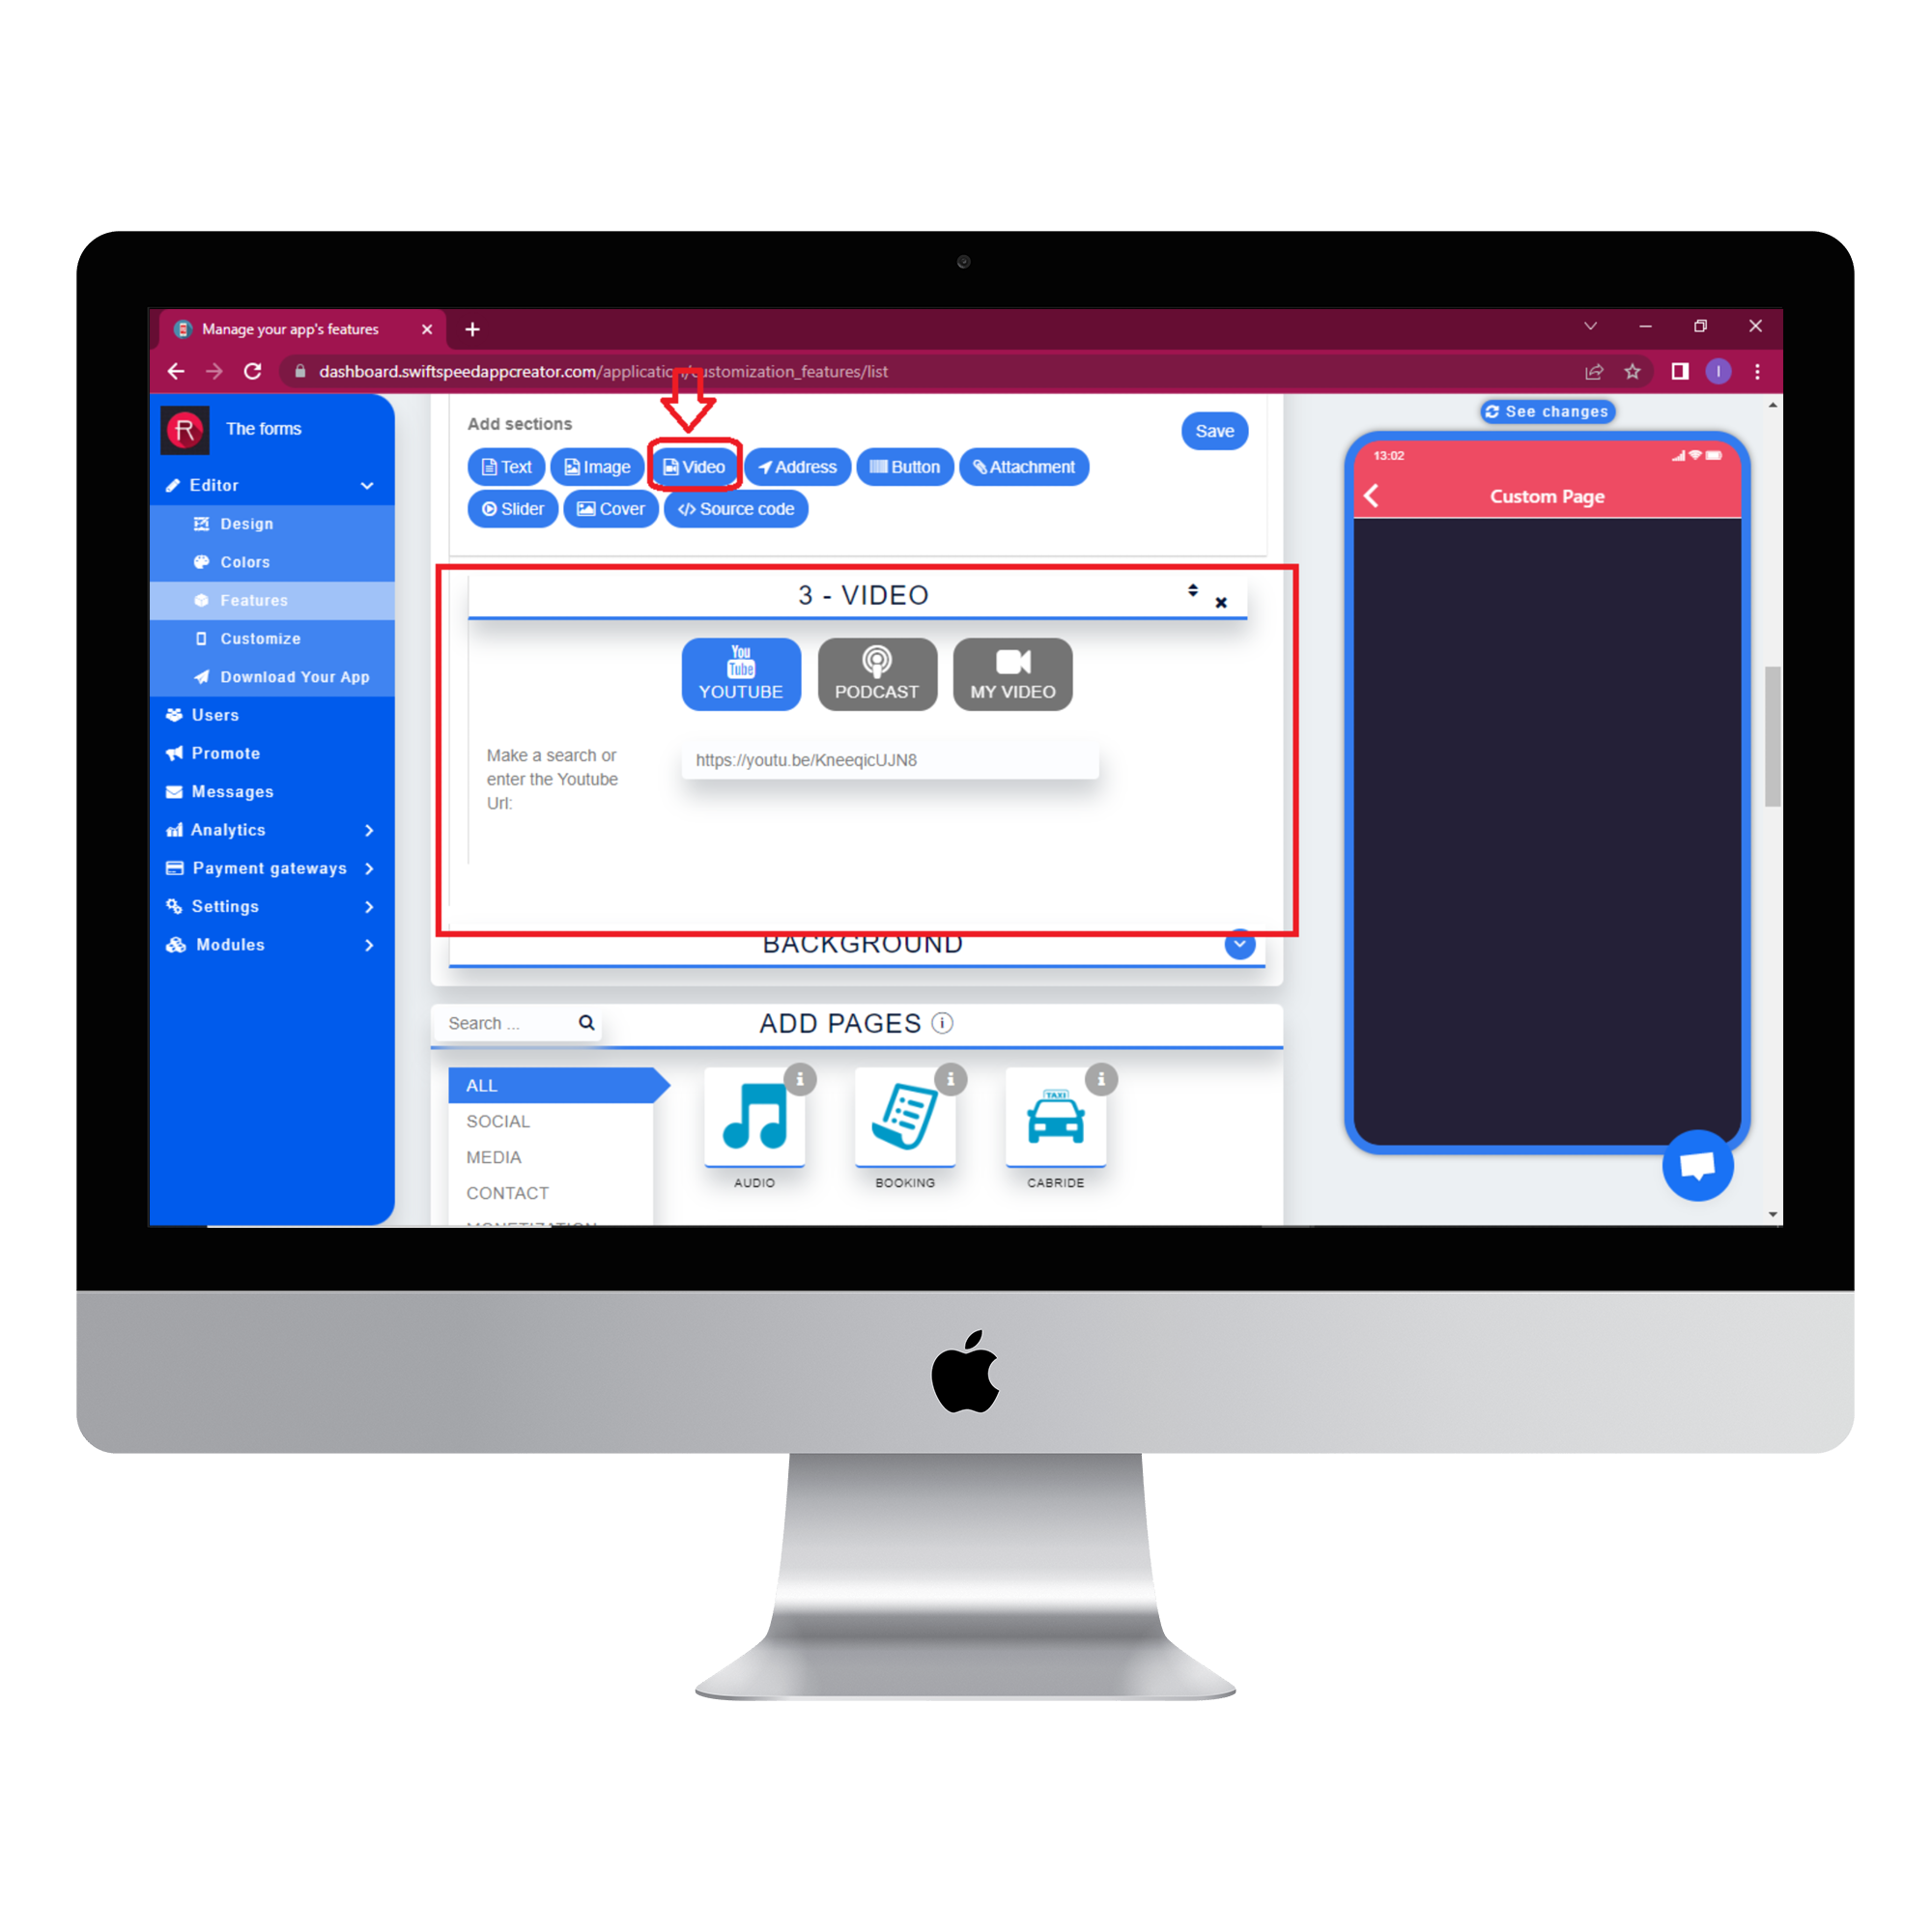
Video: The video button allows you to add a video to your page. The Swiftspeed app creator currently supports videos from youtube and podcasts. The videos can not be uploaded directly so you will need to provide the url for your video. If the video you want to upload is on youtube, click on the “Youtube” button and type in the url of the video. Podcast videos also require that you click on the “Podcast” button and type in the url of the video. For personal videos, click on “My video” and type in the url of your video along with the description and loading picture.
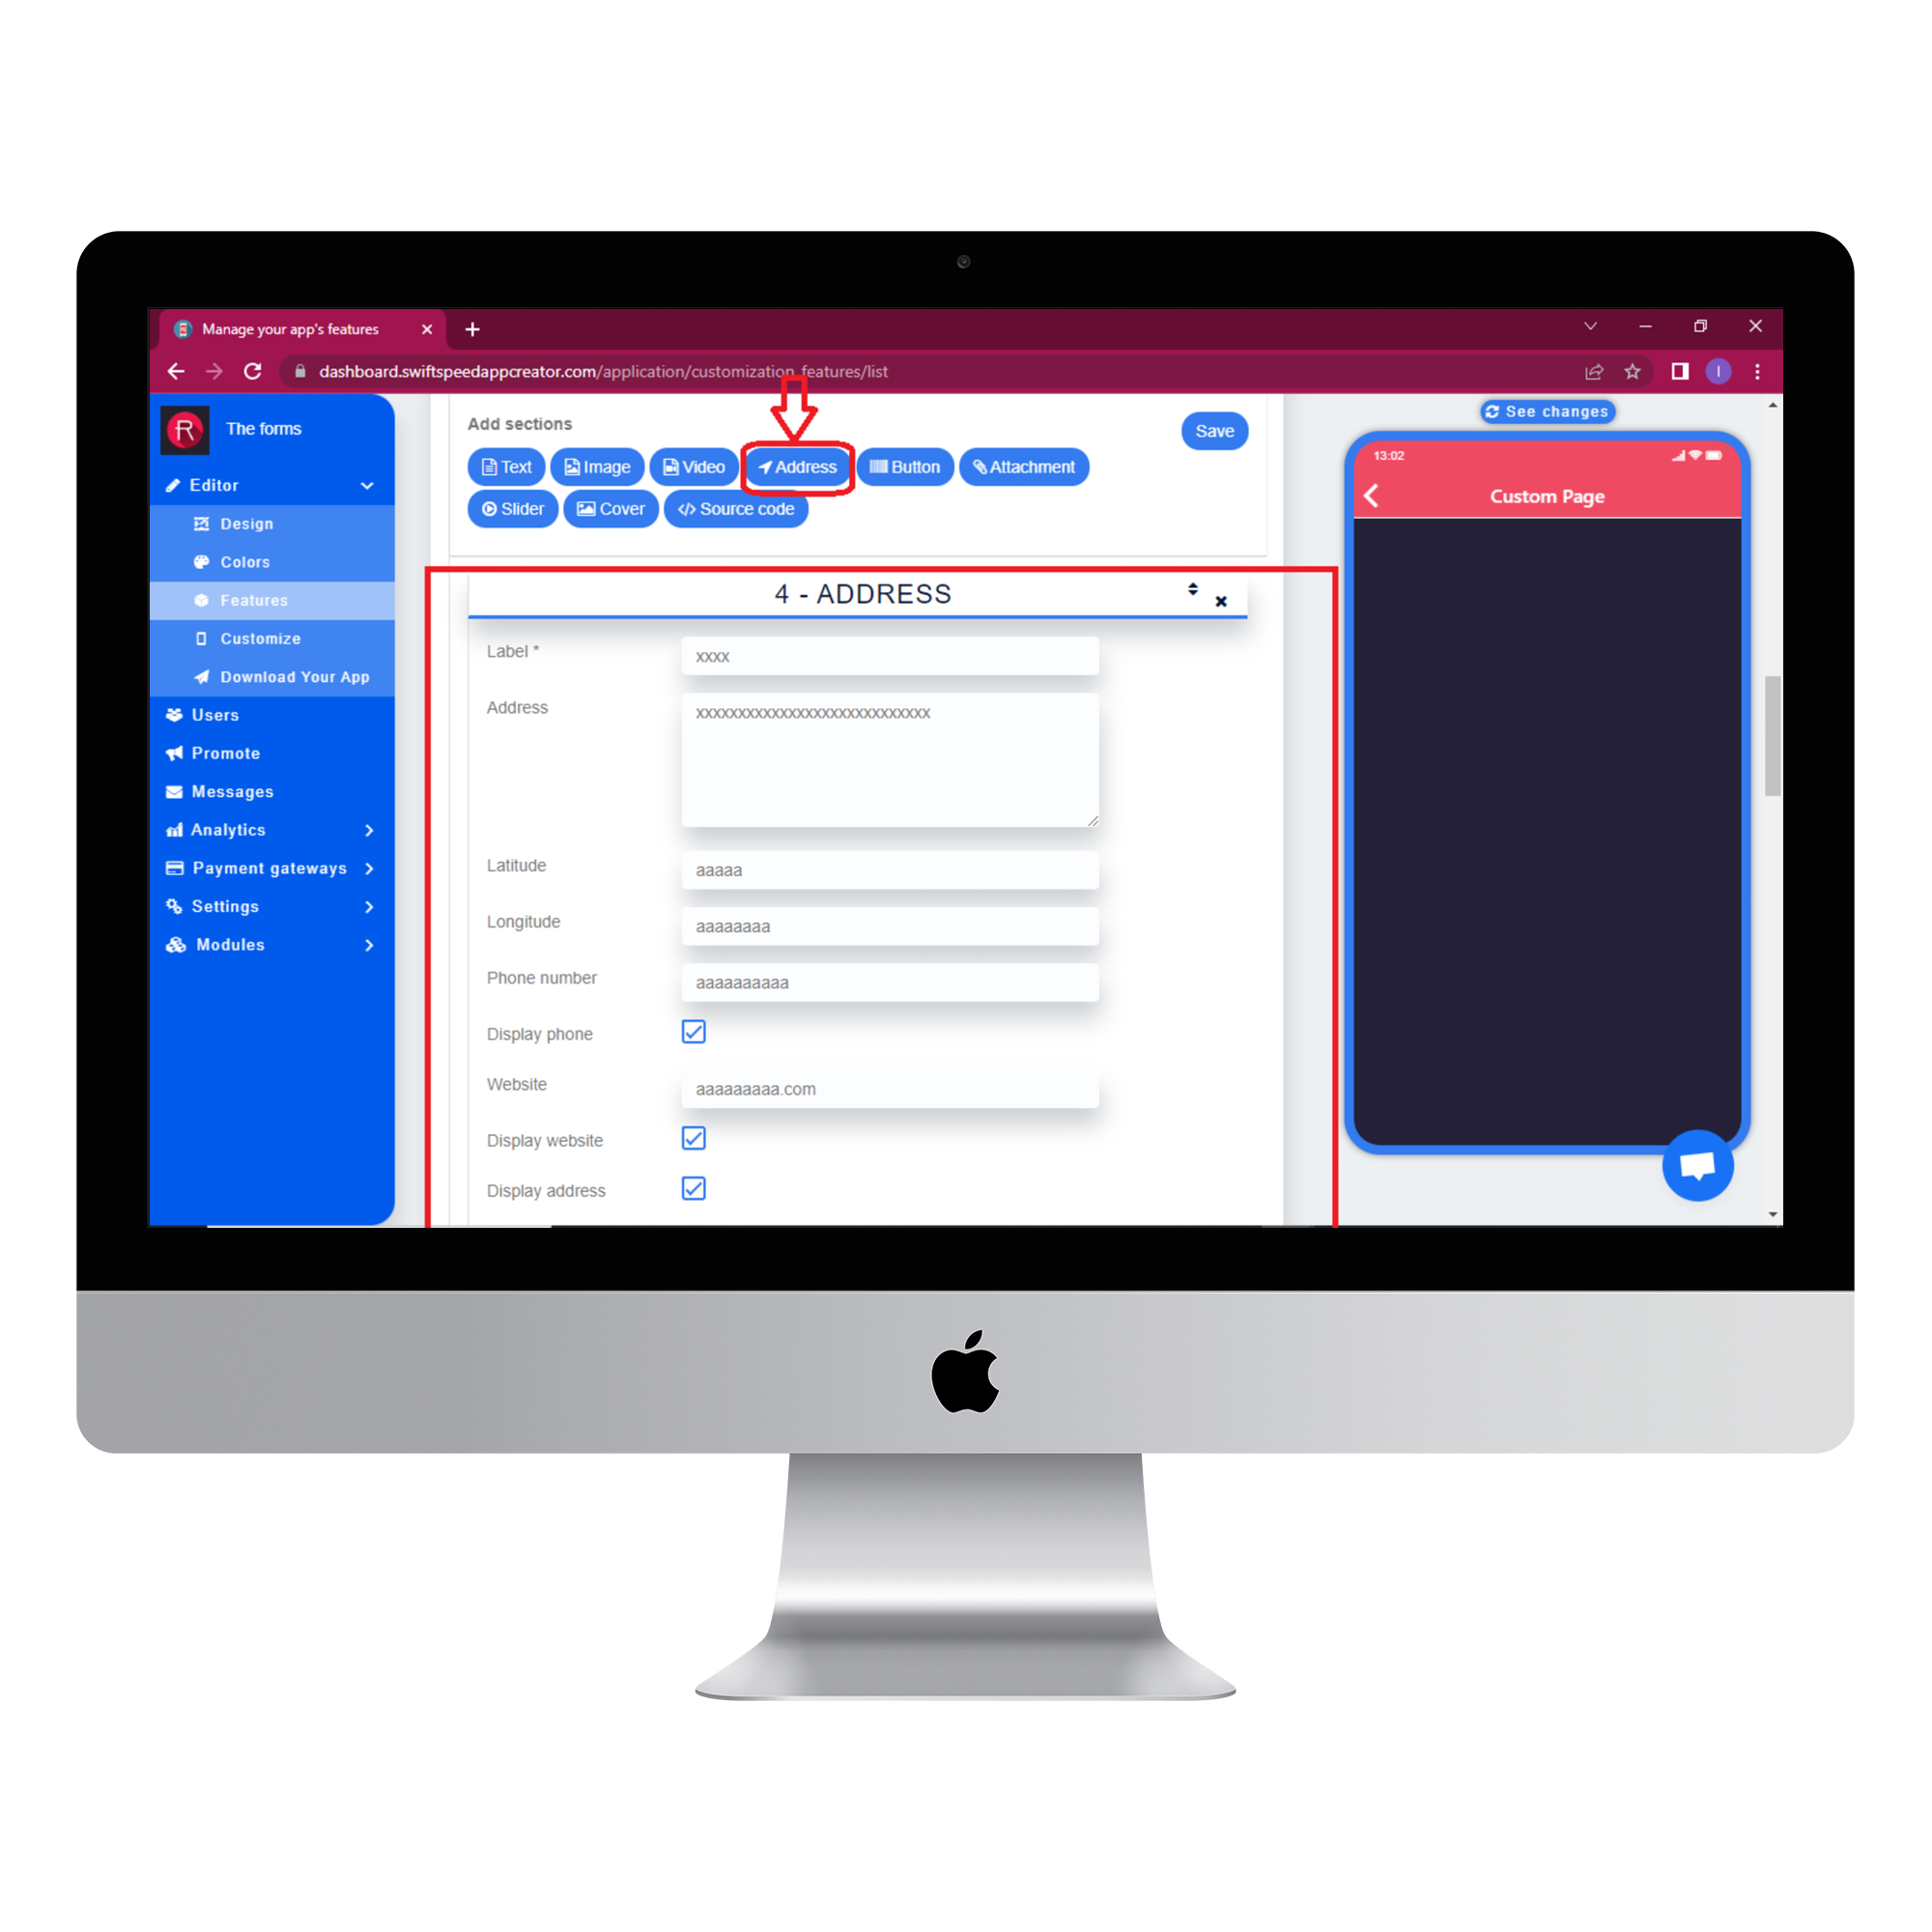
Address: The address button adds the complete address information for any location you want. Fill out the required information, and it will be added to your page.
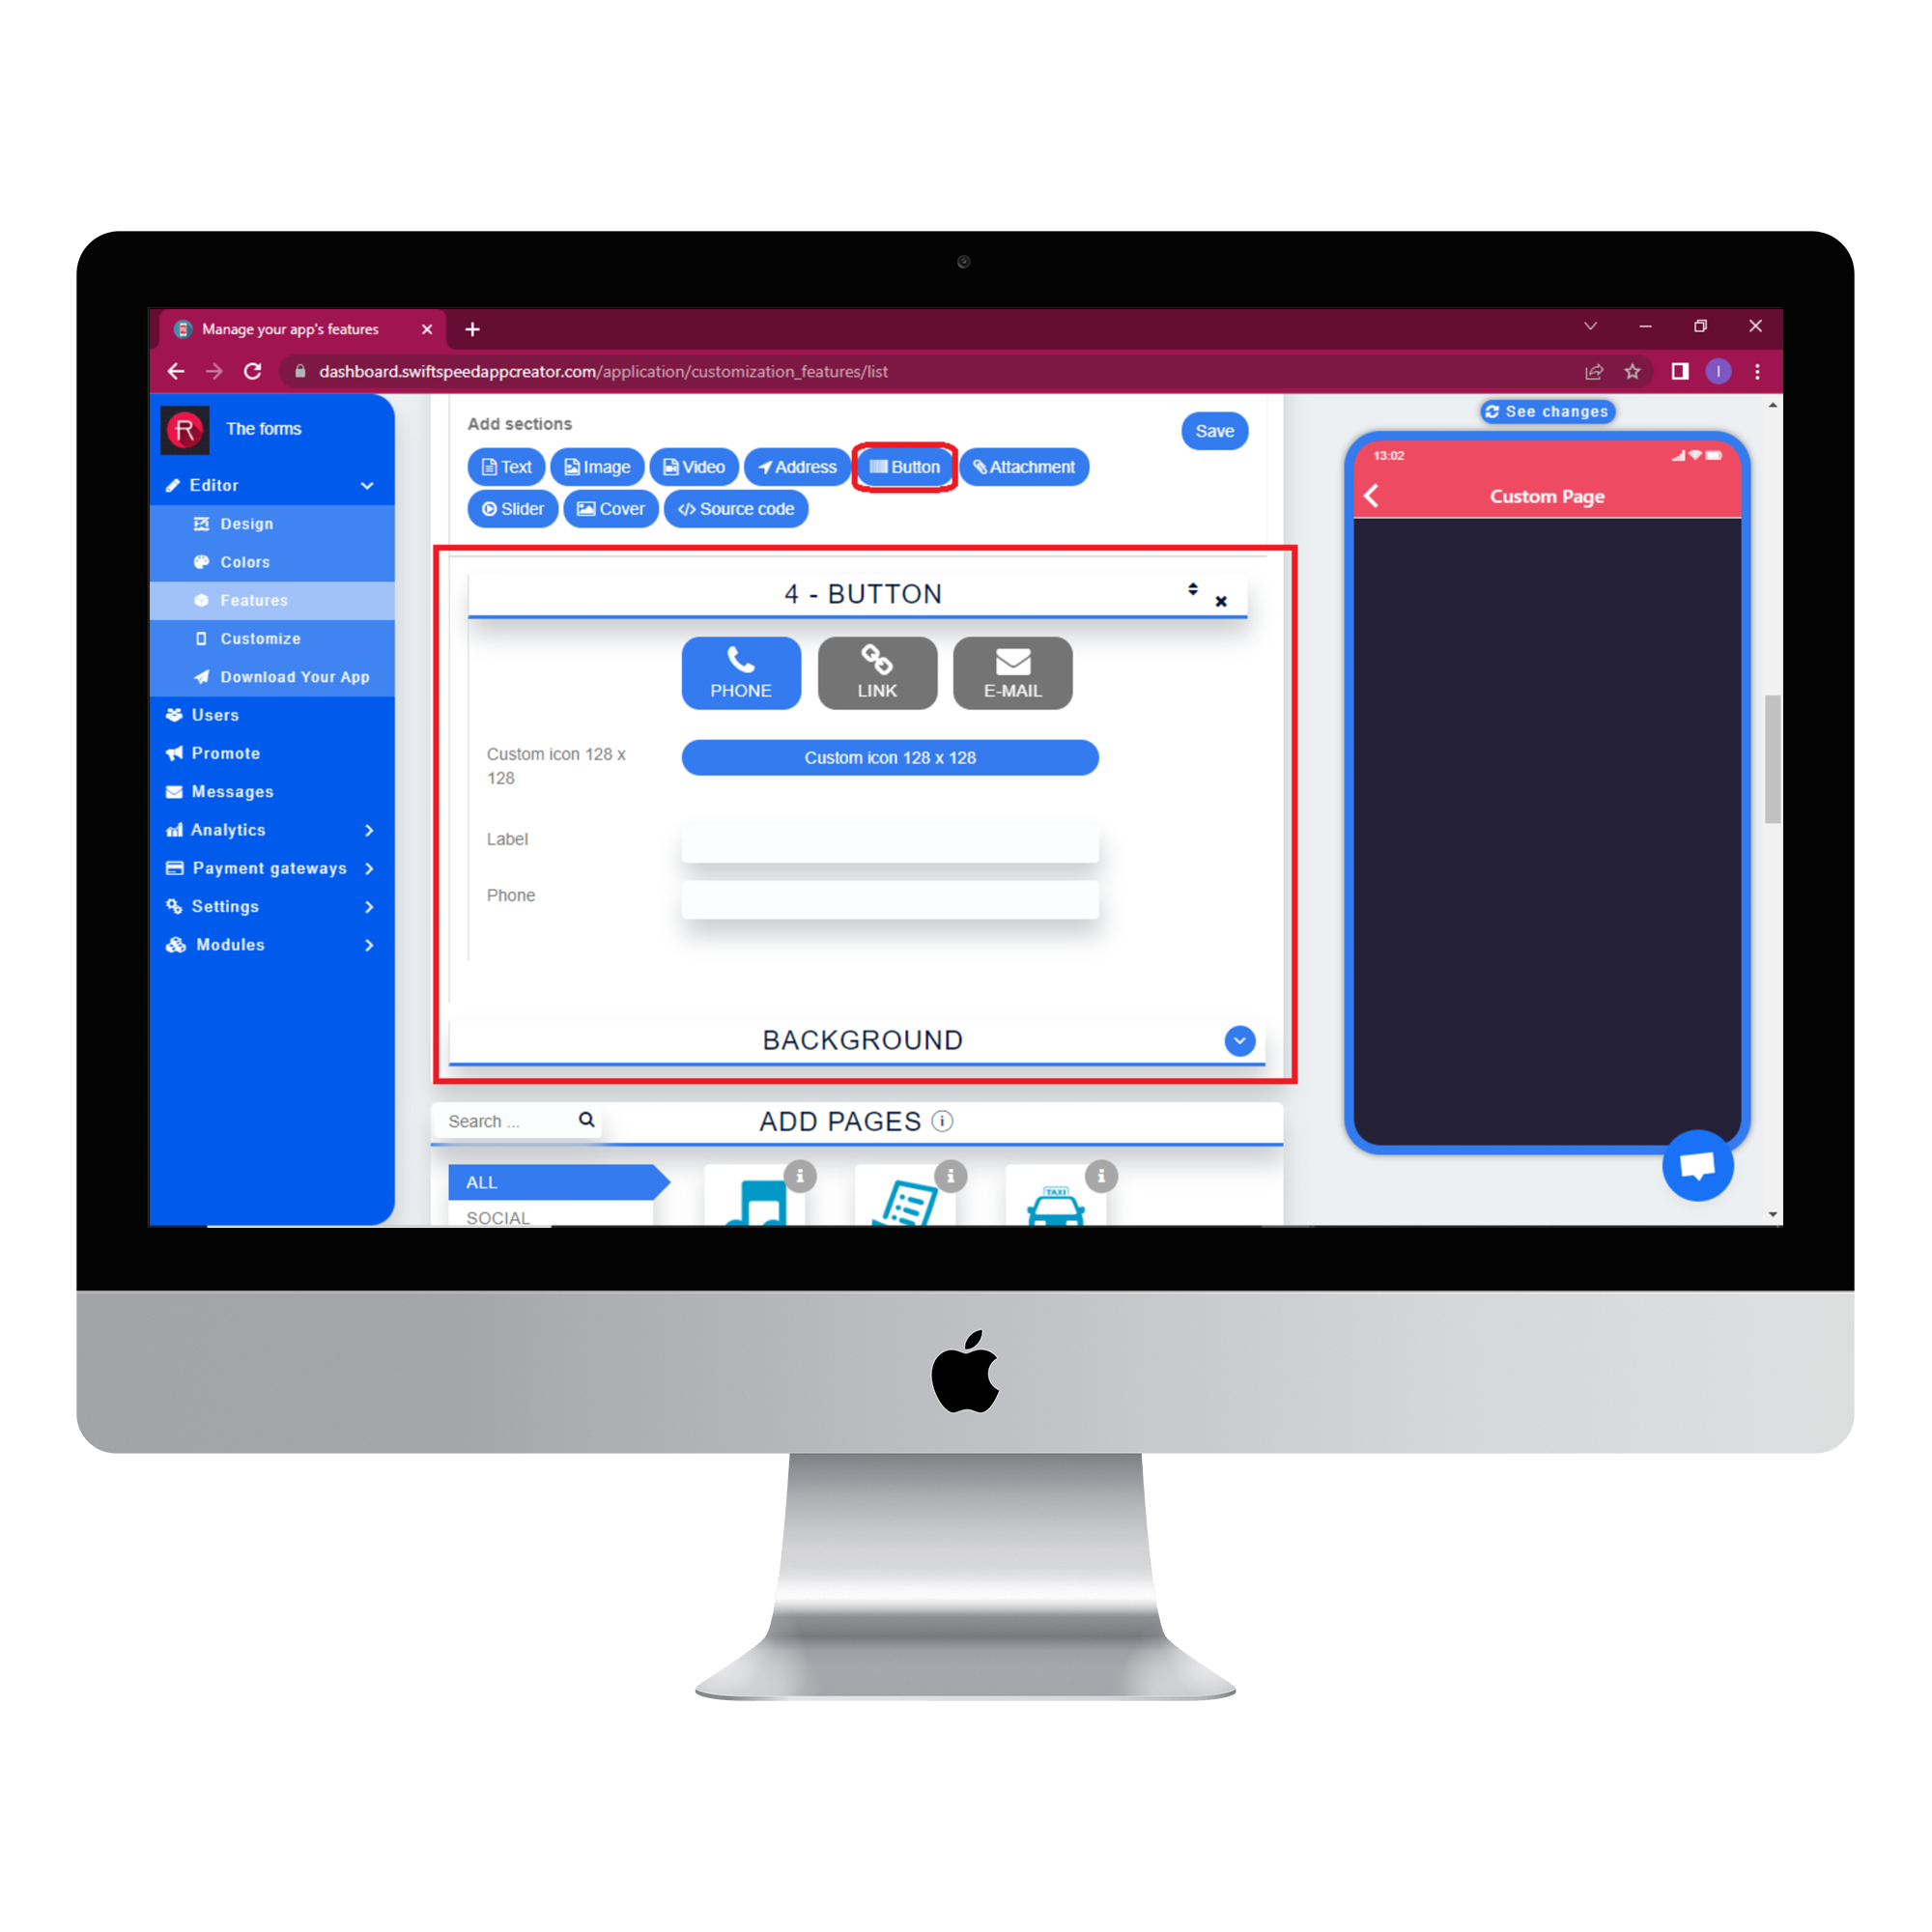
Button: The “Button” button allows you to add a phone number, link or email as a button on your page. Users that click on this button will be redirected appropriately.
Attachment: This button allows you to attach Microsoft Word documents, PDFs, Powerpoints and other kinds of documents to your page. Click the “Add attachment” button and select the document you want to add.
Slider: The slider button adds a picture carousel section to your page. This section is especially useful when you have to upload multiple pictures at once.
Source code: The source code button allows you to add your own code to the page. Type in your code in the text area provided and set the frame height and height unit.
Remember to click “Save” when you are satisfied with your custom page design.
Step 5:
You can use any image you like as the background for your app. different images can be used as the background for portrait and landscape mode. Click “save” when you have chosen the image. You can skip this step if you prefer our default background.
Step 6:
Click on the “see changes” button above the virtual device to see what your app would look like on an actual device. To generate an Apk of your app, click on “Download your app” from the side menu, scroll down and click on “Generate Apk.” Choose a subscription plan, and the Apk will be sent to your email address when the build is complete. Here is an example of what your app would look like.
Good job! You have successfully made an app with custom pages.
Check out our complete app maker features to see other essential features you could integrate into your app.

