In this article, we will discover how to use the folder feature by following a few simple steps. The folder feature can be used to categorize the list of features that you have added to your app. Similar features in your app can be stored in the same folder to make it easier for your users to find. You can watch the Youtube tutorial for this article below. Remember to like and subscribe to the channel.
Step 1:
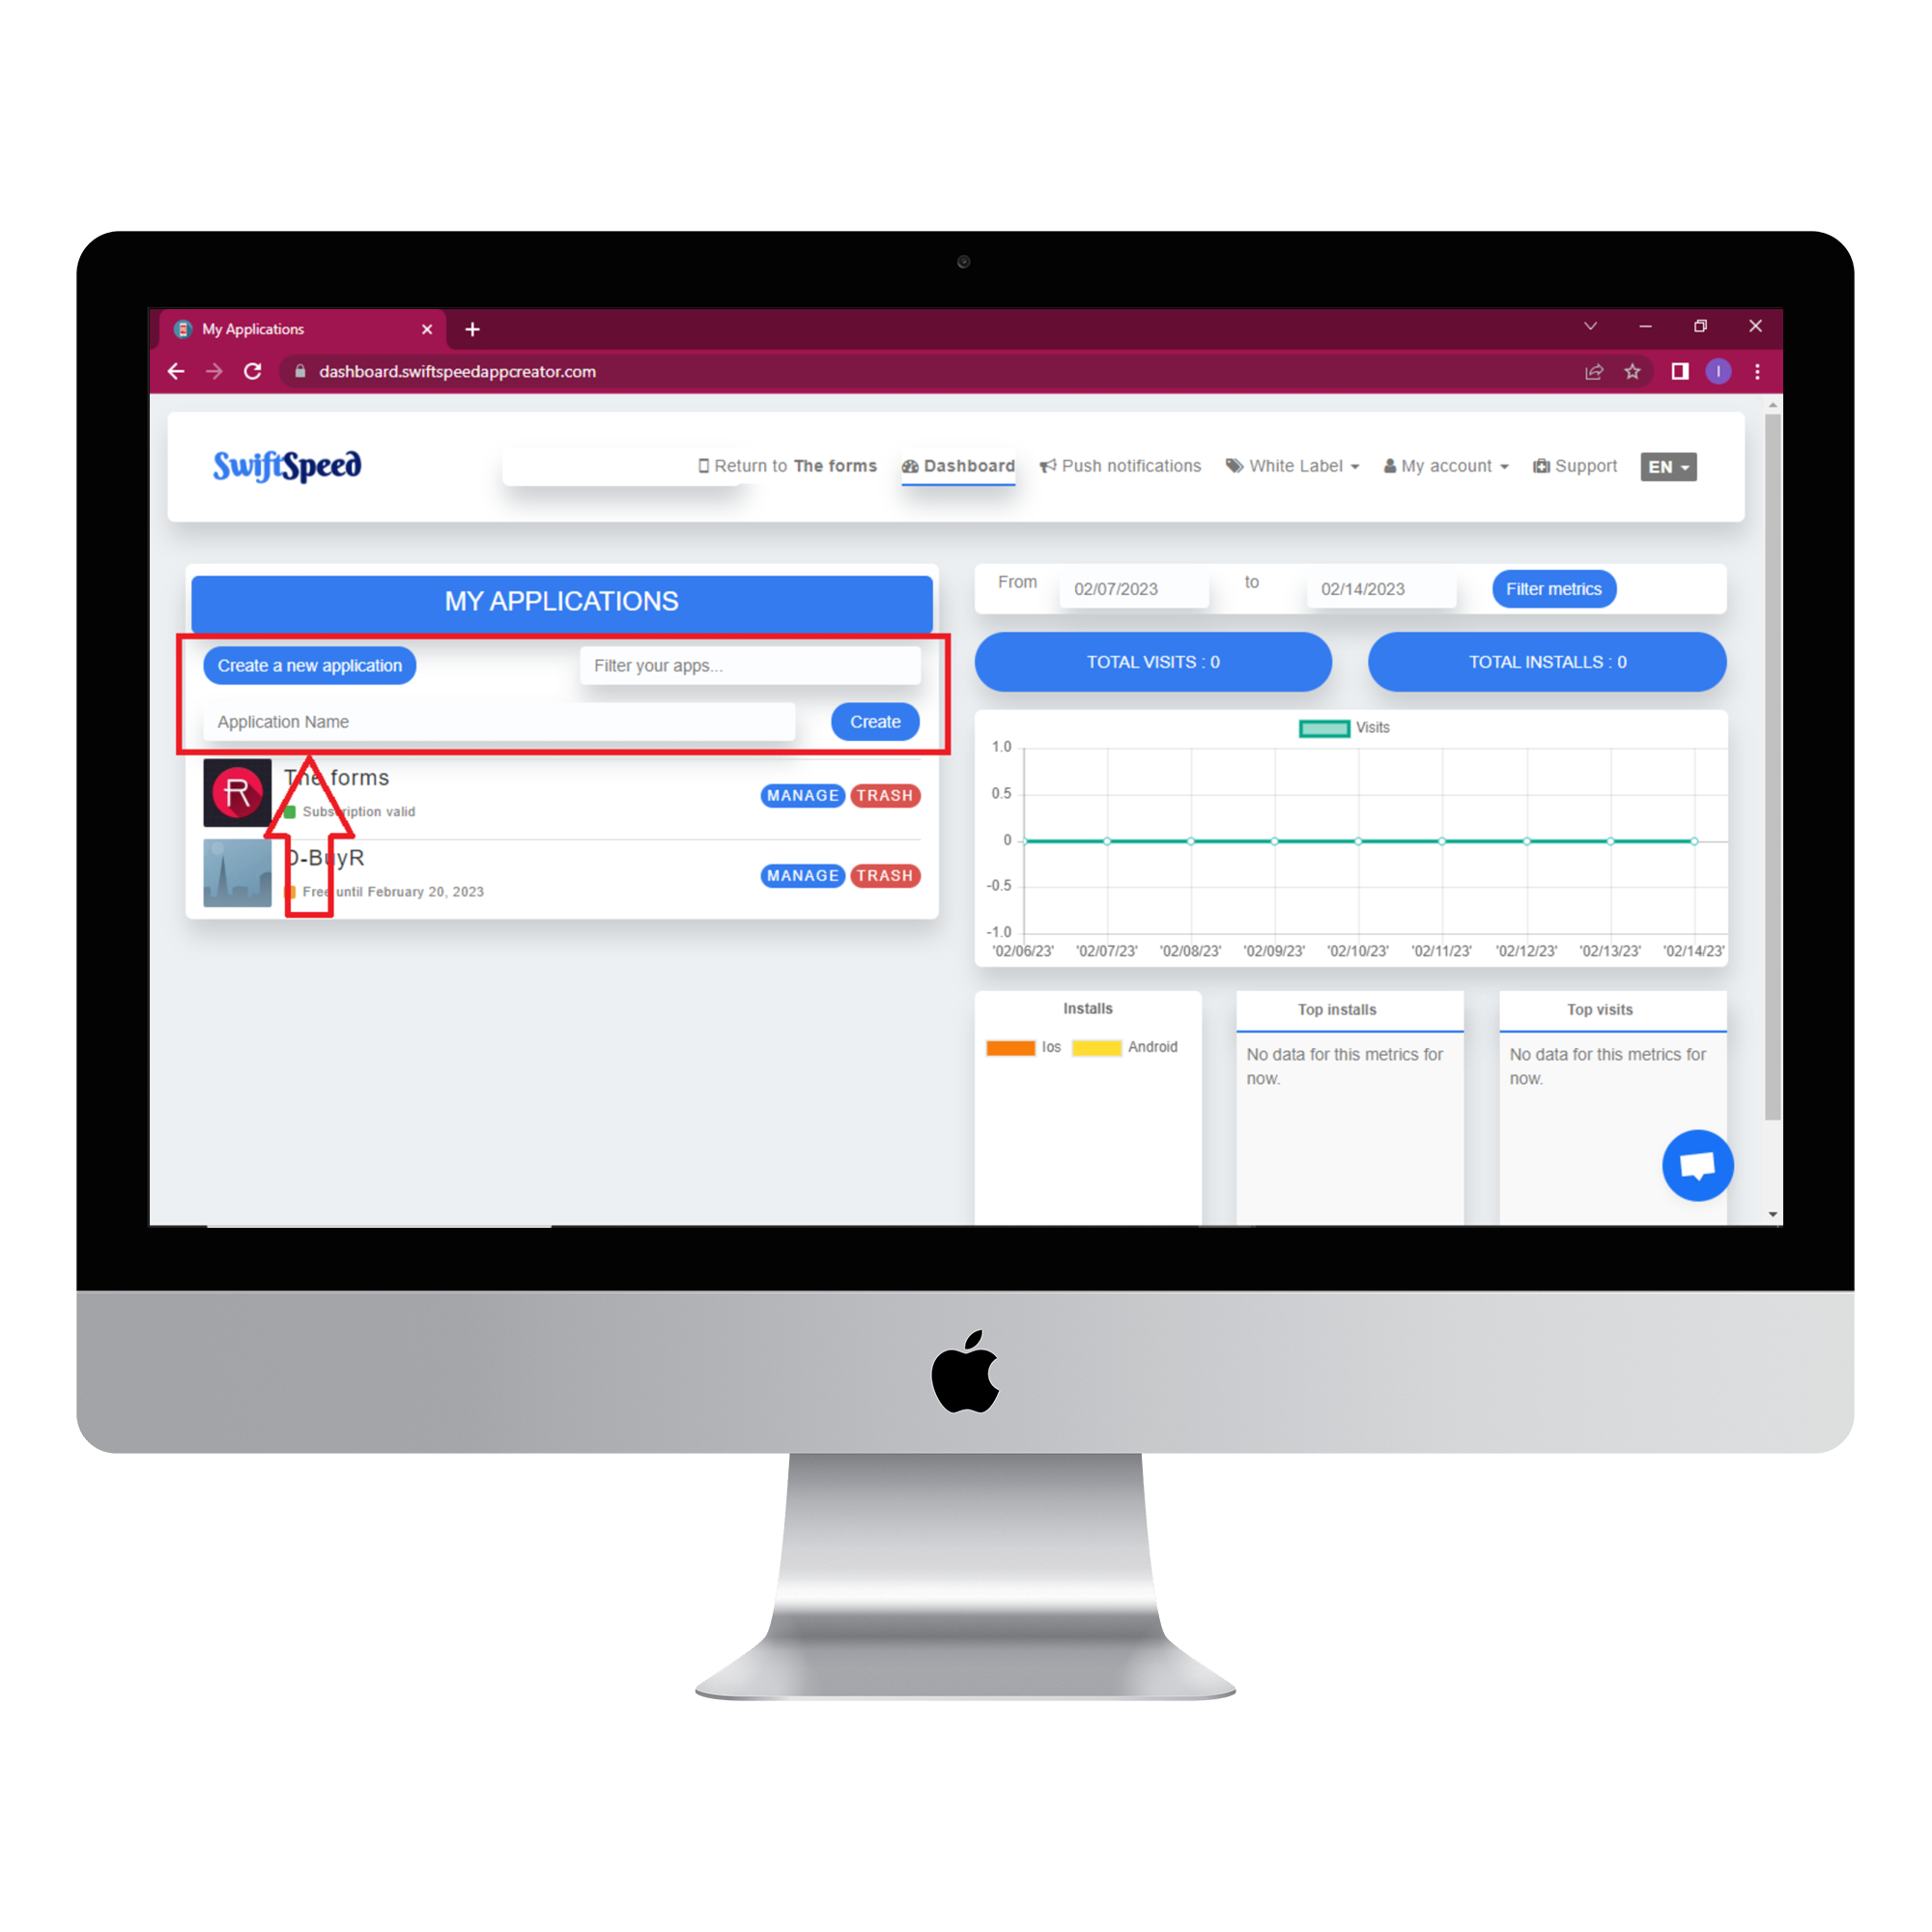
Go to the Swiftspeed homepage, log in, and you will be taken to the app creator dashboard. Click on “create a new application” or select a pre-existing app ( if you have one ). If you selected “Create a new application”, you will have to type in the name of your app and click “Create”. If you are not familiar with the app creation process, please read our article on creating an app on our platform.
Step 2:
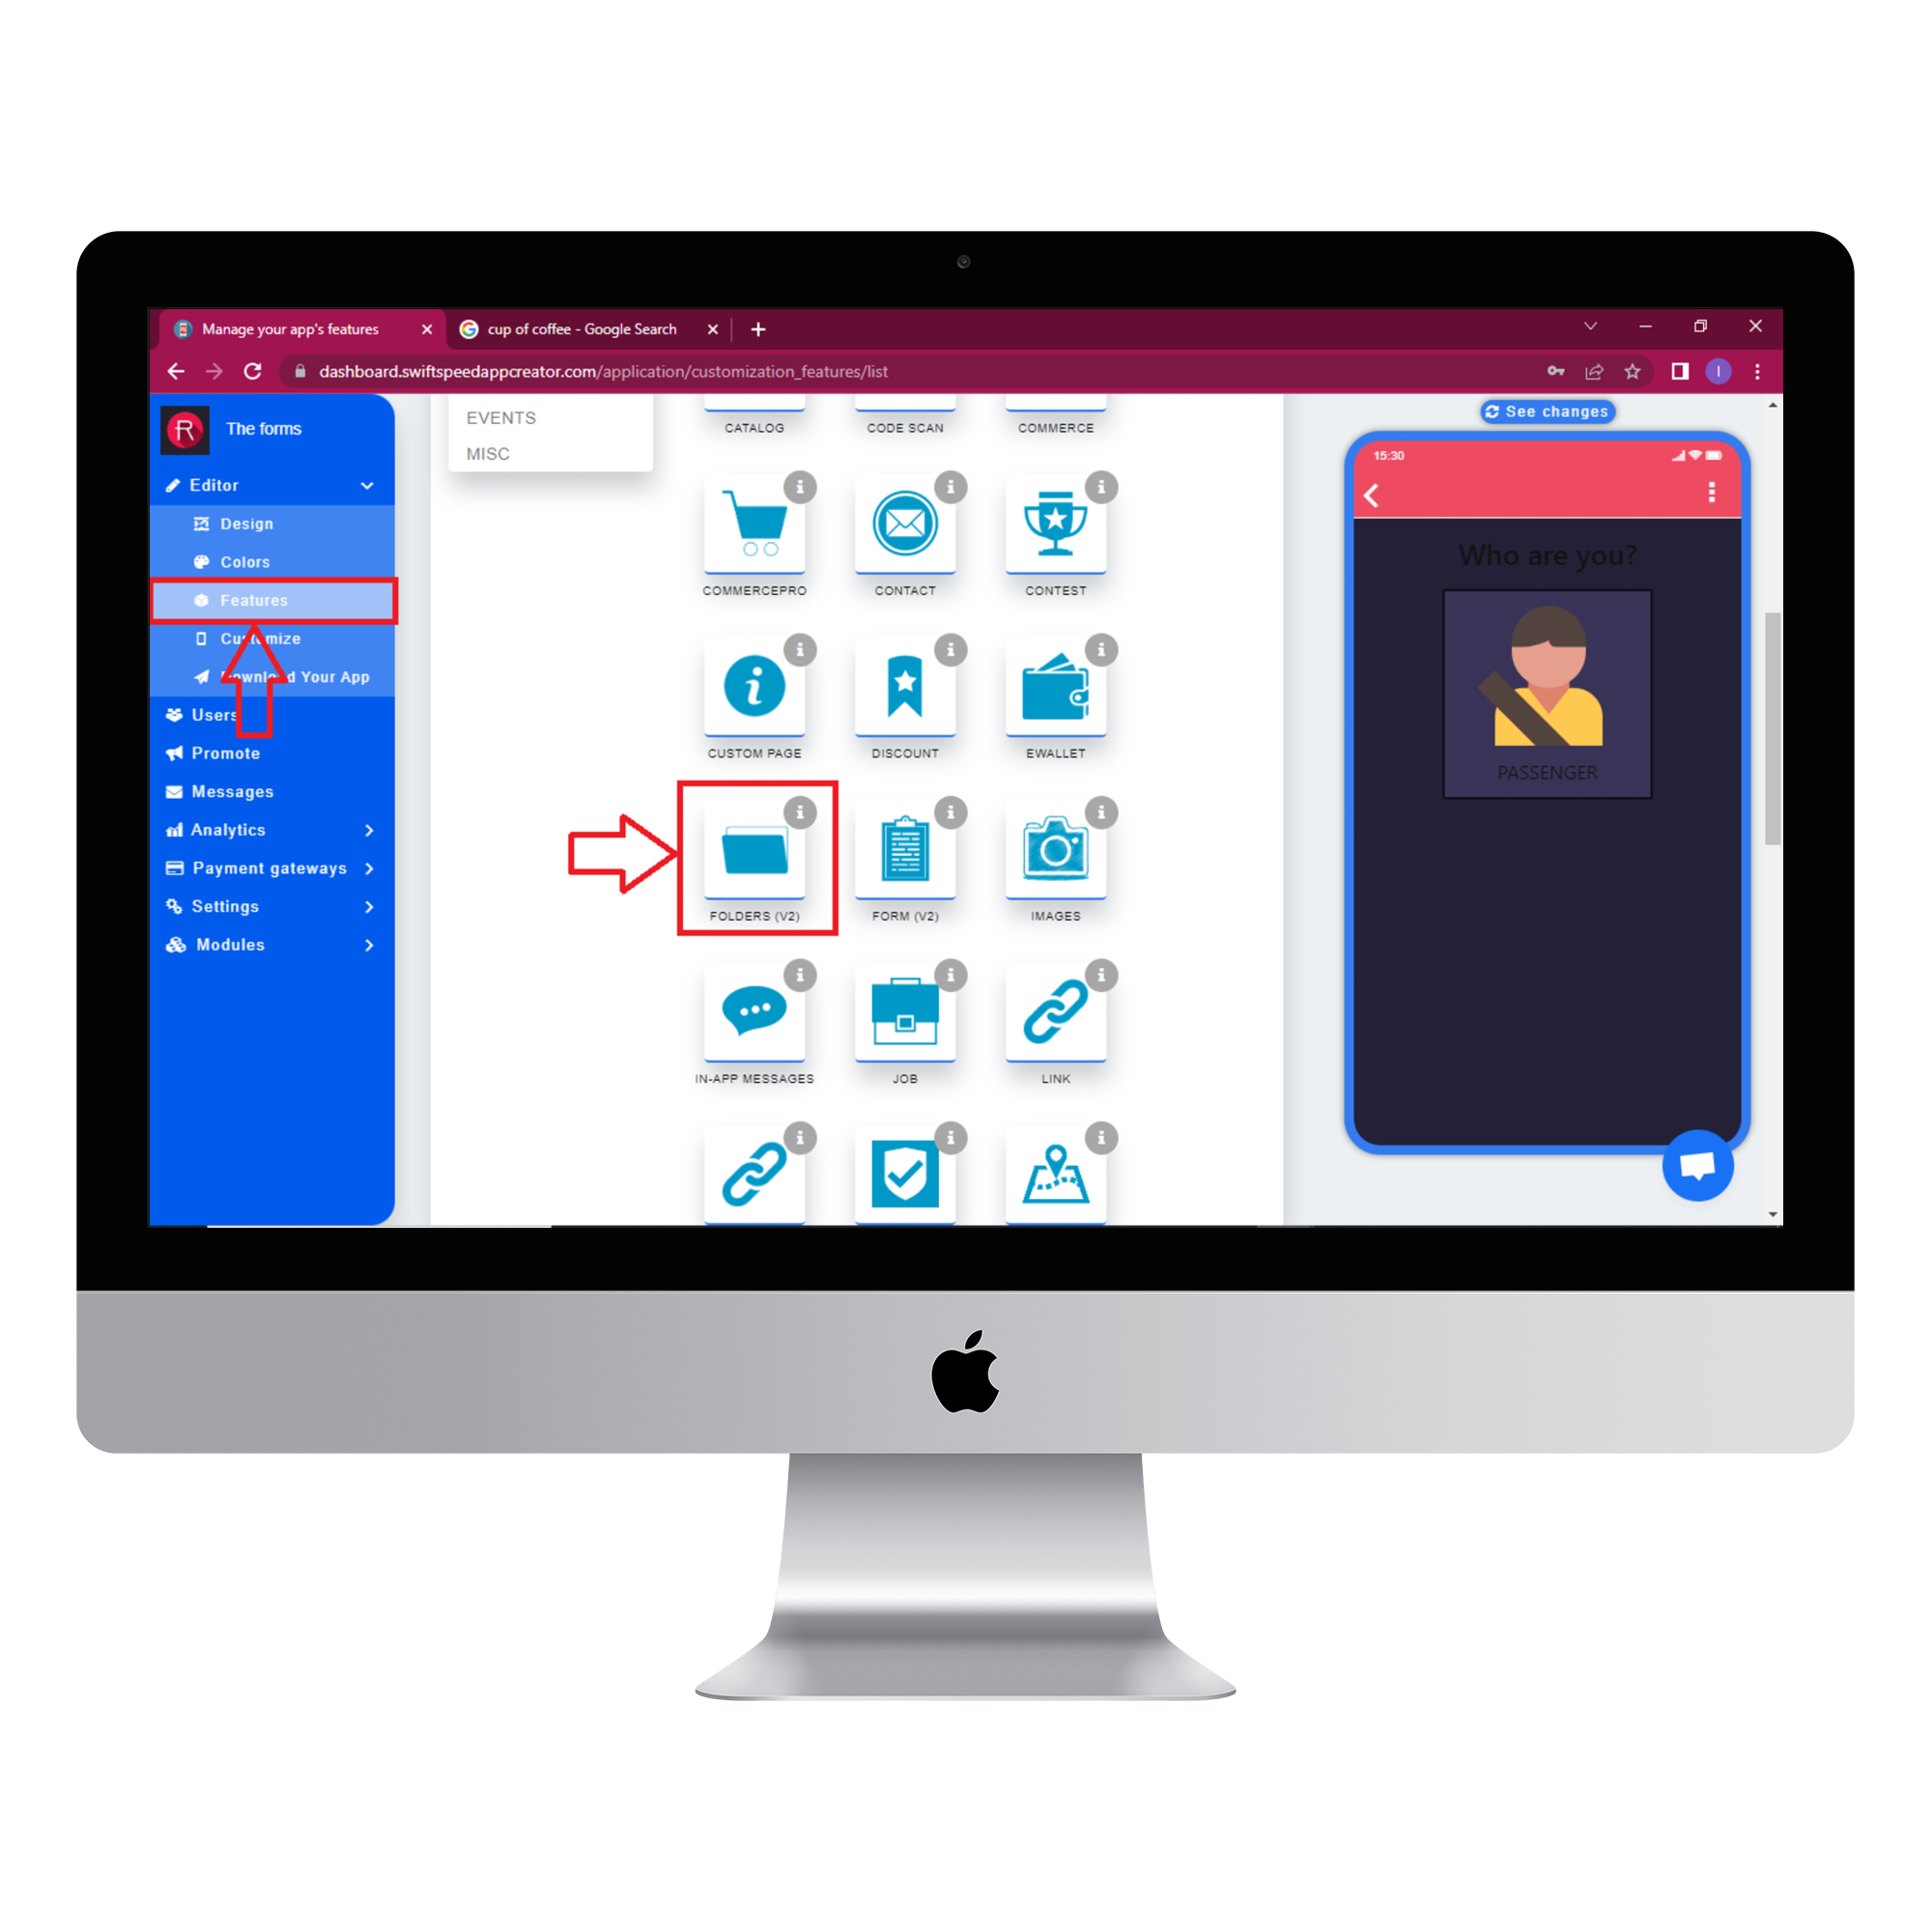
Select “Features” from the side menu on the left side of your screen. Choose the “Folder V2” feature from the list of features and click on “Add feature” when the popup window appears. If you find it challenging to locate the “Folder V2” feature, you can use the search box to find it. Just type in “Folder” and press “Enter” on your keyboard.
Step 3:
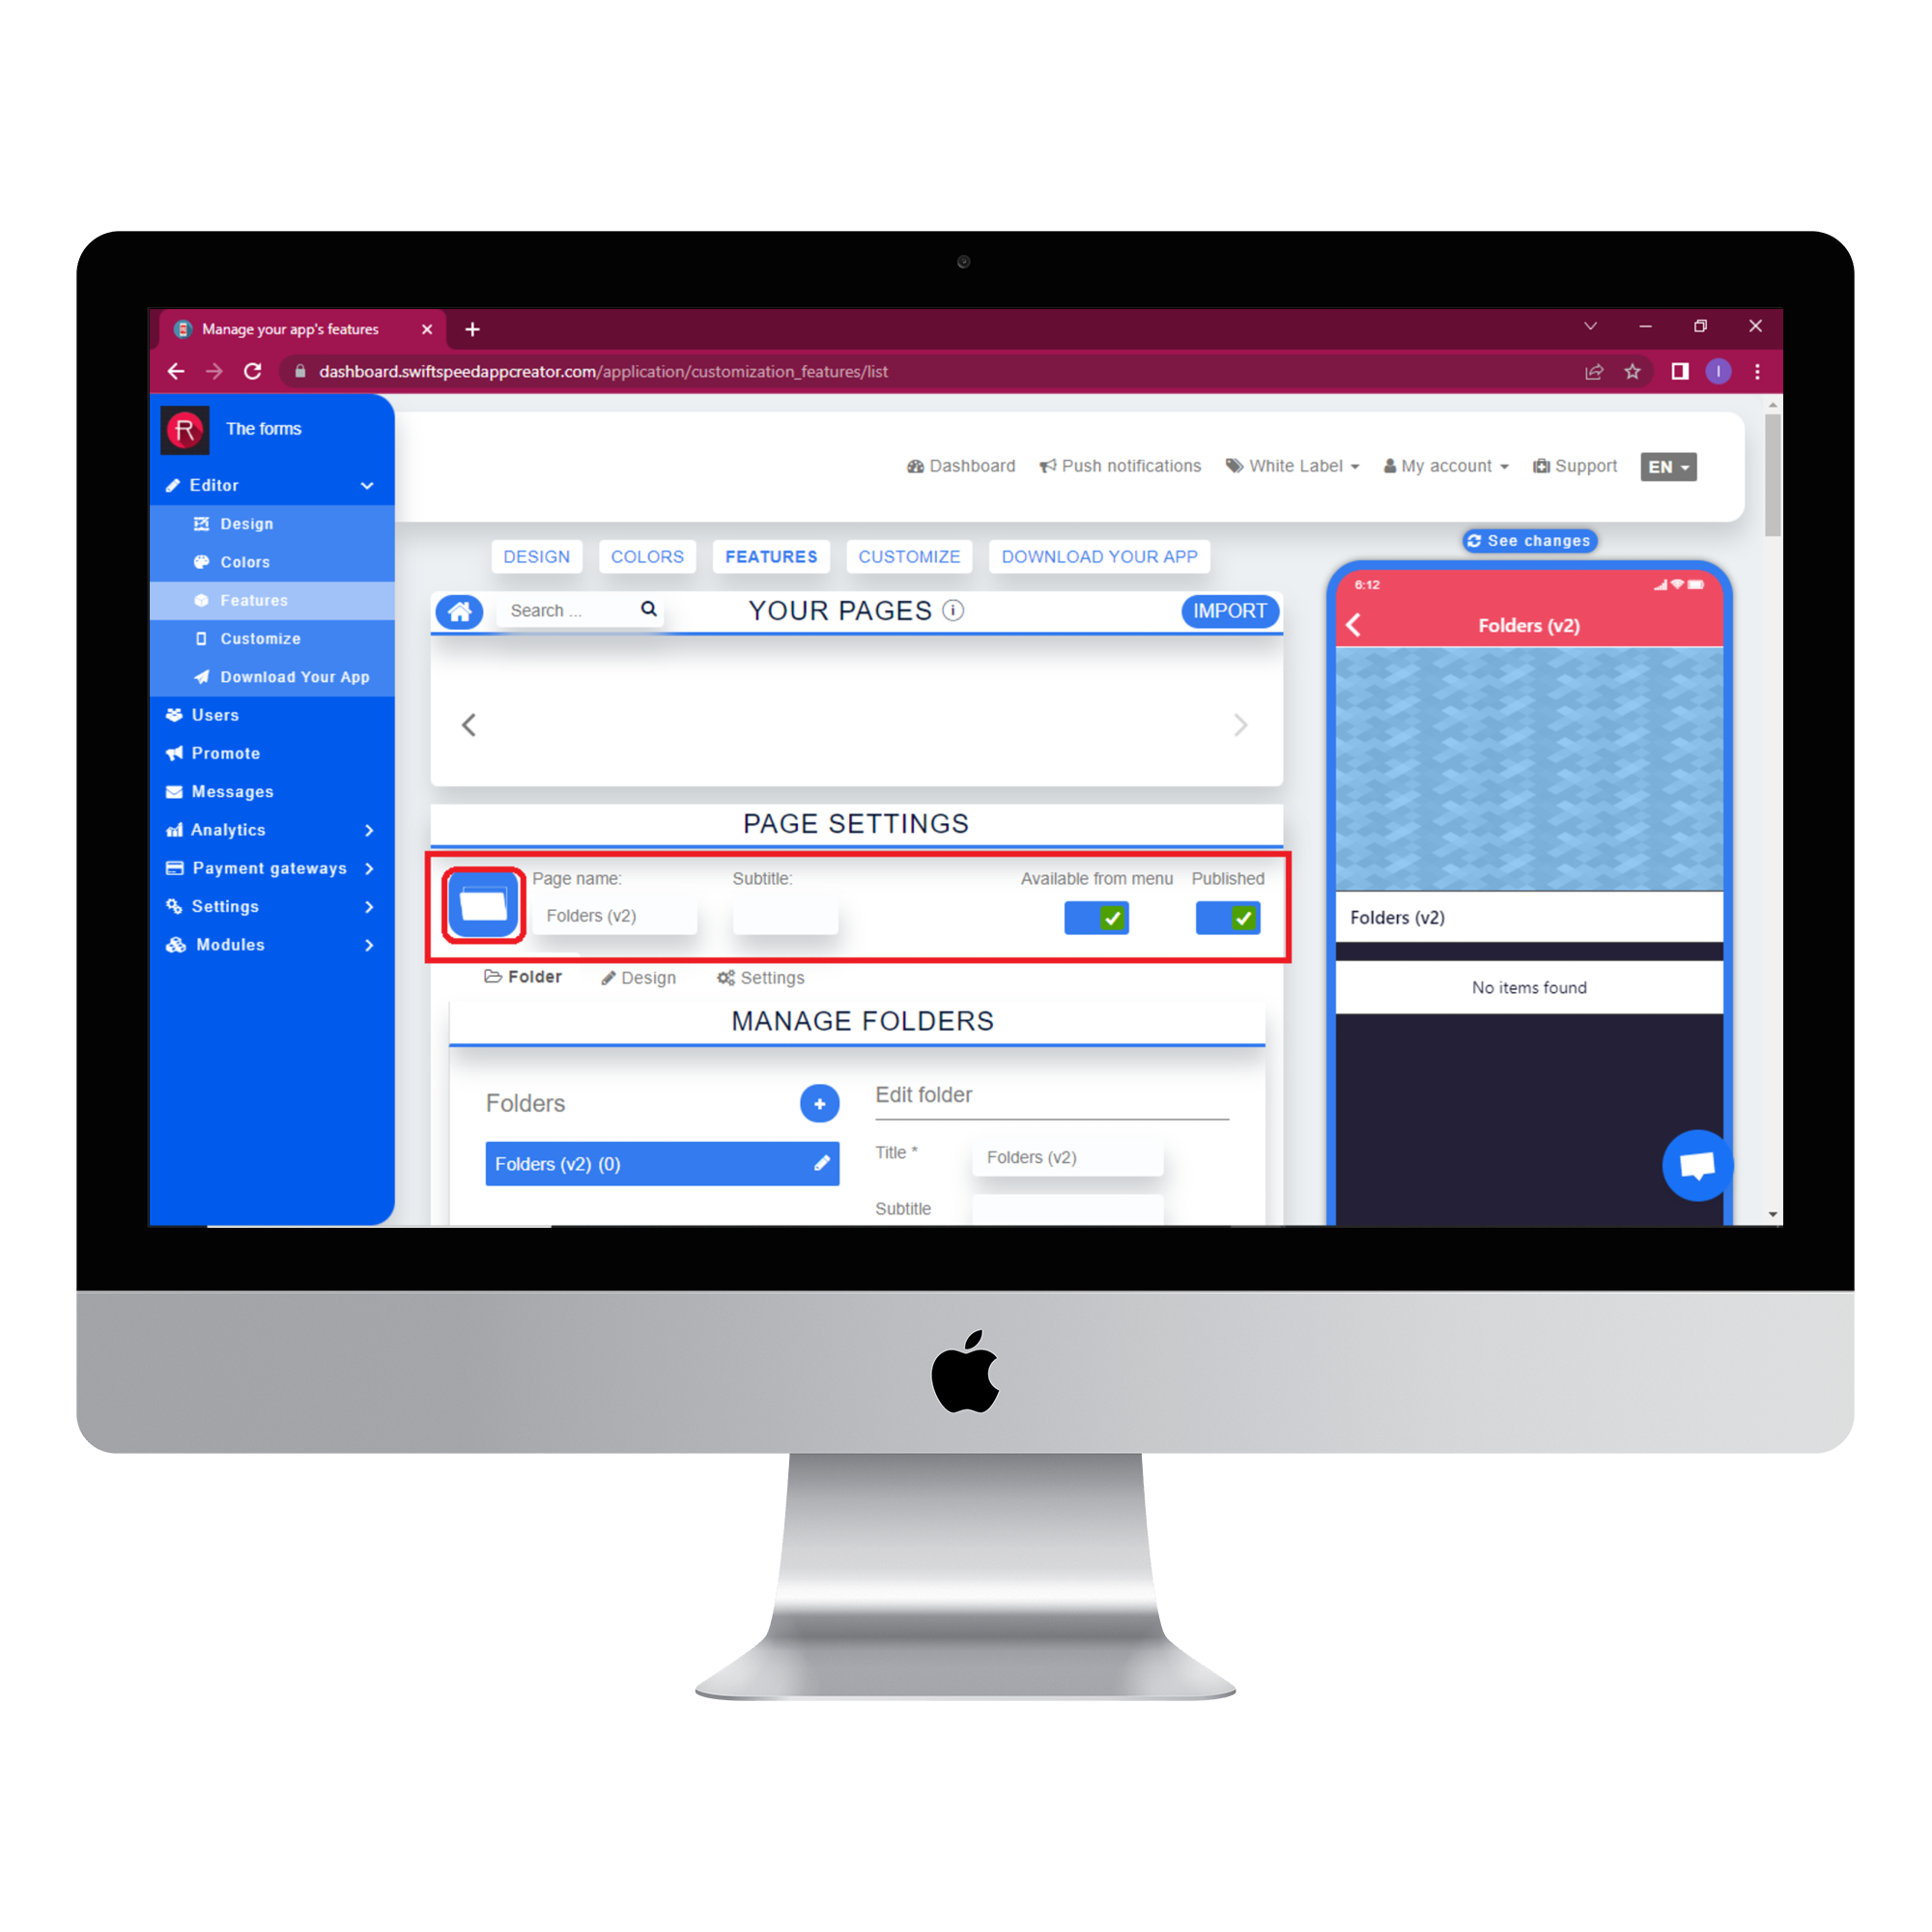
In the Page settings section, you can change the feature icon by clicking on the image button to the left of the “Page name” label. Choose your new feature icon, and it will be saved automatically.
Step 4:
Select the folder tab and type in the title of your folder. Type in a subtitle that describes the content of the folder. Choose a cover image and thumbnail image, then click save.
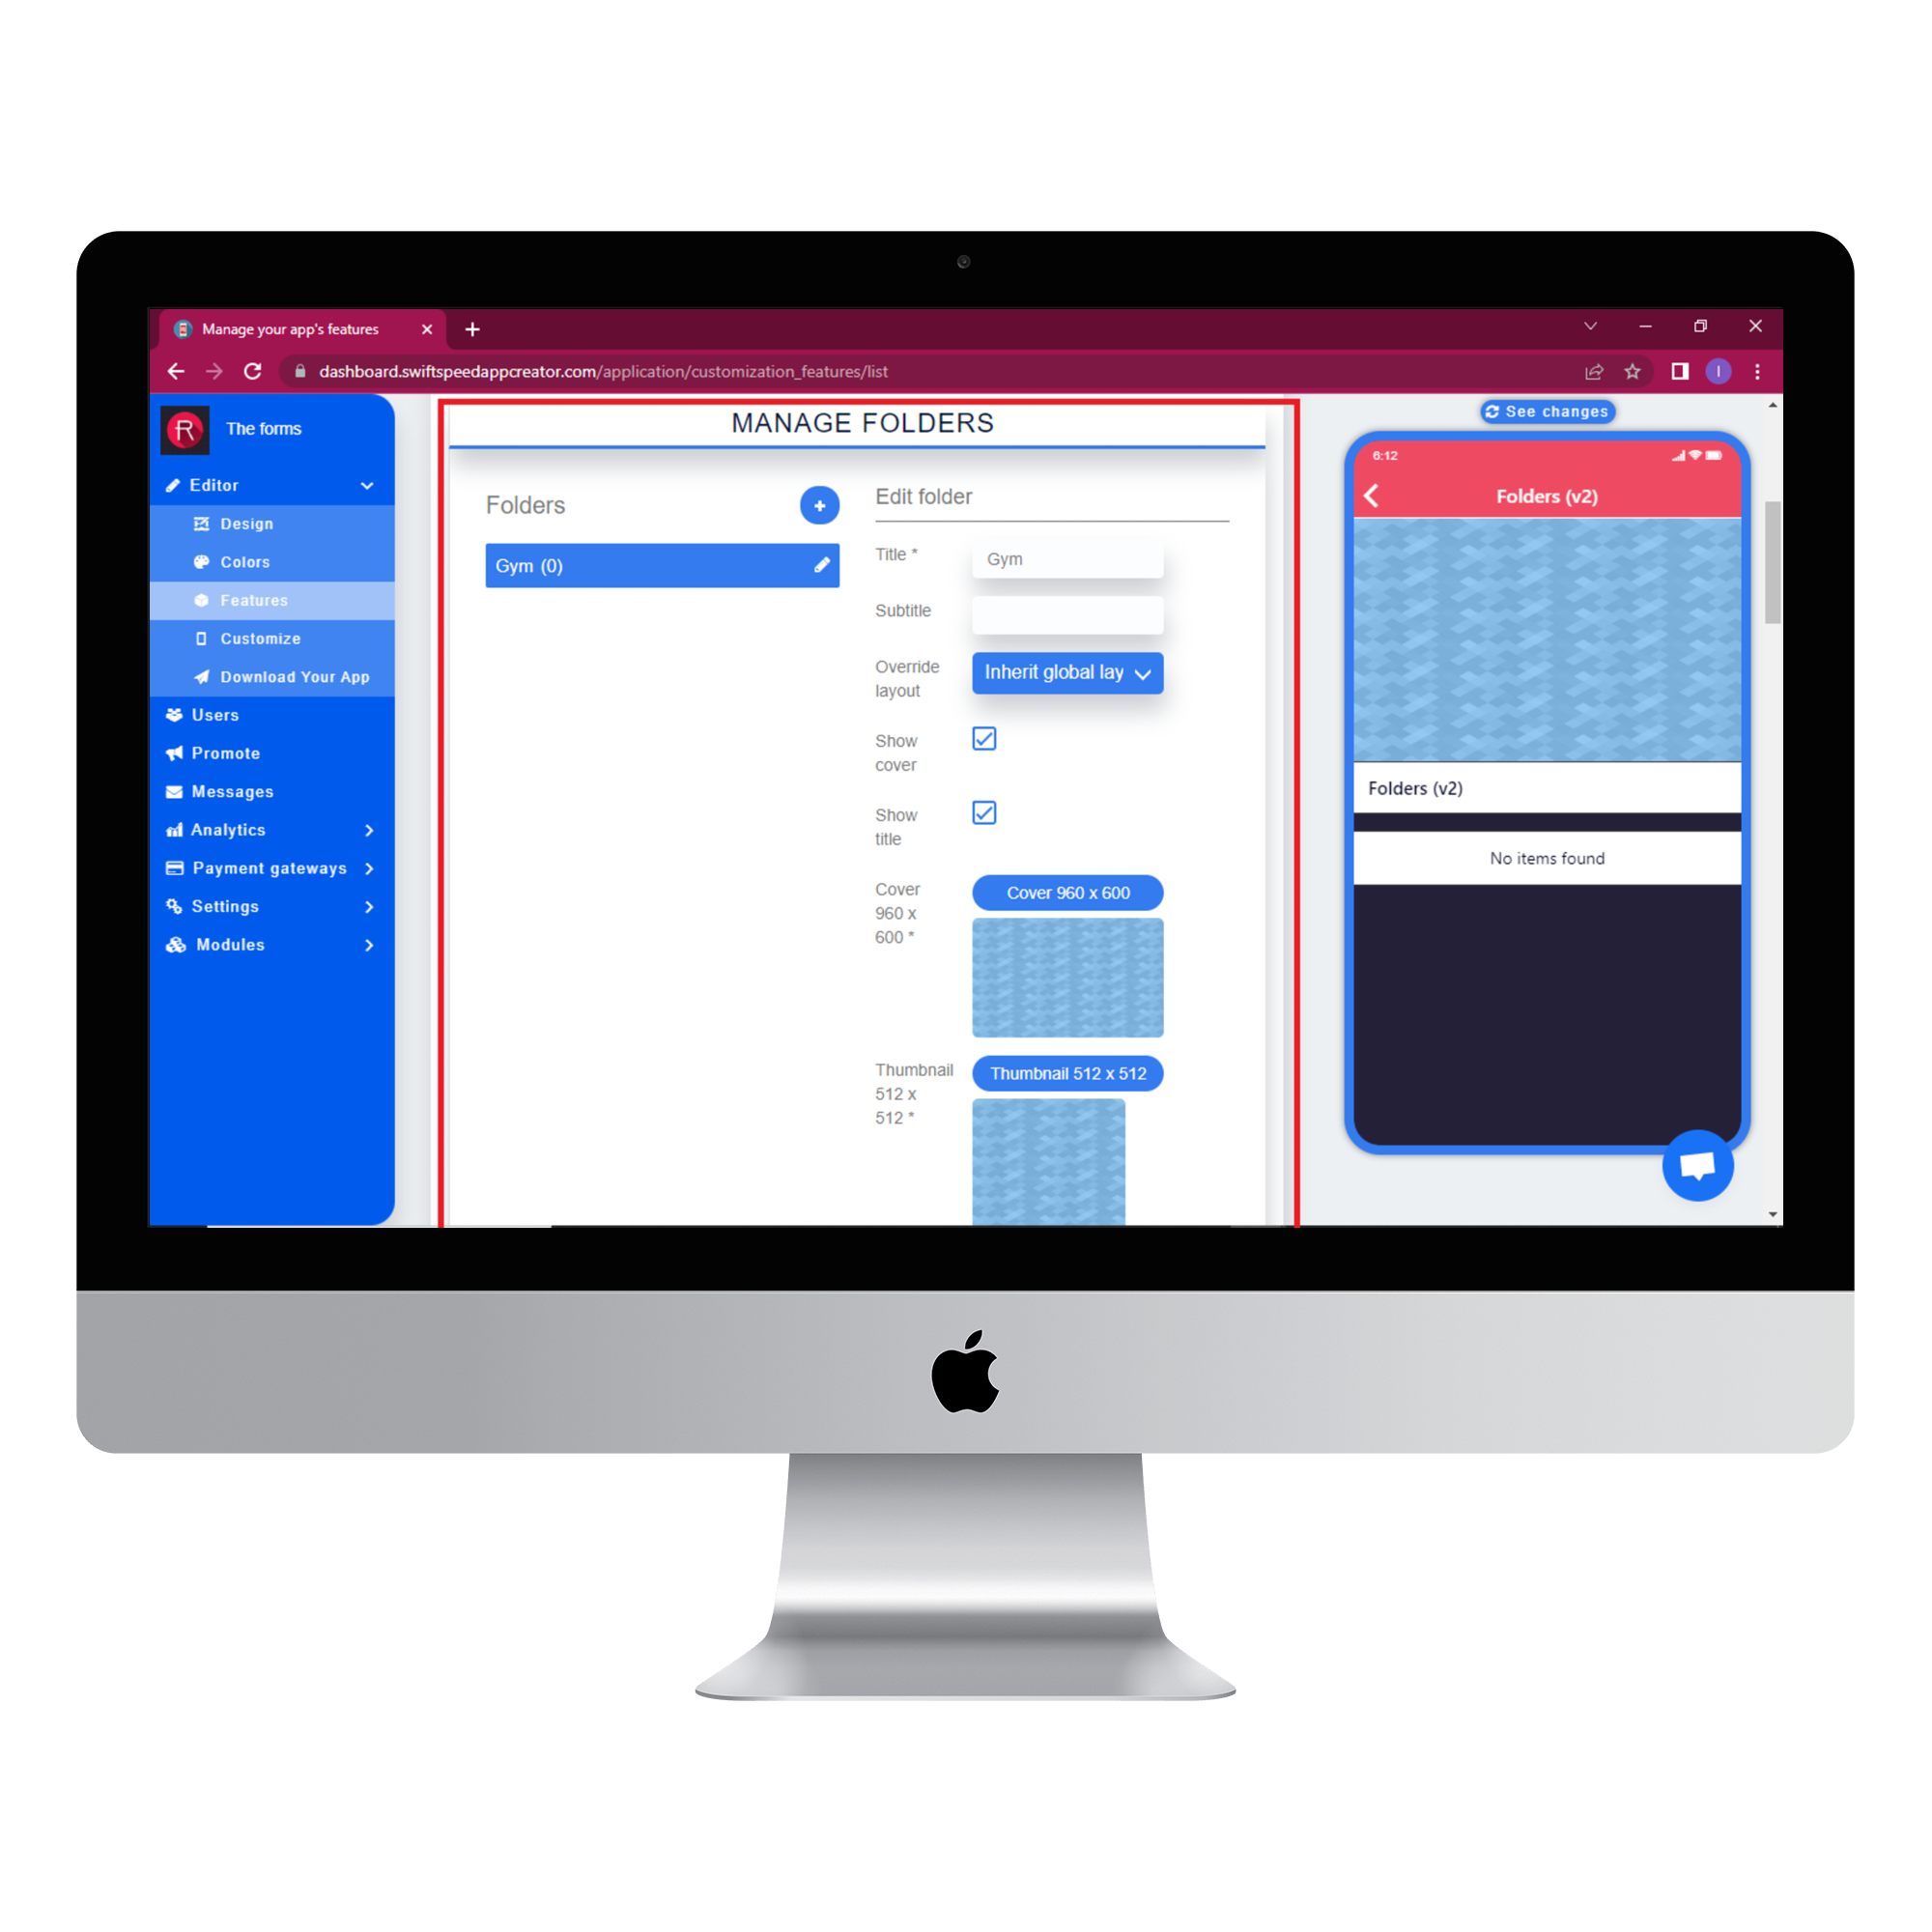
Select the features you want to add to the folder from the highlighted section in the image below. Please note that only the features that are currently in your app will appear here. Click save and proceed to the next step.
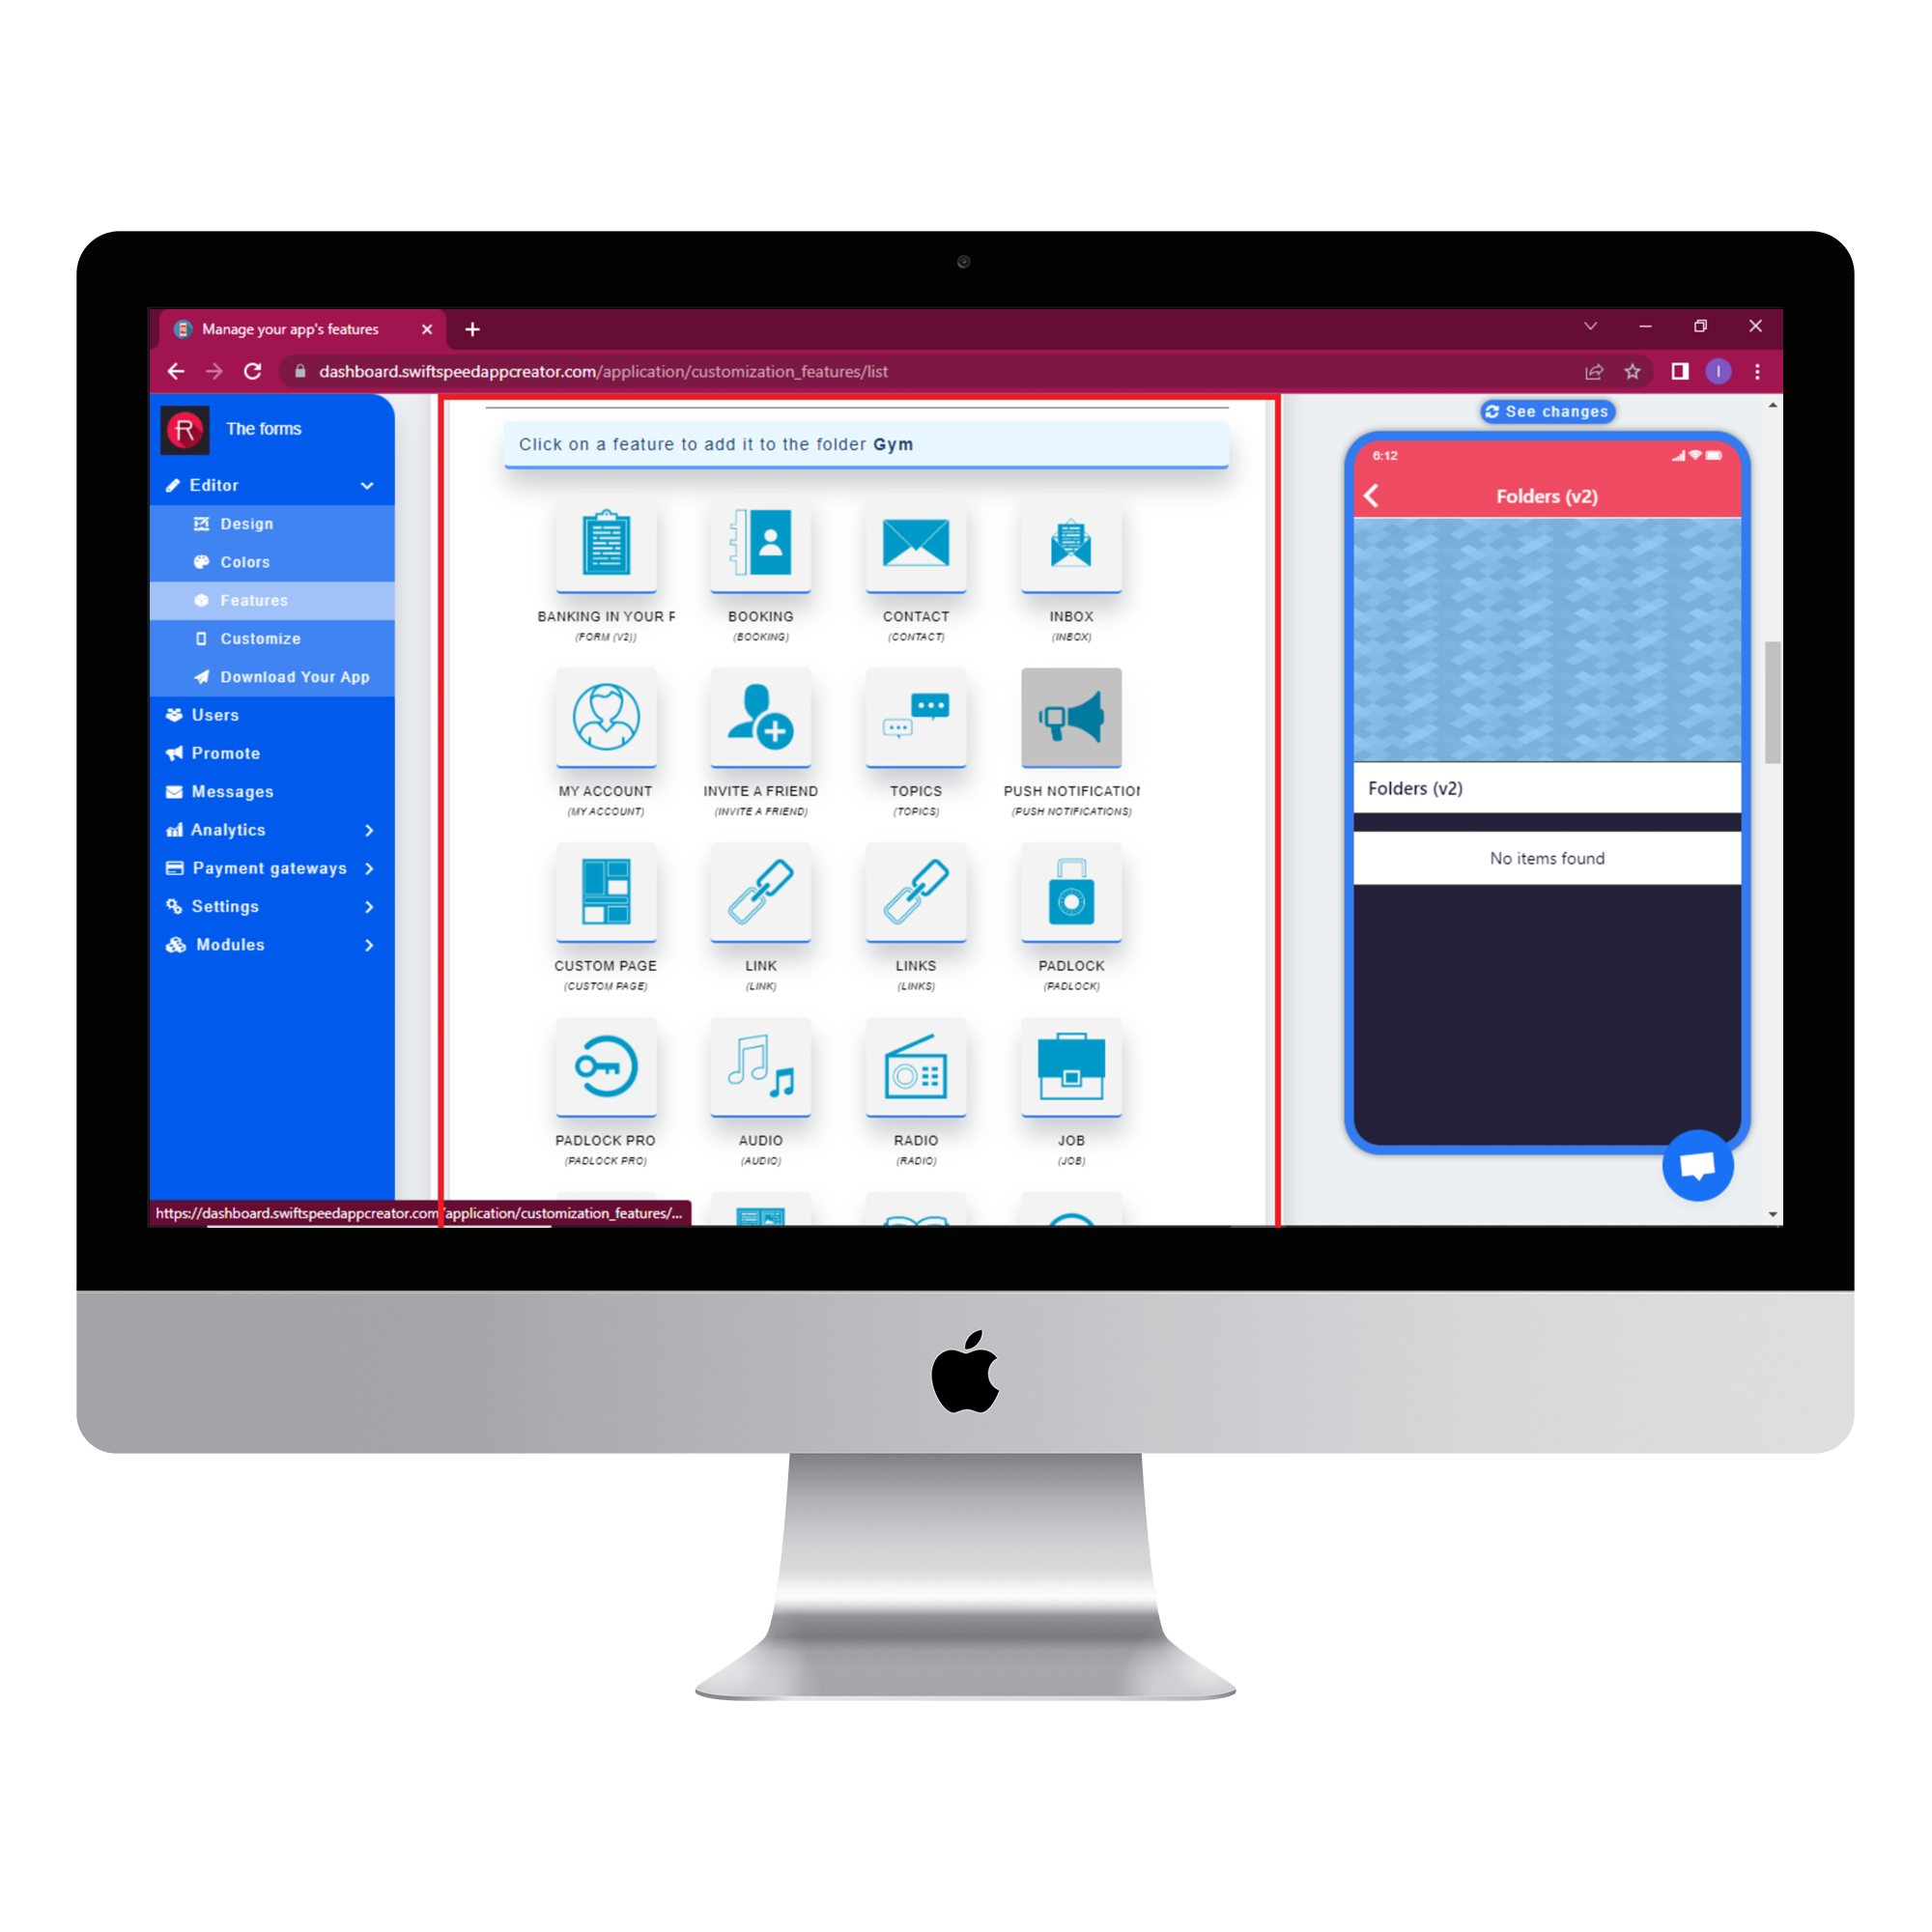
Step 5:
Select the design tab and choose a layout arrangement for your folder. Your selection will be saved and the changes will be applied automatically.
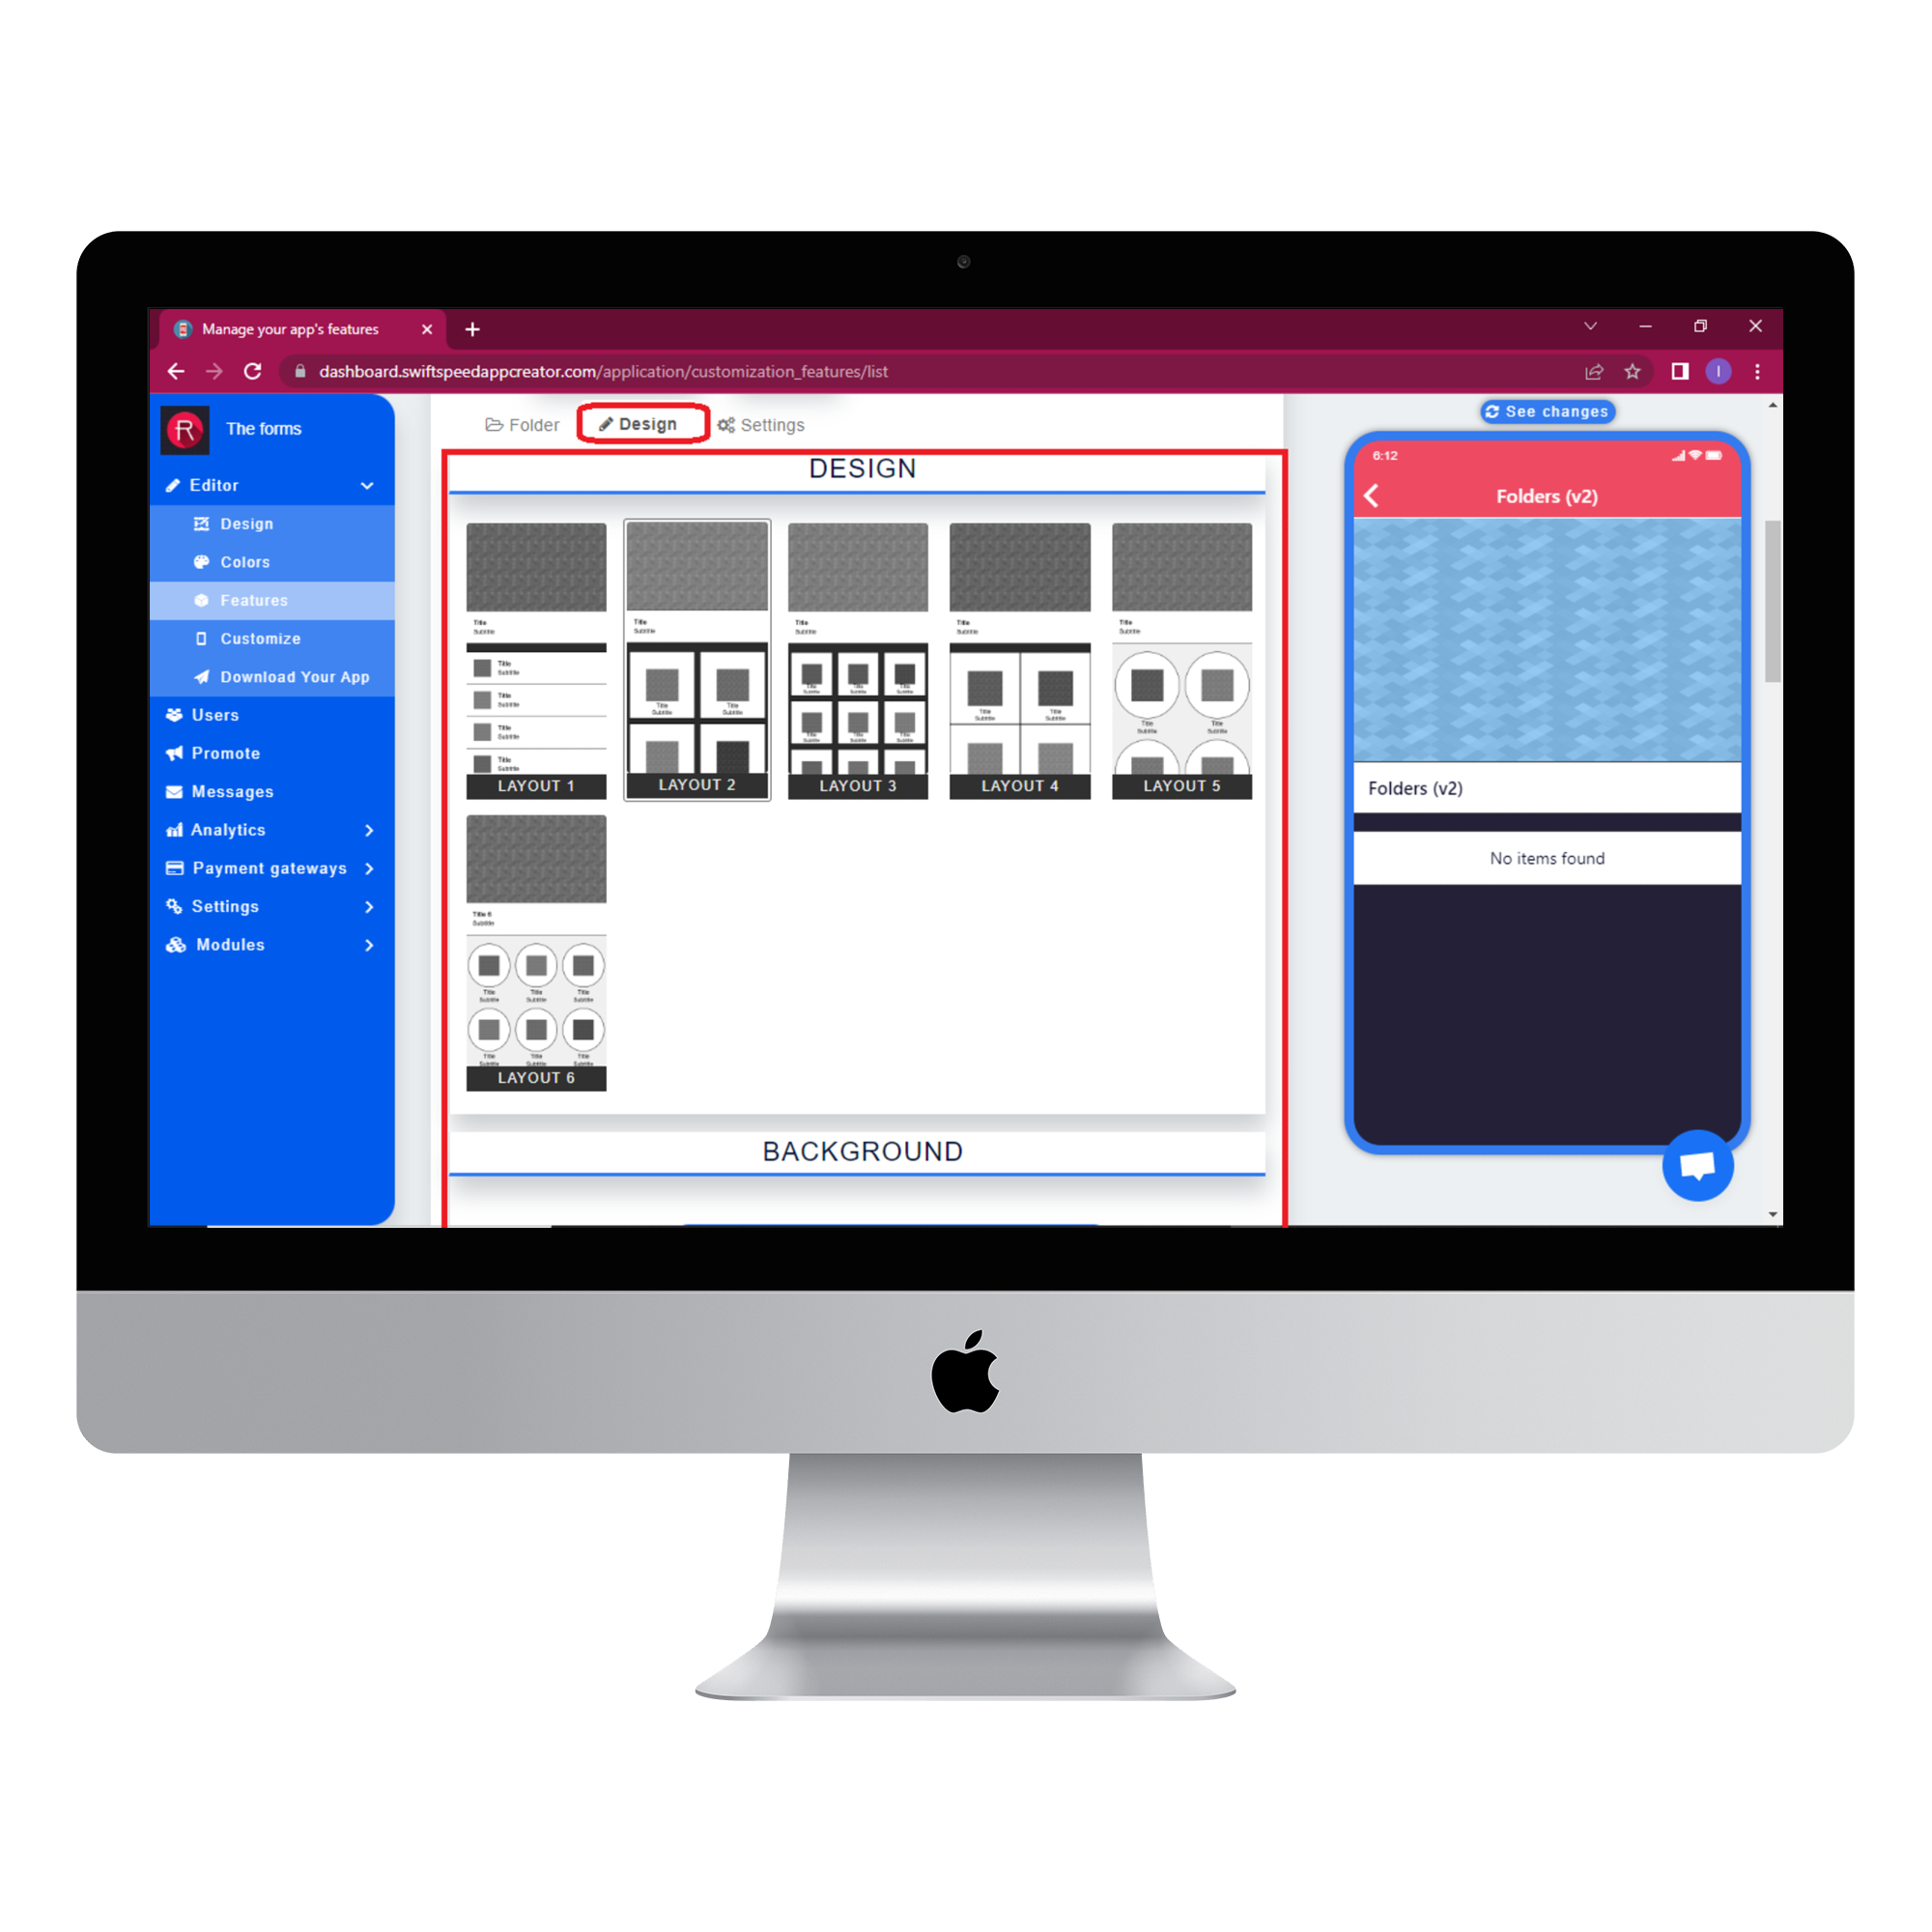
Step 6:
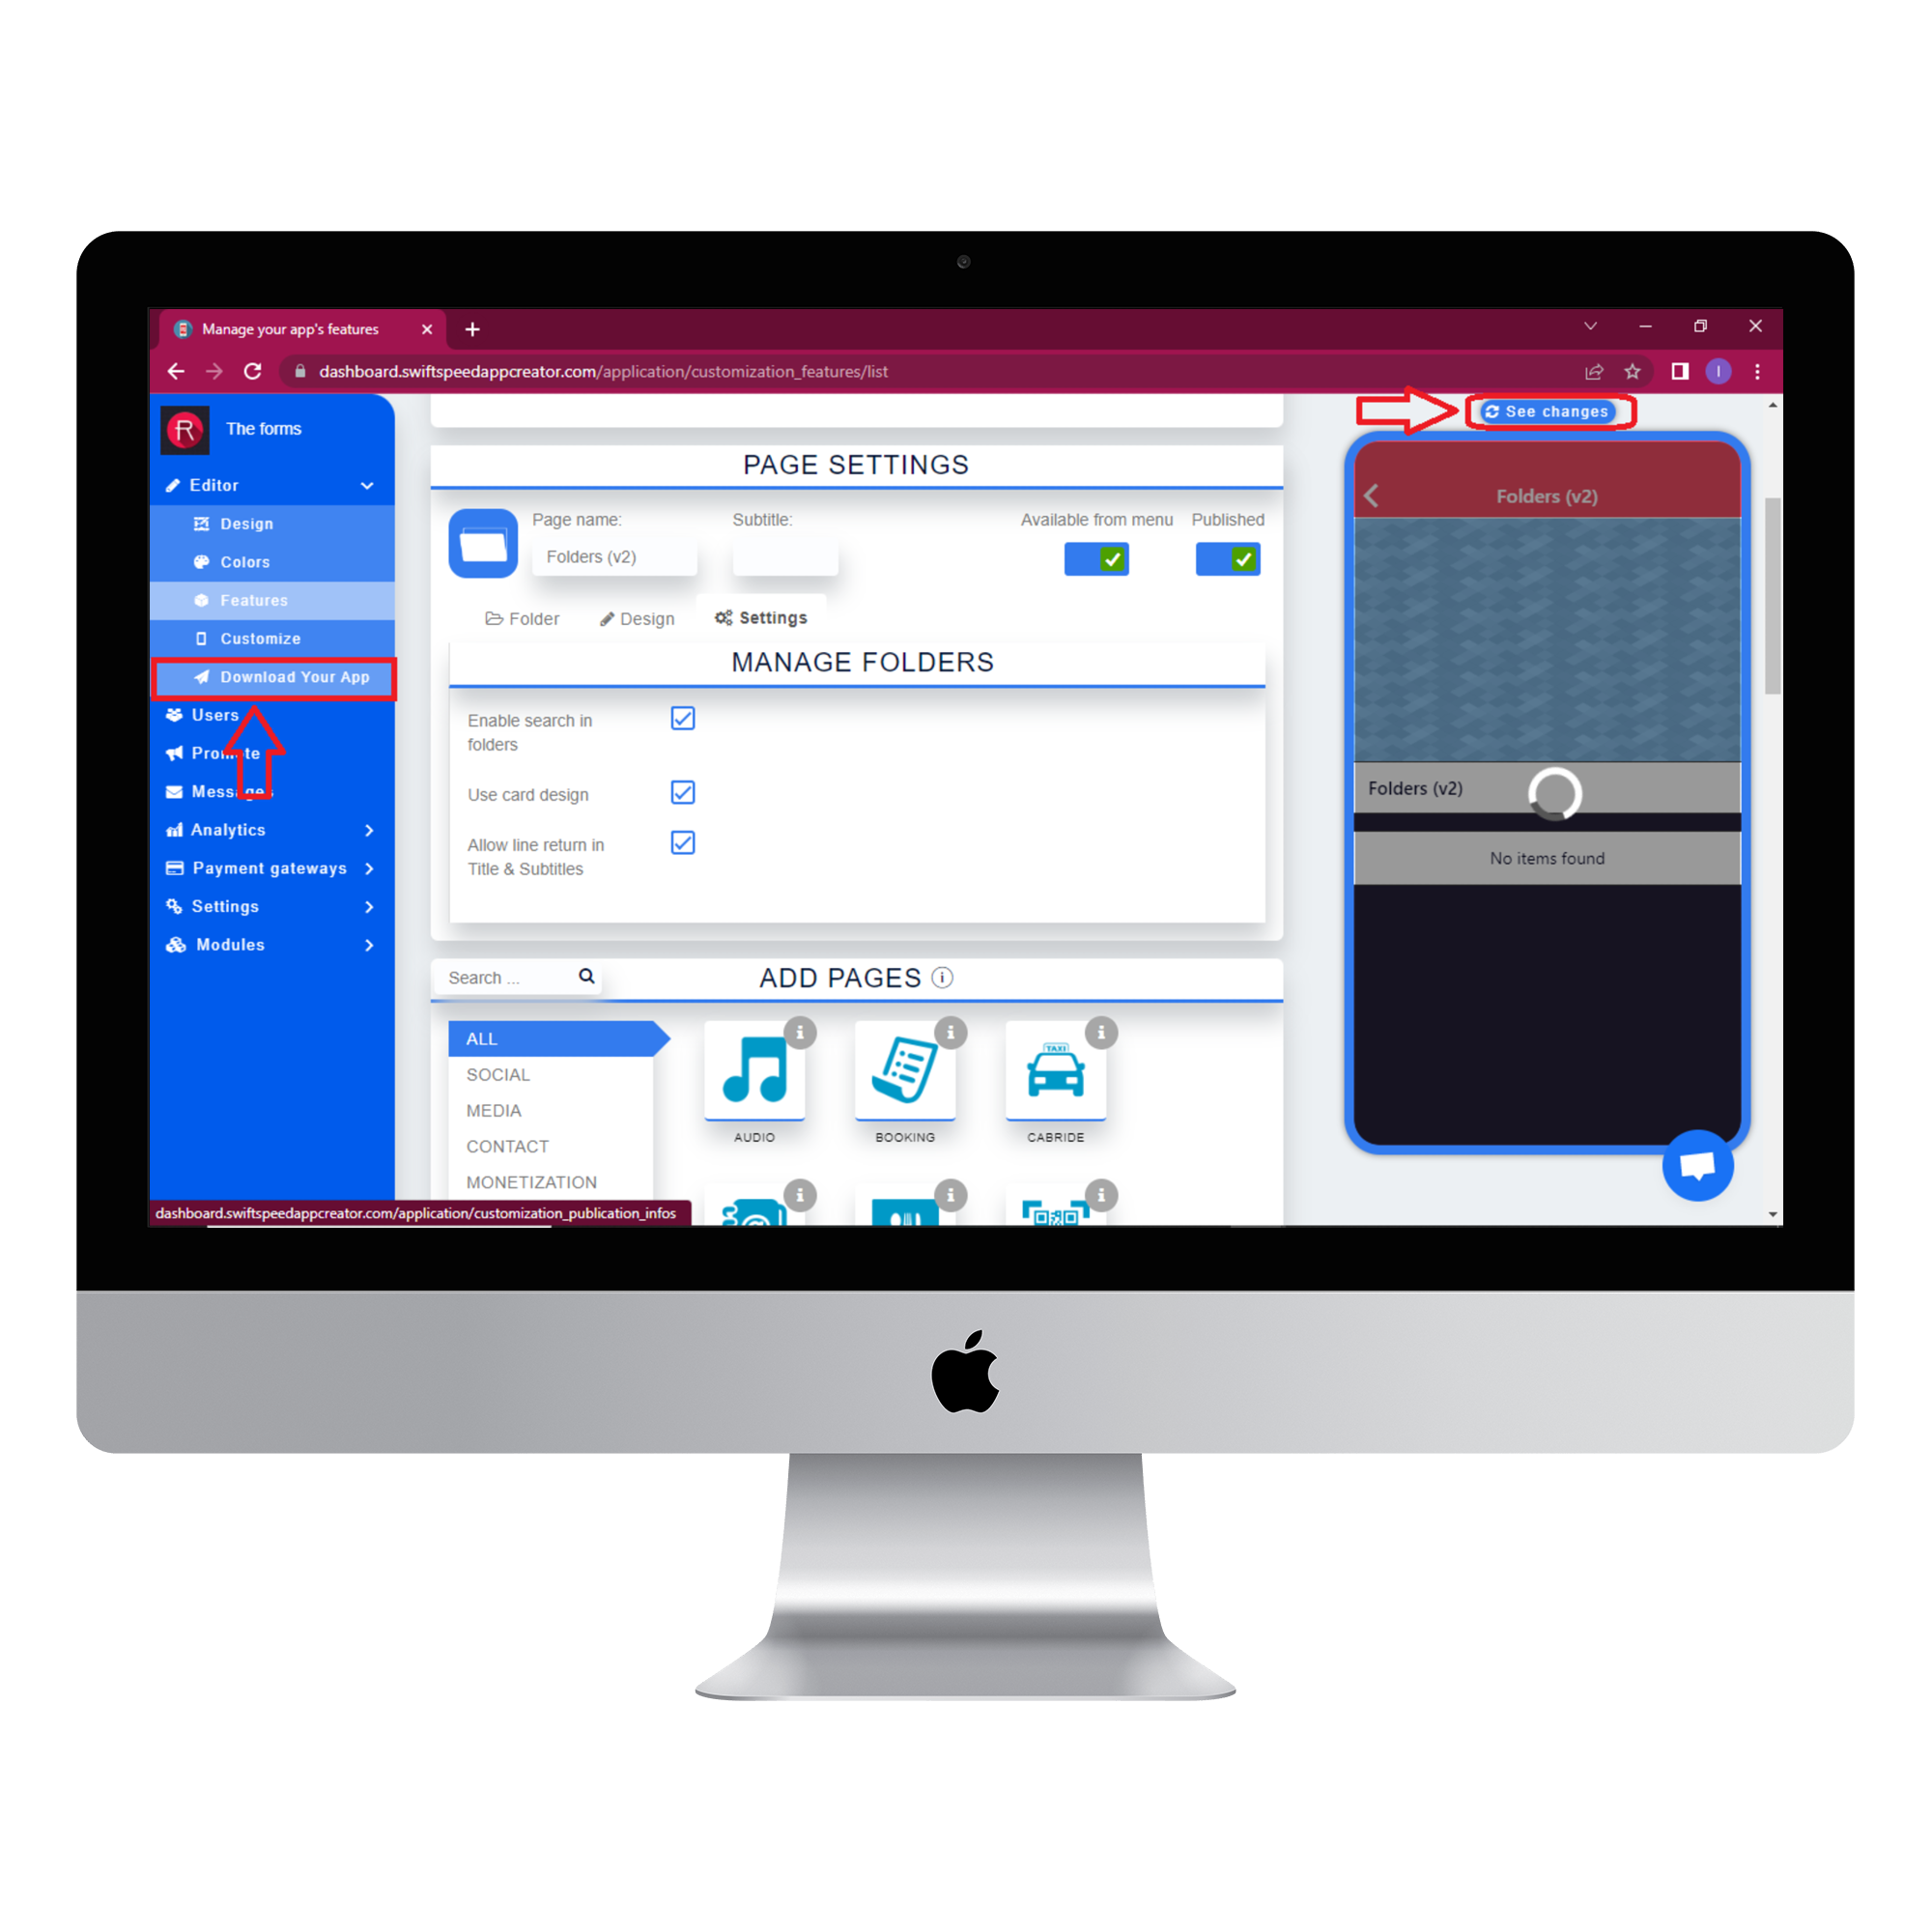
Select the settings tab and tick all the checkboxes.
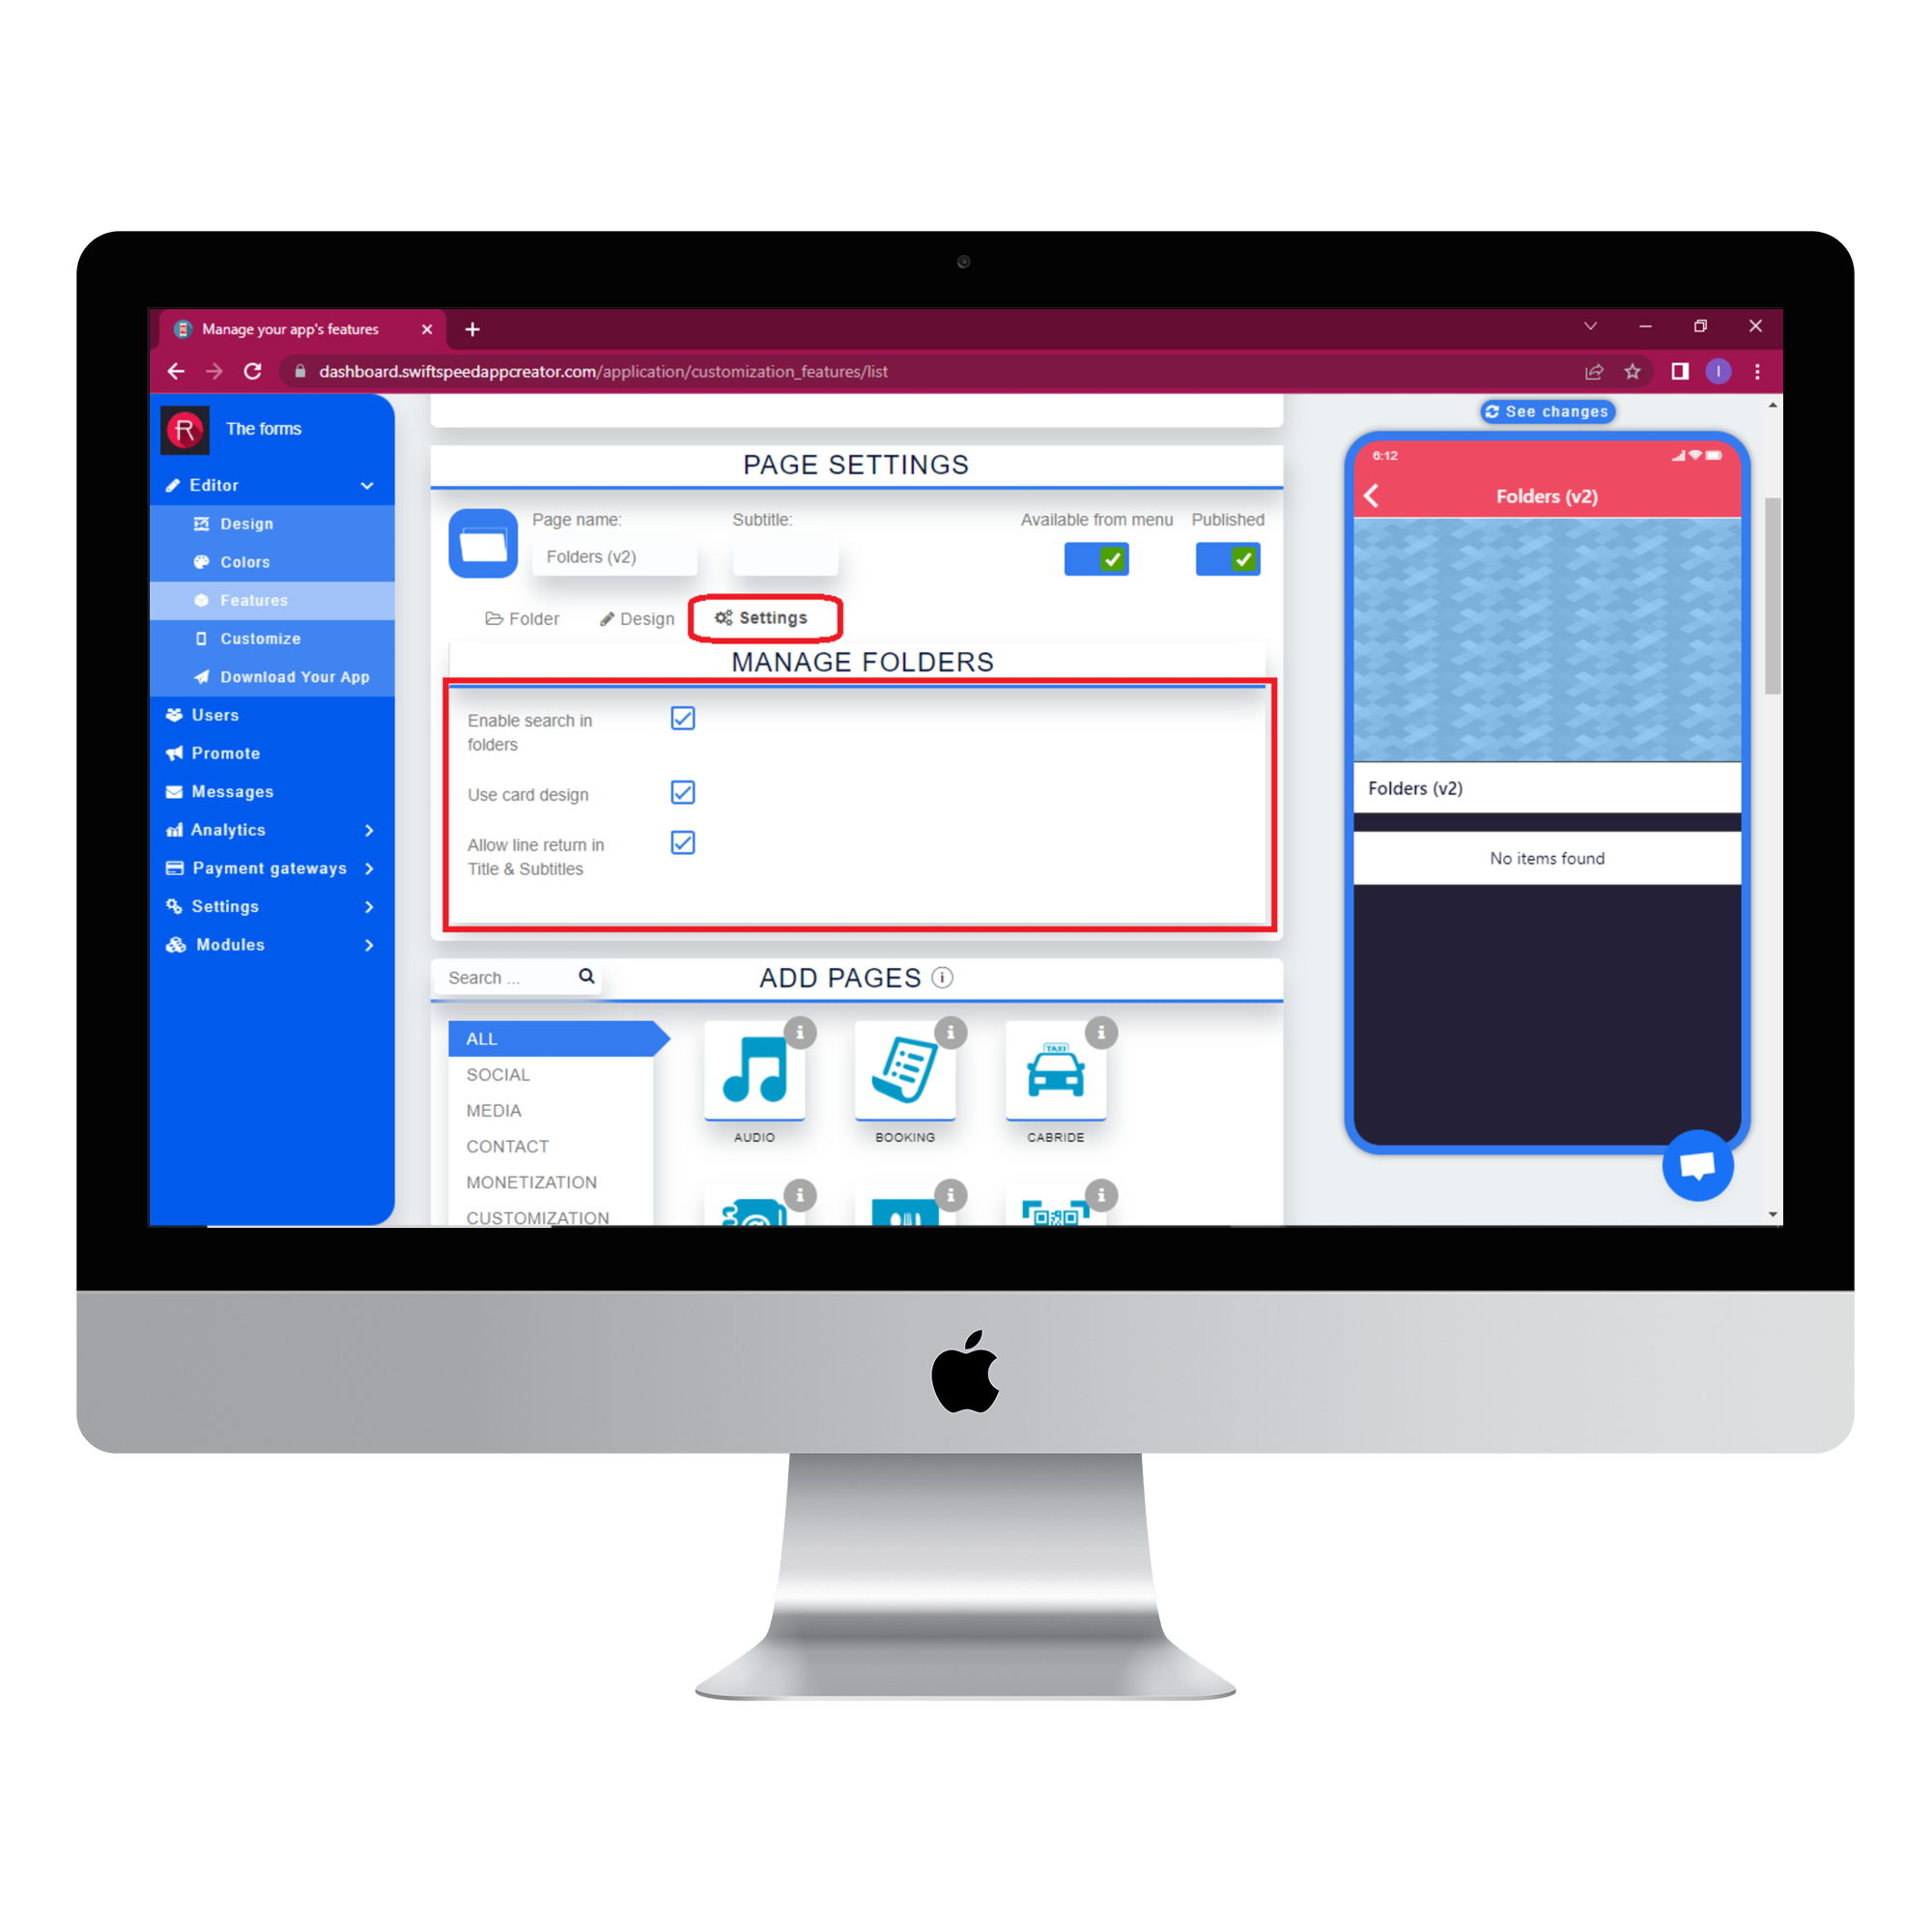
Step 7:
Click on the “see changes” button above the virtual device to see what your app would look like on an actual device. To generate an Apk of your app, click on “Download your app” from the side menu, scroll down and click on “Generate Apk.” Choose a subscription plan, and the Apk will be sent to your email address when the build is complete. Here is an example of what your app would look like.
Good job on creating your own folder app with our platform.
The Swiftspeed app creator has many more amazing features like this. Click here to check them out.

