This article will enlighten you on the uses and functionalities of the places feature. The Places feature can be used to create a list of geolocated places. All the places created by the user will be displayed on the map. The path and directions to each location by walking or driving will be displayed when the user clicks on that particular location. The listing of the locations is sorted from closest to farthest.
Step 1:
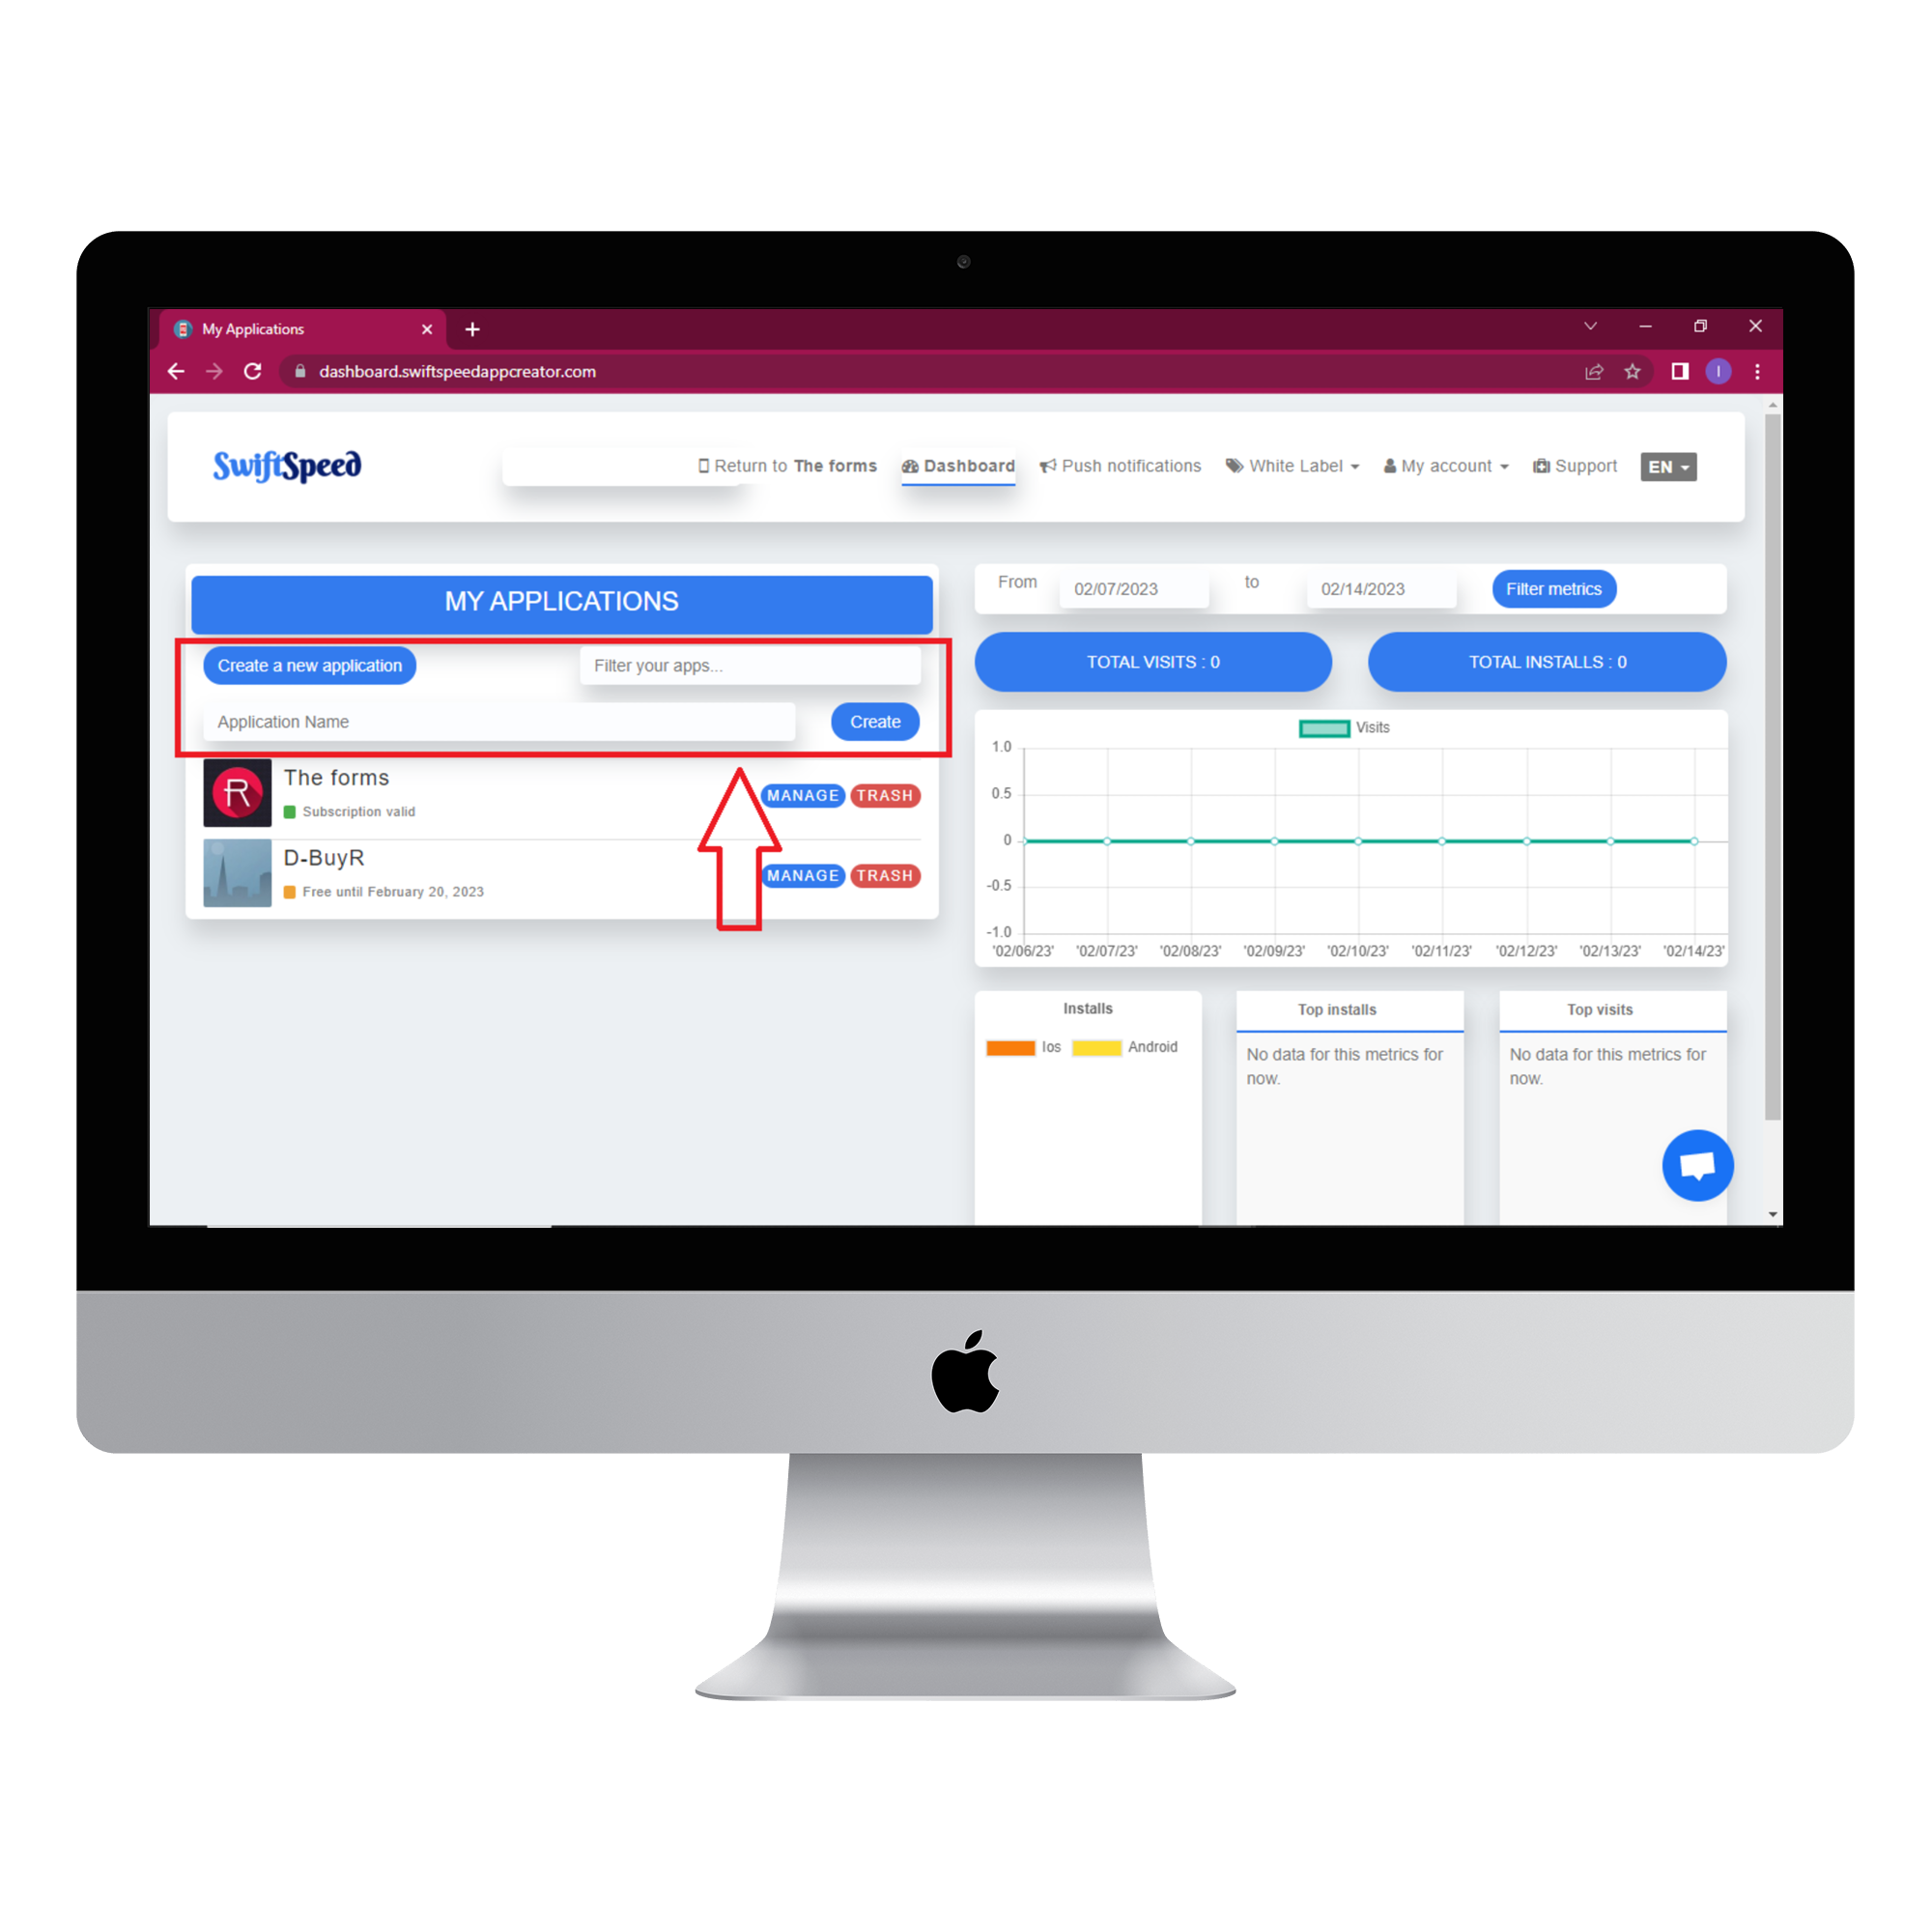
Go to the Swiftspeed homepage, log in, and you will be taken to the app creator dashboard. Click on “create a new application” or select a pre-existing app ( if you have one ). If you selected “Create a new application”, you will have to type in the name of your app and click “Create”. If you are not familiar with the app creation process, please read our article on creating an app on our platform.
Step 2:
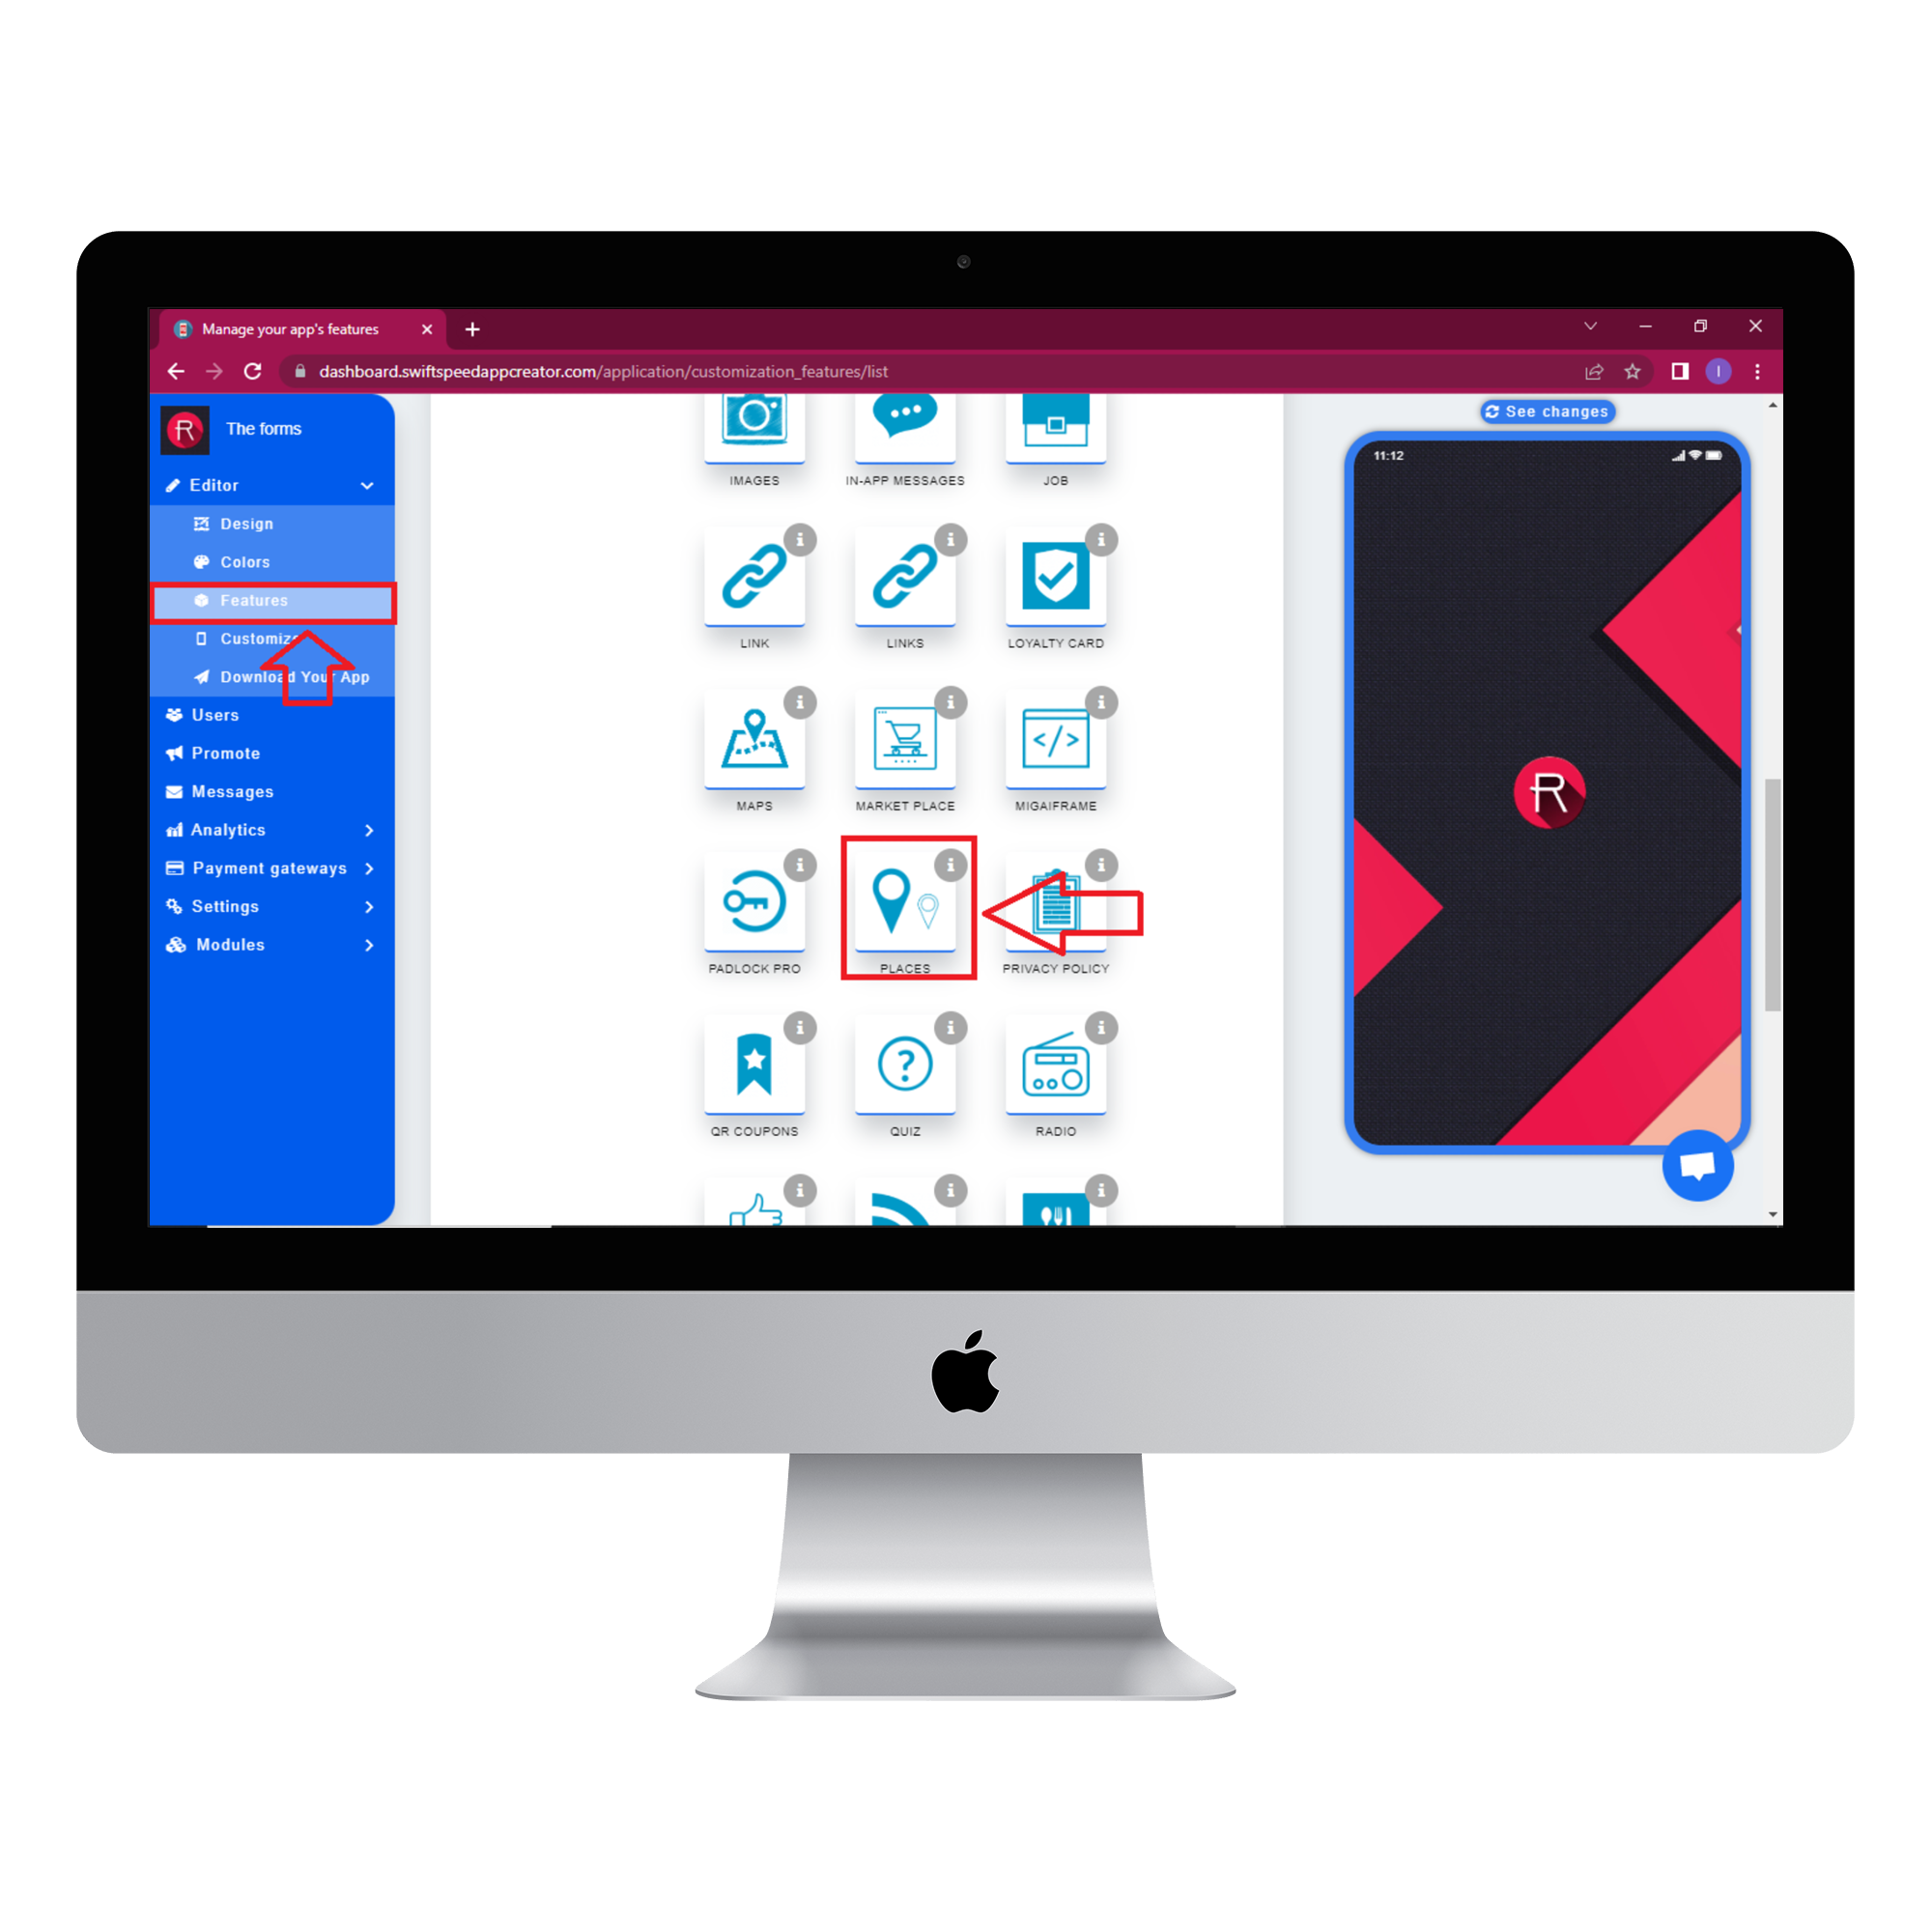
Select “Features” from the side menu on the left side of your screen. Choose the “Places” feature from the list of features and click on “Add feature” when the popup window appears. If you find it challenging to locate the “Places” feature, you can use the search box to find it. Just type in “Places” and press “Enter” on your keyboard, and our search engine will display the feature.
Step 3:
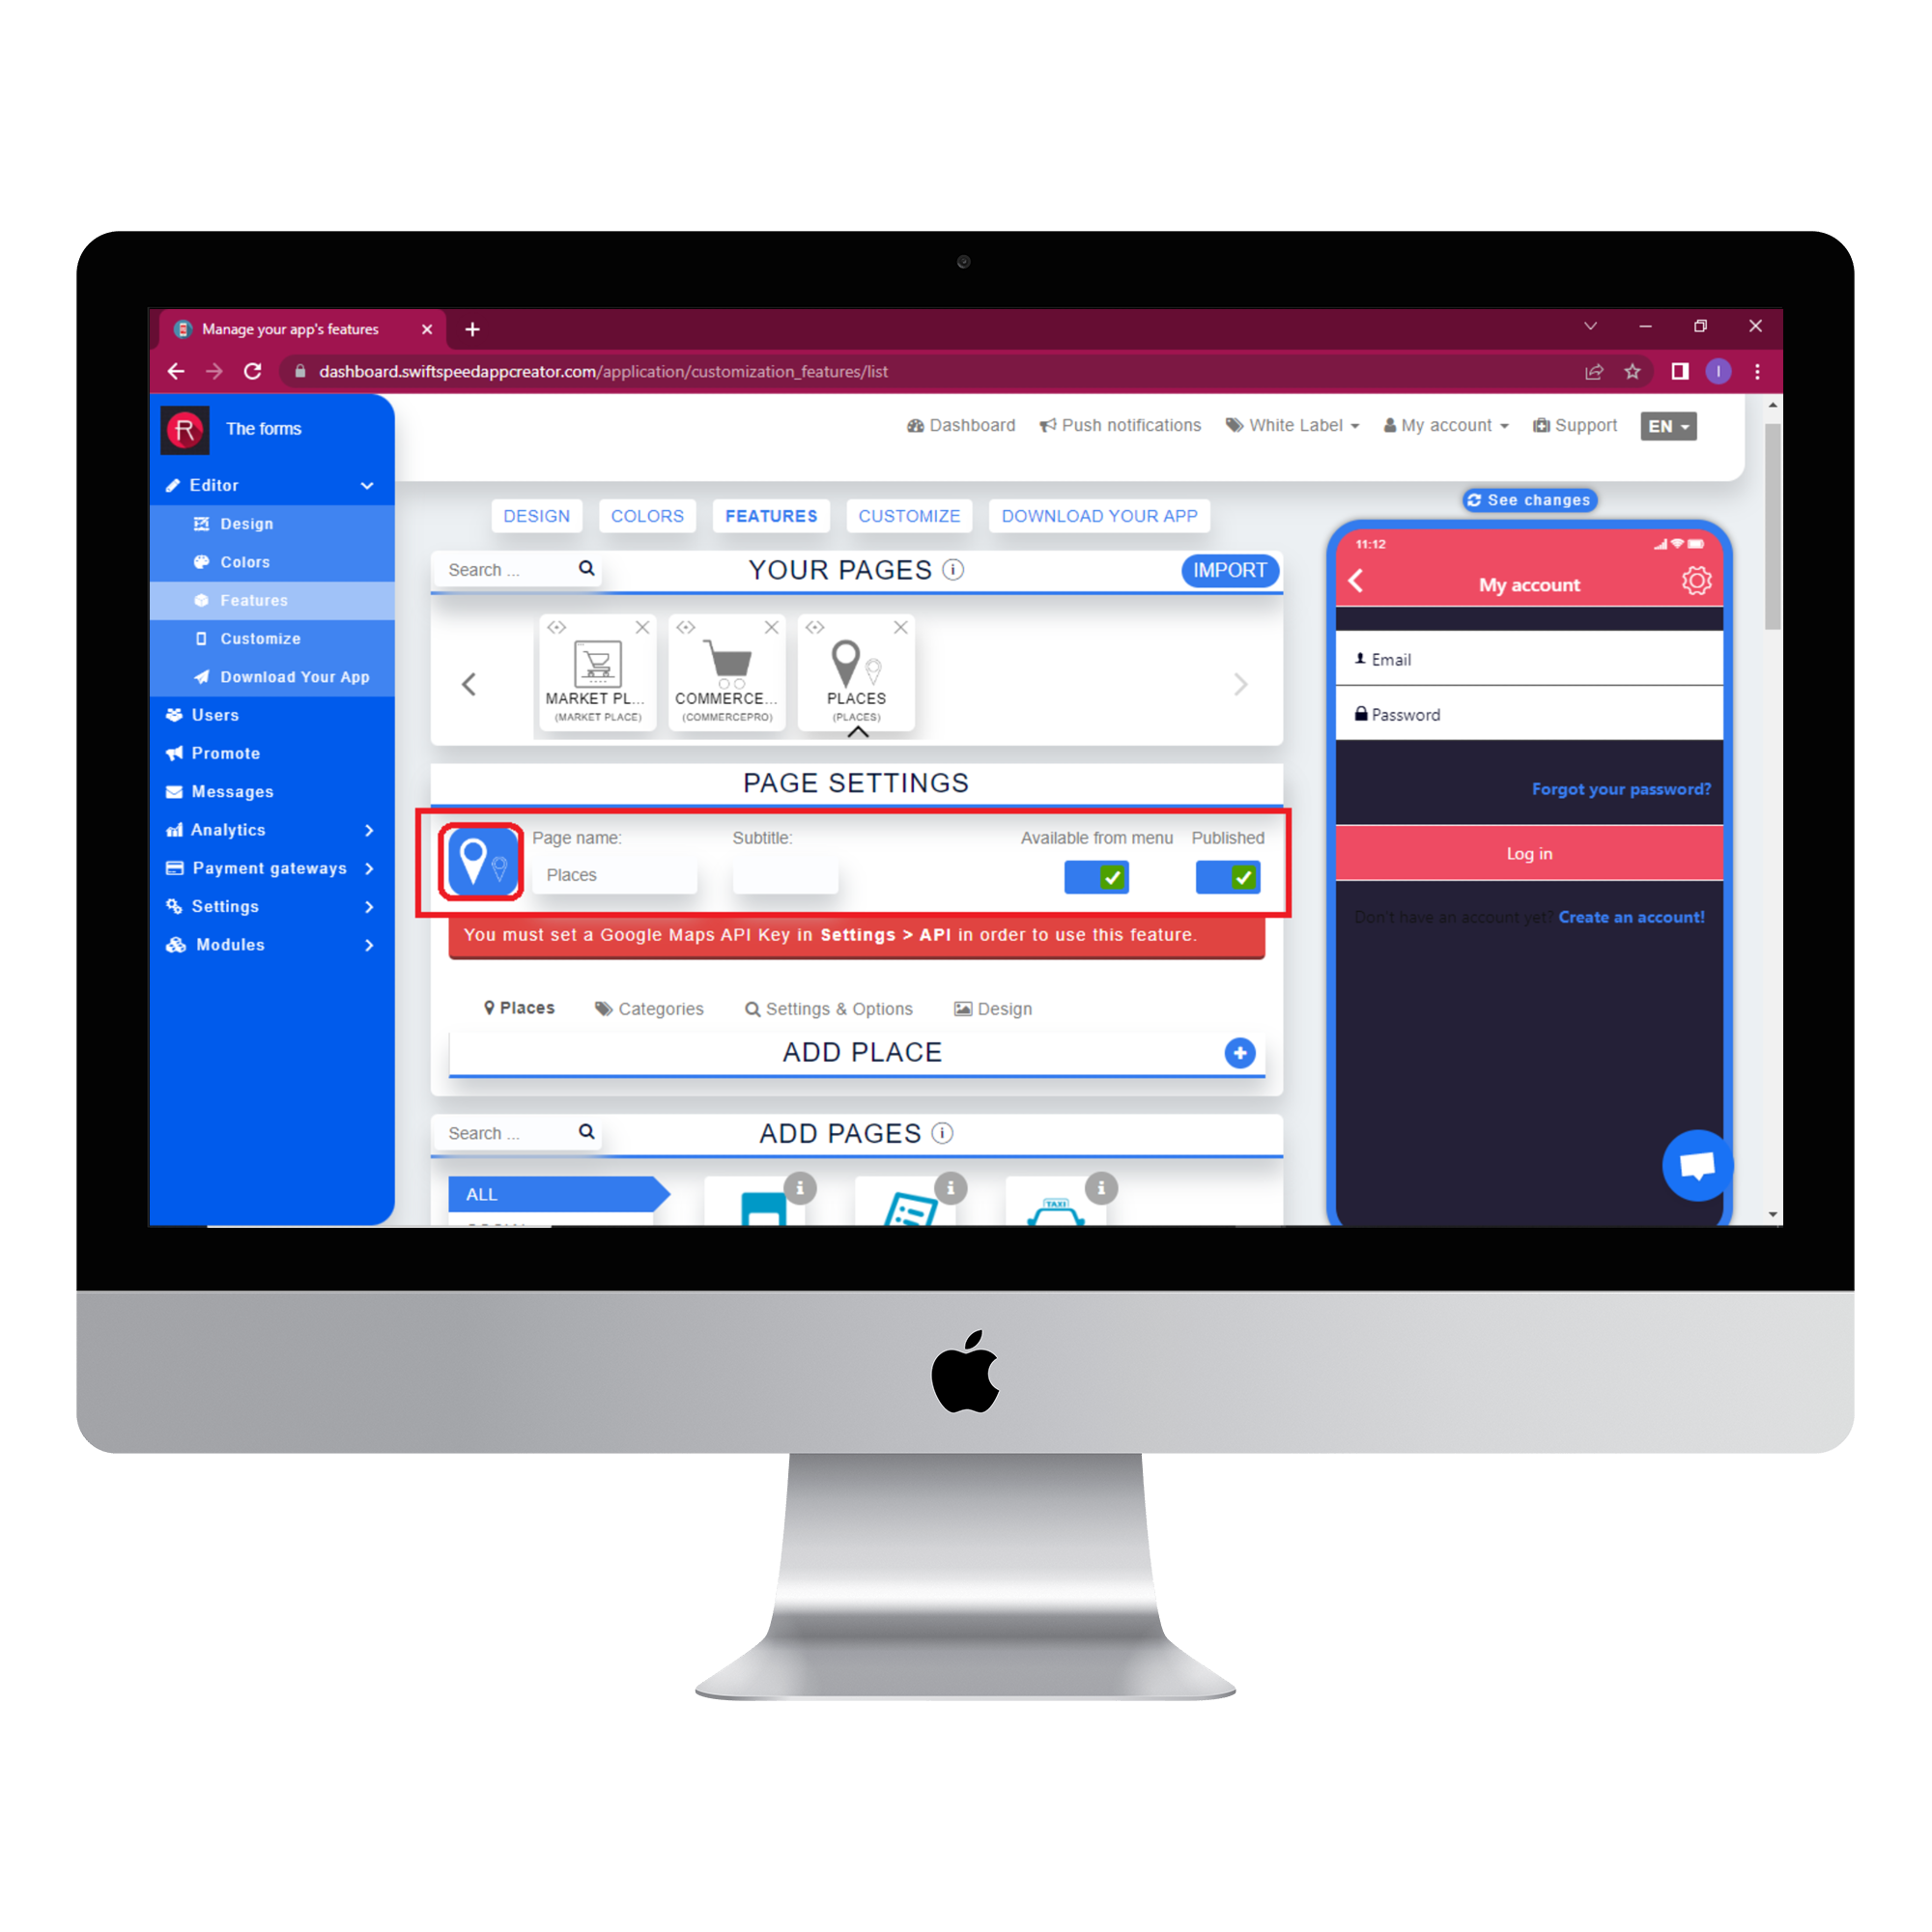
In the Page settings section, you can change the feature icon by clicking on the image button to the left of the “Page name” label. Choose your new feature icon, and it will be saved automatically.
Step 4:
Select the categories tab and click on the (+) button to add the category of a new place. Type in the name and description of the category in the appropriate text boxes. Add an image so the category can be easily identified, and click save.
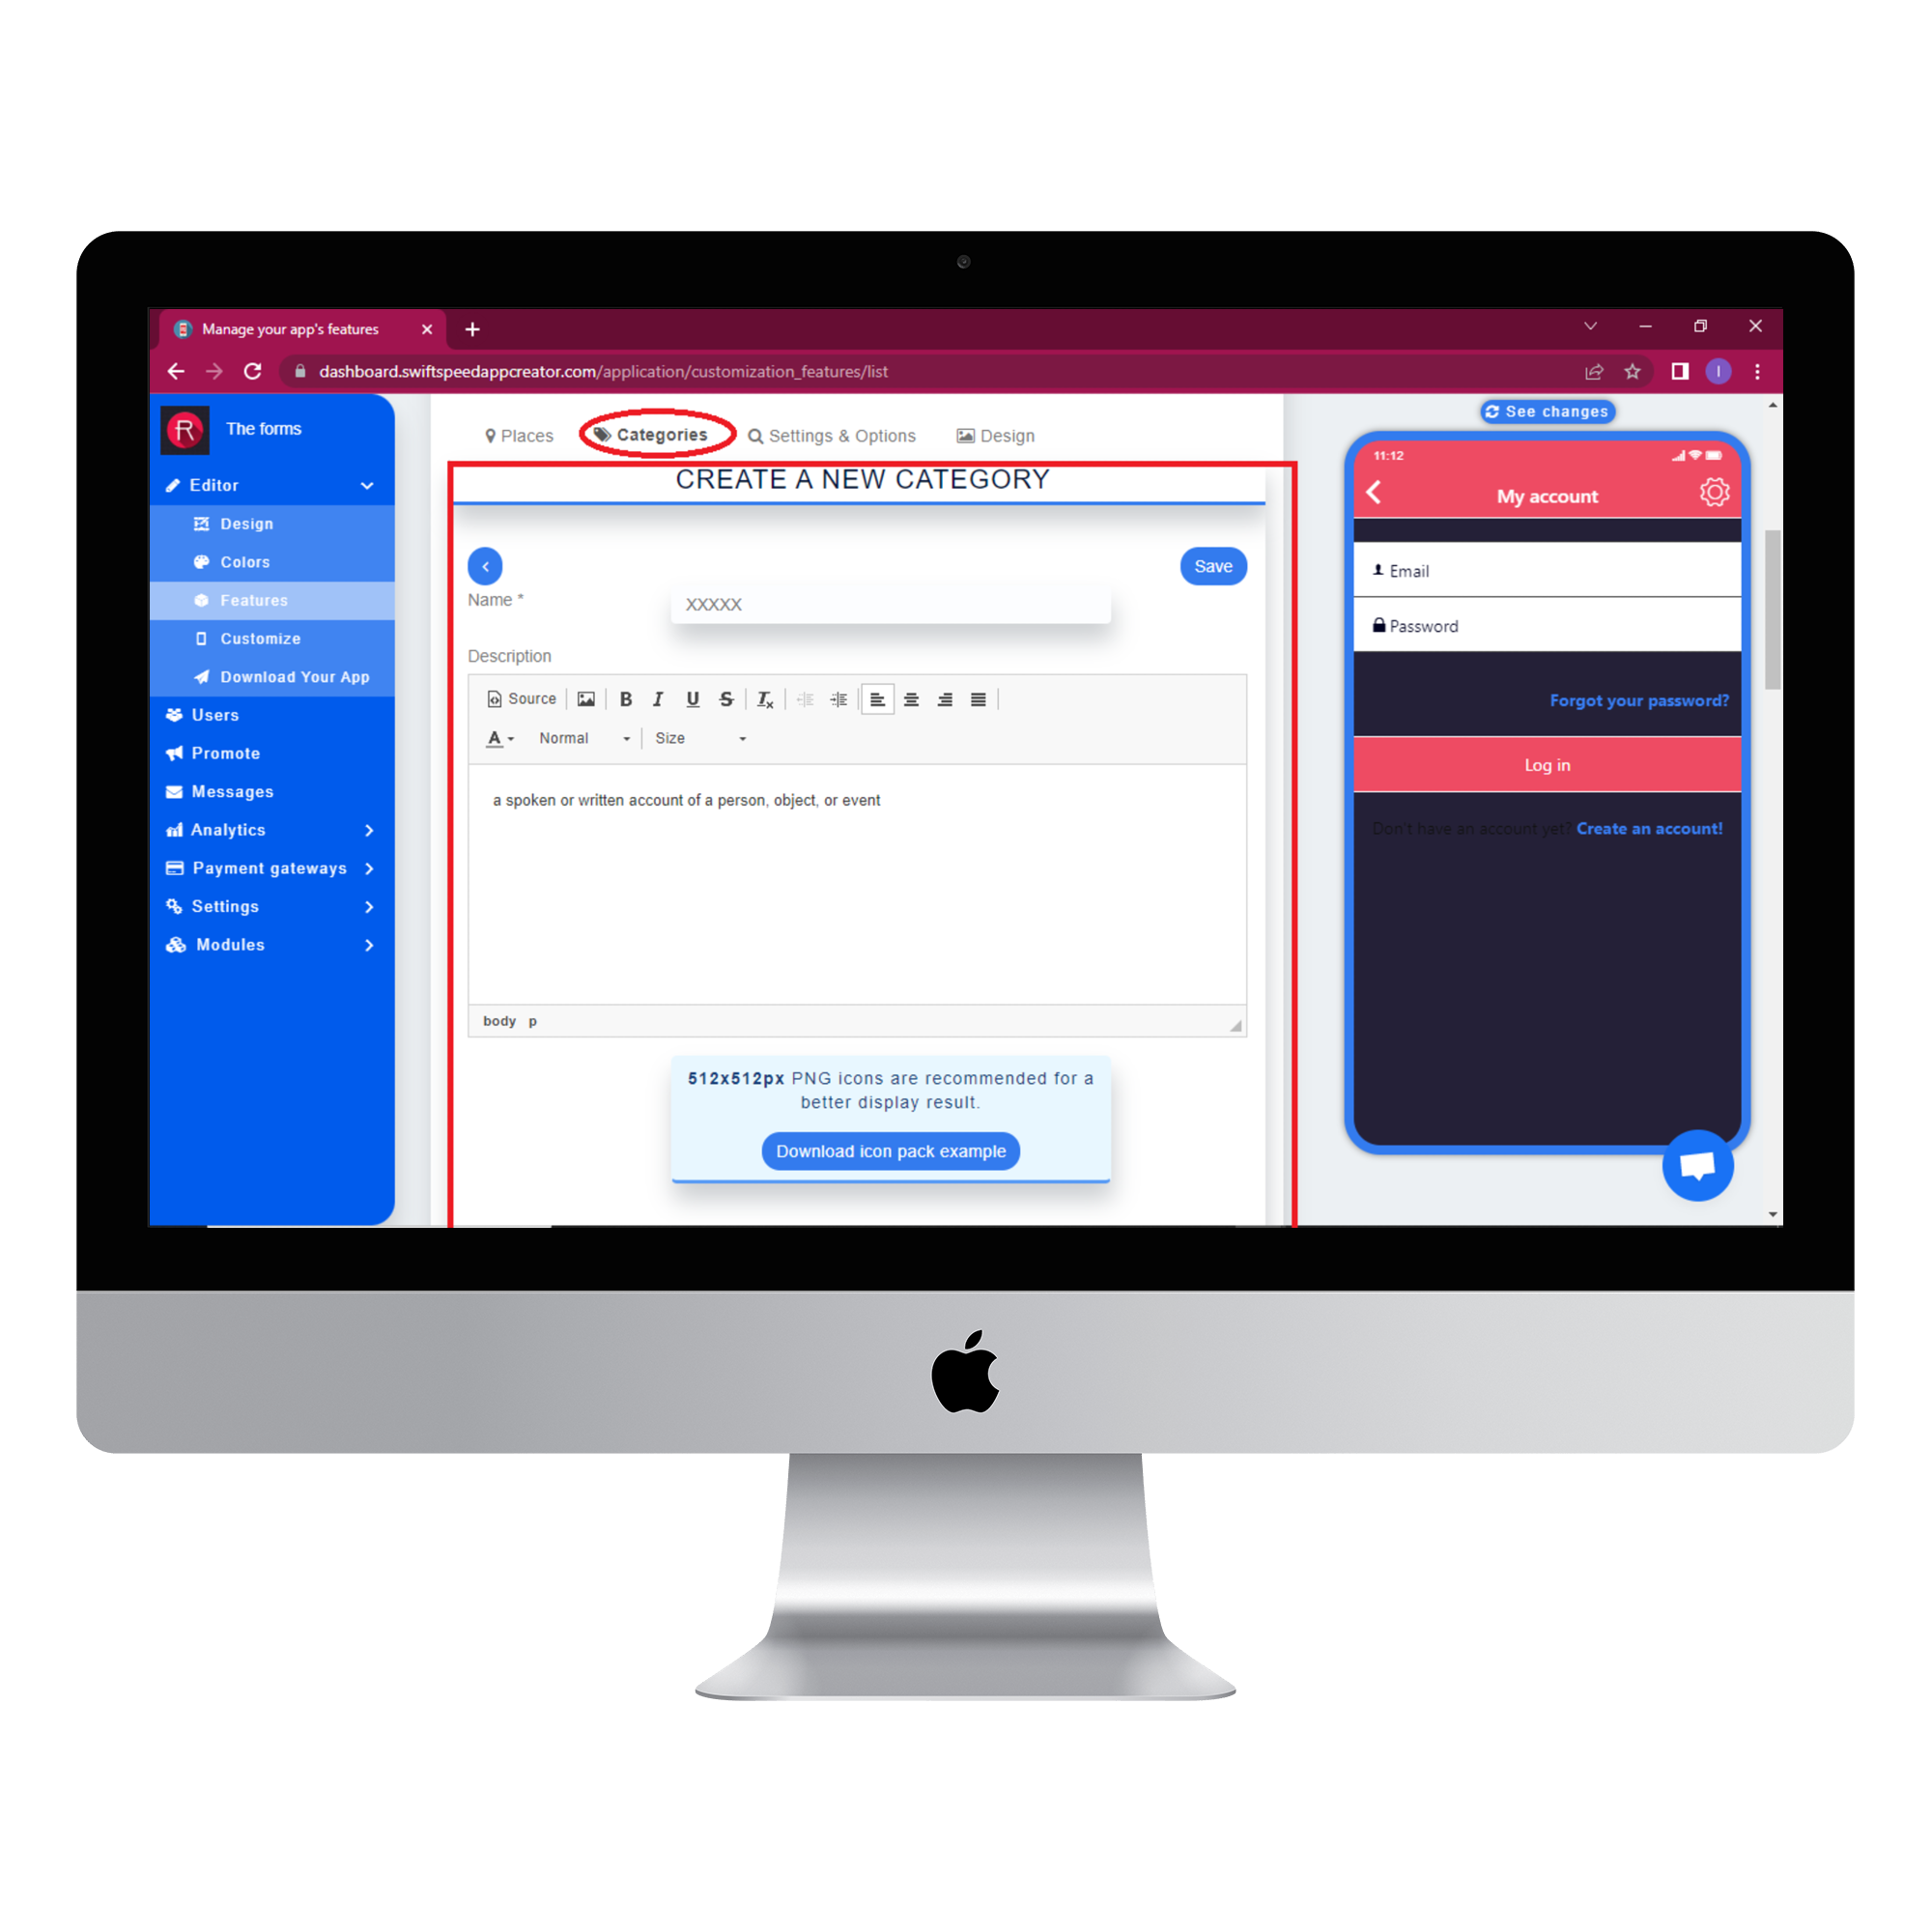
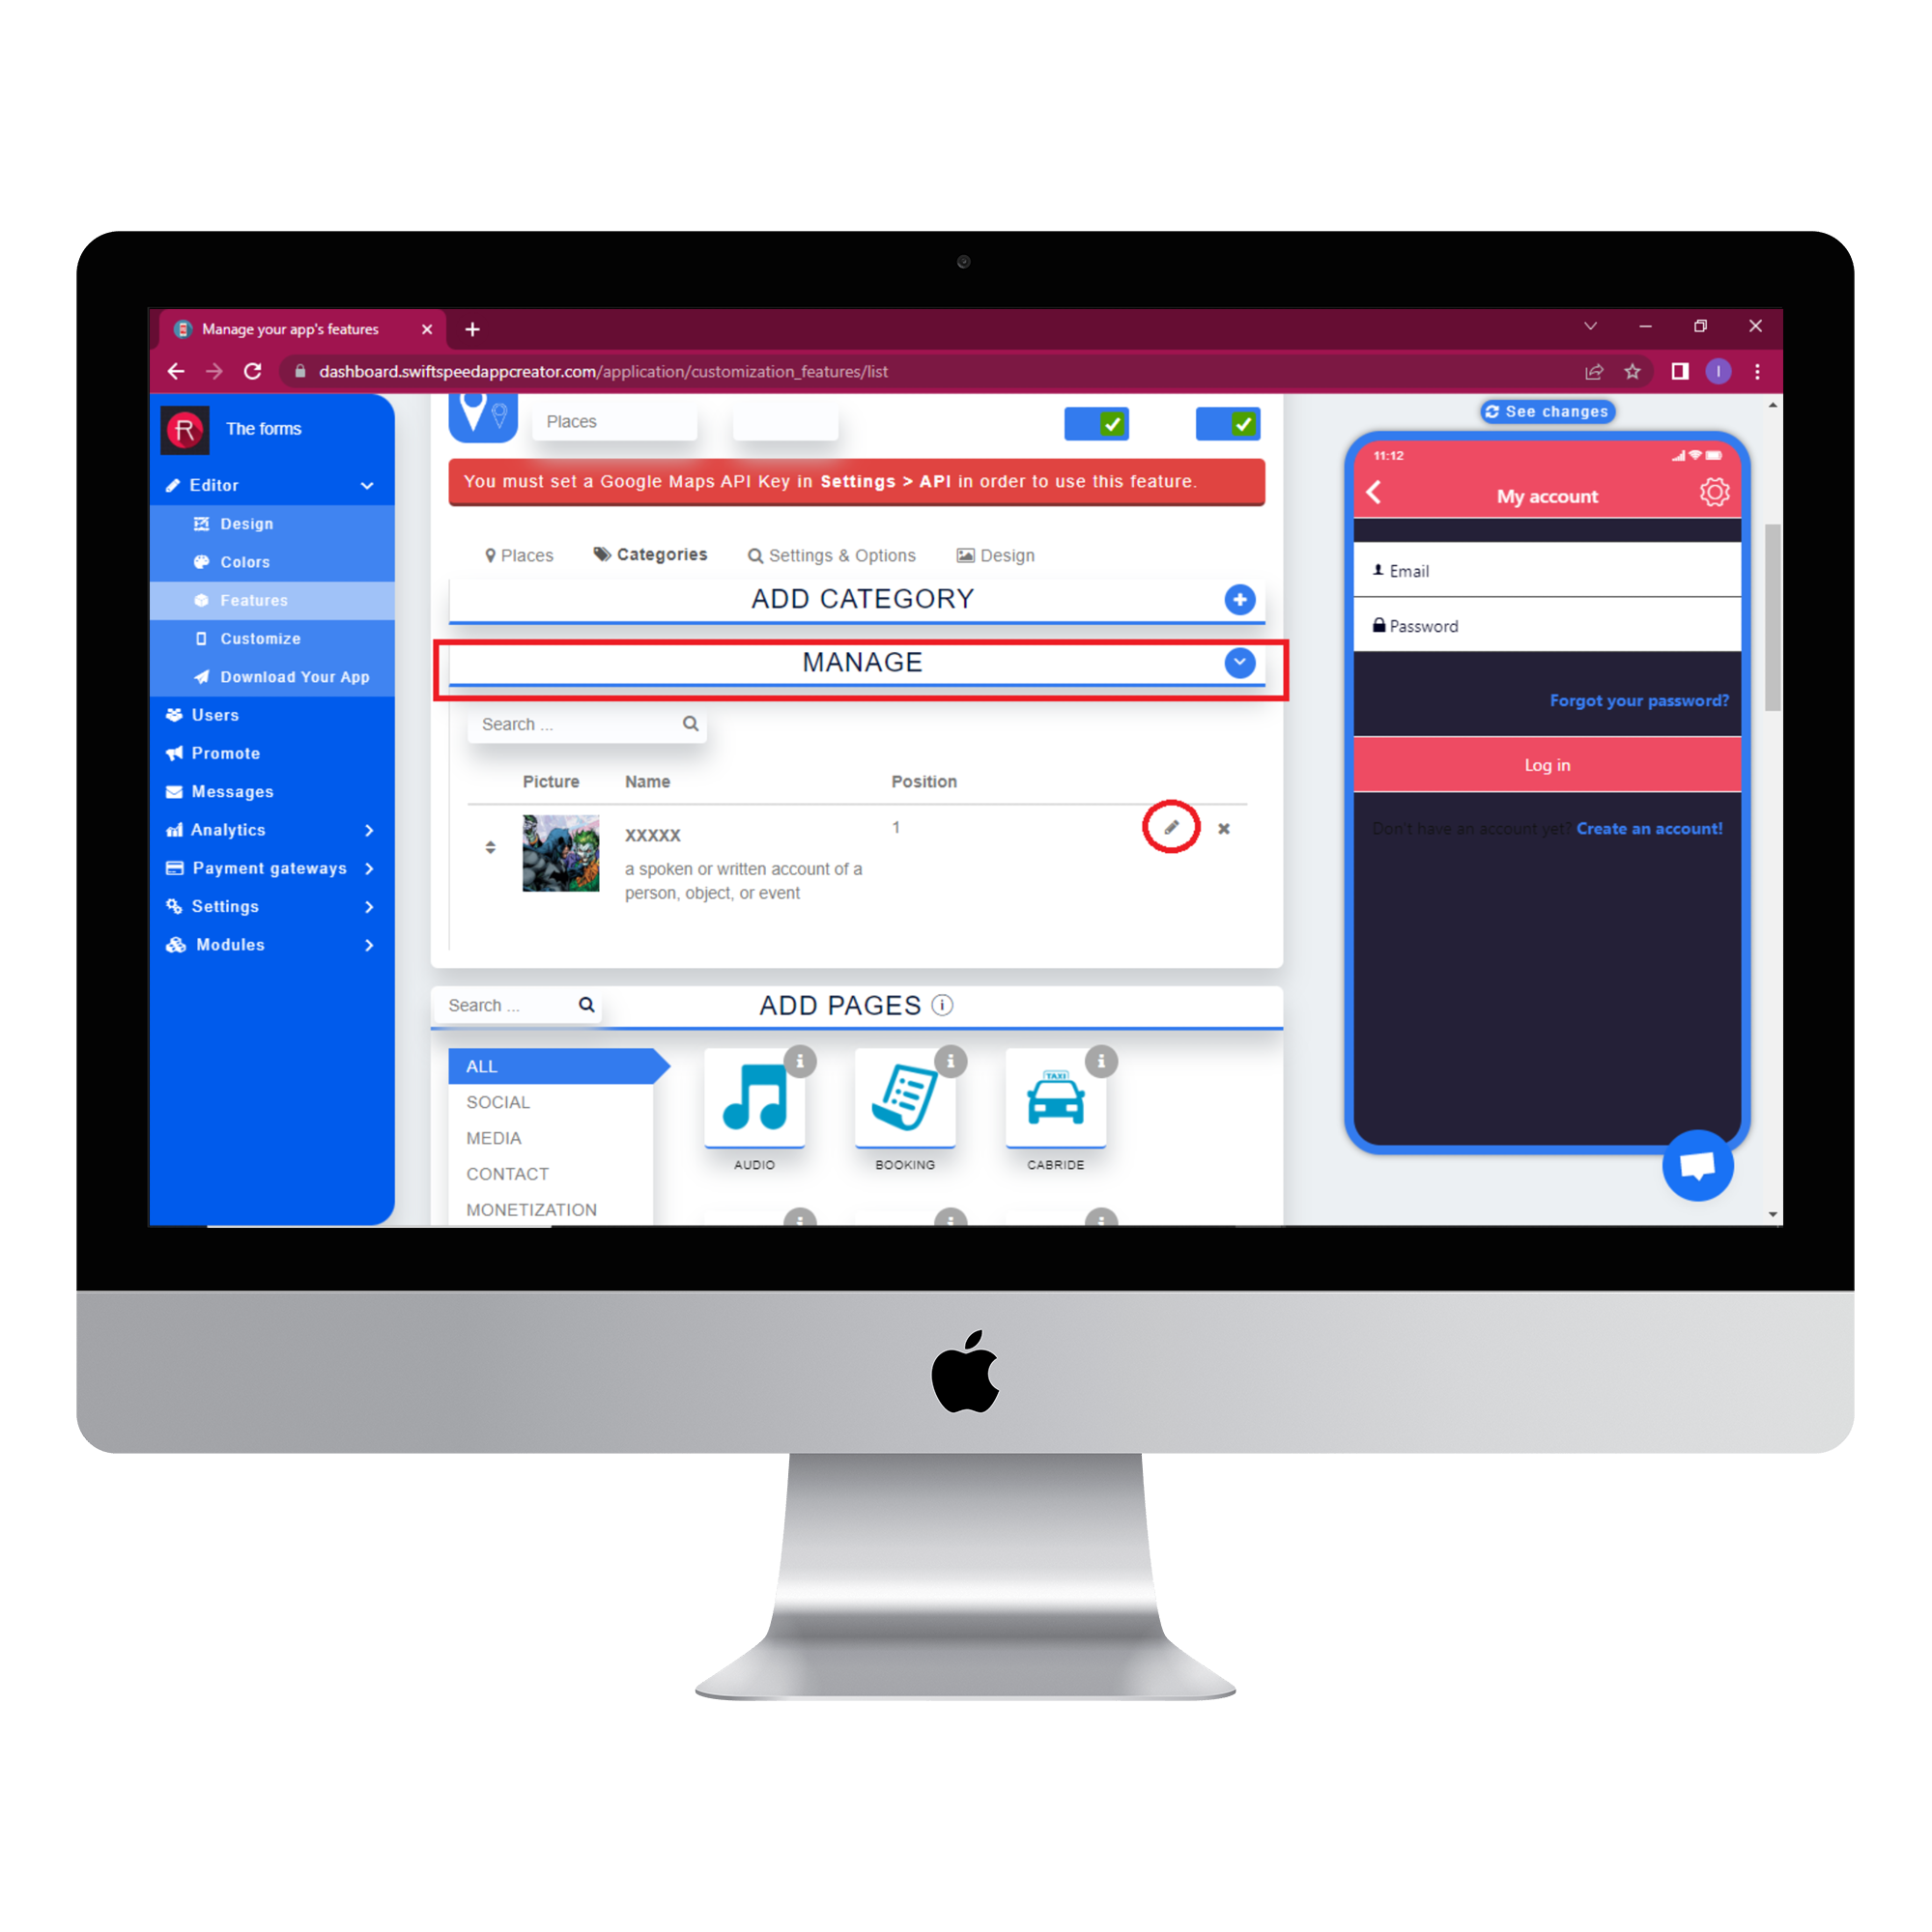
Every category you add can be edited from the “Manage” section of the categories tab. Just click on the highlighted icon in the image below, and the edit panel for that category will become visible. Click save after you are done making changes.
Step 5:
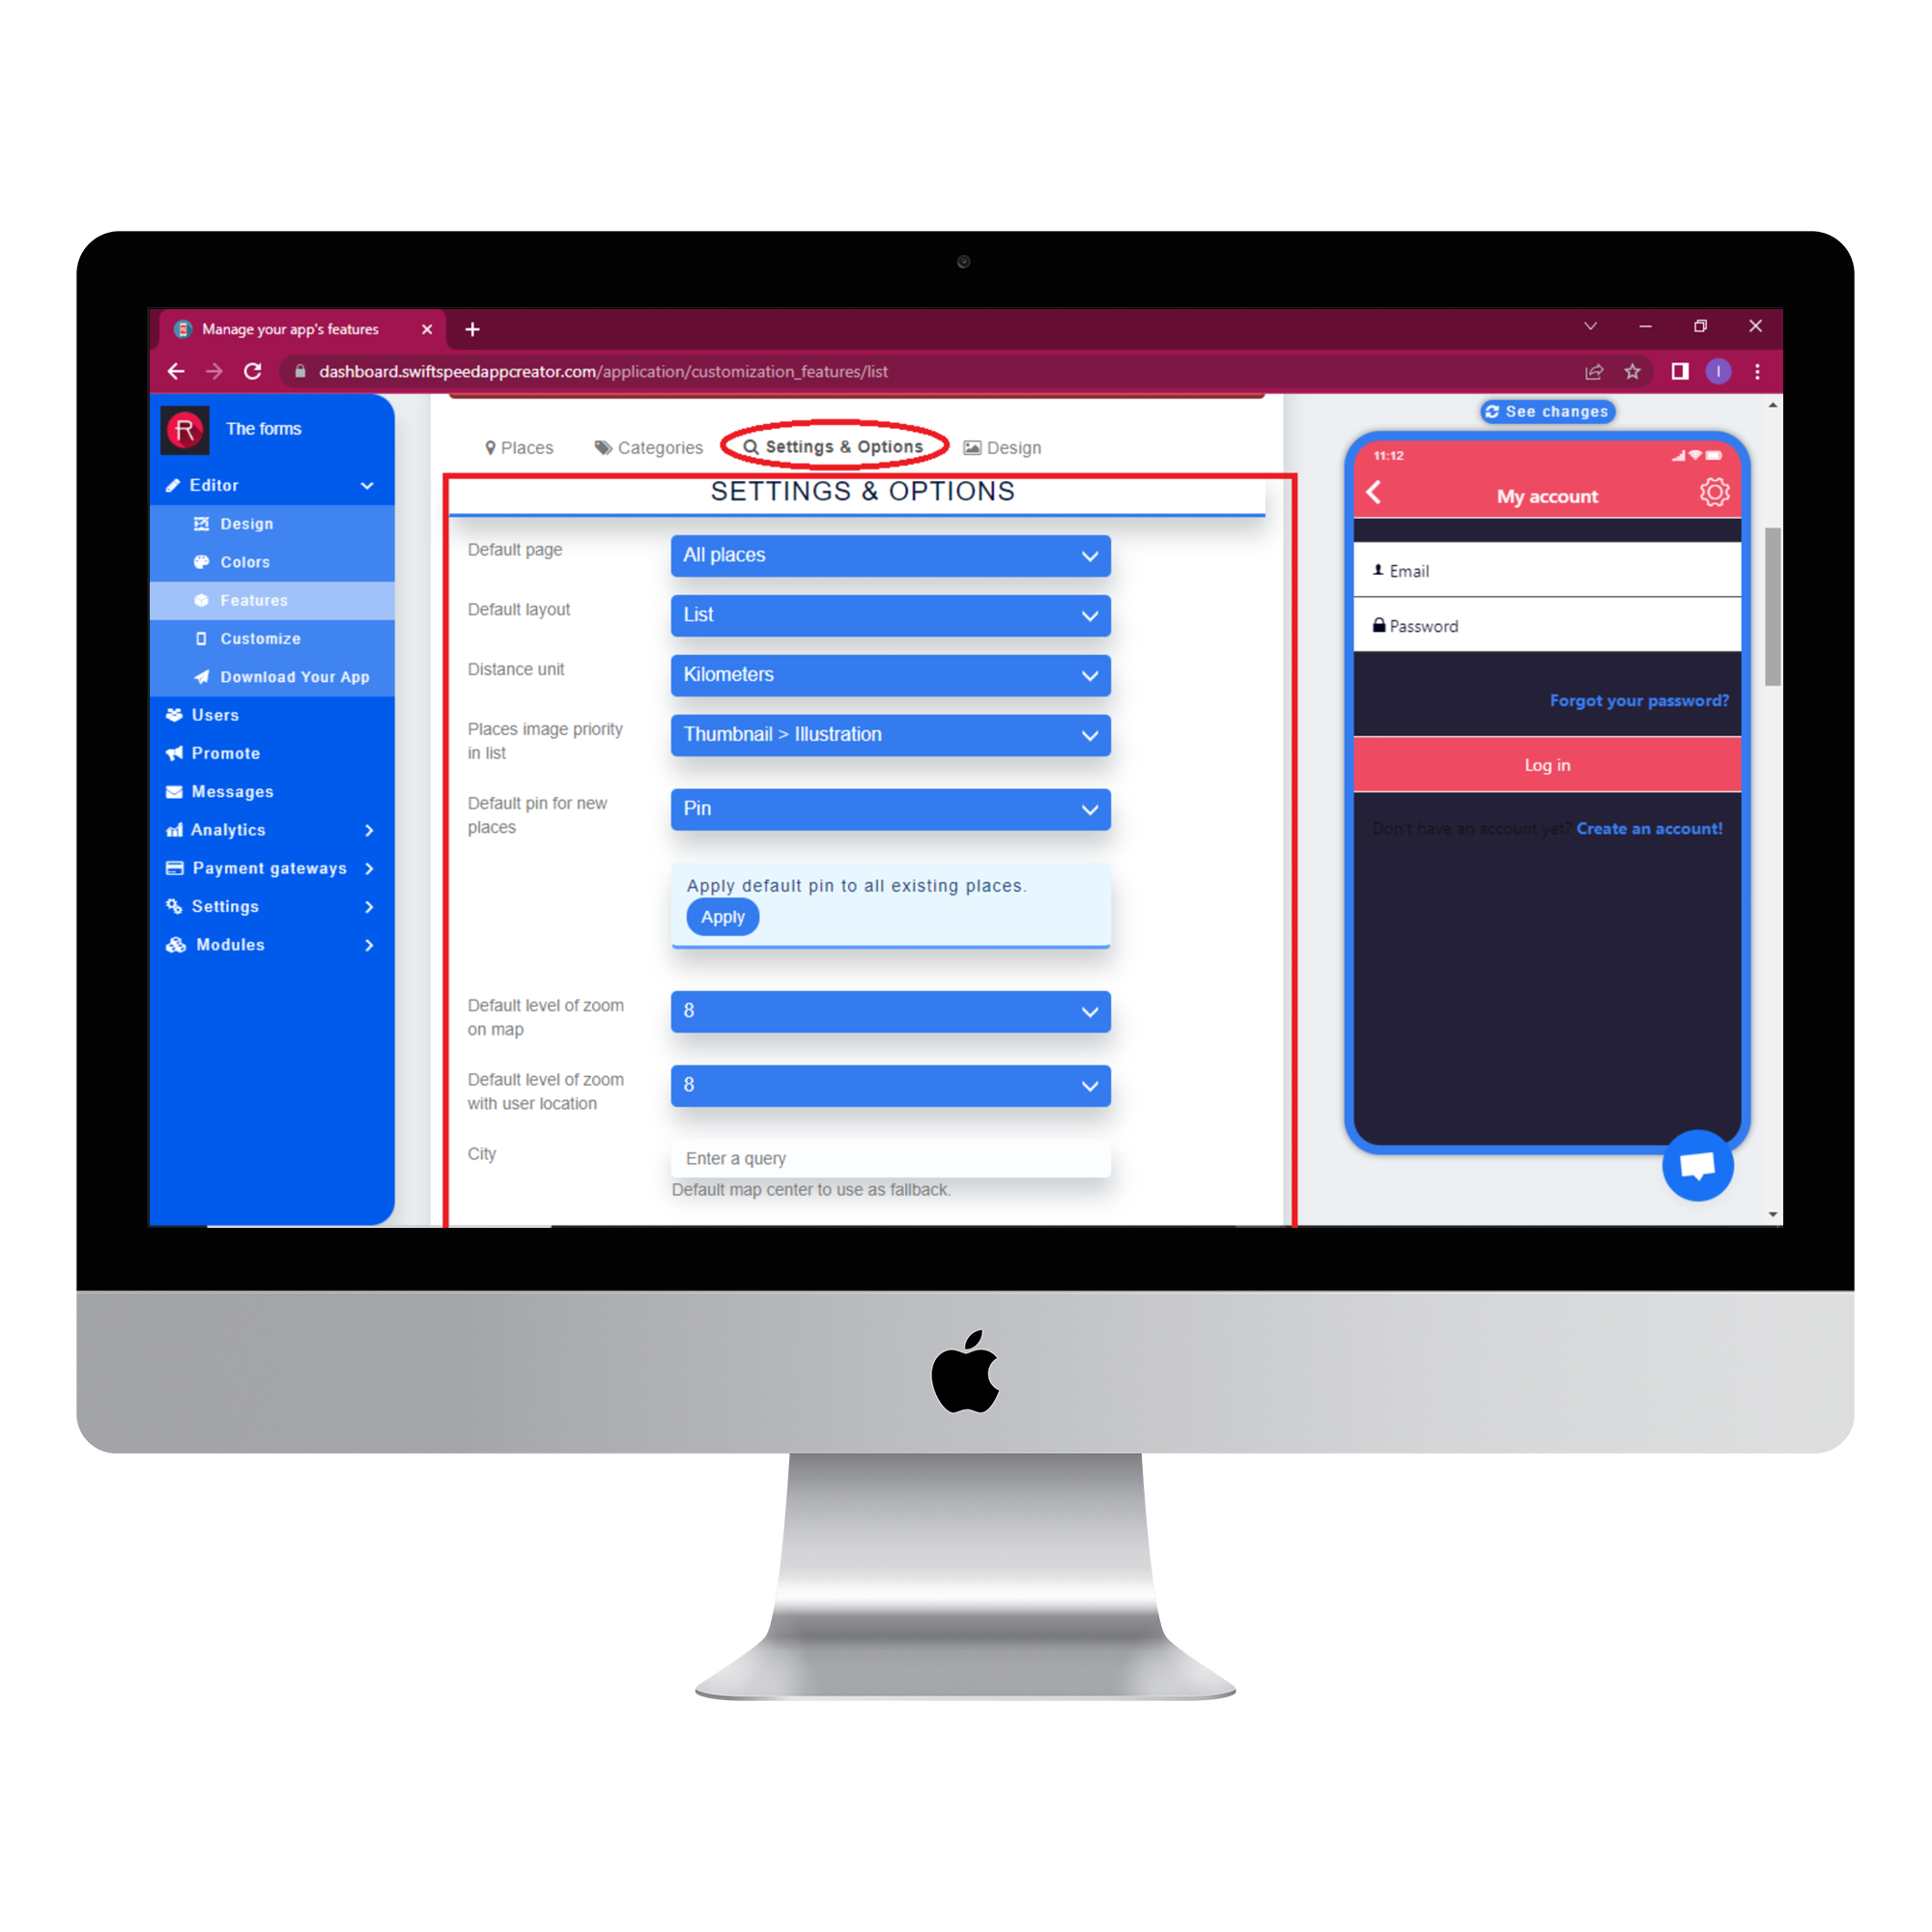
Select the settings and options tab. Set the default page to “all pages” by selecting “all pages” from the default page drop list. Choose a default layout from the default layout drop list. The default pin for new places is already set to “pin”, but you can change it by clicking on its drop list. Choose a default level of zoom on the map and the default level of zoom with the user location. The zoom level determines how much of the world is visible on the map. Our places feature provide maps in 20 zoom levels, with 0 being the lowest zoom level ( fully zoomed out ) and 20 being the highest zoom level ( fully zoomed in ). At lower zoom levels, a small set of map tiles covers a large geographical area. Type in a city name in the “city” textbox. Click save and proceed to the next step.
Step 6:
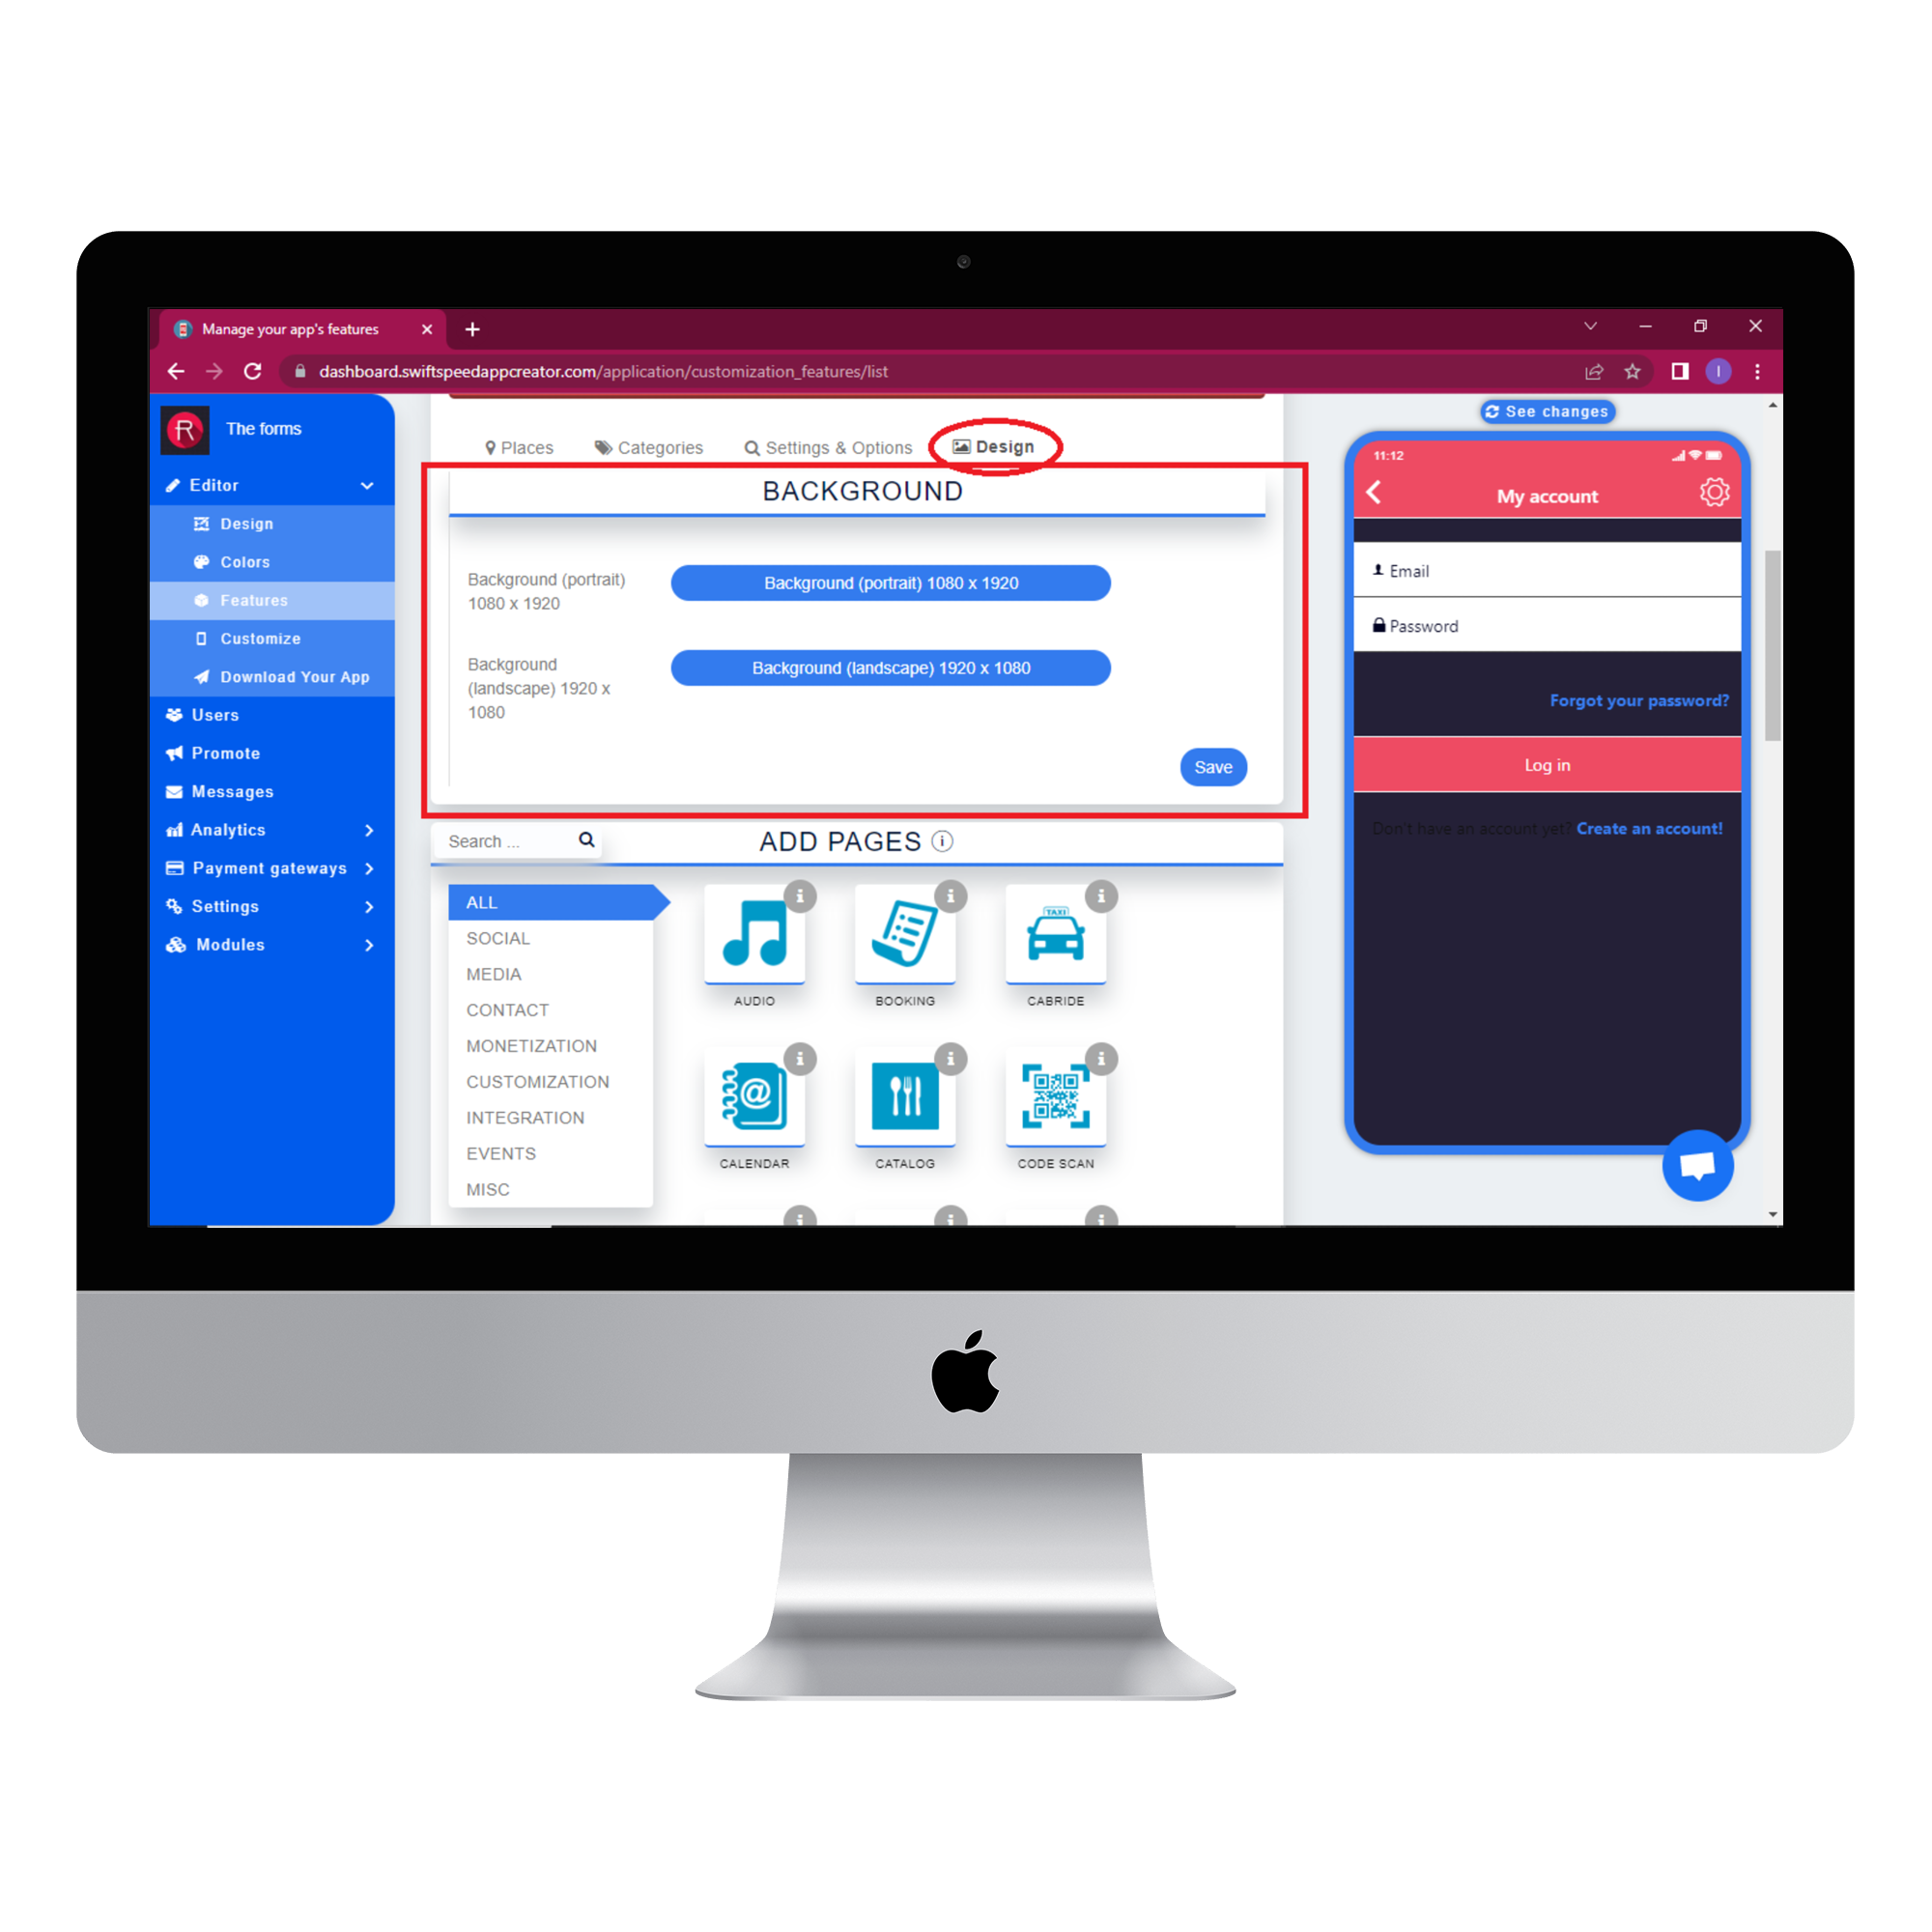
Select the design tab to change the background image of the app. You can choose any image from your personal files to use as the background image. Click on the button labelled “Background ( portrait )” to set a background image for portrait mode. Click on the button labelled “Background ( landscape )” to set a background for landscape mode. You can skip this step if you prefer the default background. Click save when you are done selecting the images.
Step 7:
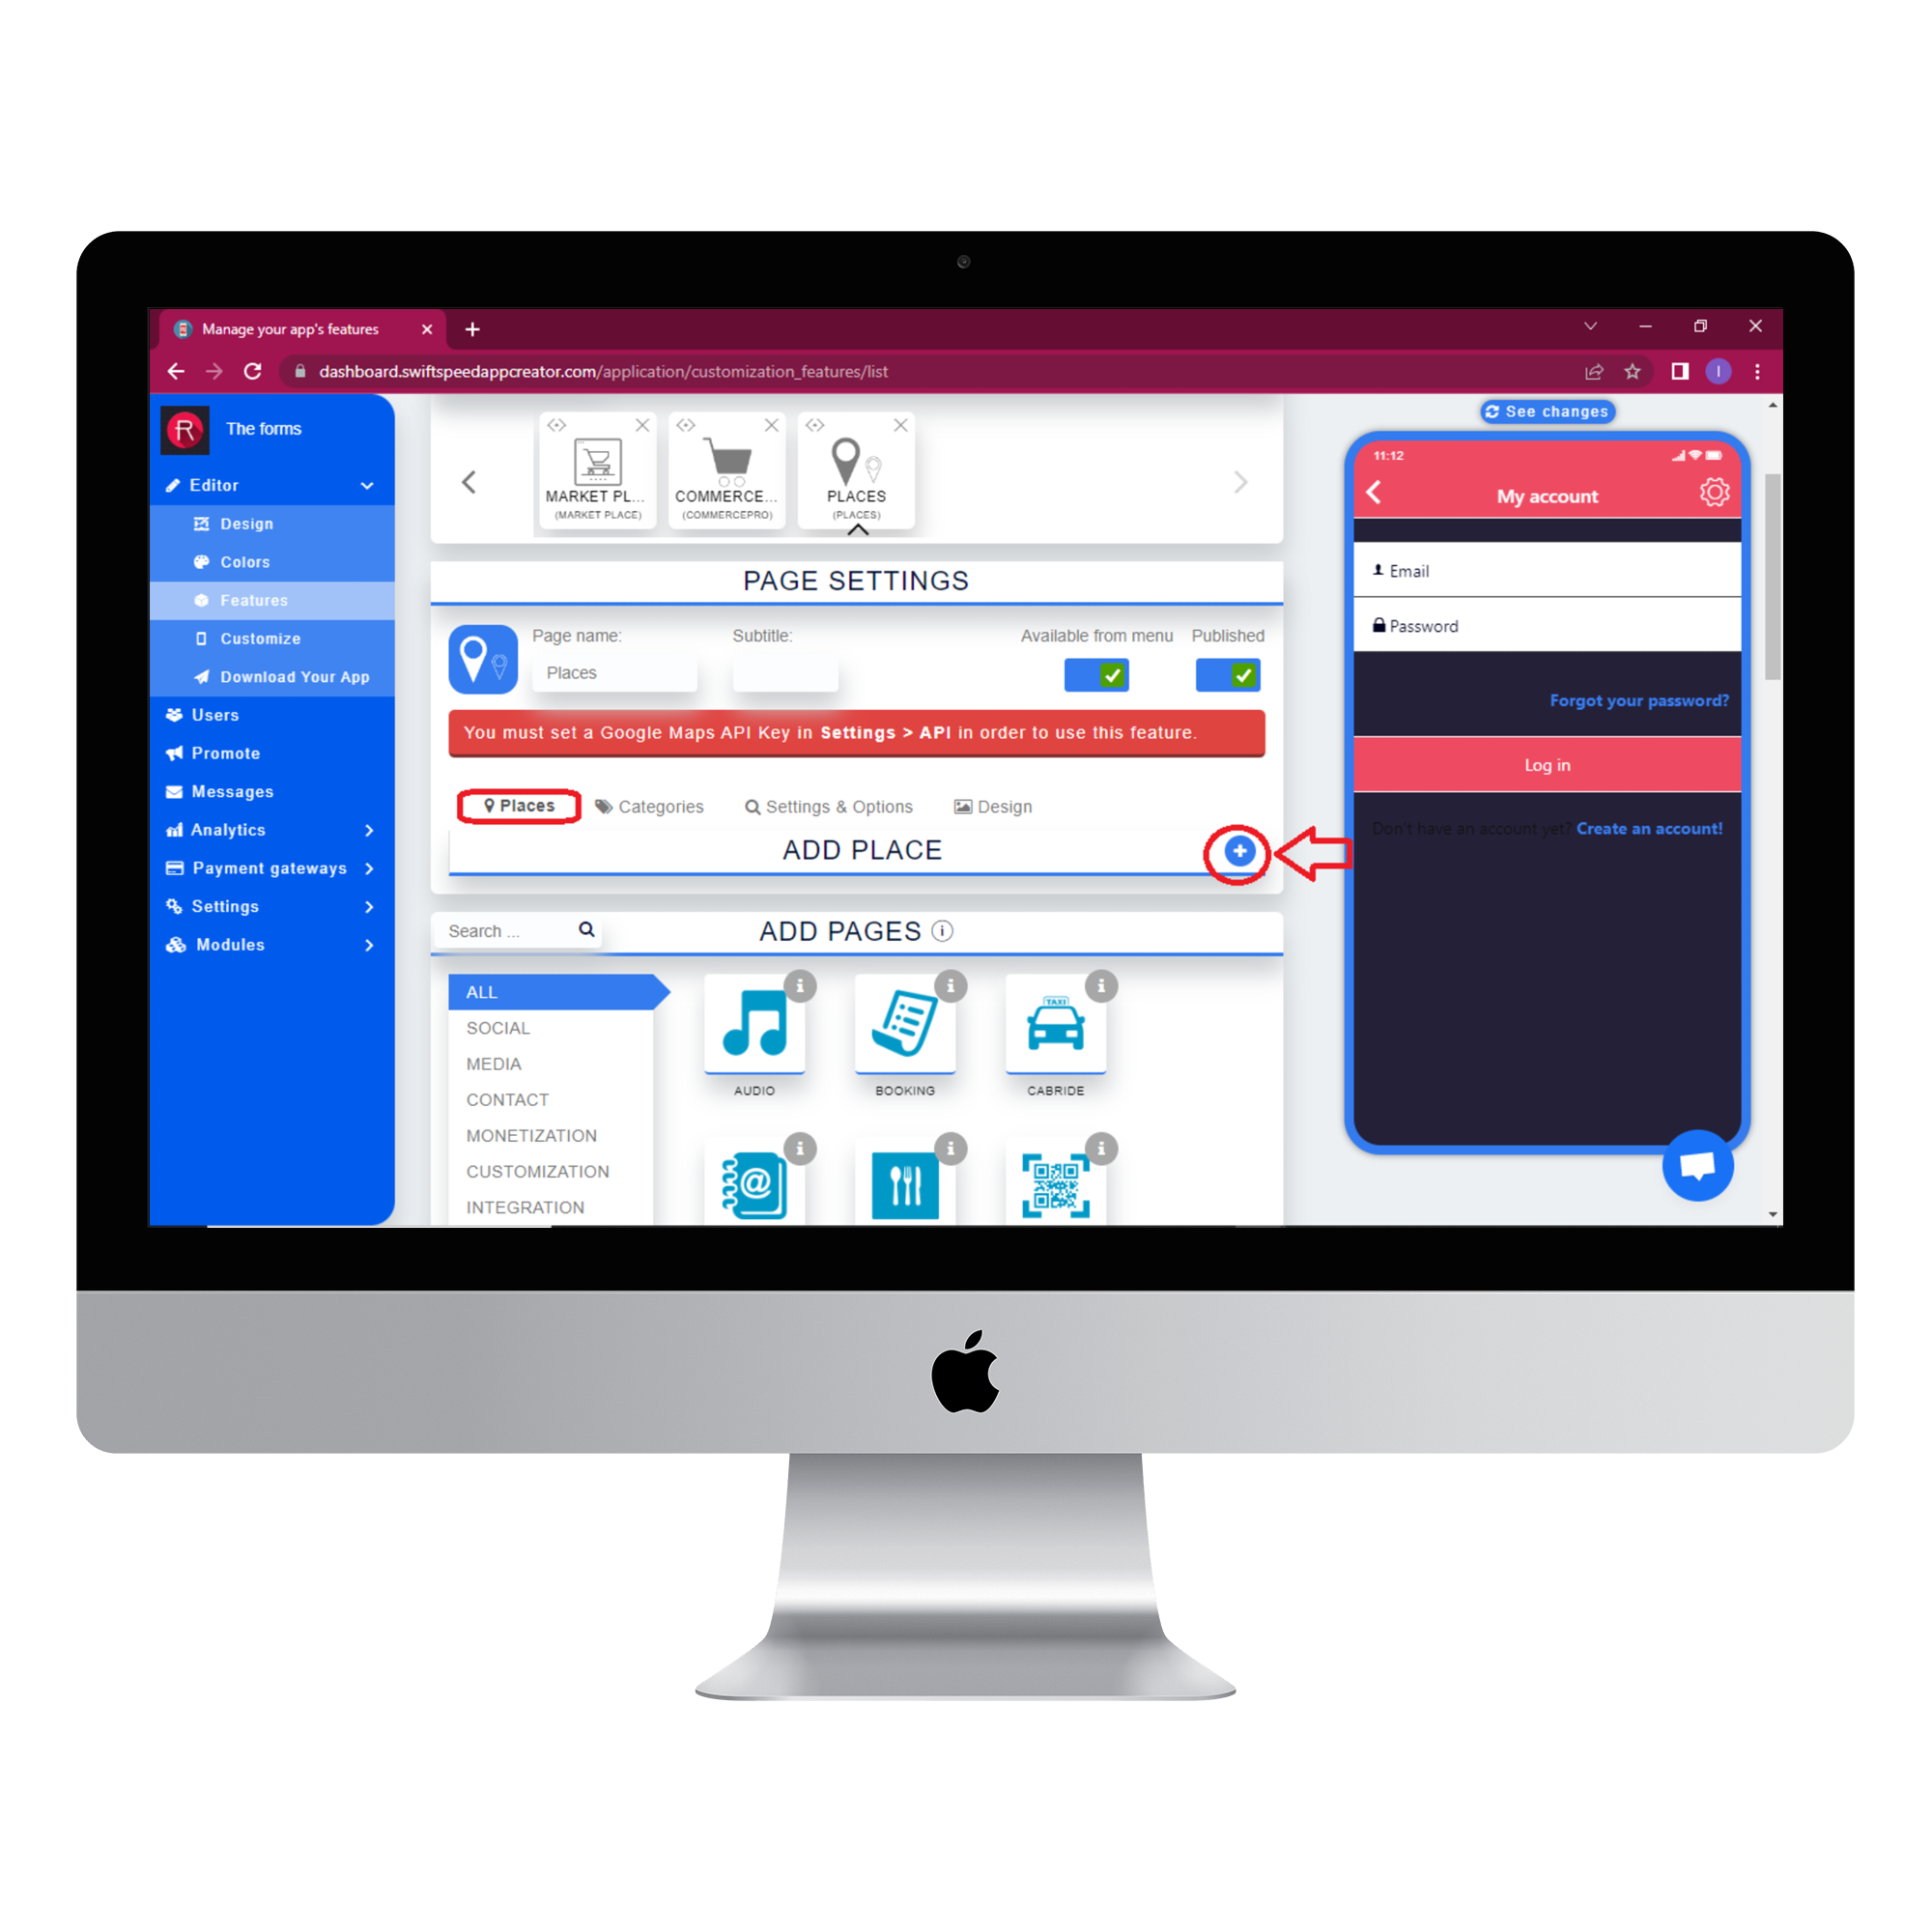
Select the Places tab and click on the (+) button in the “ADD PLACE” section to add a new location
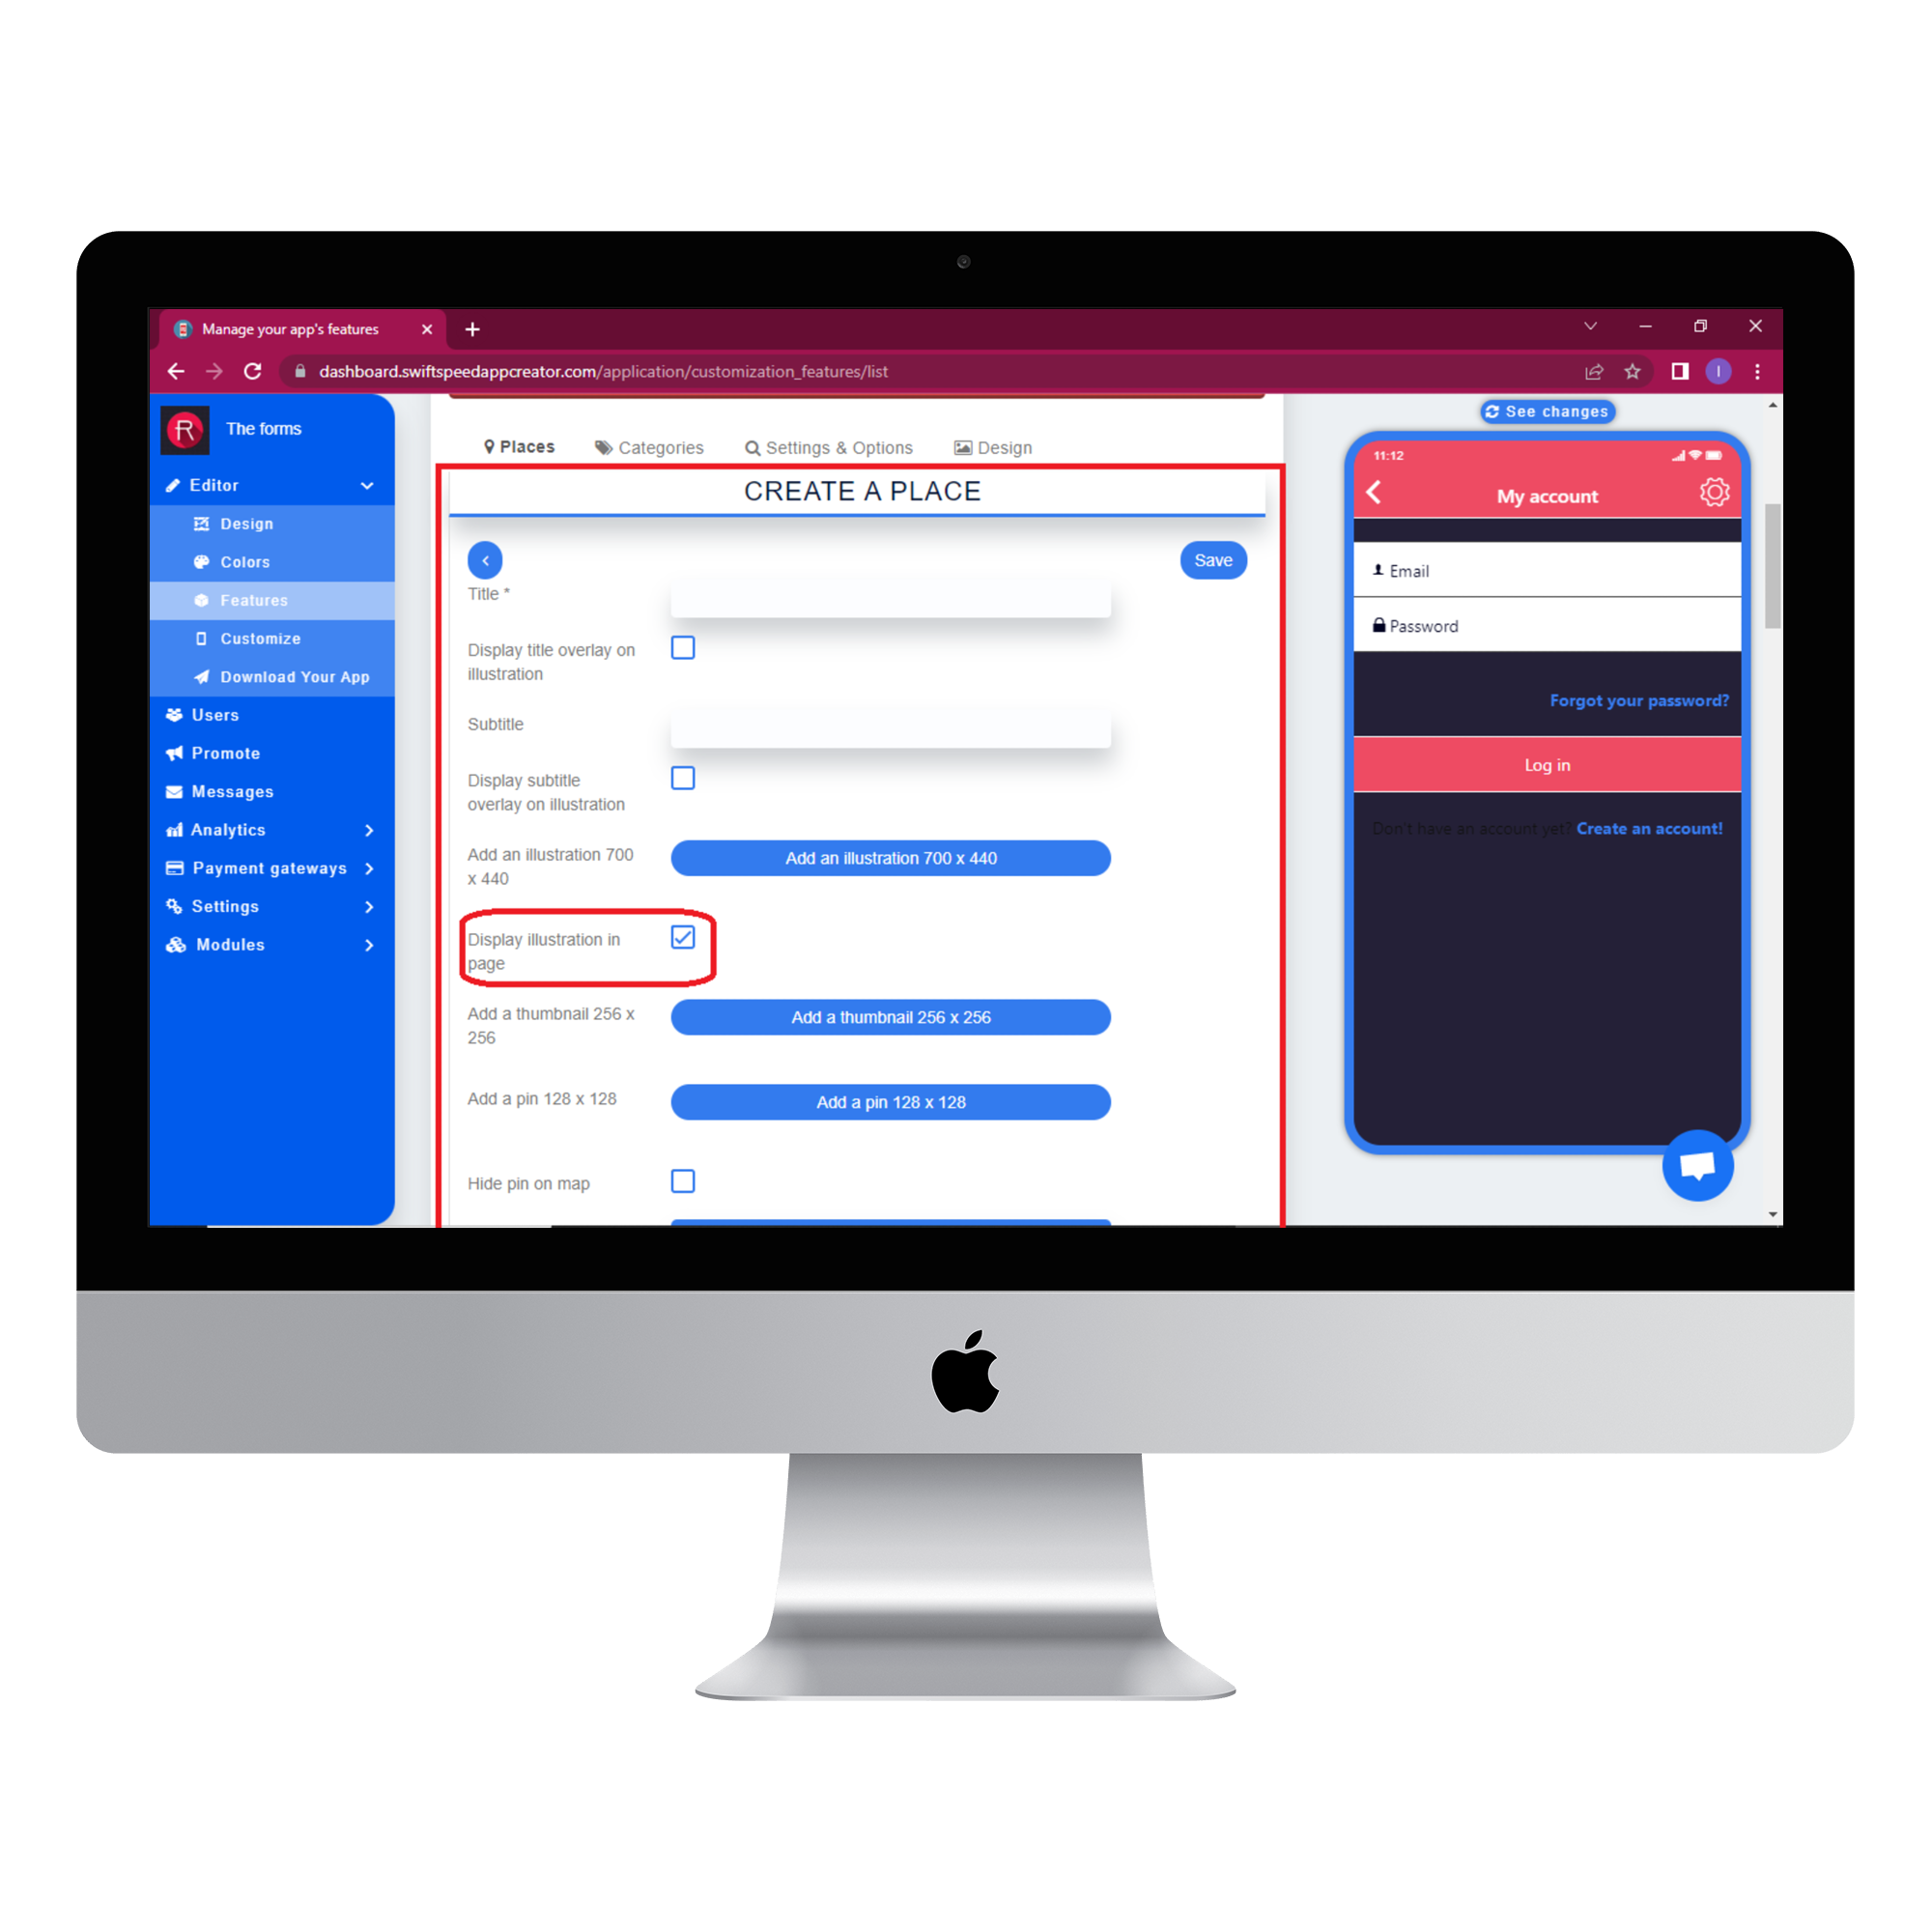
Type in the title and tick the “Display title overlay on illustration” checkbox. Type in a short descriptive subtitle and enable subtitle display by ticking the required checkbox. Add an illustration so the title would be easily recognized. Tick the checkbox labelled “Display illustration in page”. Add a thumbnail image and add a pin image. If you do not want the pin to be visible on the map, then tick the “hide pin on map” checkbox. Choose a map icon from the map icon drop list. Add tags to the tags textbox to improve full-text search. Press “Enter” after typing a tag to add a new one. Choose a category from your list of already created categories. Scroll down to the address section and fill out all the required information, then scroll back up and click save. You can add as many places as necessary by repeating this step.
Step 8:
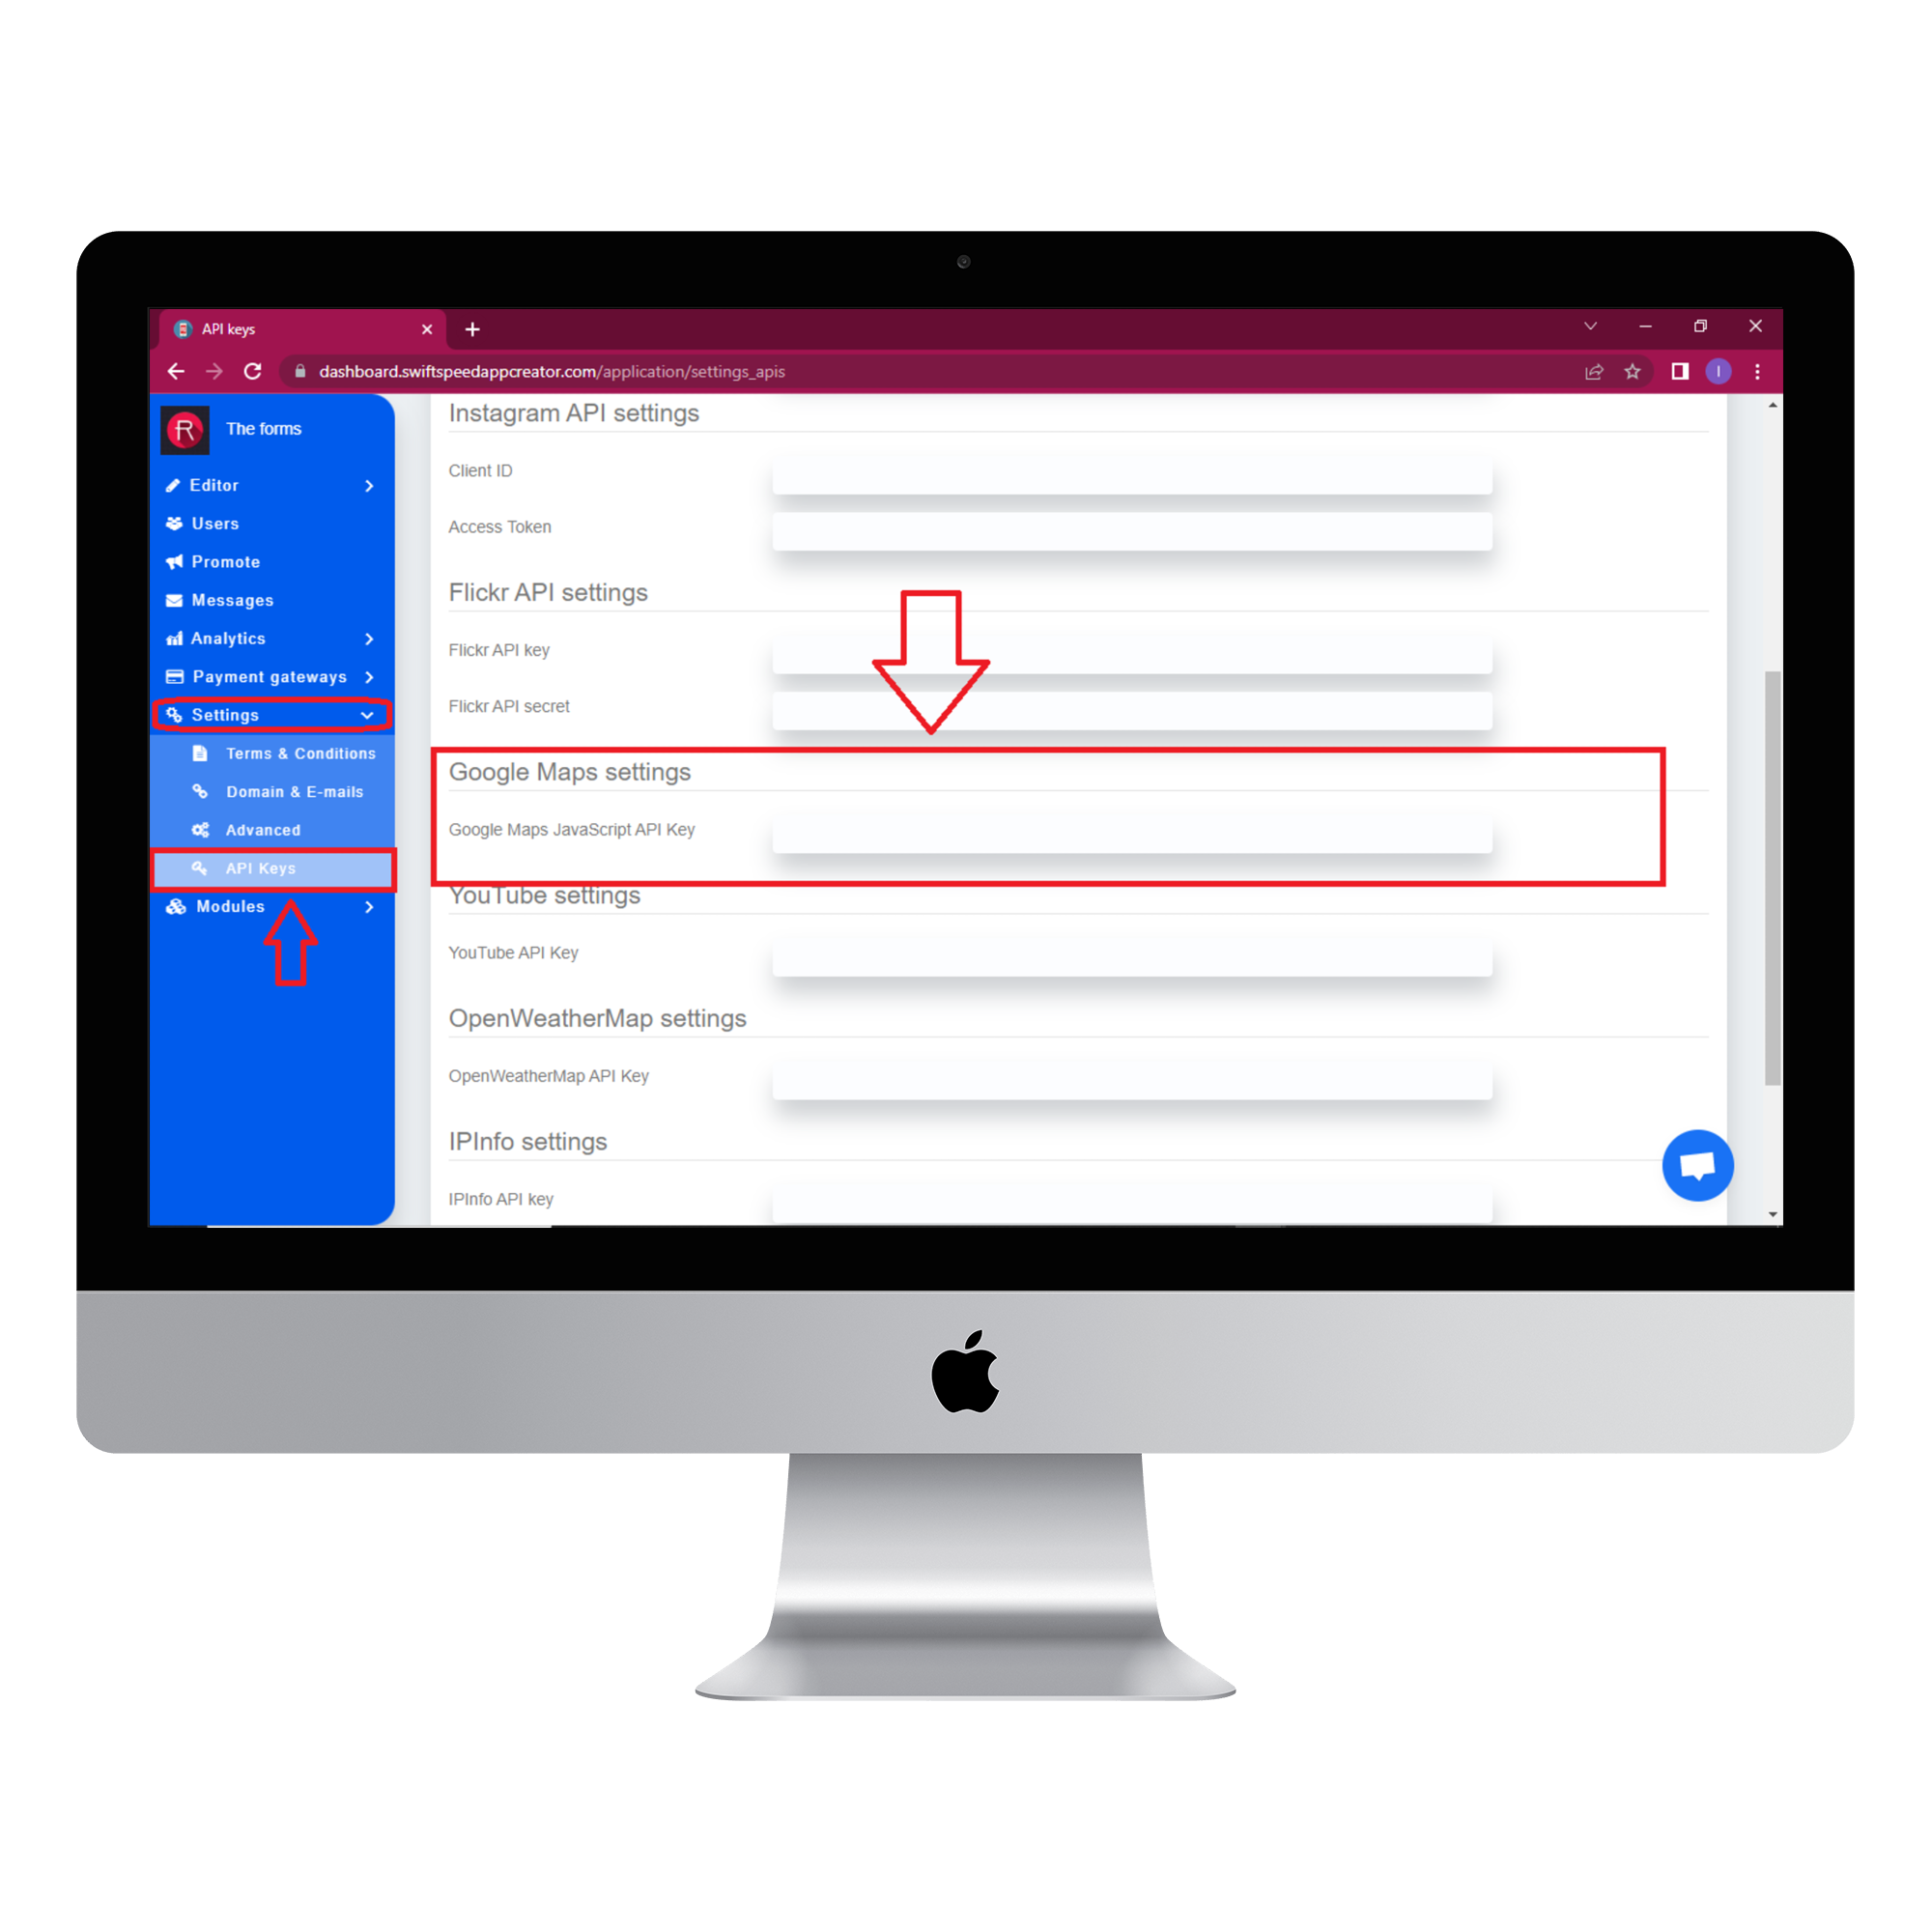
To use the places feature, you need a valid Google Maps API key. Select settings from the side menu and click on “API Keys.” Go to the Google Maps settings section and type in your Google Maps API keys into the “Google Maps Javascript API Key” textbox. Click save and return to the features page.
Step 9:
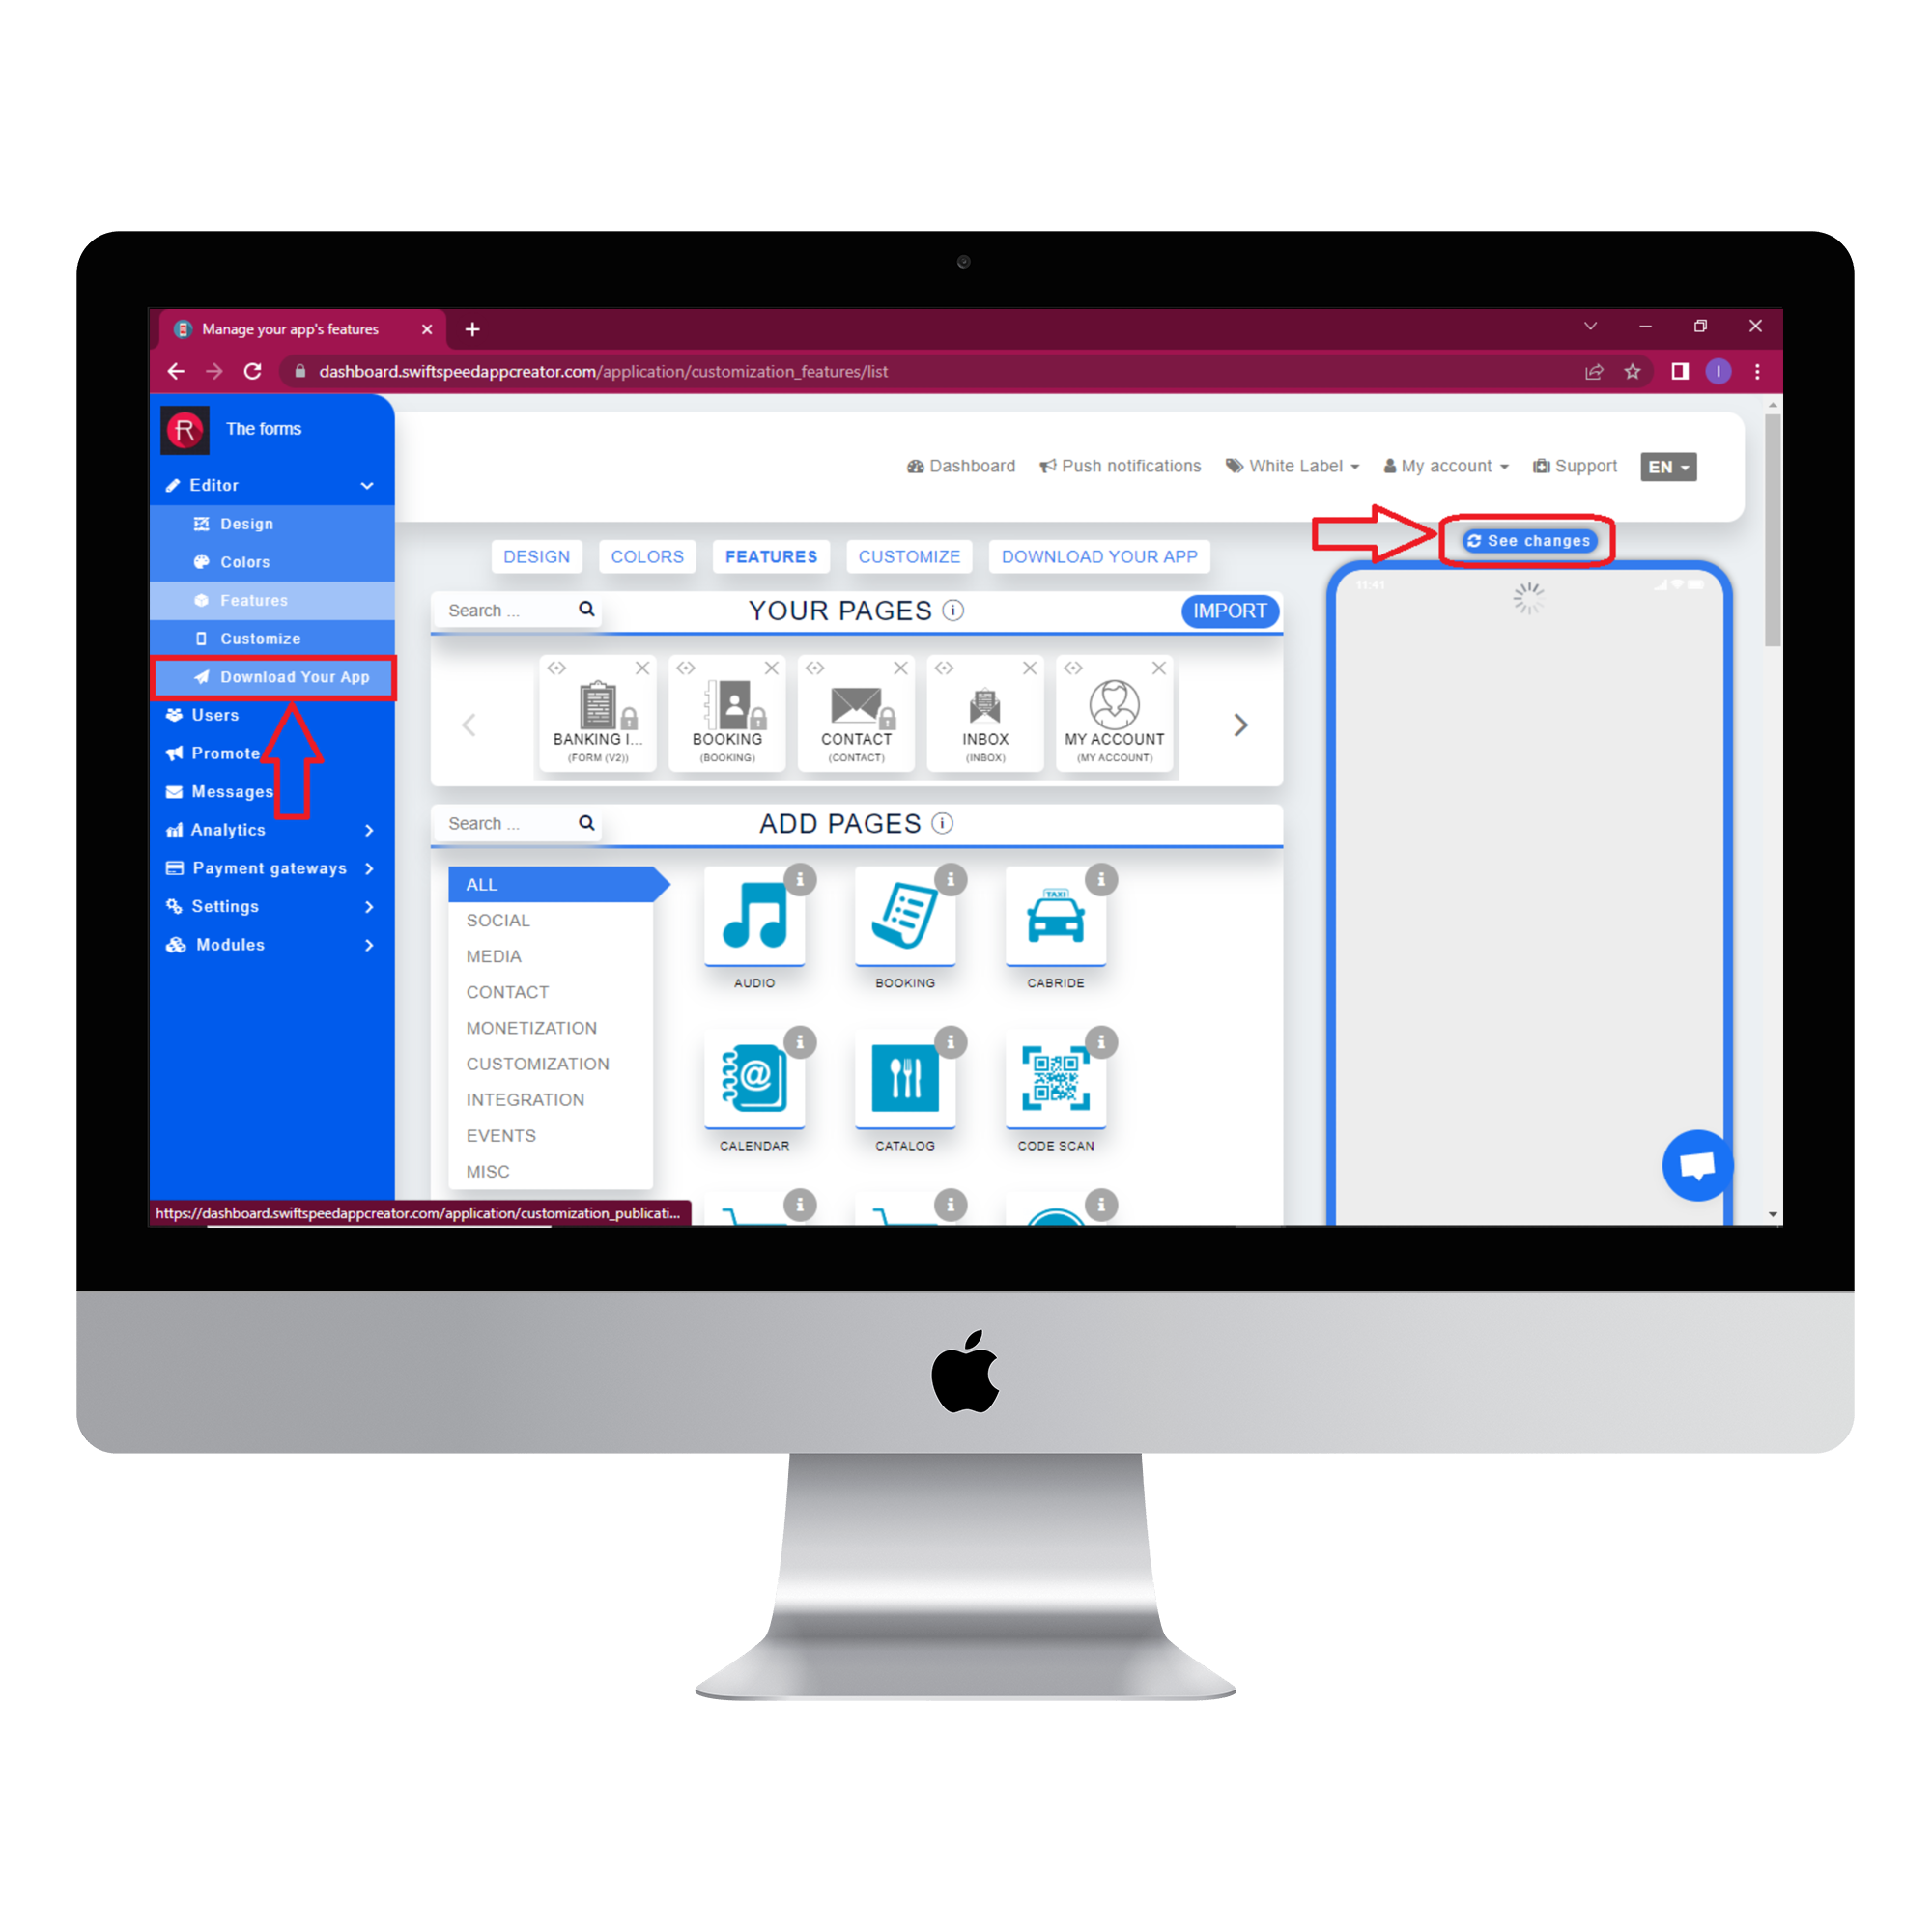
Click on the “see changes” button above the virtual device to see what your app would look like on an actual device. To generate an Apk of your app, click on “Download your app” from the side menu, scroll down, and click on “Generate Apk.” Choose a subscription plan, and the Apk will be sent to your email address when the build is complete. Here is an example of what your app would look like.
Good job on making your own app with the Places feature. Check out our complete feature list here.

