Developing mobile apps for iOS and Android requires different approaches. While there are some commonalities between the two platforms, the development process and considerations can vary significantly when converting an iOS App to Android.
iOS apps are developed using Swift or Objective-C in Xcode, Apple’s integrated development environment (IDE), and are designed specifically for iPhones and iPads. The iOS ecosystem is fairly contained, with a limited number of devices to develop for.
👉🏾 Other Swiftspeed Users Also Read: App Name Detailed Guidelines and Best Practices for Success
Android apps use Java or Kotlin code in Android Studio, Google’s IDE, and support a wide variety of devices from many different manufacturers. The Android ecosystem is much more fragmented, with thousands of potential device combinations.
The core frameworks, interface elements, monetization options, publishing processes, and technical architectures differ as well. Converting an app from one platform to another requires rethinking the entire development process, not just porting code.
This guide covers key factors to consider when converting an iOS app to Android. We’ll look at design, code architecture, data storage, testing, monetization, publishing, and maintenance. While not a simple process, with careful planning, iOS apps can be adapted to work successfully on Android.
Use Swiftspeed to Convert Your iOS App to Android
Swiftspeed technology makes it so much easier and enjoyable to convert your iOS app into Android. The website is built with the aim of making the change as convenient as possible, especially for users with different technology skills. undefined
First step: Log into the Swiftspeed editor, an intuitive interface that serves as a launching pad into your apps’ transformation. From here, you would insert the desired name of your app; Swiftspeed gives you an opportunity to apply a new design to your existing iOS app and choose the template that will suit your style and functionality.
The next step is choosing a template that best matches your app or design branding. Then, if you want to create a version of the app, you must incorporate some features. Swiftspeed’s editor provides a straightforward way to introduce these features without getting into a knot of complicated code.
The next step is where the magic happens. Once you’re satisfied with the features and overall setup, with the click of a button, Swiftspeed enables you to generate not only the iOS version of your app but also the Android AAB (Android App Bundle) and APK (Android Package) formats. These are the file types required for publishing on the Google Play Store.
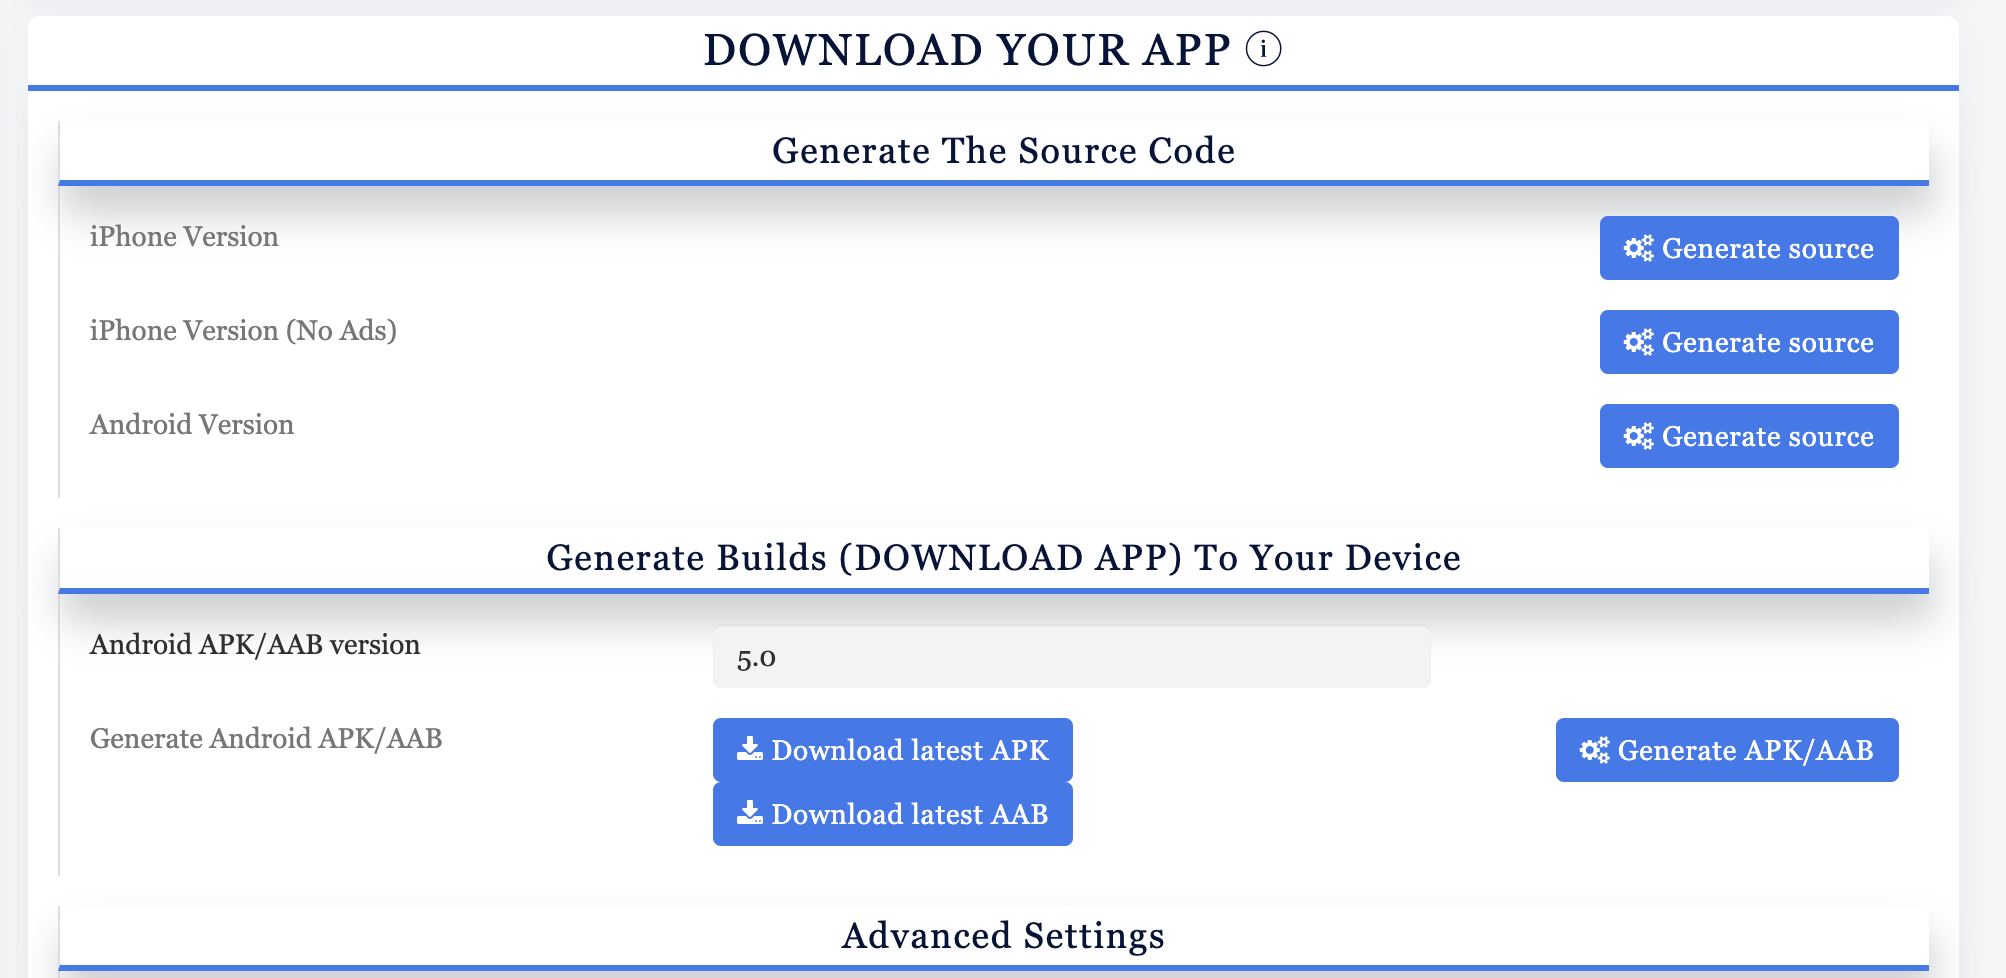
Finally, one of the major perks of using Swiftspeed is access to your app’s source code. This is particularly useful if you’d like to make more advanced customizations or if you want a professional developer to handle specific complex features. Having the source code means you’re in control and able to tweak and tailor your app to your precise specifications.
The above process is simple and straightforward when converting iOS into Android, but if you already have a codebase, you can simply follow the processes below:
Assess Your iOS App
Before converting your iOS app to Android, take time to thoroughly evaluate your existing iOS app. Review all the features and functionality to determine what is essential to the user experience versus “nice to have” extras.
- Make a list of all screens and flows in the app. Which are critical paths that users follow versus secondary features they may access less frequently?
- Look at how content and data are structured and stored. Can this be easily ported to Android?
- Examine how the app handles user accounts and data. Will the same user experience work on Android?
- Review monetization features like in-app purchases, subscriptions and ads. Will the business model translate effectively?
- Consider the core functionality that makes your app unique or gives it an advantage. This will need to be faithfully replicated on Android.
- Evaluate third-party SDKs and APIs used by your iOS app. Will they integrate with Android, or do you need to find an alternative SDK?
Gaining a deep understanding of what makes your iOS app successful will provide the blueprint for the Android version. Focus on the must-have features and prioritize those during the conversion process.
Design Considerations
When converting an iOS app to Android, one of the most important aspects to consider is the user interface (UI) and user experience (UX). Though there are similarities between the two platforms, there are also significant differences that impact design.
A key difference is that Android offers much more flexibility and customization options for UI design than iOS. Android devices have a wide variety of screen sizes, resolutions, and aspect ratios that designers need to account for. iOS devices are more consistent in their dimensions. With Android, designers need to focus on responsive and adaptive design to optimize the UI across different devices.
Another major difference is navigation patterns. Android apps tend to rely more on the “back” button integrated into Android devices rather than navigation bars within the app. The back button allows users to navigate backwards through the app, similar to a browser. iOS apps generally have navigation menus and buttons within the app itself.
Designers should also pay close attention to platform conventions. For example, Android uses an overflow menu (three vertical dots) to house secondary menu options, whereas iOS uses tab bars at the bottom of the screen. Adhering to common UI patterns for each platform creates a more seamless user experience.
When it comes to visual design, Android offers more freedom whereas iOS has stricter guidelines. Android design can be more experimental, with custom themes, animations, colors, and typography. iOS design tends to be more conservative and minimalistic. Finding the right balance between adhering to platform conventions and maintaining brand consistency is key.
Overall, successfully converting UI/UX design requires understanding the core differences between the two platforms and ensuring the app adapts to the specific strengths of each platform. Keeping the user at the center throughout the process is critical to creating an intuitive and seamless experience.
👉🏾 Other Swiftspeed Users Also Read: Swiftspeed App Maker: Build an app for free without Coding
Code Architecture
One of the biggest decisions when converting an iOS app to Android is determining your code architecture and whether to reuse code from the iOS version or rebuild from scratch on Android. There are pros and cons to each approach.
Reusing code from the iOS version allows you to:
- Save development time and costs by not rewriting everything
- Maintain feature parity more easily between iOS and Android versions
- Leverage existing business logic and backend code
However, reusing iOS code also has some downsides:
- iOS and Android have very different UI frameworks and paradigms, so a lot of UI code will still need to be rebuilt for Android
- Directly porting iOS Objective-C/Swift code to Android may result in non-idiomatic code that feels out of place
- Heavy reliance on cross-platform frameworks like React Native can limit leveraging native features and performance
Rebuilding natively in Android from scratch gives you:
- The ability to fully optimize UI and experiences for Android users
- Cleaner architecture and codebase specifically tailored to Android
- Avoidance of hacky cross-platform code
The tradeoffs are:
- Much higher development effort to rewrite everything
- Difficulty maintaining feature parity between iOS and Android versions
- Duplicated business logic and backend code
Overall, most apps take a hybrid approach – reusing as much non-UI code as possible (business logic, networking, etc) but rebuilding UI code natively for Android. This balances development effort while still allowing tailored UX for each platform. The best solution depends on the app complexity, timelines, and level of experience with each platform.
Data Storage
One of the biggest differences between iOS and Android is how data is stored. On iOS, apps typically use SQLite databases which are built into the platform. However, on Android there are several options:
- SQLite – SQLite is available on Android as well, so you can continue using it if desired. The main advantage is that you don’t have to change your database code when porting from iOS. The downside is that SQLite can be slower and less flexible on Android compared to other options.
- Realm – Realm is a mobile database designed specifically for mobile apps. It is fast, lightweight, and provides an object oriented API. Realm offers great performance and works nicely on Android.
- Room – Room is part of Android Jetpack and provides an abstraction layer over SQLite. It makes SQLite easier to work with on Android by handling things like migrations automatically. Room would be a good option if you want to move to a more Android-centric database.
- Other NoSQL databases – There are many NoSQL database options like MongoDB that work great on Android. These provide flexibility and scalability if your app requires it.
When porting an iOS app, evaluate if SQLite still meets your needs on Android or if migrating to a different database like Realm or Room would be beneficial. The extra effort to move away from SQLite may be worth it for better performance and a more idiomatic Android implementation. Thoroughly test your database code on Android and profile it to catch any performance issues.
Testing
Thorough testing is crucial for ensuring a high-quality converted Android app. Here are some key testing steps:
Emulators
Emulators allow you to simulate Android devices on your computer. The Android Studio emulator is a popular choice. Set up emulators for various Android versions and screen sizes to test compatibility. Check basic functionality and UI rendering across configurations.
Real Devices
While emulators are useful, testing on real Android phones and tablets is essential. Acquire devices covering different manufacturers, Android versions, screen sizes and resolutions. Check performance, responsiveness, UI layout, compatibility with device features like cameras.
QA Process
Establish a quality assurance process and checklist that covers:
- Functionality testing – All app features work correctly
- UI/UX testing – App is intuitive, flows make sense
- Compatibility testing – Works on various devices
- Localization testing – Translations are accurate
- Compliance testing – Adheres to Google Play policies
- Security testing – No vulnerabilities or crashes
- Performance testing – Acceptable speed and responsiveness
- Accessibility testing – Usable for those with disabilities
- Regression testing – Previously fixed bugs have not reappeared
Thorough testing across devices and configurations will help ensure a smooth launch on Android. Leverage emulators for quick iterations combined with real devices for final validation.
Monetization
Monetization is a key consideration when converting an iOS app to Android. There are several options to monetize your Android app:
Ad Networks
- Google AdMob – This is the most popular ad network for Android apps. Easy to implement with robust targeting options.
- Facebook Audience Network – Allows you to show Facebook ads in your Android app. Can leverage Facebook’s targeting capabilities.
- AppLovin – Offers full-screen ads, video ads, and native ads. Known for high eCPMs.
- ironSource – Focuses on rewarded video ads. Provides a mediation platform to maximize ad revenue.
When choosing an ad network, look at fill rates, eCPM, targeting capabilities, ad formats, and mediation support. It’s recommended to implement multiple ad networks and A/B test to determine which performs best.
In-App Purchases
In-app purchases allow users to unlock additional features or content. Some options:
- One-time purchases – User pays once to unlock a feature.
- Subscriptions – User pays a recurring fee for ongoing access.
- Consumable items – Items that get used up and need to be purchased again.
- Non-consumable items – Purchased once and the user retains permanent access.
When planning in-app purchases, consider the user experience carefully. Make sure to provide value and clearly communicate what the user is getting. Leverage Google Play Billing for in-app purchases on Android.
Monetization takes experimentation. Analyze metrics to determine what monetization models and ad placements work best. Optimize over time to maximize revenue while providing a great user experience.
Publishing
One key difference between iOS and Android is how you publish your app. The iOS App Store is the only way to distribute iOS apps, while there are multiple app stores for Android.
The most popular is the Google Play Store. Google has specific requirements for publishing like supporting certain screen sizes and densities, following UI guidelines, and using specific APIs. Apps are reviewed by Google before publishing.
Other Android app stores include the Amazon Appstore, Samsung Galaxy Store, Huawei AppGallery, and more. Each has their own policies and requirements. A benefit of Android is you can choose to publish in multiple stores or even self-publish.
Overall the Google Play Store review process is faster than the iOS App Store. Apple can take days or weeks to review while Google is often within hours. Google also allows staged rollouts while Apple has an all-or-nothing approach.
On the flip side, Apple offers more marketing opportunities within the App Store like featured placements. Discoverability can be easier on iOS since there’s only one storefront.
Maintenance
Once your app is published on the Google Play Store, maintenance becomes an important part of the process. You’ll need to handle updates and scaling of your app over time.
Handling Updates
When you make changes and improvements to your iOS app, you’ll want to push those updates to your Android version as well. Set up a process to regularly merge changes from your iOS codebase into your Android project. Test the updates thoroughly before publishing to ensure feature parity across both platforms. Consider automating testing to speed up the process.
Schedule regular release cycles for updates, such as monthly or quarterly. More frequent updates show users you are actively maintaining the app, while less frequent updates reduce the workload. Find a cadence that works for your resources.
For major updates, carefully plan the release and test it with a smaller group first before rolling out to all users. Monitor metrics after launching to check for issues. Android allows quick fixes for bugs without a full release cycle, so hot patches can address critical issues.
Scaling
As your user base grows, your app needs to scale up to handle increased traffic. Profile your app’s performance regularly to catch potential bottlenecks. Optimize images, refactor code, and implement caching to improve efficiency.
Set up monitoring tools to get visibility into crashes and performance metrics. Use this data to proactively scale up your servers and infrastructure to meet demand. Consider implementing load balancing, containerization, and auto-scaling capabilities.
Test your app under load to determine maximum capacity. Plan ahead for traffic spikes and have room to scale. Distribute your backend across multiple availability zones for higher uptime and redundancy. With careful monitoring and capacity planning, you can smoothly scale your Android app over time.
👉🏾 Other Swiftspeed Users Also Read: A Complete Guide to Mobile App Development in 2024
Conclusion
Converting an iOS app to Android can seem like a daunting task, but following the right steps will make it much more manageable. Here’s a summary of the key points:
- Assess your existing iOS codebase to see what can be reused vs. needs to be built from scratch for Android. Look at the app architecture, UI, business logic etc.
- Design for Android’s navigation patterns and interface elements. Adapt the visual design for Android UI conventions.
- Modularize code into layers for business logic, UI, and data. This will make it easier to share logic across platforms.
- Evaluate data storage options on Android like SQLite and determine if migration is needed from iOS.
- Build with Android’s testing frameworks like Espresso for UI testing. Automated testing will help catch issues.
- Consider monetization differences between the platforms such as in-app purchases. Leverage Android billing libraries.
- Use Android Studio and Gradle for building and publishing your app to the Play Store. Enroll in the developer console.
- Plan for ongoing maintenance post-launch. Cross-platform app frameworks can ease future development.
Converting to Android takes strategic planning and understanding of Android-specific APIs. Following mobile development best practices will ease multi-platform development. With the right approach, you can successfully bring your iOS app over to the Android platform

