How to Convert WMV to MOV: Best Solutions for Windows and Mac Users
The best ways to convert WMV to MOV in 2026 for Windows and Mac users: free desktop tools (HandBrake, VLC, FFmpeg), browser-based converters, and paid editors when batch processing or quality control matters. Includes the codec and bitrate notes that prevent quality loss in the conversion.
Video formats can be a real headache when you're trying to play or edit files across different devices and platforms. If you've found yourself stuck with WMV files that need to be converted to MOV format, you're not alone. This transition is something many content creators, professionals, and everyday users face regularly. In this article, we will discuss how to convert WMV to MOV:
Why Convert from WMV to MOV?
Windows Media Video (WMV) has been around since 1999 and serves its purpose well in the Microsoft ecosystem. However, when working across different platforms or with Apple devices, compatibility issues often arise.
MOV files, developed by Apple for their QuickTime framework, offer several advantages:
Better compatibility with Mac devices and professional video editing software
Higher quality retention for the same file size in many cases
More widespread acceptance in creative industries and online platforms
According to recent usage statistics, MOV remains among the five most widely used video formats globally, making it a practical choice when sharing videos across different systems.
Understanding the Differences Between WMV and MOV
Before diving into conversion methods, it helps to understand what makes these formats different:
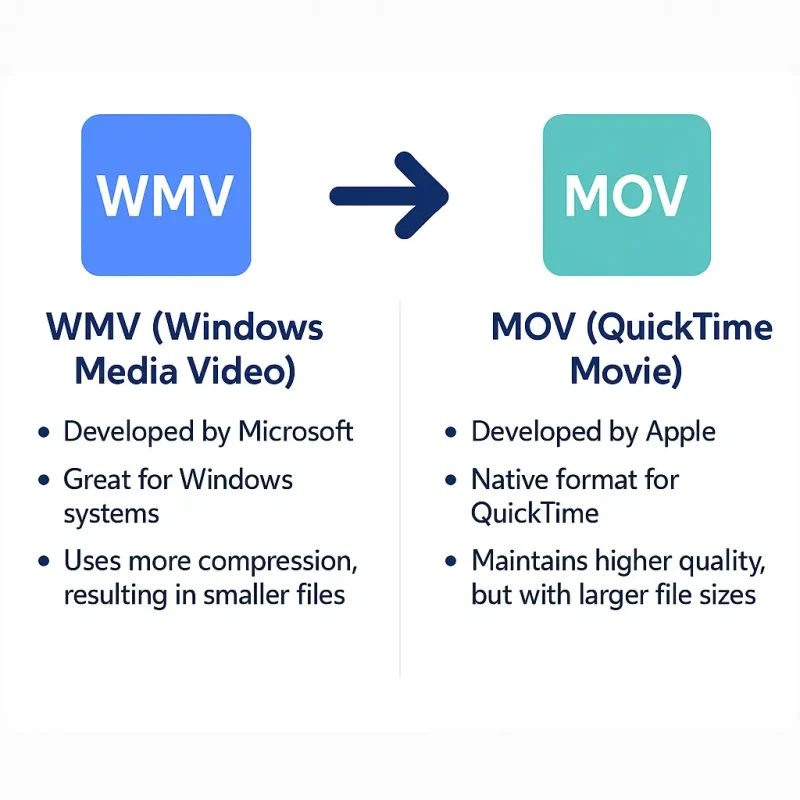
WMV (Windows Media Video):
Developed by Microsoft
Great for Windows systems
Uses more compression, resulting in smaller files
Sometimes sacrifices quality for size
Limited support on non-Windows platforms
MOV (QuickTime Movie):
Developed by Apple
Native format for QuickTime
Maintains higher quality, but with larger file sizes
Better color depth and transparency handling
Better support for professional editing workflows
Desktop Software Solutions for WMV to MOV Conversion
Movavi Video Converter
Movavi has established itself as a reliable option for video conversion needs, particularly when dealing with large files or batch processing multiple videos simultaneously.
Detailed Process:
Download Movavi Video Converter from their official website and install it on your computer.
Launch the program and add your WMV files using either:
Drag and drop functionality (simply pull files directly into the program window)
The "Add Media" button in the top left corner, followed by "Add Video"
After selecting files, navigate to the bottom section where output formats are displayed.
Click on the "Video" tab and locate the MOV option—you'll find various presets available for different devices and quality settings.
Before converting, you can:
Adjust video quality settings by clicking the gear icon
Trim videos if you only need specific sections
Apply basic filters or effects
Set your destination folder by clicking the "Save to" button.
Click "Convert" to begin the process.
Pros: High-speed conversion, batch processing, maintains good quality, includes basic editing tools.
Cons: The full version requires payment after the trial period.
Best for: Users who frequently convert multiple files and need reliable quality.
Aiseesoft Video Converter Ultimate
Aiseesoft is known for its focus on preserving video quality during the conversion process, making it popular among professionals who can't afford to lose fidelity.
Detailed Process:
Download and install Aiseesoft Video Converter Ultimate from their website.
Open the program and click the "Add File" button to import your WMV videos.
For multiple files, use the "Add Folder" option to import an entire directory of videos.
In the output format section, click on "Format" and navigate to the "Video" category.
Select "MOV" from the available options.
For advanced users:
Click "Settings" to fine-tune parameters like resolution, bitrate, frame rate, and encoder
These settings can significantly impact the quality and size of your output files
Specify your destination folder in the "Save to" field.
Click "Convert All" to start the conversion process.
The program displays a progress bar and estimated time remaining during conversion. For larger files, you might want to enable the "Shut down computer after conversion" option available in the preferences.
Pros: Exceptional quality preservation, extensive customization options, supports 4K/8K video, hardware acceleration.
Cons: Steeper learning curve, higher price point than some alternatives.
Best for: Professional users who prioritize quality over simplicity.
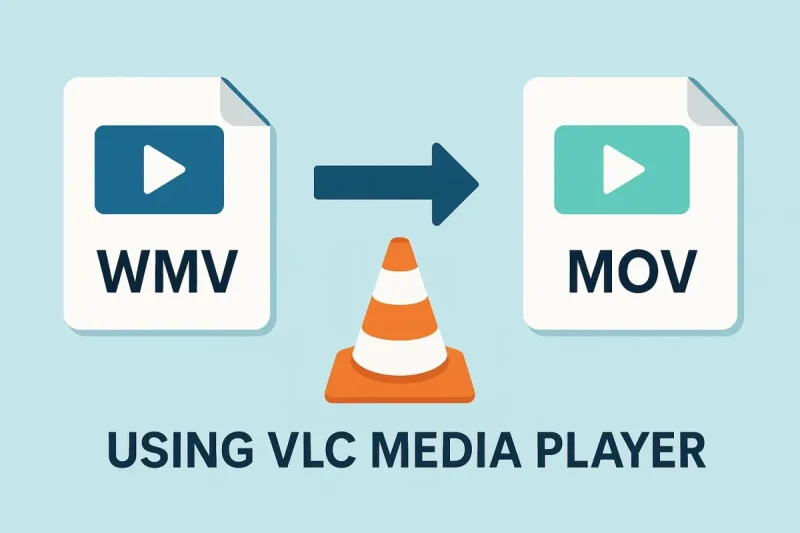
VLC Media Player
Many people don't realize that VLC, the popular media player installed on millions of computers worldwide, also includes powerful conversion capabilities.
Detailed Process:
Download and install VLC Media Player if you don't already have it.
Open VLC and click on "Media" in the top menu.
Select "Convert/Save" from the dropdown menu (or press Ctrl+R on Windows/Cmd+R on Mac).
Click "Add" to select your WMV file(s).
After adding files, click the "Convert/Save" button at the bottom of the dialog.
In the next window:
Under "Profile," select "Video - H.264 + MP3 (MOV)"
If you don't see this exact profile, click the wrench icon to create a custom profile
Set the destination file by clicking "Browse" and specifying where to save the new MOV file
Click "Start" to begin conversion.
VLC conversion can be slower than dedicated conversion software, but it's completely free and already installed on many systems. For occasional conversion needs, it's hard to beat the convenience.
Pros: Completely free, no watermarks, already installed on many computers, simple interface.
Cons: Fewer customization options, slower processing speeds, limited batch processing.
Best for: Casual users who need to convert files occasionally and already have VLC installed.
HandBrake
HandBrake has developed a loyal following as an open-source video transcoder that offers substantial control over conversion parameters.
Detailed Process:
Download and install HandBrake from the official website.
Launch the program and click "Open Source" to select your WMV file.
Under the "Format" dropdown menu, select "MP4" first.
Then click on the "Container" dropdown below it and change it to "MOV".
Choose a preset from the right sidebar that matches your needs, or create a custom configuration:
For maximum quality: Select "Production Max" preset
For good balance: Select "Production Standard" preset
For smaller files: Select "Fast 1080p30" preset
Advanced users can adjust:
Video codec (H.264, H.265, etc.)
Frame rate
Constant vs. variable bitrate
Audio tracks and formats
Set your destination path in the "Save As" field.
Click "Start" to begin the conversion process.
HandBrake provides detailed logs during conversion, which can help diagnose issues with problematic files. It also offers queue functionality for converting multiple files with different settings.
Pros: Extremely customizable, open-source (free), regularly updated, excellent community support.
Cons: Interface can be intimidating for beginners, fewer presets for specific devices.
Best for: Technical users who want precise control over every aspect of video conversion.
MiniTool MovieMaker
MiniTool MovieMaker combines basic video editing features with conversion capabilities, making it useful for those who want to make some edits before converting.
Detailed Process:
Download and install MiniTool MovieMaker from their website.
Launch the program and click "Import Media Files" to select your WMV videos.
Once imported, drag the videos to the timeline at the bottom of the screen.
Make any desired edits:
Cut or trim sections
Add transitions between clips if using multiple videos
Apply filters or effects
Adjust color balance
Add text or subtitles
When satisfied with your edits, click "Export" from the top menu.
Select "MOV" as your output format.
Choose your preferred resolution and quality settings.
Specify a filename and destination folder.
Click "Export" to begin the conversion process.
The program offers a good balance between editing capabilities and conversion functionality.
Pros: Combines editing and conversion, user-friendly interface, free version available.
Cons: Less powerful conversion engine than dedicated converters, some features limited in free version.
Best for: Users who want to make simple edits before converting their videos.
Mac-Specific Solutions
QuickTime Player
If you're a Mac user, the simplest solution might already be installed on your computer. QuickTime Player offers basic conversion capabilities that are sufficient for many users.
Detailed Process:
Open QuickTime Player (found in your Applications folder).
Go to "File" and select "Open File..." to locate your WMV video.
Note: QuickTime may not open some WMV files directly due to codec limitations
If this happens, try using one of the other methods below
Once the file is open and playing, go to "File" again and select "Export As..."
From the format options, select "Movie to MOV."
Choose your desired quality level:
High: Best quality, larger file size
Medium: Good balance between quality and size
Low: Smaller file size, reduced quality
Select a destination folder and filename.
Click "Save" to begin the conversion.
QuickTime conversions are straightforward but limited in terms of customization. For basic needs, however, it's hard to beat the convenience of using software that's already installed on your Mac.
Pros: Already installed on Macs, simple interface, native format support, no extra software needed.
Cons: Limited customization options, may not open all WMV files, no batch processing.
Best for: Mac users with basic conversion needs and compatible WMV files.
Online Conversion Tools
For occasional conversion needs or when installing software isn't practical, online converters offer a convenient alternative.
Online-Converter
Online-Converter provides a simple web-based solution for converting individual files without installing software.
Detailed Process:
Visit the Online-Converter website.
Select "Video Converter" from their tools.
Click "Choose File" to upload your WMV video.
Select "MOV" as your target format.
Optional: Adjust video settings if needed:
Resolution
Bitrate
Frame rate
Start/end points if you only want to convert part of the video
Click "Start Conversion."
Once complete, download your converted MOV file.
Important limitations: Most online converters, including Online-Converter, have restrictions:
File size limits (typically 100MB-2GB depending on the service)
Slower conversion speeds compared to desktop software
Potential quality reduction
Privacy concerns with uploading content to third-party servers
Pros: No installation required, accessible from any device with internet, simple interface.
Cons: File size limitations, slower than desktop software, requires internet connection, potential privacy concerns.
Best for: Converting small files when you don't have access to desktop software.
Online UniConverter (formerly Media.io)
Online UniConverter offers more features than basic online converters while maintaining the convenience of a web-based solution.
Detailed Process:
Navigate to the Online UniConverter website.
Click "Choose Files" to upload your WMV video.
The format should automatically be set to convert to MOV, but verify this in the output format section.
Adjust settings if needed:
Resolution
Quality
You can also crop, trim, add watermarks, or apply basic effects
Click "Convert" to start the process.
Once conversion is complete, download your MOV file.
Online UniConverter offers a more robust feature set than many online converters, including batch processing in its premium version. However, the free version has significant limitations on file size and number of conversions.
Pros: More features than basic online converters, user-friendly interface, basic editing capabilities.
Cons: Significant limitations in free version, requires stable internet connection, privacy considerations.
Best for: Users who need occasional conversions with some basic editing capabilities.
Tips for Maintaining Video Quality During Conversion
Regardless of which conversion method you choose, these tips will help ensure the best possible quality in your converted files:
1. Start with the highest quality source possible
The output quality can never exceed the input quality. If your original WMV is low resolution or highly compressed, the resulting MOV will have those same limitations.
2. Choose the right codec settings
For MOV files:
H.264 codec typically offers the best balance of quality and file size
ProRes codec is excellent for editing but creates very large files
HEVC/H.265 provides better compression but may not be compatible with older software
3. Understand bitrate settings
Higher bitrates mean better quality but larger files. As a general guideline:
For standard 1080p video: 8-12 Mbps is usually sufficient
For 4K video: 35-45 Mbps provides good quality
For archival purposes: Consider even higher bitrates
4. Pay attention to audio settings
Don't neglect audio quality when focusing on video settings:
AAC codec at 256-320 kbps provides excellent quality for most content
For music-heavy videos, consider higher audio bitrates
Ensure audio sync is maintained during conversion
5. Test your settings with a short clip first
Before converting a long video, test your chosen settings on a 30-second clip to verify the quality meets your expectations.
Troubleshooting Common Conversion Issues
Problem: Conversion fails or crashes
Solutions:
Update your conversion software to the latest version
Check if your WMV file is corrupted (try playing it first)
Ensure your computer meets the minimum requirements for the converter
Try a different converter if problems persist
Problem: Audio and video are out of sync
Solutions:
Try a different conversion tool
Check if the original WMV has sync issues before conversion
For severe cases, consider separating audio and video, converting separately, then recombining
Problem: Significant quality loss after conversion
Solutions:
Increase bitrate settings
Check if you're using two-pass encoding (which provides better quality)
Make sure you're not accidentally downscaling resolution
Try a different codec within the MOV container
Problem: Conversion is extremely slow
Solutions:
Enable hardware acceleration if your software and GPU support it
Close other resource-intensive applications
Reduce the output quality settings slightly
Consider upgrading your computer's RAM or CPU for frequent conversions
Making Your Final Decision
With so many conversion options available, how do you choose the right one? Consider these factors:
For occasional, simple conversions:
Mac users: QuickTime Player is your simplest option
Windows users: VLC Media Player offers a good balance of convenience and quality
Anyone without installation privileges: Online converters work in a pinch
For frequent conversions or professional needs:
Aiseesoft or Movavi for highest quality and batch processing
HandBrake for maximum control over settings
MiniTool MovieMaker if editing is also needed
For large-scale projects:
Consider investing in professional video conversion workflow software
Look into command-line tools like FFmpeg for automation possibilities
Test thoroughly before committing to a full-scale conversion project
Final Thoughts
Converting from WMV to MOV doesn't have to be complicated, though finding the right balance between quality, convenience, and cost depends on your specific needs. The good news is that with modern conversion tools, you can achieve excellent results without specialized technical knowledge.
For most users, a quality converter like Movavi or HandBrake will provide the best combination of usability and results. Mac users have the added convenience of QuickTime's built-in capabilities, while those who only occasionally need to convert files might find online tools sufficient.
Whatever solution you choose, remember that starting with the highest quality source material and understanding basic video parameters will ensure your converted MOV files look their best.