Setting up In-App Purchases
Before you start
Make sure these are in place. If any is missing, the steps below will fail later in a confusing way.
- You have an Apple Developer Program membership (99 USD a year) and access to App Store Connect.
- You have a Google Play Developer account (one time 25 USD) and access to Google Play Console.
- Your Swiftspeed app has been submitted to Apple at least once (even if still in review), so the App Store Connect listing exists. Apple does not show the in-app purchase tab on apps that have never been created in App Store Connect.
- Your Swiftspeed app has been uploaded to Google Play at least once (Internal Testing track is fine), so the Play Console app exists with the correct package name.
- You know your app's Bundle ID (Apple) and Package name (Google). They must match exactly what is configured in Swiftspeed under App Info.
Step 1: Create your products in App Store Connect
Before Swiftspeed can sell anything on iOS, Apple needs to know what you are selling. You define one In-App Purchase product for each plan.
Open https://appstoreconnect.apple.com and sign in with your Apple Developer account, then:
- Click Apps in the top navigation.
- Click your app in the apps list.
- In the left sidebar, scroll to Monetization and click Subscriptions for recurring plans, or In-App Purchases for one-time unlocks. Most apps want Subscriptions.
- Click Create (or the plus icon) and choose the type: Auto-Renewable Subscription for monthly or yearly plans, Non-Consumable for a one-time unlock, Consumable for things the user can buy multiple times.
- Fill in the Reference Name (internal label, never shown to users) and the Product ID. Use a clear, lowercase, dotted format like
com.yourcompany.yourapp.premium_monthly. Write the product ID down, you will paste it into Swiftspeed in Step 5. - For subscriptions, you will also be asked to create or pick a Subscription Group. Group together plans that compete with each other (monthly, yearly, lifetime) so the user can only have one active at a time.
- Set the price for the territories where you want to sell. Apple lets you pick a price tier.
- Fill in the Localization section: display name and description in at least English. This is what the user sees on the purchase screen.
- Save. The product will show as Missing Metadata or Ready to Submit. That is normal; it goes live when you submit the app for review with the IAP product attached.
- Repeat for every plan you want to sell.
Important: write down every Product ID exactly as you typed it. They are case sensitive. A single typo between App Store Connect and Swiftspeed means the purchase will fail at runtime with no obvious error.
Step 2: Grab the Apple App-Specific Shared Secret
This is the 32 character hex string Swiftspeed uses to verify Apple receipts. Without it, every purchase fails verification.
- Still inside App Store Connect, click Apps and pick your app.
- In the left sidebar, scroll up to General and click App Information.
- Scroll down to the App-Specific Shared Secret section.
- Click Manage, then Generate if no secret exists yet, or View if one already does.
- Copy the secret. It is a 32 character string of hexadecimal characters (only
0-9anda-f). - Paste it somewhere safe for the moment. You will paste it into Swiftspeed in Step 5.
If your account has multiple apps, generate a separate shared secret per app, not the master shared secret. The master one works but it is less secure and harder to rotate.
Step 3: Create your products in Google Play Console
Same idea as Step 1, on the Android side. Each plan on iOS needs a matching product on Android (or you can sell only on one platform if you prefer).
Open https://play.google.com/console and sign in, then:
- Click your app from the list.
- In the left sidebar, expand Monetize with Play, then Products. Pick Subscriptions for recurring plans, or In-app products for one time unlocks.
- Click Create subscription (or Create product).
- Set the Product ID. Use the same naming pattern as Apple:
com.yourcompany.yourapp.premium_monthly. The IDs do not have to match Apple's exactly, but it is much easier to keep your sanity if they do. - Fill in the name and description. These show on Google's purchase sheet.
- For subscriptions, create at least one Base plan. The base plan holds the billing period (monthly, yearly), the price, and renewal type. Write down the Base plan ID along with the Product ID, you need both for Swiftspeed.
- Set prices for the countries where you want to sell.
- Click Activate on the product (and on the base plan, for subscriptions). Until you activate, the product is invisible to the app.
- Repeat for every plan.
For each Google subscription, you need both the Product ID and the Base plan ID. One-time products only need the Product ID. Write them all down before moving on.
Step 4: Create the Google service account and download its JSON key
Google does not use a shared secret like Apple. Instead, Swiftspeed talks to the Google Play Developer API using a service account, which is a robot user with limited permissions. You create it once in Google Cloud, give it permissions in Play Console, then download a JSON key file Swiftspeed will use to authenticate.
This is the step that confuses most people. Take it slowly.
- Open https://console.cloud.google.com in a new tab and sign in with the same Google account that owns your Play Console.
- At the top of the page, click the project picker, then New Project. Name it something like
your-app-iap. Click Create. - Once the project is created, make sure it is selected in the project picker.
- In the search bar at the top of Google Cloud Console, type Google Play Android Developer API and click the matching result. Click Enable. This lets your service account talk to Play.
- Now go to the left navigation drawer (three lines top left), pick IAM and Admin, then Service Accounts.
- Click Create Service Account at the top.
- Give it a name like
swiftspeed-iap-verifier. The ID auto-fills. Click Create and Continue. - On the Grant this service account access to project step, you do not need any role here. Click Continue, then Done.
- You should now see your service account in the list. Click the email address (it looks like
swiftspeed-iap-verifier@your-app-iap.iam.gserviceaccount.com). - Click the Keys tab at the top of the service account page.
- Click Add Key, then Create New Key. Pick JSON and click Create.
- Your browser will download a JSON file. This file is the credential. Anyone with it can talk to your Play account, so keep it private. Move it to a folder you will remember; you upload it to Swiftspeed in Step 5.
The downloaded JSON file is the only copy. If you lose it, you have to come back here and create a new key, then re-upload it to Swiftspeed.
Step 5: Give the service account permission inside Play Console
Creating the service account in Google Cloud does not automatically give it access to your Play data. You have to grant it explicitly in Play Console.
- Back in https://play.google.com/console, click the gear icon at the bottom left, then Setup, then API access.
- You should see your Google Cloud project listed under Linked Google Cloud project. If not, click Link existing project and select the project you created in Step 4.
- Scroll down to the Service accounts section. Your service account email should be listed.
- Click Grant access next to it.
- On the permissions screen, you must enable at least these:
- - View financial data, orders, and cancellation survey responses
- - Manage orders and subscriptions
- - View app information and download bulk reports (read-only)
- Choose All apps in the App permissions section, or select just the apps you want this service account to verify purchases for.
- Click Invite user (the button name is misleading; it just saves the permissions for the service account).
- Wait a few minutes. Google takes 5 to 60 minutes to propagate these permissions. If you try to use them too soon Swiftspeed will report a permission error.
If you skip this step, Swiftspeed can authenticate as the service account but cannot read or verify any purchases. The save will succeed but every IAP attempt will fail with a 403 error.
Step 6: Open the IAP setup page in Swiftspeed
Sign in to https://swiftspeed.app and open the app you want to configure.
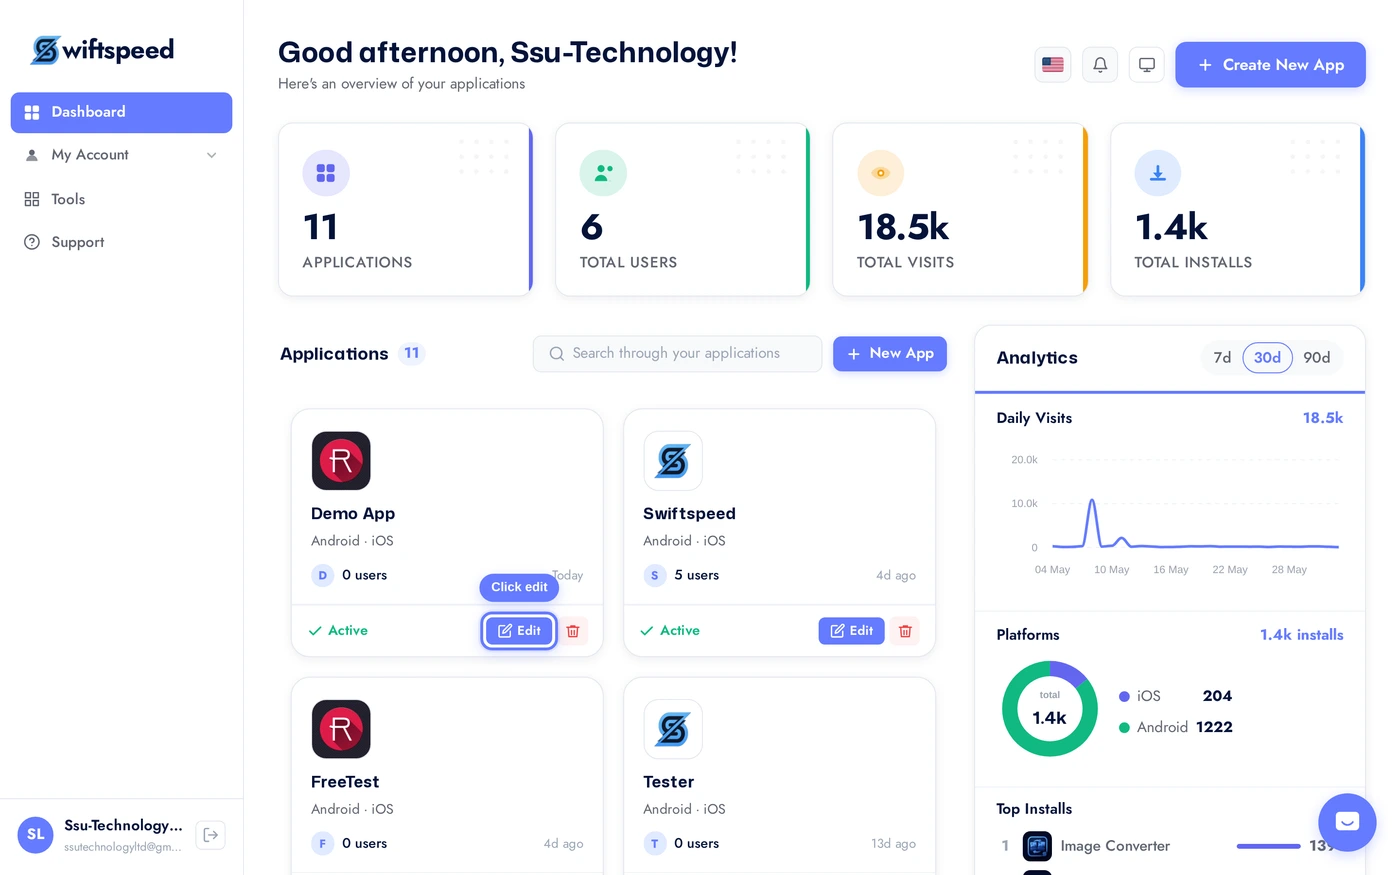
In the editor sidebar, open Settings > App Access. This is where you turn on IAP as the gate for unlocking your app or specific features. (If you only want IAP for Fitness Memberships, open the Membership tab of the Fitness feature instead. The credentials card we show below appears in both places and is shared, so you only need to fill it once.)

Flip the Access Control master toggle on. Until this is on, the rest of the page stays hidden.

Pick a Lock mode. Lock entire app if everyone has to pay before they see anything. Lock specific features if the app is free and only some screens are paid. Access by user is unrelated to IAP and is not used here. For this walkthrough we pick Lock entire app.

Pick In-App Purchase as the unlock method. The IAP configuration section appears below.
Step 7: Save your Apple credentials in Swiftspeed
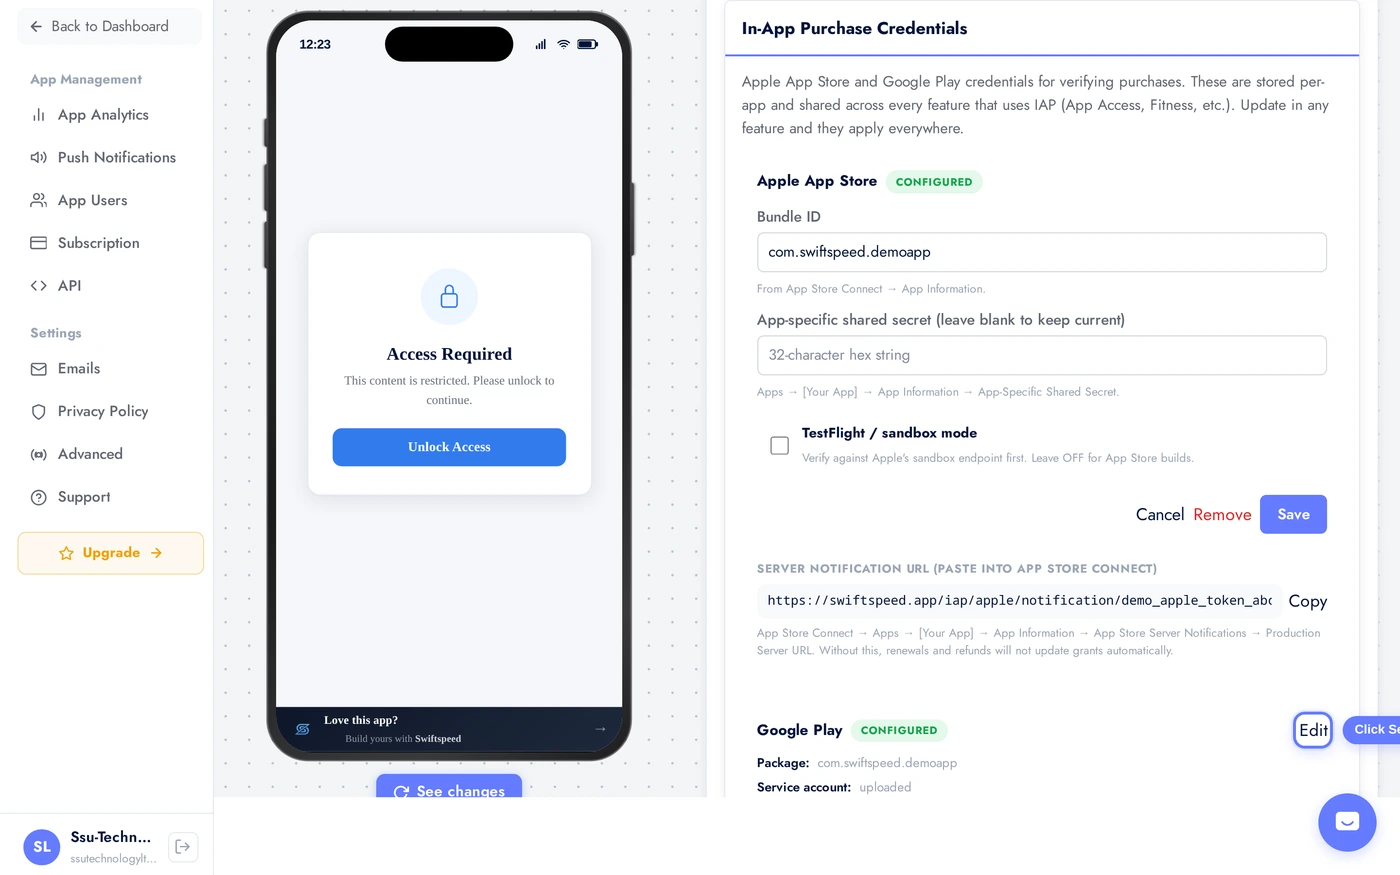
Scroll to the In-App Purchase Credentials card. Two platforms are shown, Apple App Store and Google Play. Click Set up next to Apple App Store (the button reads Edit if you have already saved credentials before).
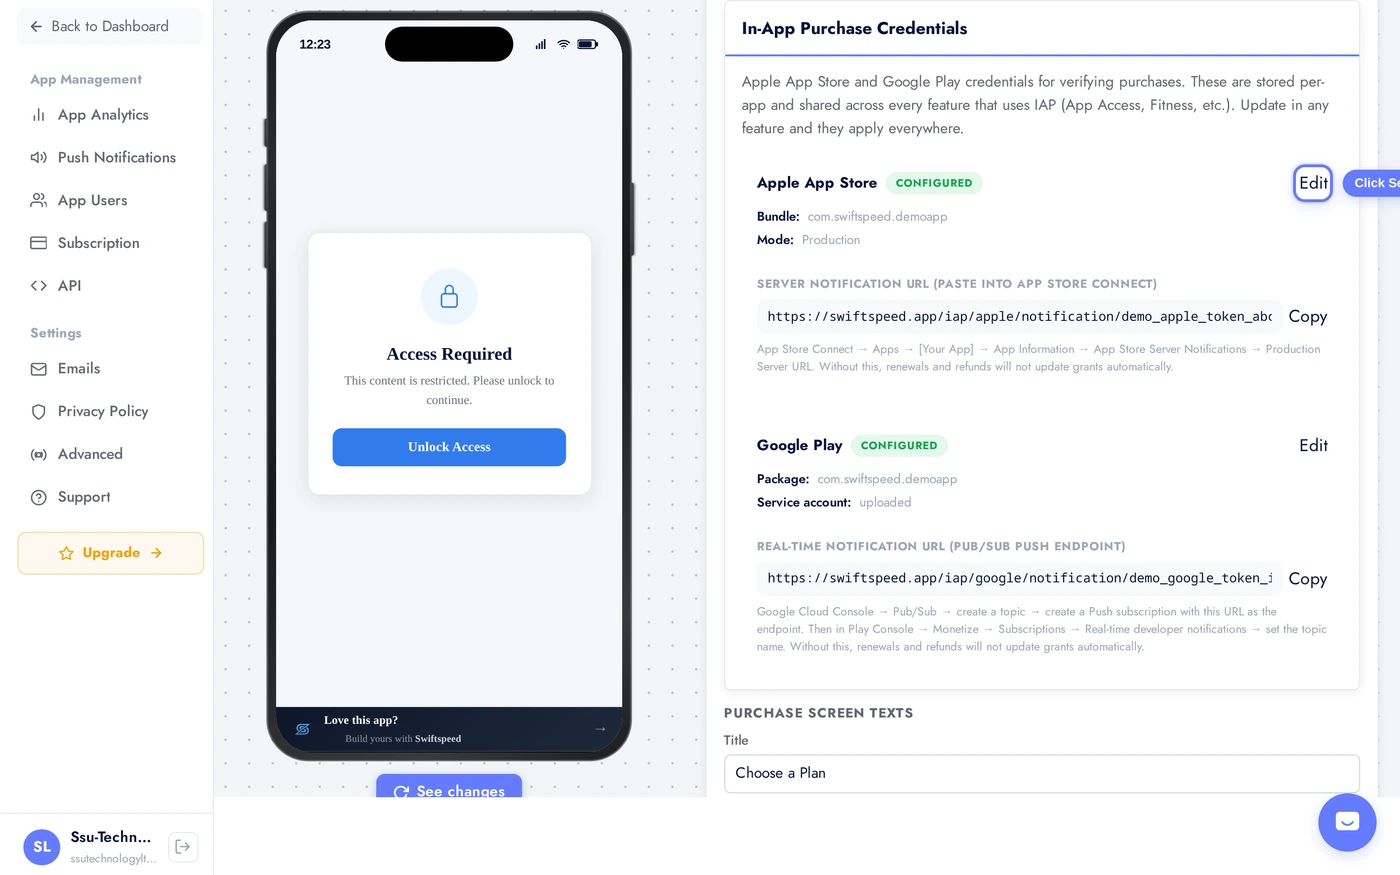
Fill in the form:
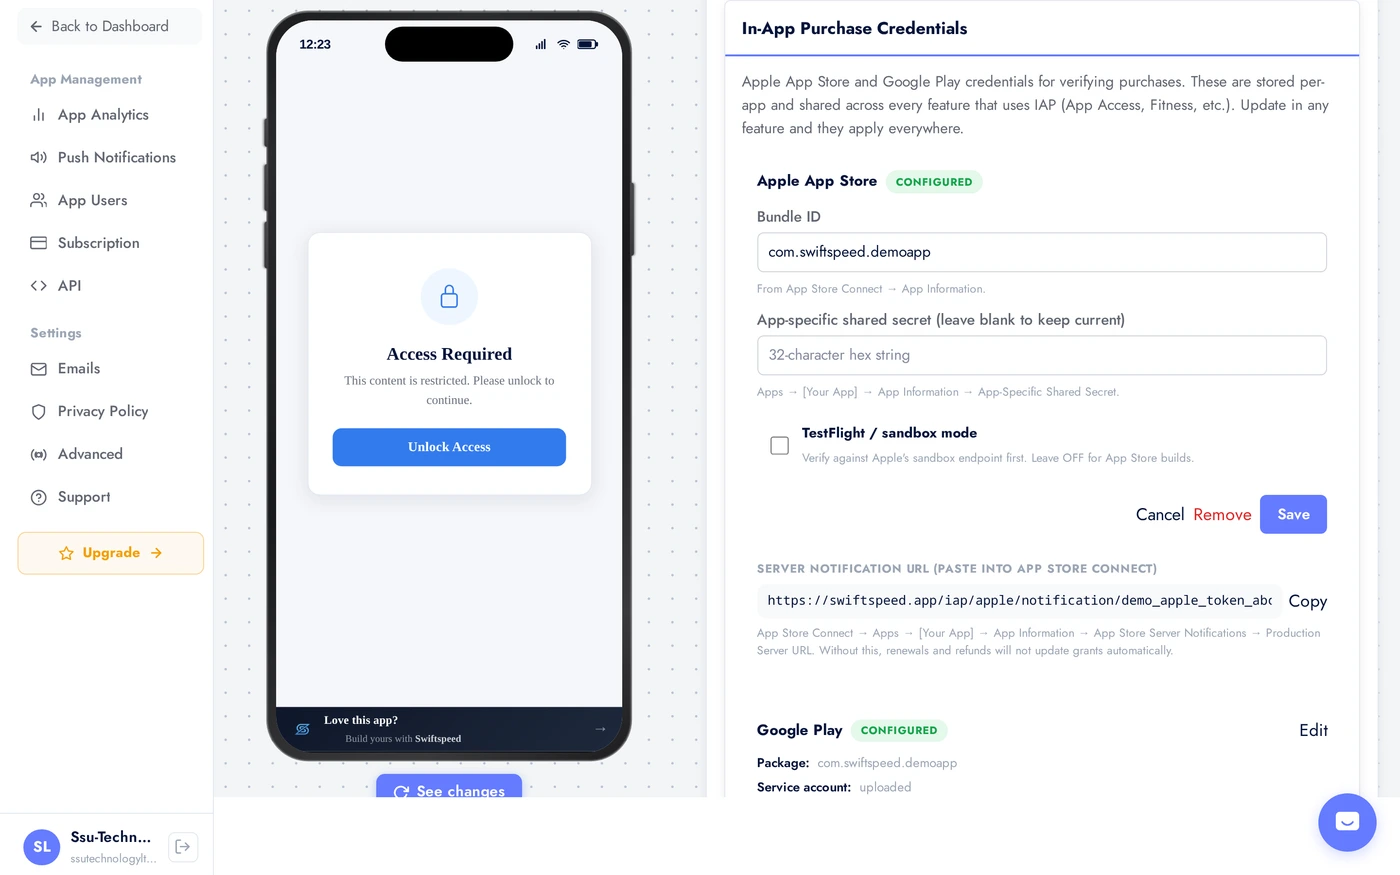
- Bundle ID: the exact bundle id you set when you created the iOS app in App Store Connect. Looks like
com.yourcompany.yourapp. - App-specific shared secret: paste the 32 character hex string from Step 2.
- TestFlight or sandbox mode: leave this OFF for App Store builds. Turn it ON only while you are testing through TestFlight or the iOS simulator with a sandbox tester. It changes which Apple endpoint we verify against; leaving it ON for the live App Store build will reject every real customer's purchase.
- Click Save. The card now shows the Apple section as Configured.
Step 8: Save your Google credentials in Swiftspeed
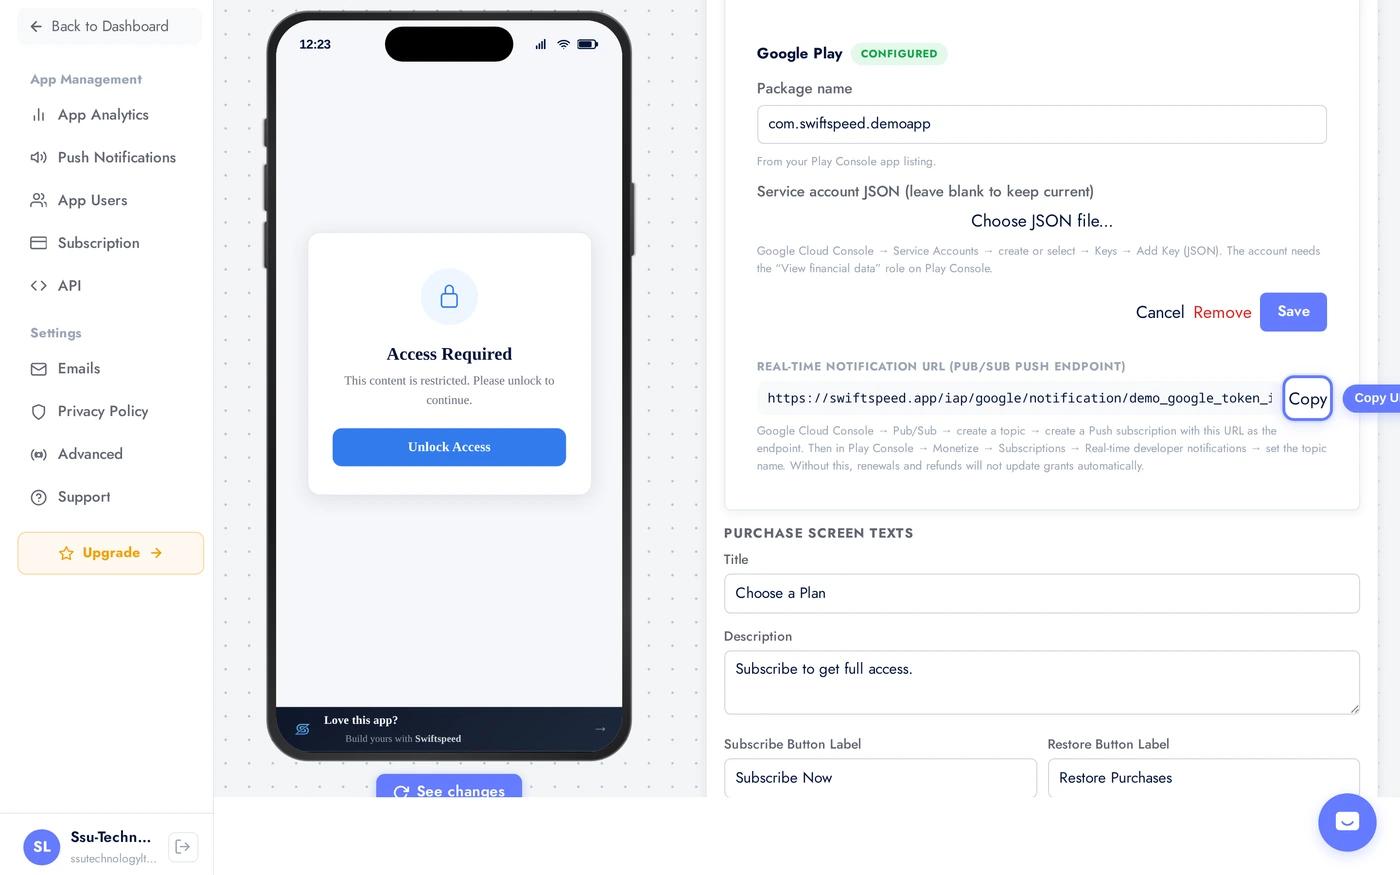
In the same card, scroll down to the Google Play section and click Set up (or Edit if already saved before).
Fill in the form:

- Package name: the exact package name from Google Play Console. Looks like
com.yourcompany.yourapp. - Service account JSON: click Choose JSON file, pick the file you downloaded in Step 4. It must be the
.jsonfile from Google Cloud Console. - Click Save. The card now shows the Google section as Configured.
If you see a validation error after saving (something like service account missing required permissions or package not found), come back to Step 5 and double check the permissions you granted in Play Console. You may also need to wait a few more minutes for permissions to propagate.
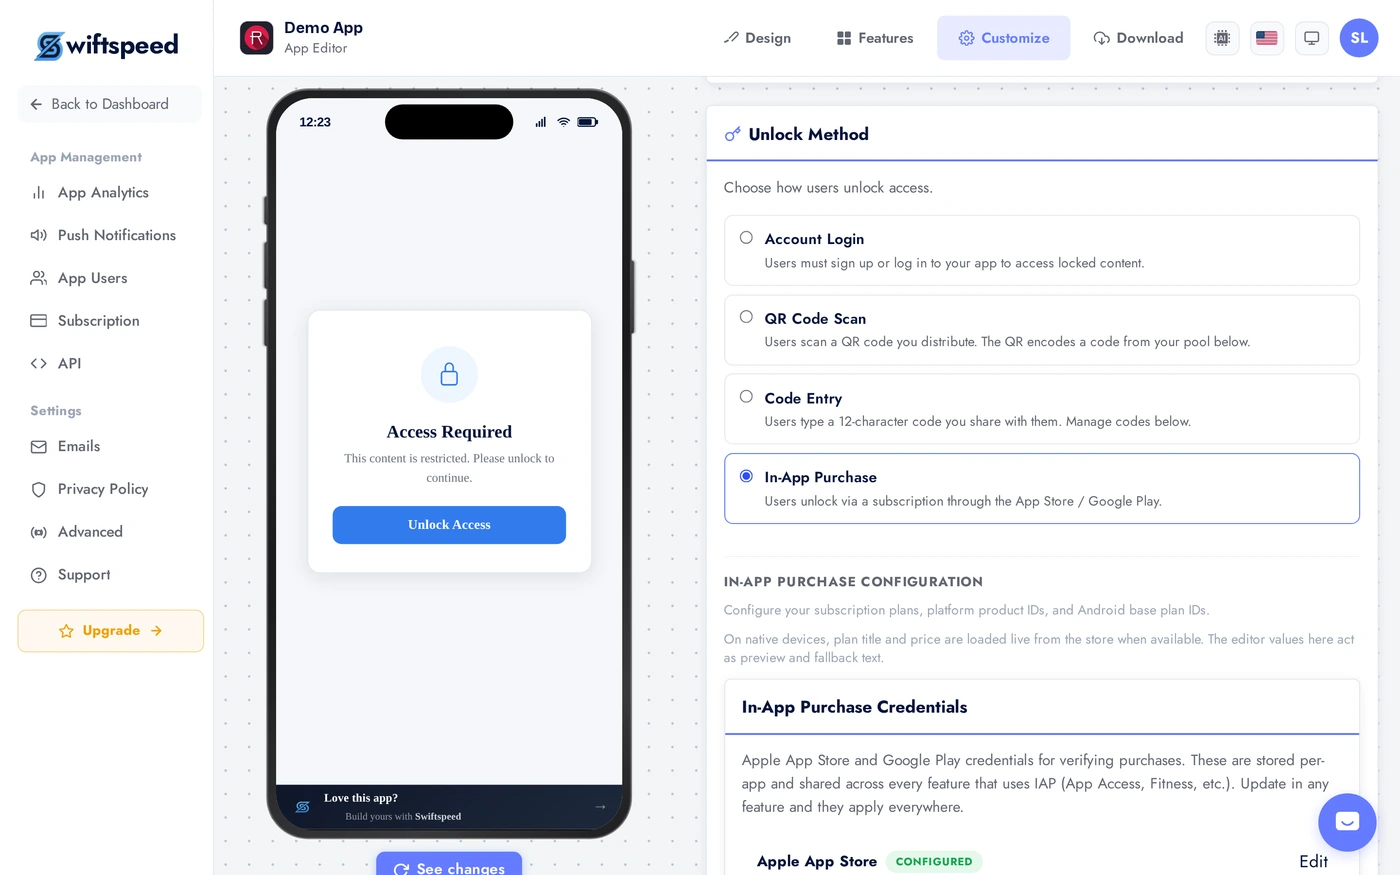
Step 9: Paste the Apple webhook URL back into App Store Connect
Saving the credentials lets Swiftspeed verify the initial purchase. But subscriptions are not one off events; they renew, get refunded, get cancelled. Apple needs to tell Swiftspeed when those things happen, so we can keep the customer's access in sync.
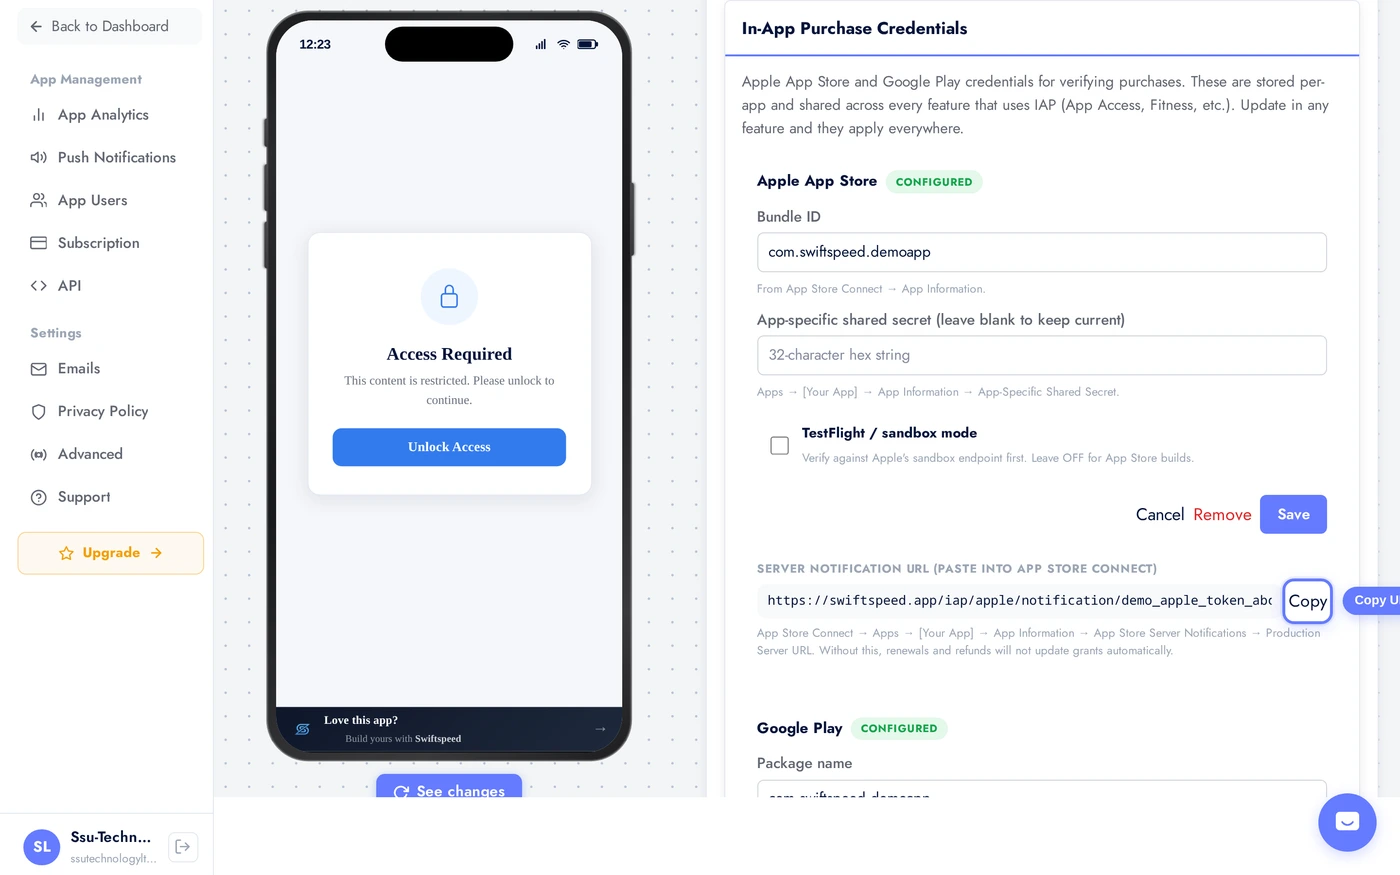
Apple does this through App Store Server Notifications. You give Apple a URL, Apple POSTs events to it. The URL is unique to your app and shown right under the Apple credentials in Swiftspeed.
Right below the Apple credentials, find the Server notification URL field. Click Copy.
- Go back to App Store Connect, open your app, click App Information in the sidebar.
- Scroll down to App Store Server Notifications.
- Paste the URL into the Production Server URL field. (If you are still in TestFlight, paste it into Sandbox Server URL instead.)
- Set the Version to Version 2 (Apple's recommended modern format). Swiftspeed supports both v1 and v2.
- Save.
Without this URL, the initial purchase will work but renewals, refunds, and cancellations will not automatically update your customer's access. You will get angry support tickets from people whose subscription expired but who are still being charged, or who got a refund but still have access.
Step 10: Paste the Google webhook URL via Pub/Sub
Google's version of server notifications is called Real-time developer notifications. The mechanism is different from Apple's. Google publishes events to a Pub/Sub topic in your Google Cloud project, then pushes them to a URL you set. We give you the URL, you create the topic and the push subscription.
It looks more complicated than it is. You only do it once.
Right below the Google credentials in Swiftspeed, find the Real-time notification URL field. Click Copy.
- Open Google Cloud Console at https://console.cloud.google.com and select the project you created in Step 4.
- In the search bar at the top, type Pub/Sub and pick the Pub/Sub result.
- Click Create Topic. Name it something like
play-iap-notifications. Leave the defaults and click Create. - On the topic page, click the Subscriptions tab, then Create Subscription.
- Pick a Subscription ID like
play-iap-push. - Set Delivery type to Push.
- Paste the Swiftspeed URL you copied into the Endpoint URL field.
- Leave everything else on default. Click Create.
- Now open Play Console at https://play.google.com/console. Pick your app.
- Sidebar > Monetize with Play > Monetization setup.
- Scroll to Real-time developer notifications.
- In the Topic name field, paste the full topic name in the format
projects/your-project-id/topics/play-iap-notifications. (You can copy this from the Pub/Sub topic page in Google Cloud.) - Click Send test notification. If everything is wired correctly, you will see a success message.
- Save.
Same risk as Apple: without this in place, renewals and refunds will not automatically update your customers' access.
Step 11: Configure the plans inside Swiftspeed
You have credentials saved and webhooks in place. The last setup step is to tell Swiftspeed which plans to actually offer, by referencing the Product IDs you wrote down in Steps 1 and 3.
Still on the App Access page (or the Fitness Membership tab if that is where you are setting up IAP), scroll to the IAP plans section.
- Click Add plan.
- Title: what shows on the purchase button in your app, like
Premium Monthly. - Price: what shows next to the title in the app UI, like
4.99 USD per month. This is display only; Apple and Google charge whatever the price tier is set to in their consoles. - Period: a short word for the billing period, like
monthoryear. Display only. - Description: one short sentence on what the user gets.
- Apple product ID: paste the Product ID from Step 1, exact match, case sensitive.
- Google product ID: paste the Product ID from Step 3.
- Google base plan ID: paste the Base plan ID from Step 3 (only for subscriptions). Leave blank for one-time products.
- Repeat for every plan.
- Click Save at the bottom of the App Access page.
Tip: if your iOS app only sells subscriptions and your Android app only sells one time unlocks (or vice versa), leave the unused field blank on each plan. Swiftspeed will only attempt to charge on the platform where a Product ID is filled in.
Step 12: Test it before you go live
Never ship IAP straight to production without testing. Both Apple and Google offer sandbox modes that let you simulate purchases without being charged.
- iOS: in App Store Connect go to Users and Access > Sandbox Testers and create at least one test user with a fake email address. Sign into that account inside the App Store app on your test device (Settings > App Store > Sandbox Account). Build a TestFlight version of your app, turn ON the TestFlight or sandbox mode toggle in the Apple credentials card in Swiftspeed, install through TestFlight, attempt a purchase. You should see Apple's sandbox purchase sheet.
- Android: in Play Console go to Setup > License testing and add the Google account you will test with. Upload your build to the Internal Testing track in Play Console. Install through the Play Store using that account. Attempt a purchase. You should see Google's test purchase sheet with "Test card, always approves" available.
- Check that the customer is granted access immediately after the purchase completes.
- Cancel the test subscription in the device's settings, and verify Swiftspeed receives the cancellation webhook and revokes access at the end of the period.
- Once both flows work end to end, turn the Apple sandbox toggle back OFF, submit your app for review, and go live.
Troubleshooting
- Purchase succeeds but the user is not granted access: the Product ID in Swiftspeed does not match what is in App Store Connect or Play Console. Check exactly, case sensitive.
- Apple credentials save returns "Shared secret must be 32 hex characters": you copied something other than the app specific shared secret, possibly the master one or a label. Go back to App Store Connect > App Information > App-Specific Shared Secret and copy only the hex string.
- Google save returns "Service account JSON invalid": the file you uploaded is not the JSON key. Make sure you downloaded a
.jsonfile, not the service account email or a screenshot. - Google purchases fail with a 403 permission error: the service account does not have the right permissions in Play Console, or you did not wait long enough after granting them. Recheck Step 5 and wait 30 to 60 minutes.
- Renewals do not update access: the webhook URL is not configured (or pointing to sandbox instead of production). Recheck Step 9 for Apple and Step 10 for Google.
- Sandbox purchases work but production fails: the TestFlight or sandbox mode toggle in the Apple credentials card is still ON. Turn it OFF for App Store builds.
- Everything looks right but the plan never shows in the app: you forgot to Activate the product in Play Console, or the iOS product is Missing Metadata in App Store Connect. The product must be in Ready to Submit or Approved before the app sees it.
Where to find this again
- App Access path: Settings > App Access > unlock method In-App Purchase.
- Fitness Membership path: Fitness feature > Membership tab. Same credentials card.
- Credentials are stored per app and shared across every feature that uses IAP. Updating in one place updates everywhere.
Related
- App Access Control - the broader page on locking your app or specific features. IAP is one unlock method out of four (Account, QR, Code, IAP).
- Publishing on the App Store - your IAP products will not be live until the app is approved with the IAP submission attached.
- Publishing on Google Play - same, the Android side.
- App Billing and Subscription - your Swiftspeed plan, not the same thing as in-app purchases sold inside your app.