The White Label plan is Swiftspeed’s premium subscription tier, designed for entrepreneurs and agencies who want to offer app creation services under their own brand. This powerful solution enables you to take full ownership of the app creator platform, completely customized with your branding, while leveraging Swiftspeed’s robust technology infrastructure.
Key Benefits of the White Label Plan:
- Complete Brand Ownership: Present the entire platform under your company name, logo, and brand identity—clients will see your brand exclusively throughout their experience.
- Comprehensive Customization Options: Access hundreds of configuration settings to tailor the platform to your specific business needs and client requirements.
- Business Growth Tools: Receive extensive resources to build, integrate, manage, and monetize your app creation services.
- Flexible Client Management: Set your own pricing structure and manage client relationships according to your business model.
This guide will walk you through the complete setup process for your White Label platform, enabling you to launch your branded app creation business efficiently.
Setup Process
Step 1: Accessing the White Label Settings
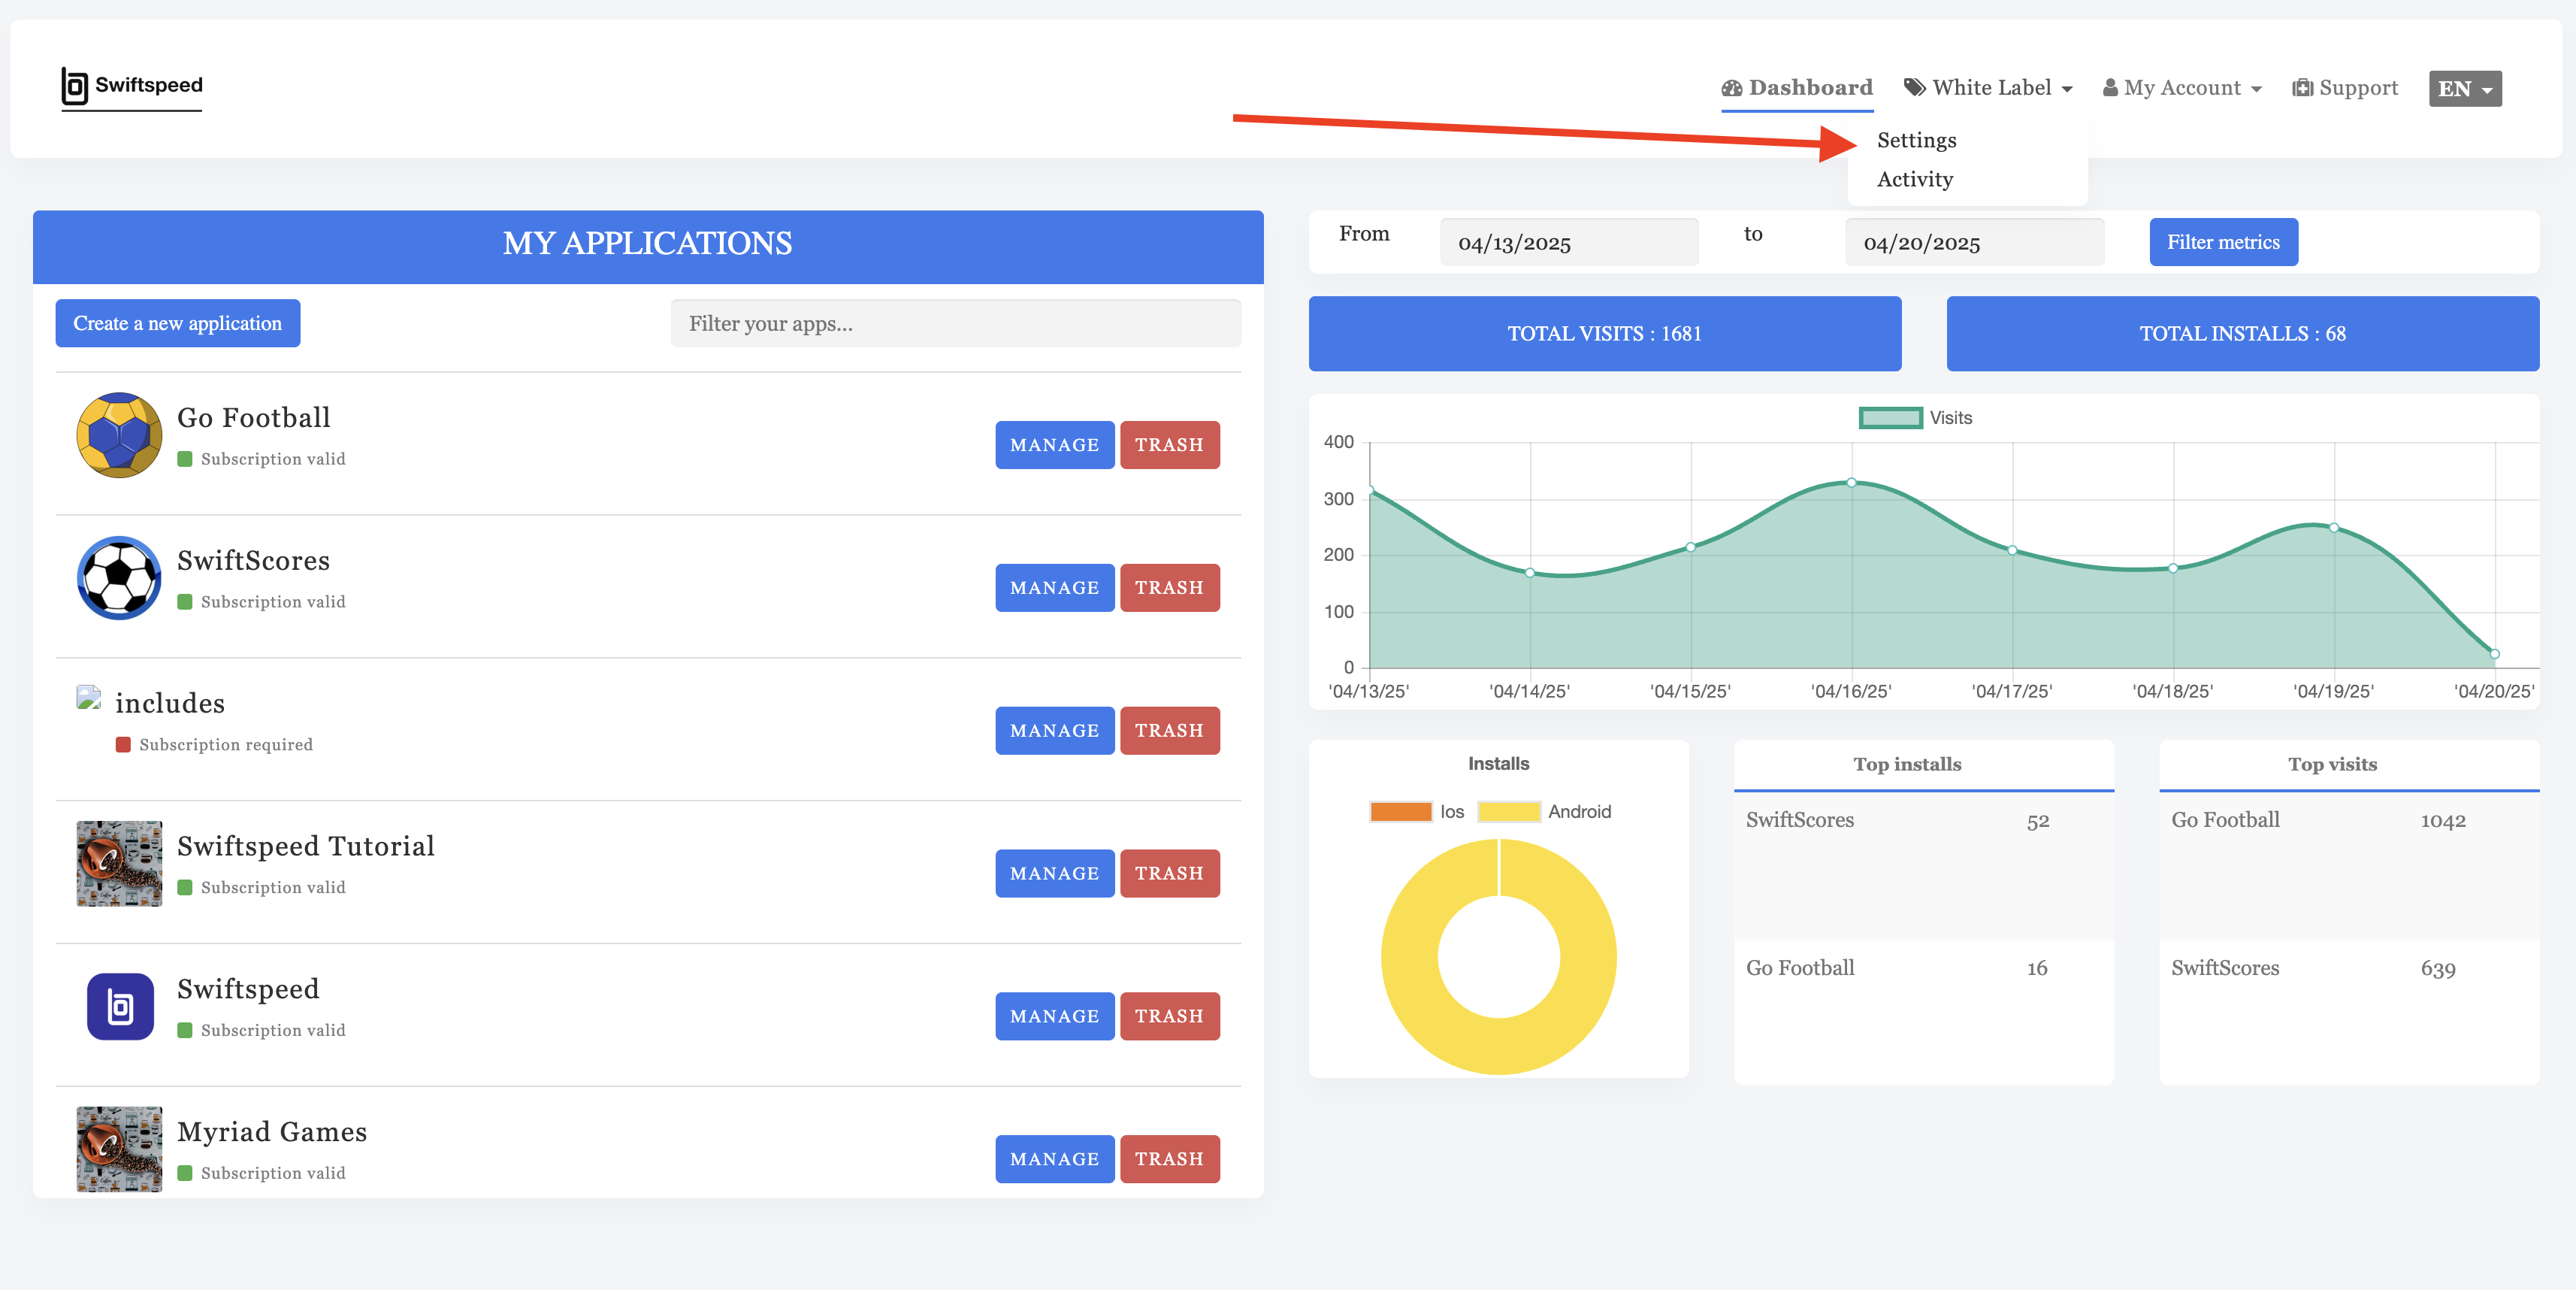
- Navigate to the Swiftspeed editor dashboard and log in with your credentials.
- Once on the app creator dashboard, locate and click the “White Label” tab in the main navigation menu.
- Select “Settings” from the dropdown menu that appears.
- You will be automatically redirected to the White Label settings configuration page.
Step 2: Configuring Basic White Label Settings
On the settings page, you’ll need to provide essential information about your business and configure your custom domain:
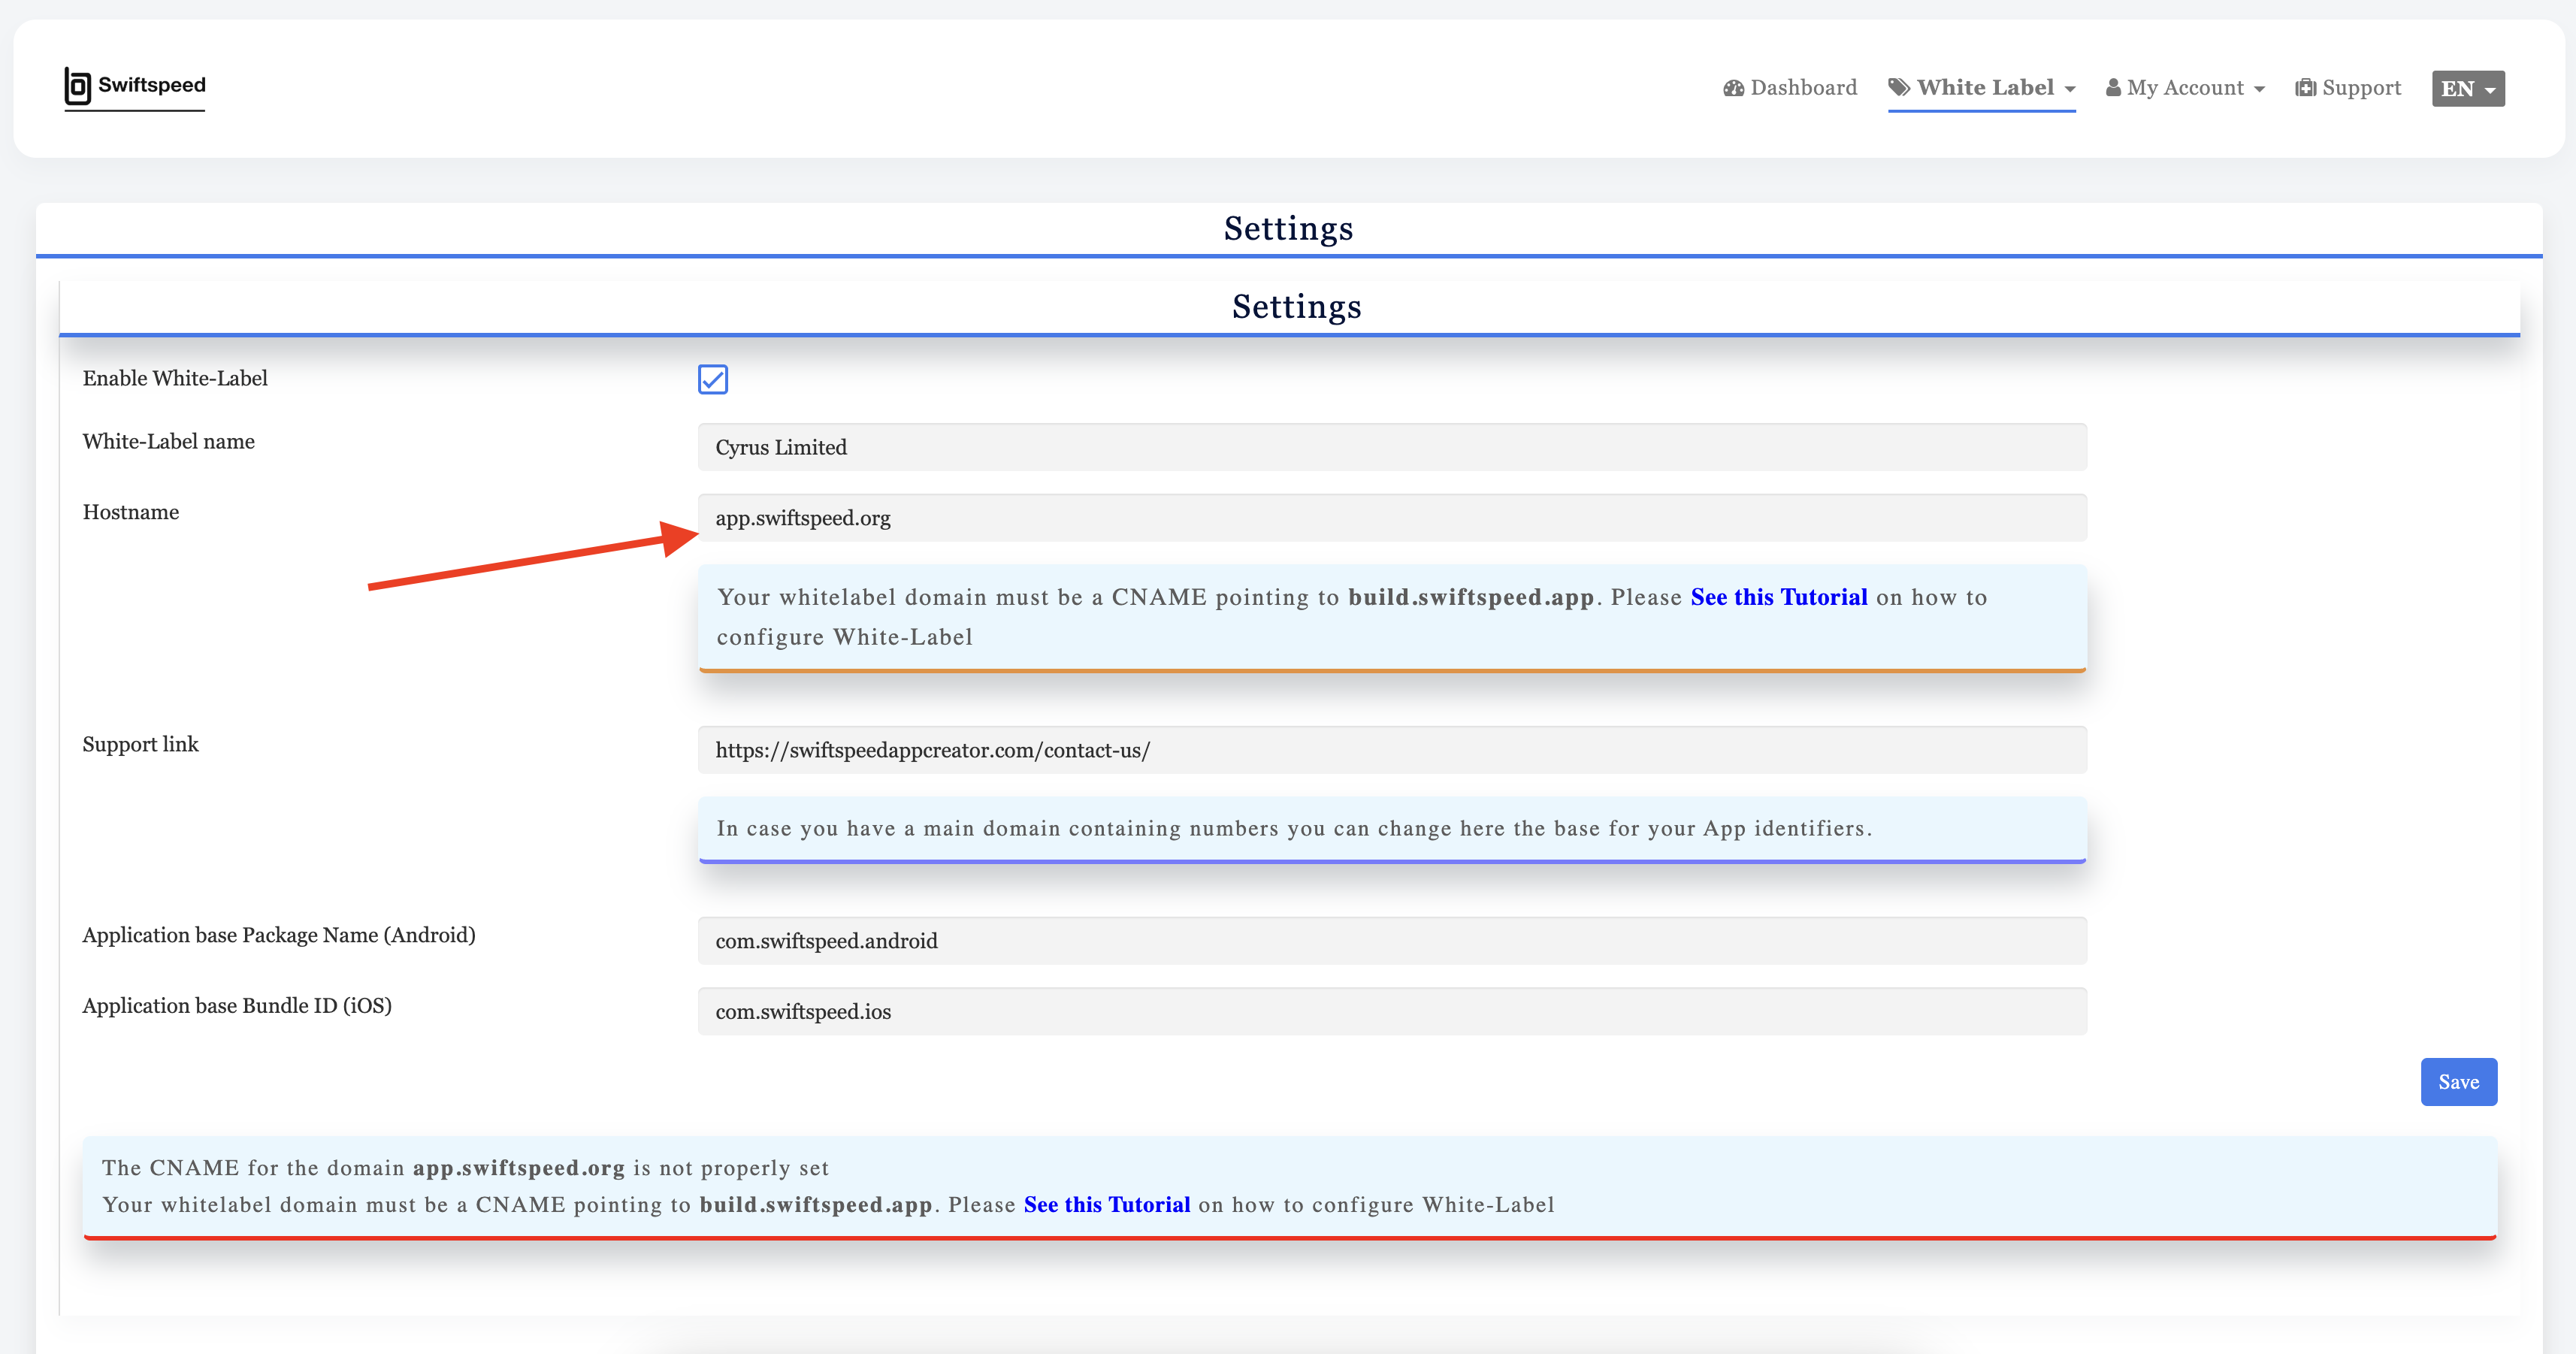
- First, toggle the “Enable White-Label” switch to activate White Label functionality.
- Enter your business name in the “White Label Name” field—this will be displayed throughout the platform.
- For the “Hostname” field, enter your custom domain that clients will use to access your platform.
Important Domain Configuration: Your White Label domain must be configured as a CNAME record pointing to build.swiftspeed.app. Below is an example of how to set this up using the Contabo platform:
- Visit the Contabo homepage and navigate to DNS zone management.
- Locate your domain (e.g., “swiftspeed.org”) in the list of URLs and select it.
- Select “C” (CNAME) from the “Type” dropdown menu.
- Enter
build.swiftspeed.appin the “Data” field. - Click “Create Record” to save your CNAME configuration.
- Copy your newly created domain and return to the Swiftspeed White Label settings.
- Paste the domain into the “Hostname” field.
Additional Required Settings:
- Enter your “Application Package Name” in the designated field.
- Provide your “Application Base Bundle ID” in the appropriate field.
- Click “Save” to store these settings.
- Scroll down to continue with the Privacy settings section.
Step 3: Configuring Privacy Settings
If your business operates in Europe or serves European customers, you’ll need to comply with GDPR regulations:
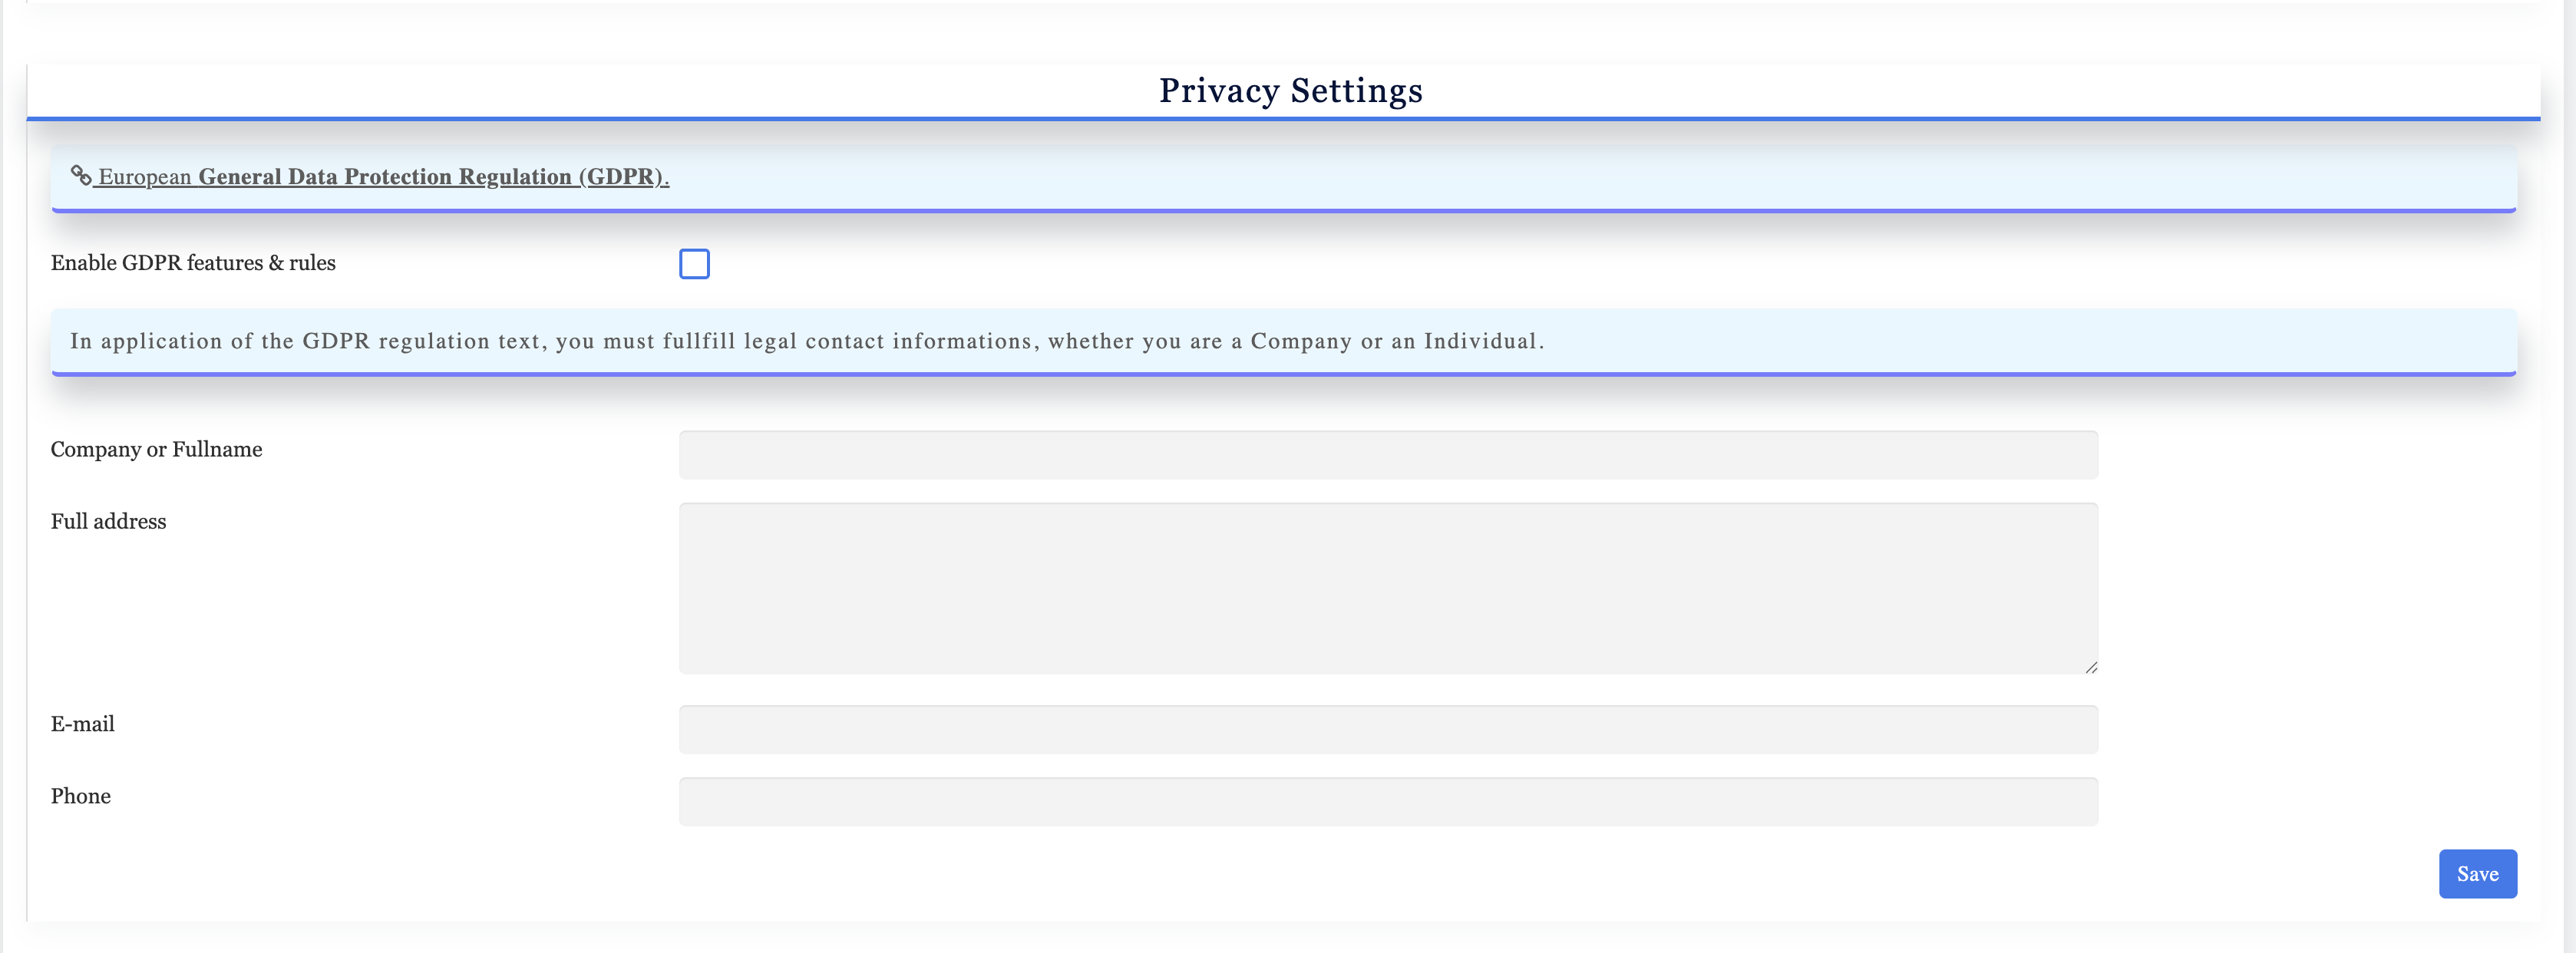
- In the “Privacy Settings” section, enable the “GDPR Features and Rules” option.
- Complete the required company information fields:
- Full company name
- Complete business address
- Official contact email address
- Business phone number
- Click “Save” to store your privacy settings.
- Scroll down to the next section for email configuration.
Step 4: Setting Up Email Configuration
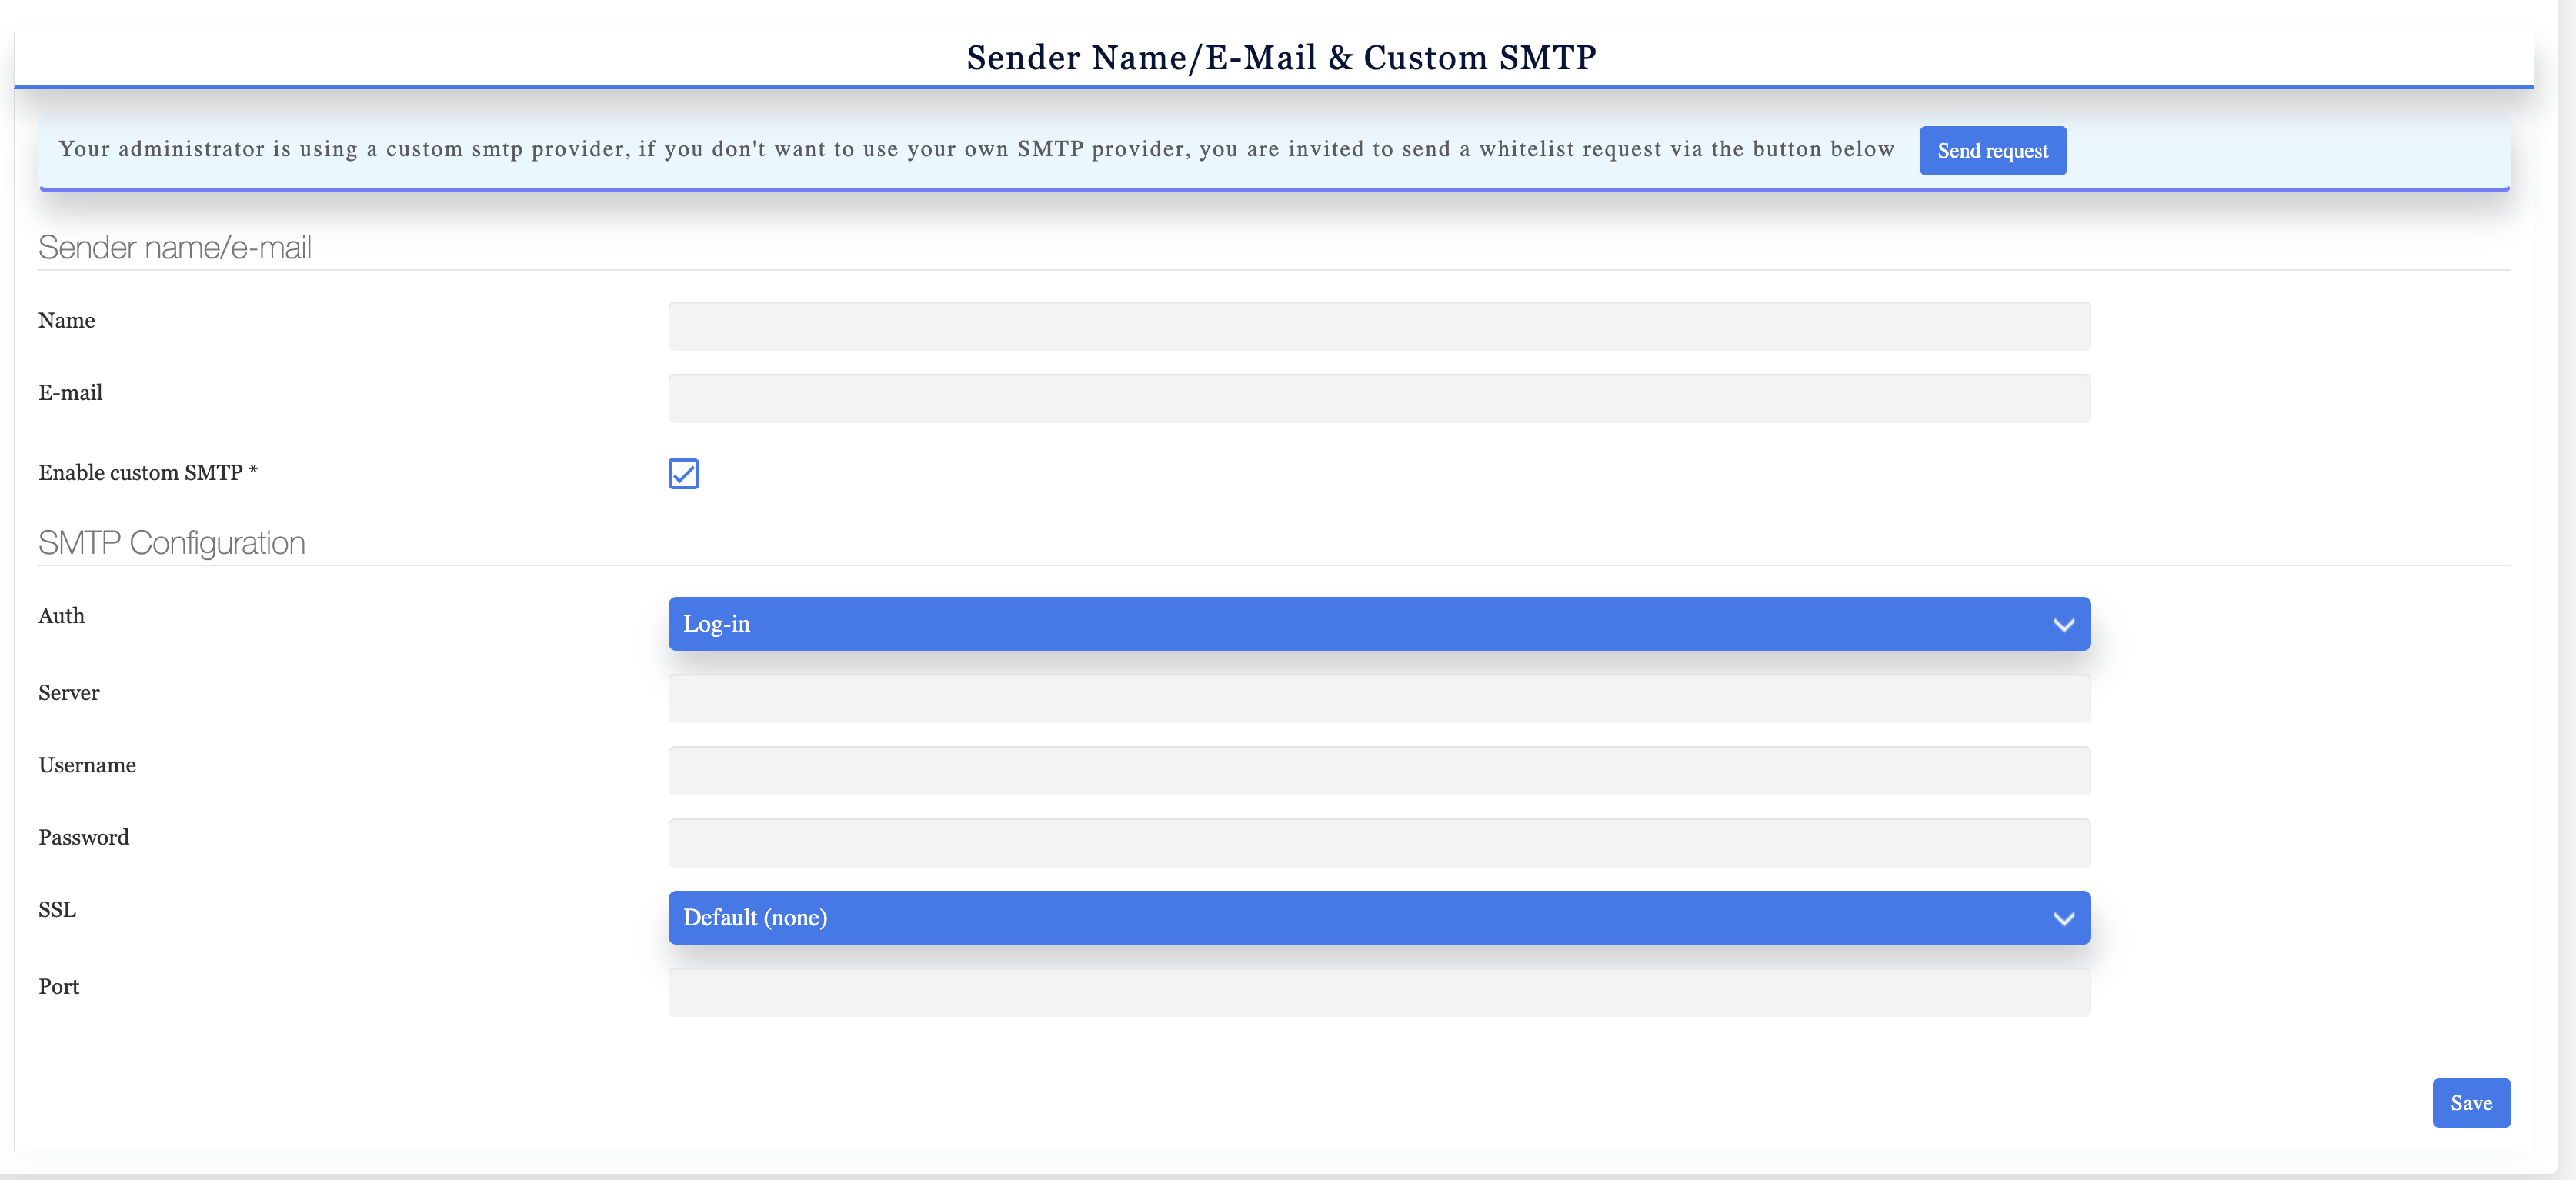
The email configuration determines how communications from your platform will appear to your clients:
- In the “Sender Name, Email & Custom SMTP” section, enter your business name as it should appear in email communications.
- Provide the email address that will be used as the sender for all platform notifications and communications.
- If you have a custom SMTP server for sending emails:
- Toggle “Enable Custom SMTP” to activate this feature.
- Enter your SMTP server details in the fields that appear.
- Click “Save” to store your email configuration settings.
- Navigate back to the main dashboard by clicking the “Dashboard” tab in the navigation menu.
Step 5: Customizing Your Platform’s Appearance
Now it’s time to personalize the visual elements of your White Label platform:
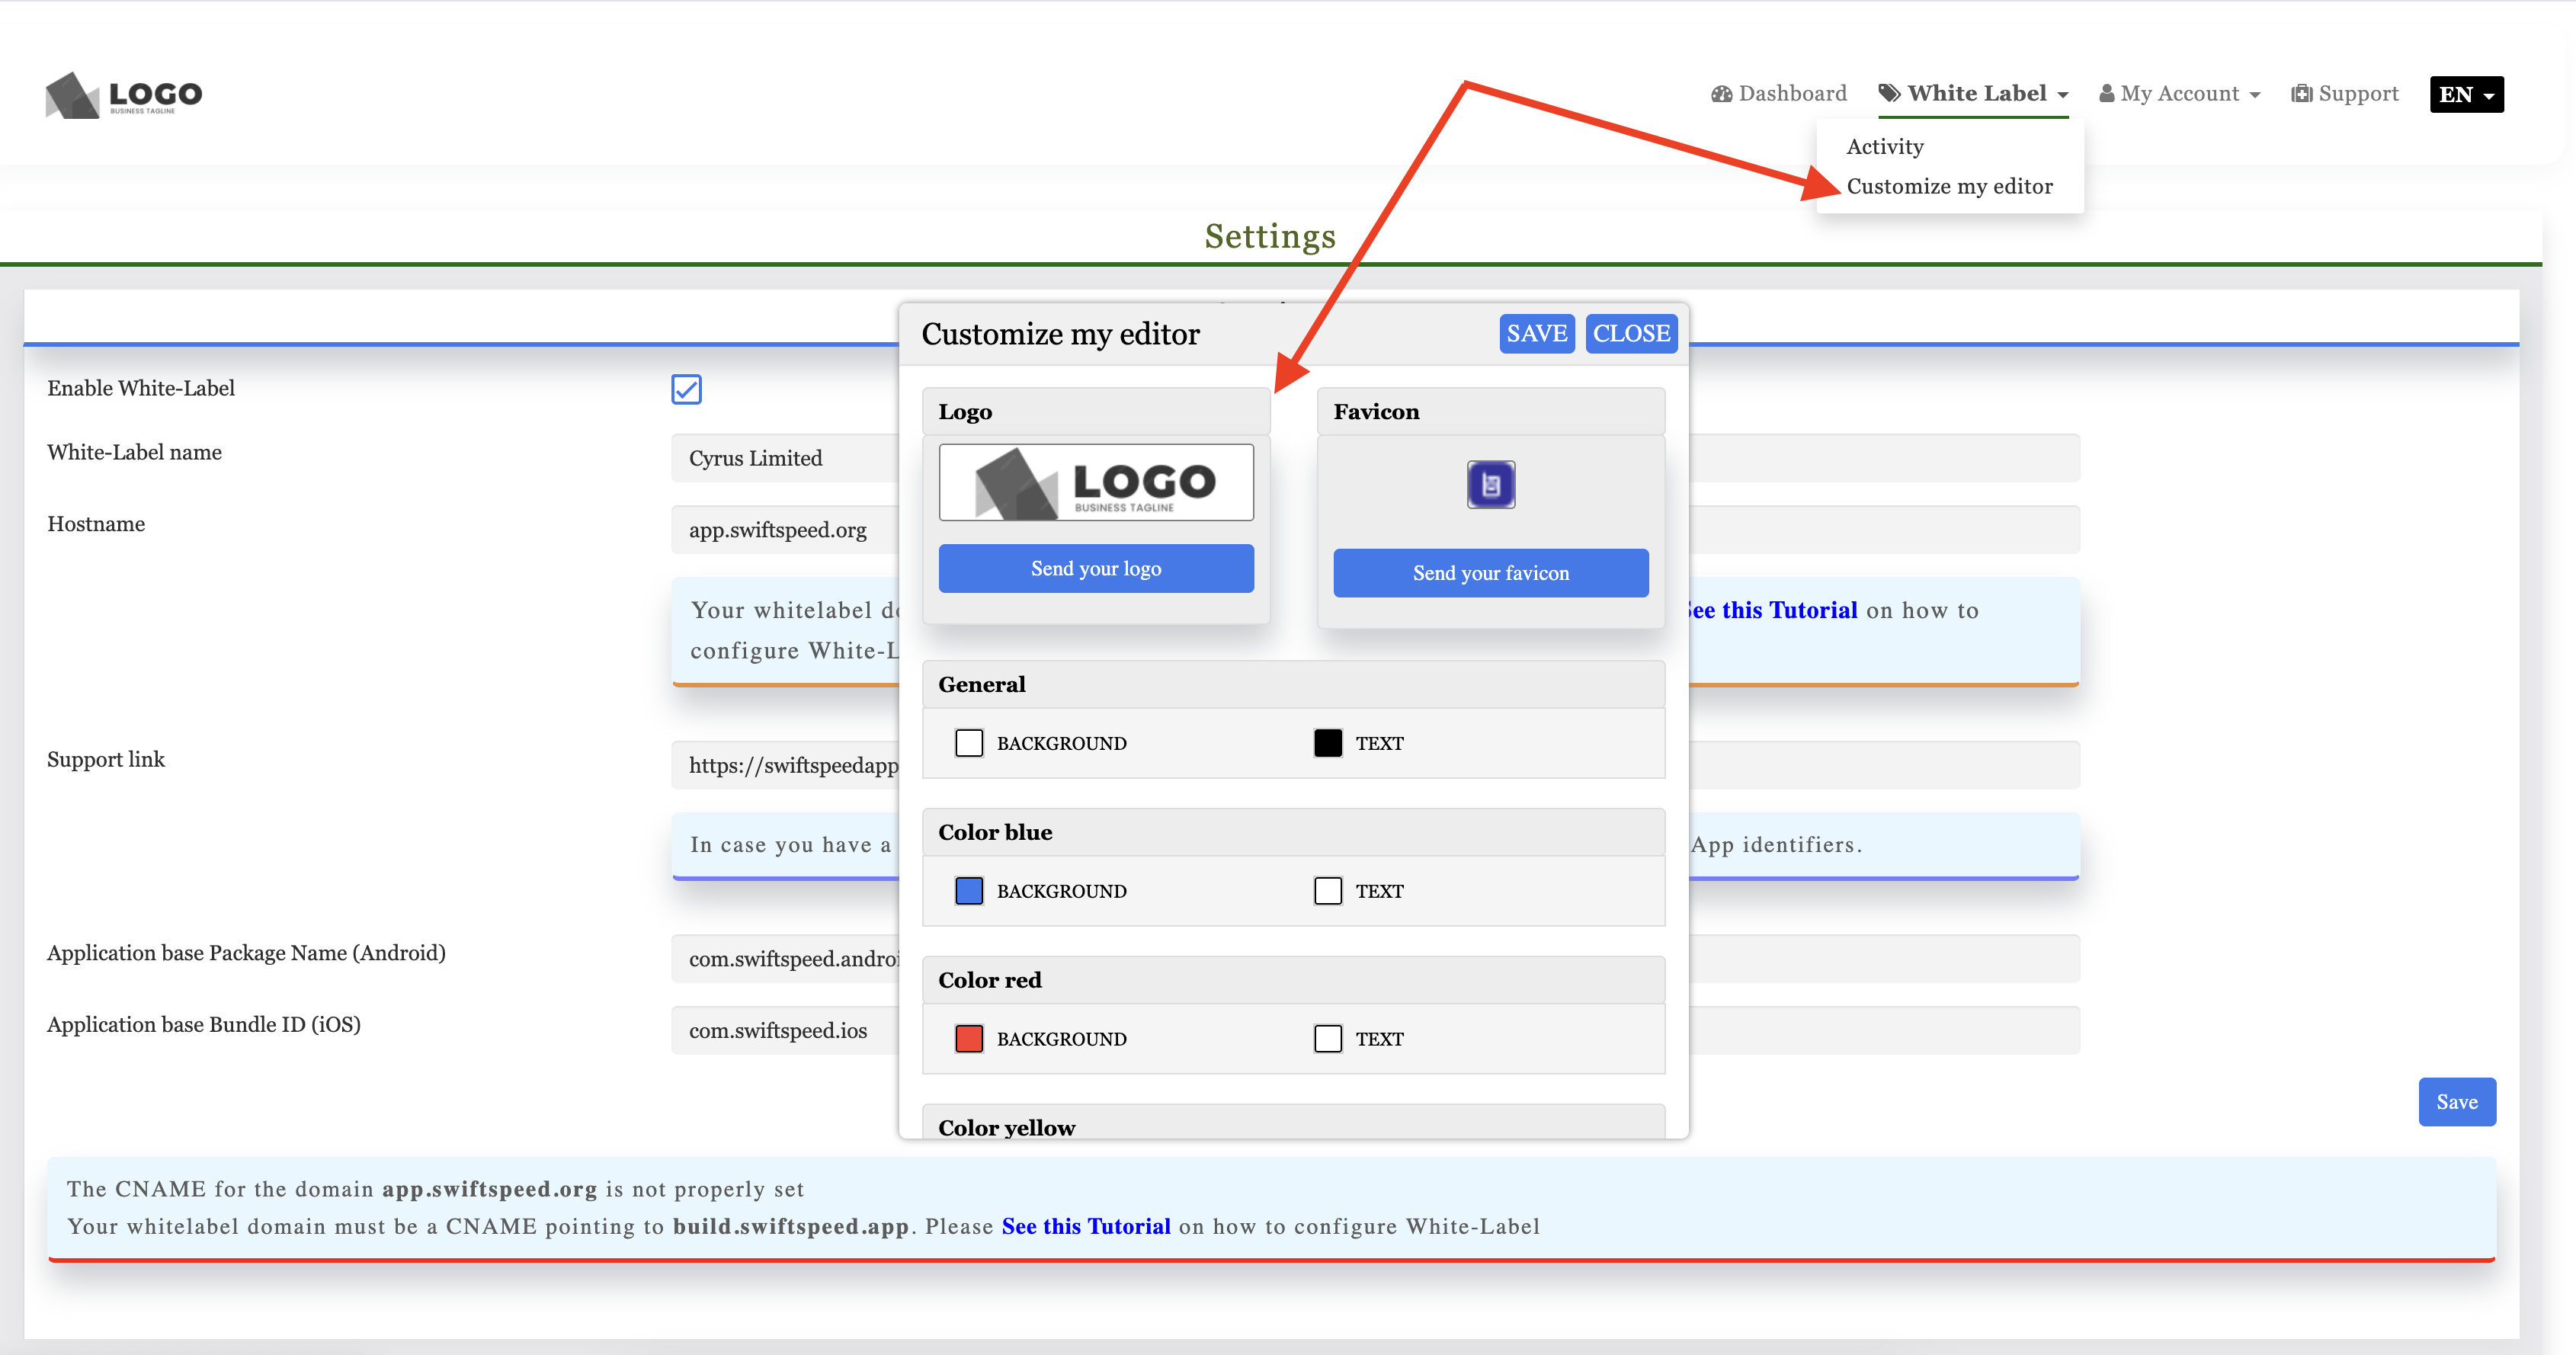
- From the dashboard, locate and click the “Customize My Editor” button.
- In the customization interface, you can modify the following elements:
- Logo: Upload your company logo to replace the Swiftspeed branding.
- Favicon: Upload a custom favicon that will appear in browser tabs.
- Color Scheme: Select custom colors that match your brand identity for various platform elements.
- Any changes you make are saved automatically in real-time.
- When you’ve completed your customizations, click the (X) button to close the customization interface.
Step 6: Verifying Your White Label Setup
It’s important to verify that your White Label configuration is working correctly:
- Open a new browser tab or window.
- Enter the custom hostname you configured in Step 2 (your White Label domain).
- Press Enter to load the page.
- You should see a login interface that displays your logo and brand colors instead of Swiftspeed’s.
Note: At this point, your White Label platform is technically ready, but you’ll need to create user accounts for your clients to access it.
Step 7: Creating User Accounts
To allow clients or team members to access your White Label platform:
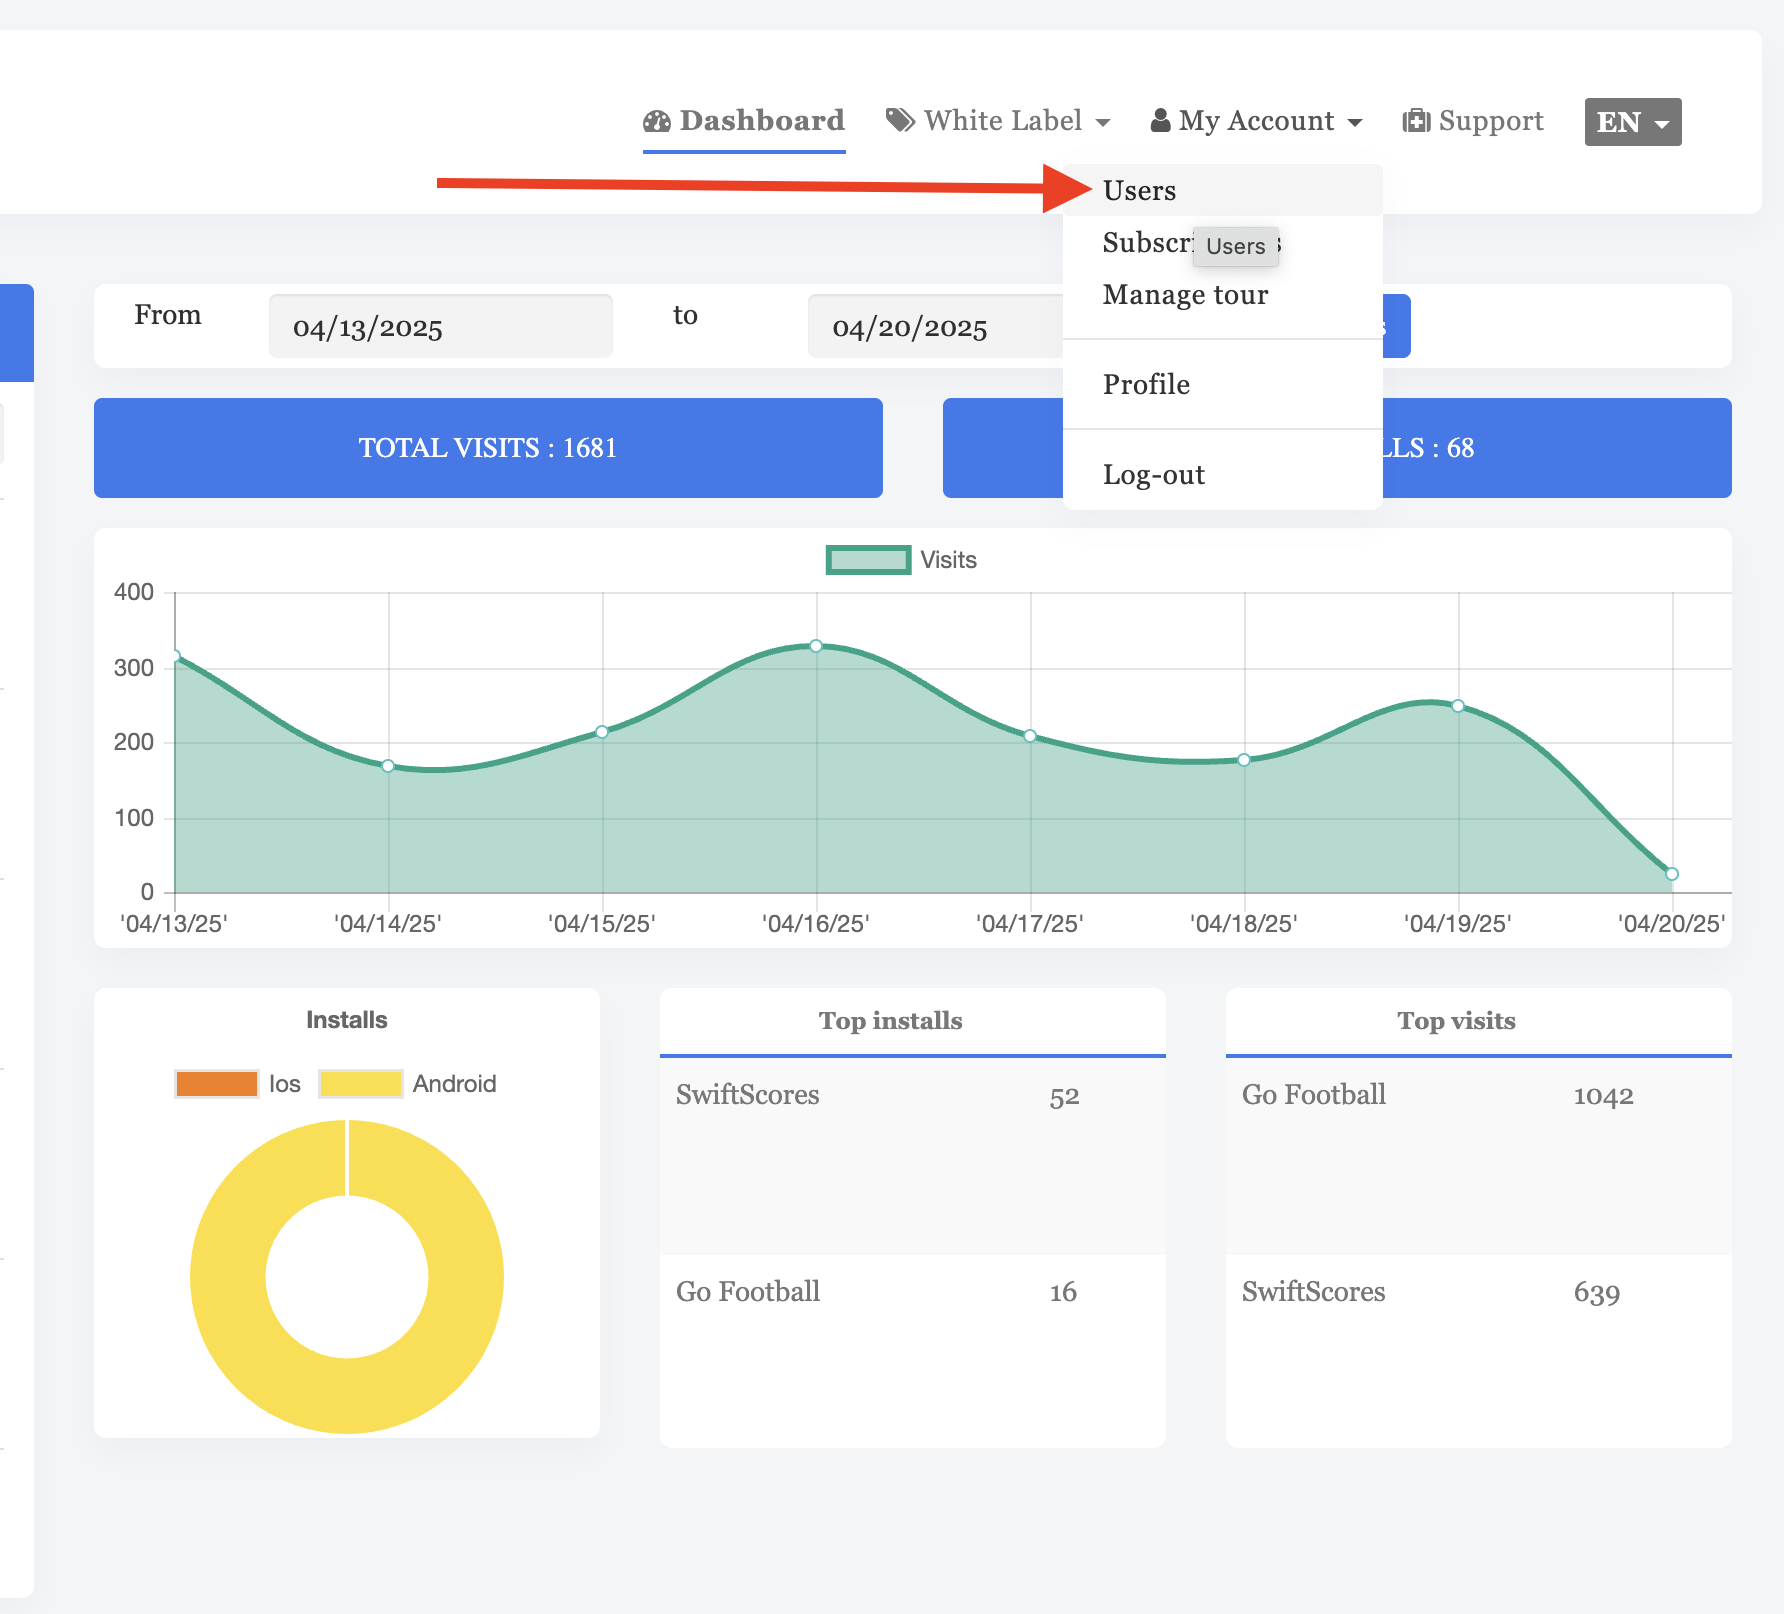
- Return to your White Label dashboard.
- Click on the “My Account” tab in the main navigation.
- Select “Users” from the dropdown menu.
- You’ll be taken to the “My Users” section where all existing user accounts are displayed.
- Click the “Create New Users” button to add a new account.
- Fill in the new user’s information:
- Full name
- Email address
- Password (or option to let the user set their own)
- Contact details
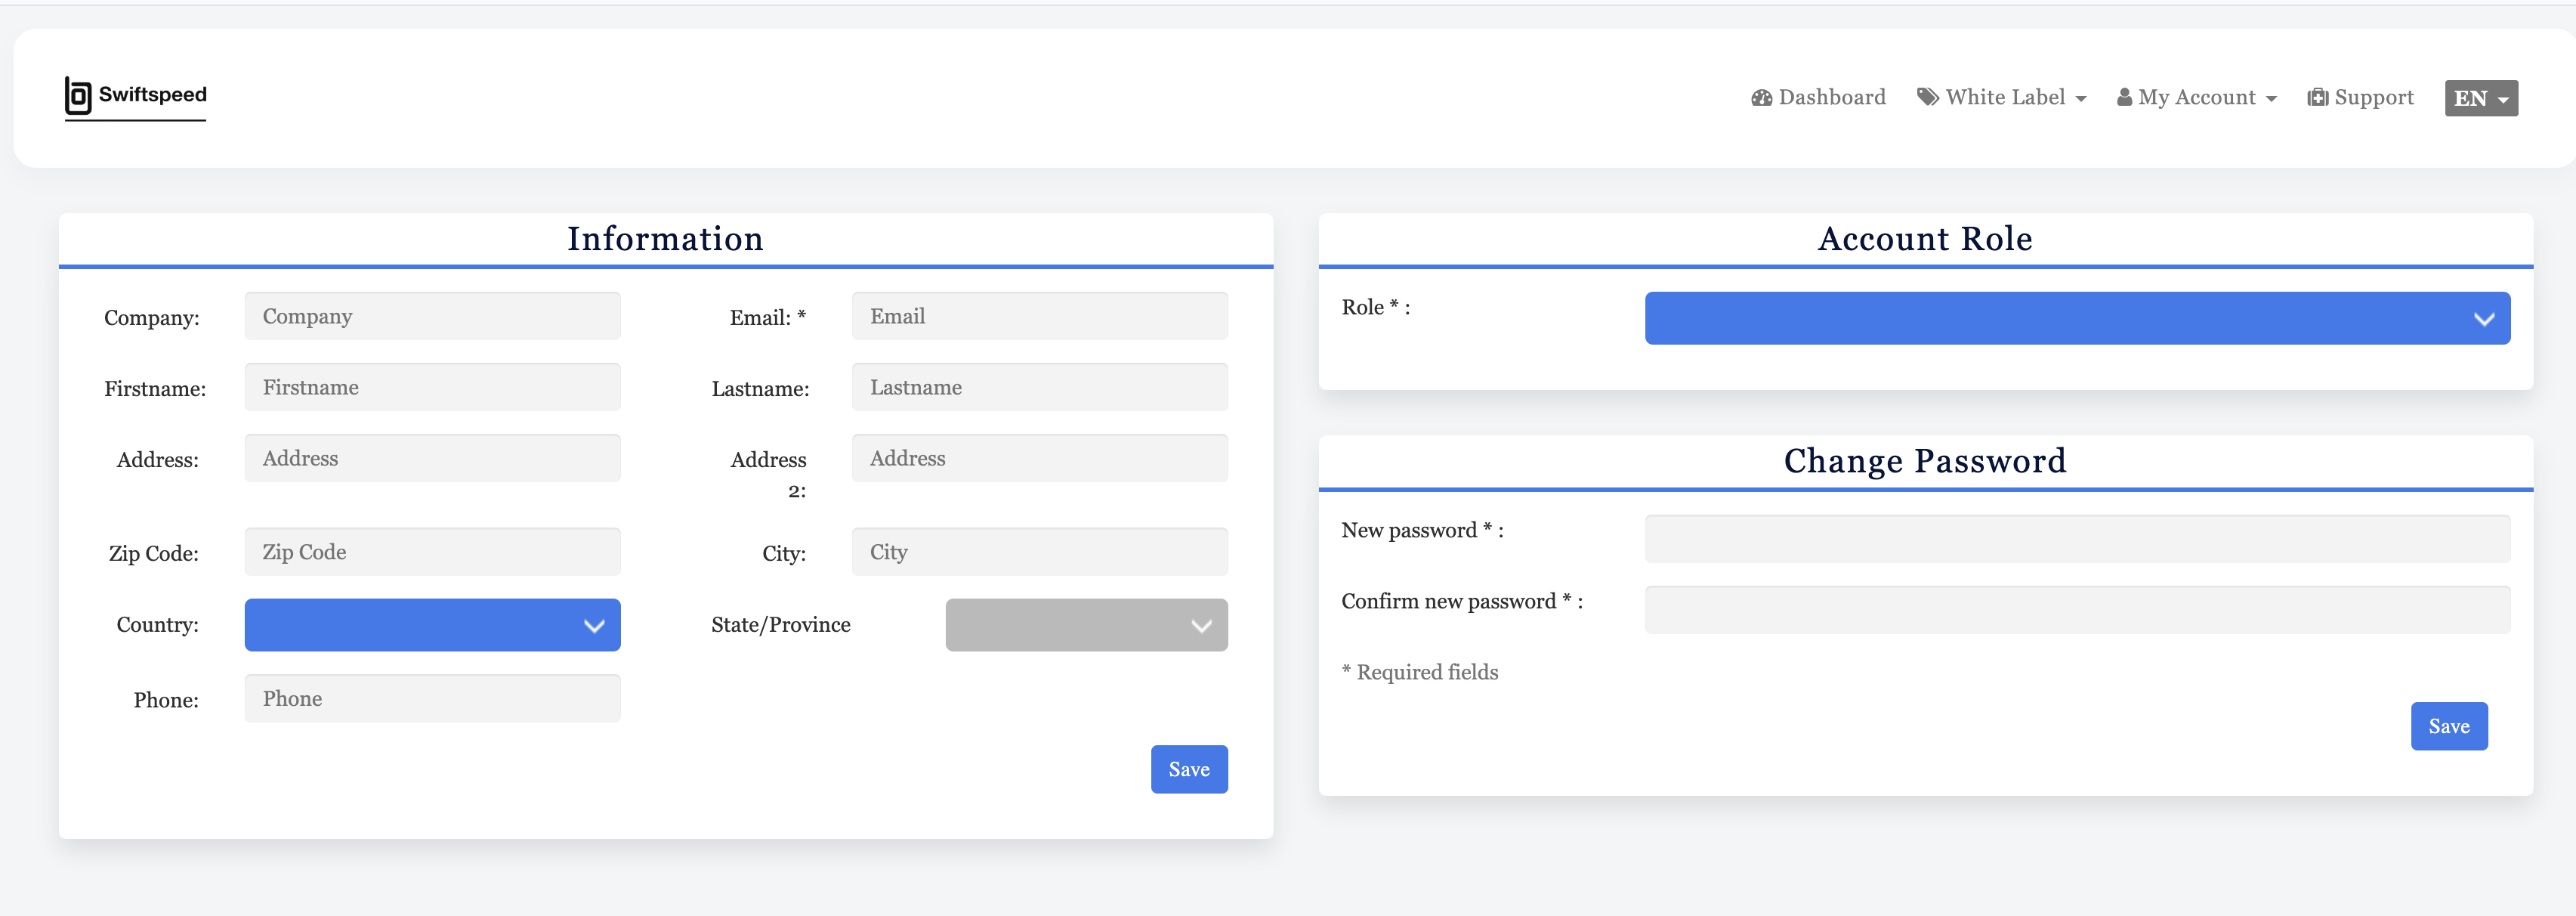
- Assign an appropriate role to the user by clicking the “Role” dropdown and selecting from the available options:
- Administrator
- Editor
- Viewer
- Custom role (if configured)
- Click “Save” to create the new user account.
Step 8: Assigning Apps to Users
To control which apps your users can access and manage:
- Navigate to the “My Account” tab and select “Users” to return to the user management interface.
- Locate the user you want to modify and click the “Edit” button next to their entry.
- In the user edit interface, you’ll see a list of all apps in your platform.
- Check the boxes next to the apps you want to assign to this user.
- Click “Save” to update the user’s permissions.
- Return to the dashboard and refresh the page.
Important: Users can only access and edit the apps specifically assigned to them. They cannot delete any app they are assigned to manage, providing you with ultimate control over your platform’s content.
Conclusion
Congratulations! You have successfully set up and configured your Swiftspeed White Label platform. Your branded app creation business is now ready to serve clients under your own brand identity.
Next Steps:
- Create marketing materials to promote your new app creation services.
- Develop pricing packages that make sense for your target market.
- Onboard your first clients by creating their user accounts and guiding them through the platform.
- Regularly review and update your White Label settings as your business grows.
Remember that as a White Label partner, you have access to Swiftspeed’s ongoing support resources. Don’t hesitate to reach out if you encounter any issues or have questions about maximizing the potential of your White Label platform.

