Did you know that with our App maker, you can make an eCommerce app for your store? Our app maker also has an advanced commerce pro feature that gives you more control over your stores. This feature allows you to fulfil orders, accept payment and keep track of your business all from the convenience of your mobile device. Kindly follow the steps below to integrate this feature into your own app.
Suppose you are more comfortable with visual learning; this video thoroughly demonstrates the steps.
PAYMENT INTEGRATION
Follow the below guide to integrating payment
Step 1:
Visit the Swiftspeed homepage, log in, and you will be taken to the app creator dashboard. Click on “create a new application” or select a pre-existing app ( if you have one ). If you selected “Create a new application”, you will have to type in the name of your app and click “Create”. If you are not familiar with the app creation process, please read our article on creating an app on our platform.
Step 2:
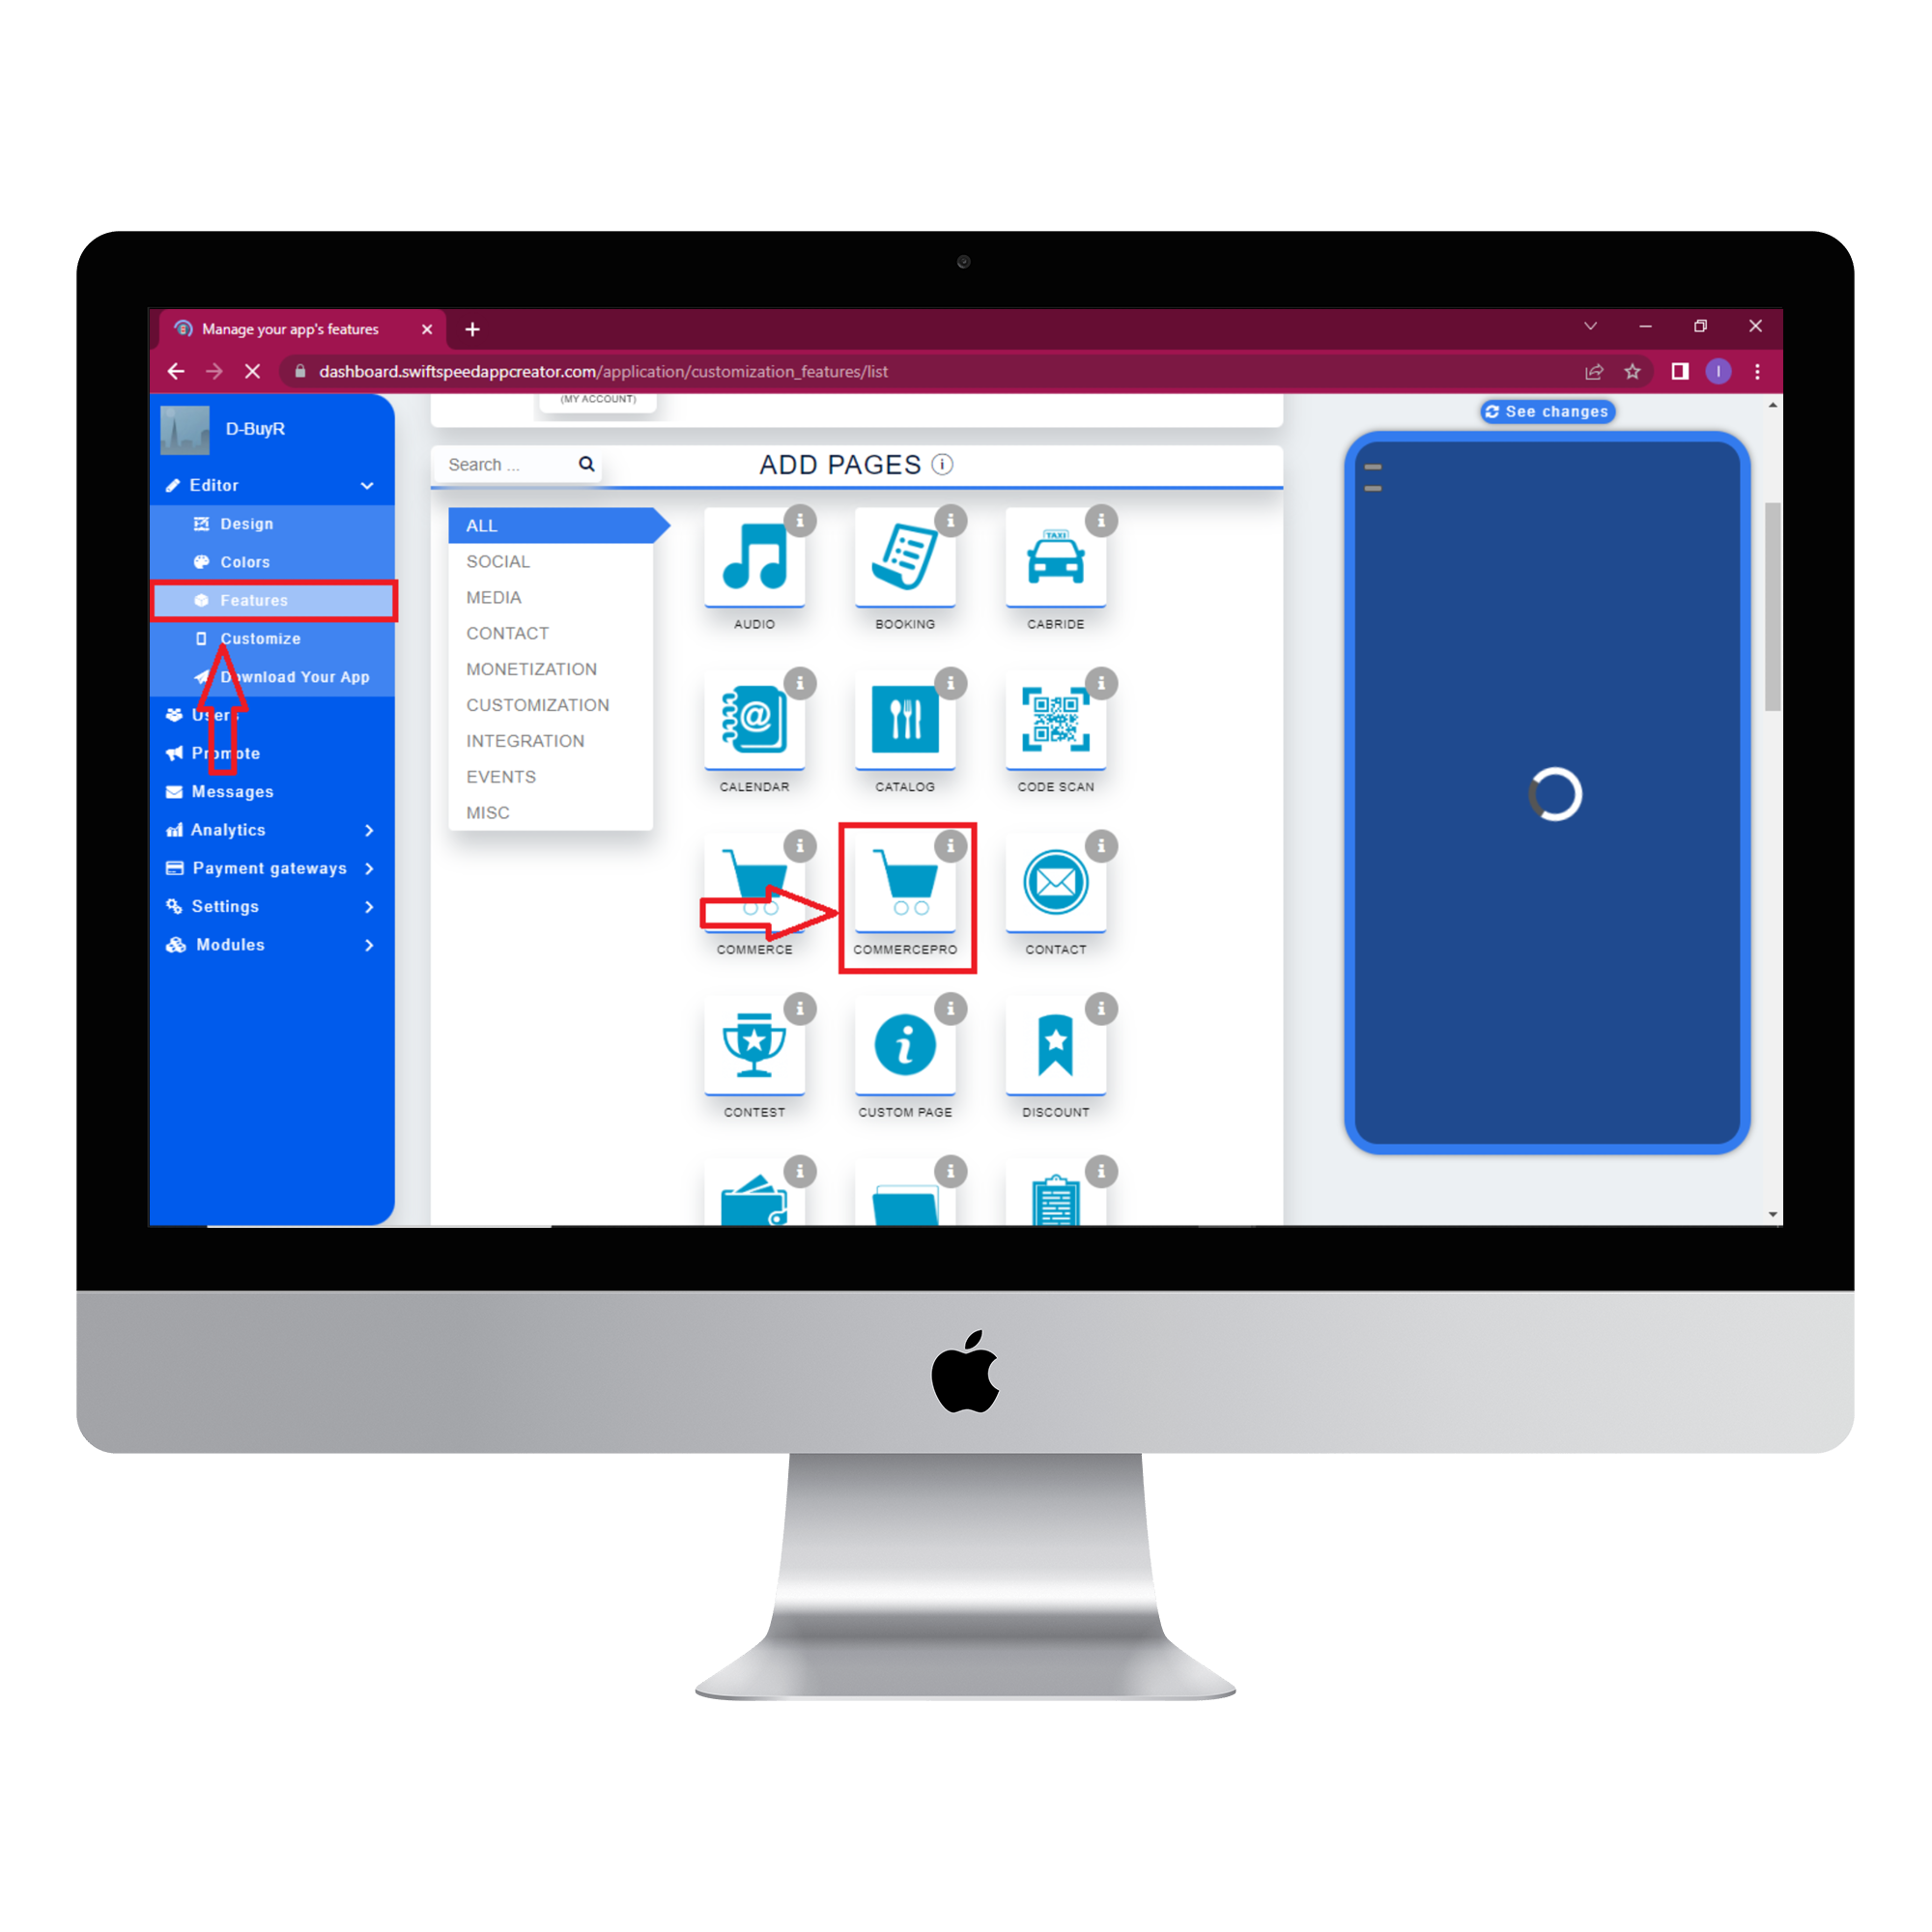
Select “Features” from the side menu on the left side of your screen. Choose the “Commerce pro ” feature from the list of features and click on “Add feature” when the popup window appears. If you find it challenging to locate the “Commerce pro” feature, you can use the search box to find it. Just type in “Commercepro” and press “Enter” on your keyboard.
Step 3:
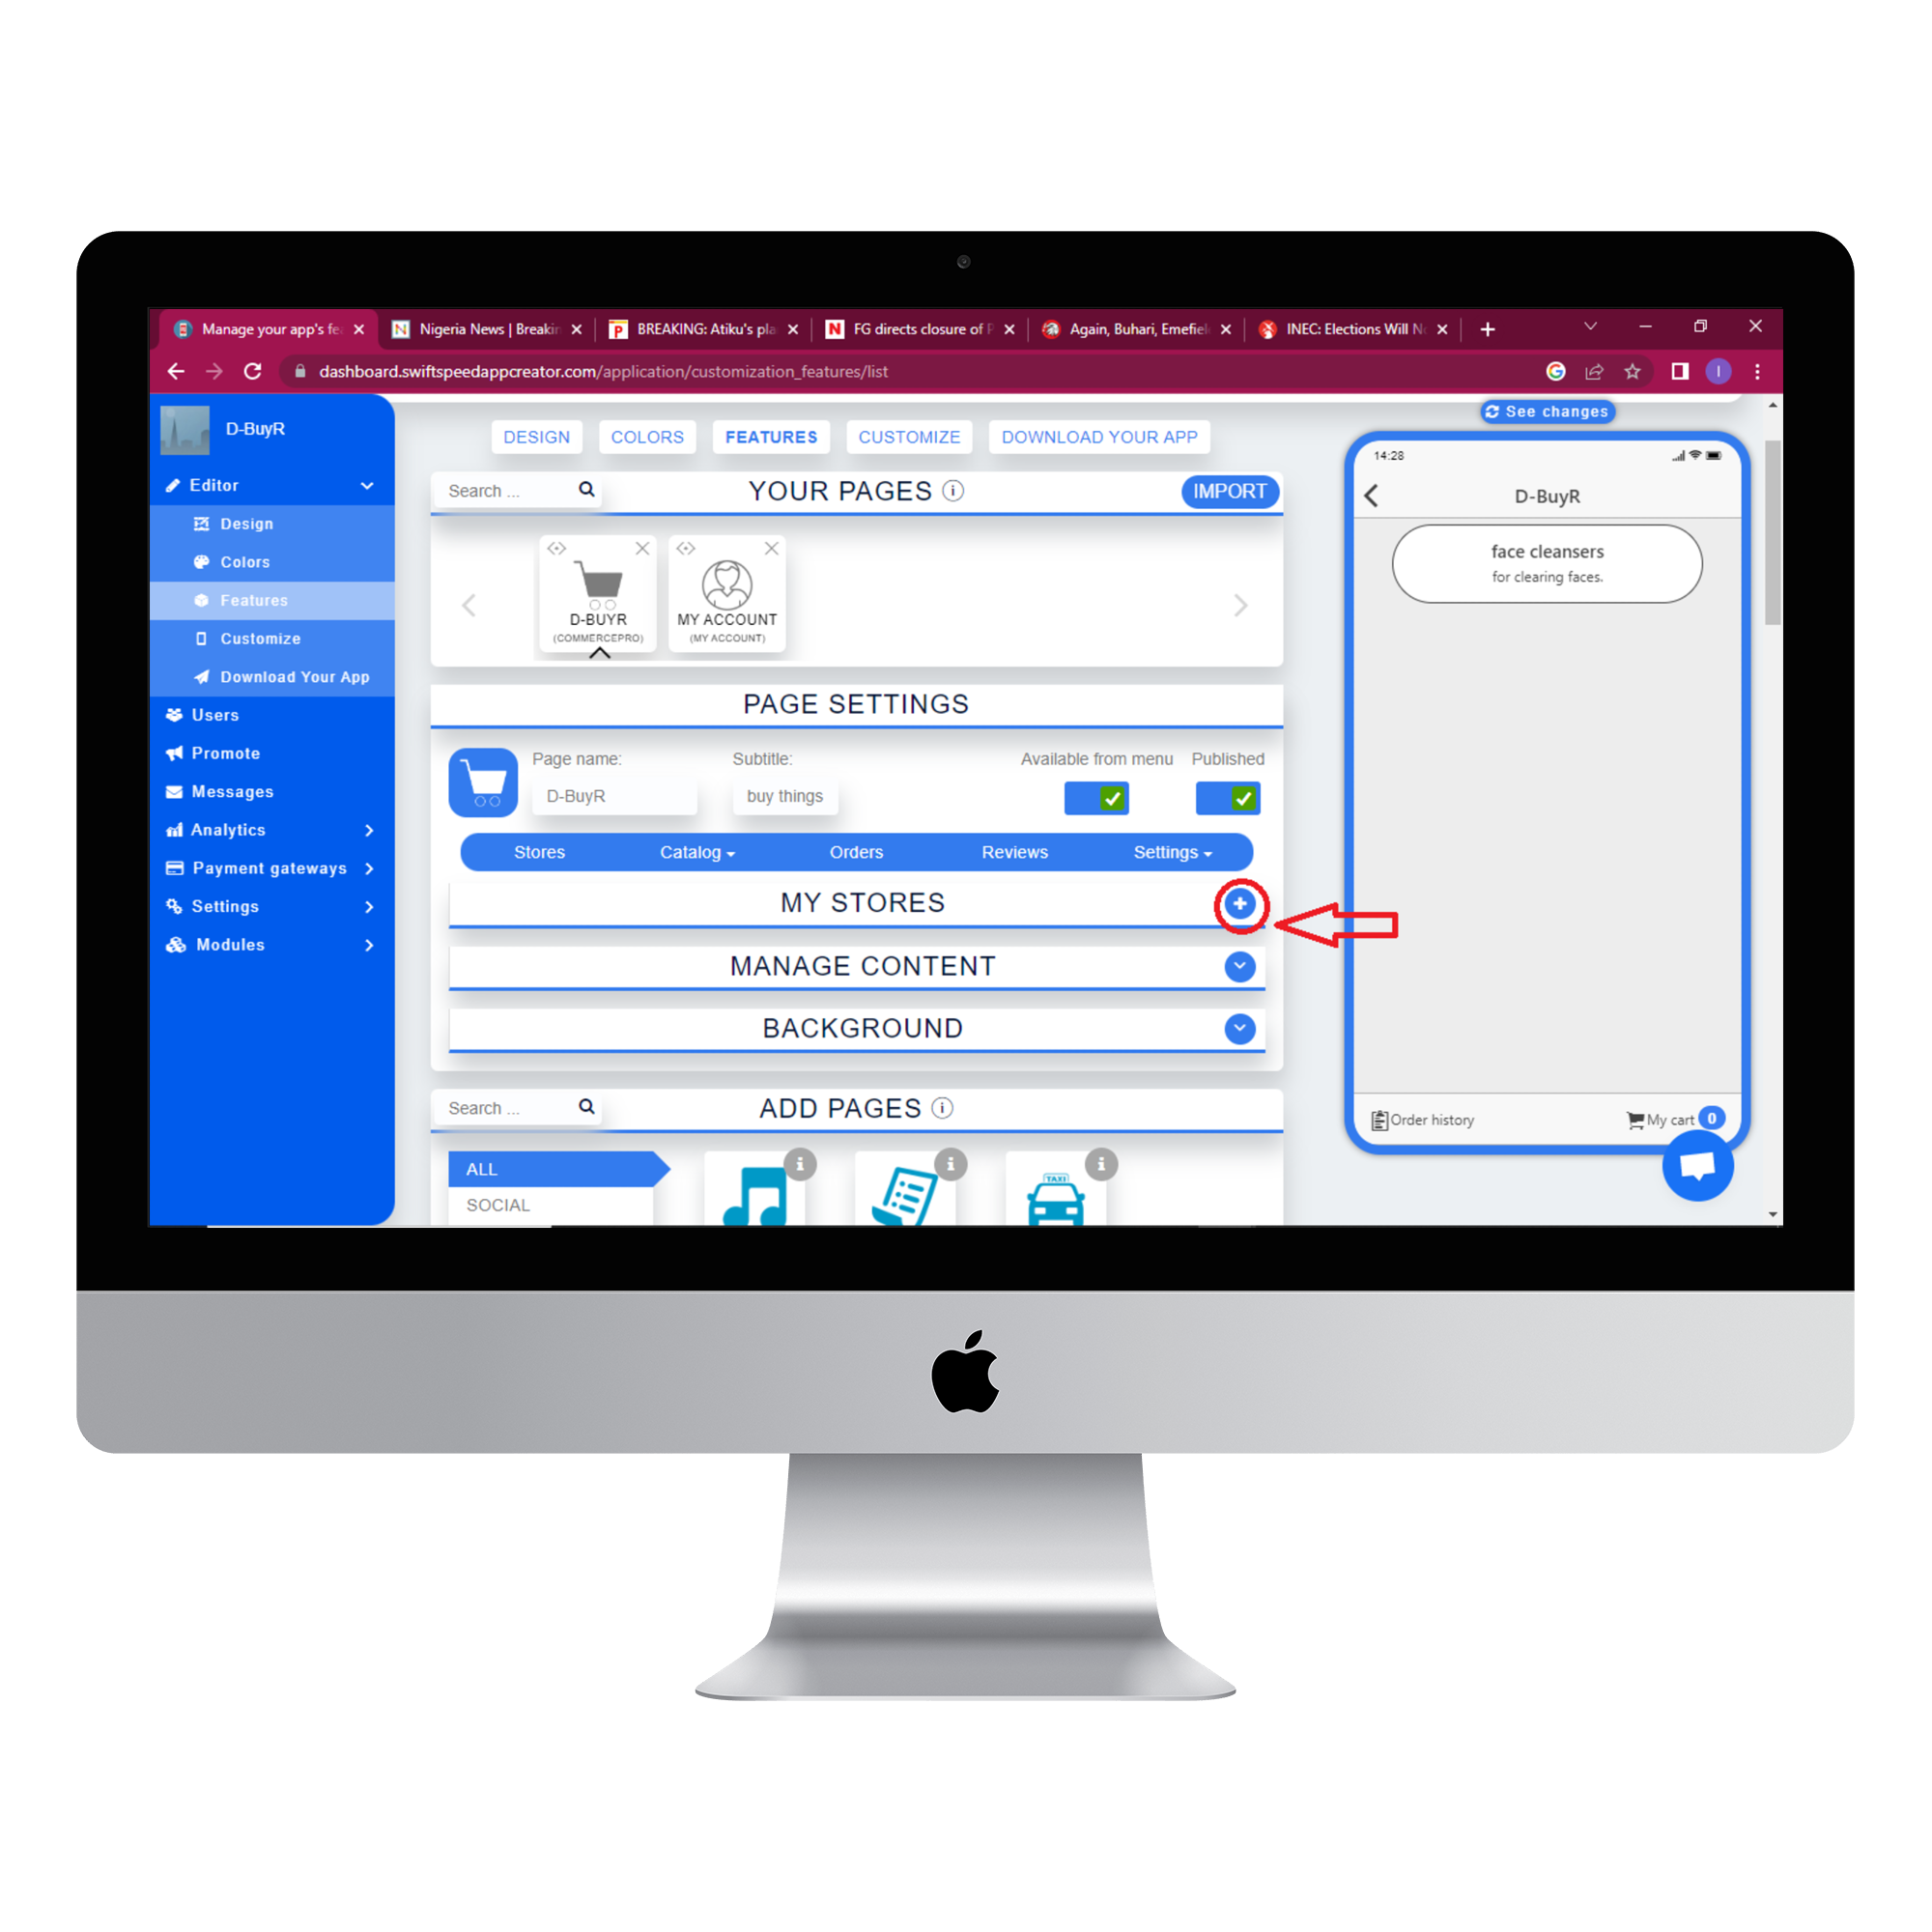
Click on the (+) icon in the “My stores” section to add a new store to your app.
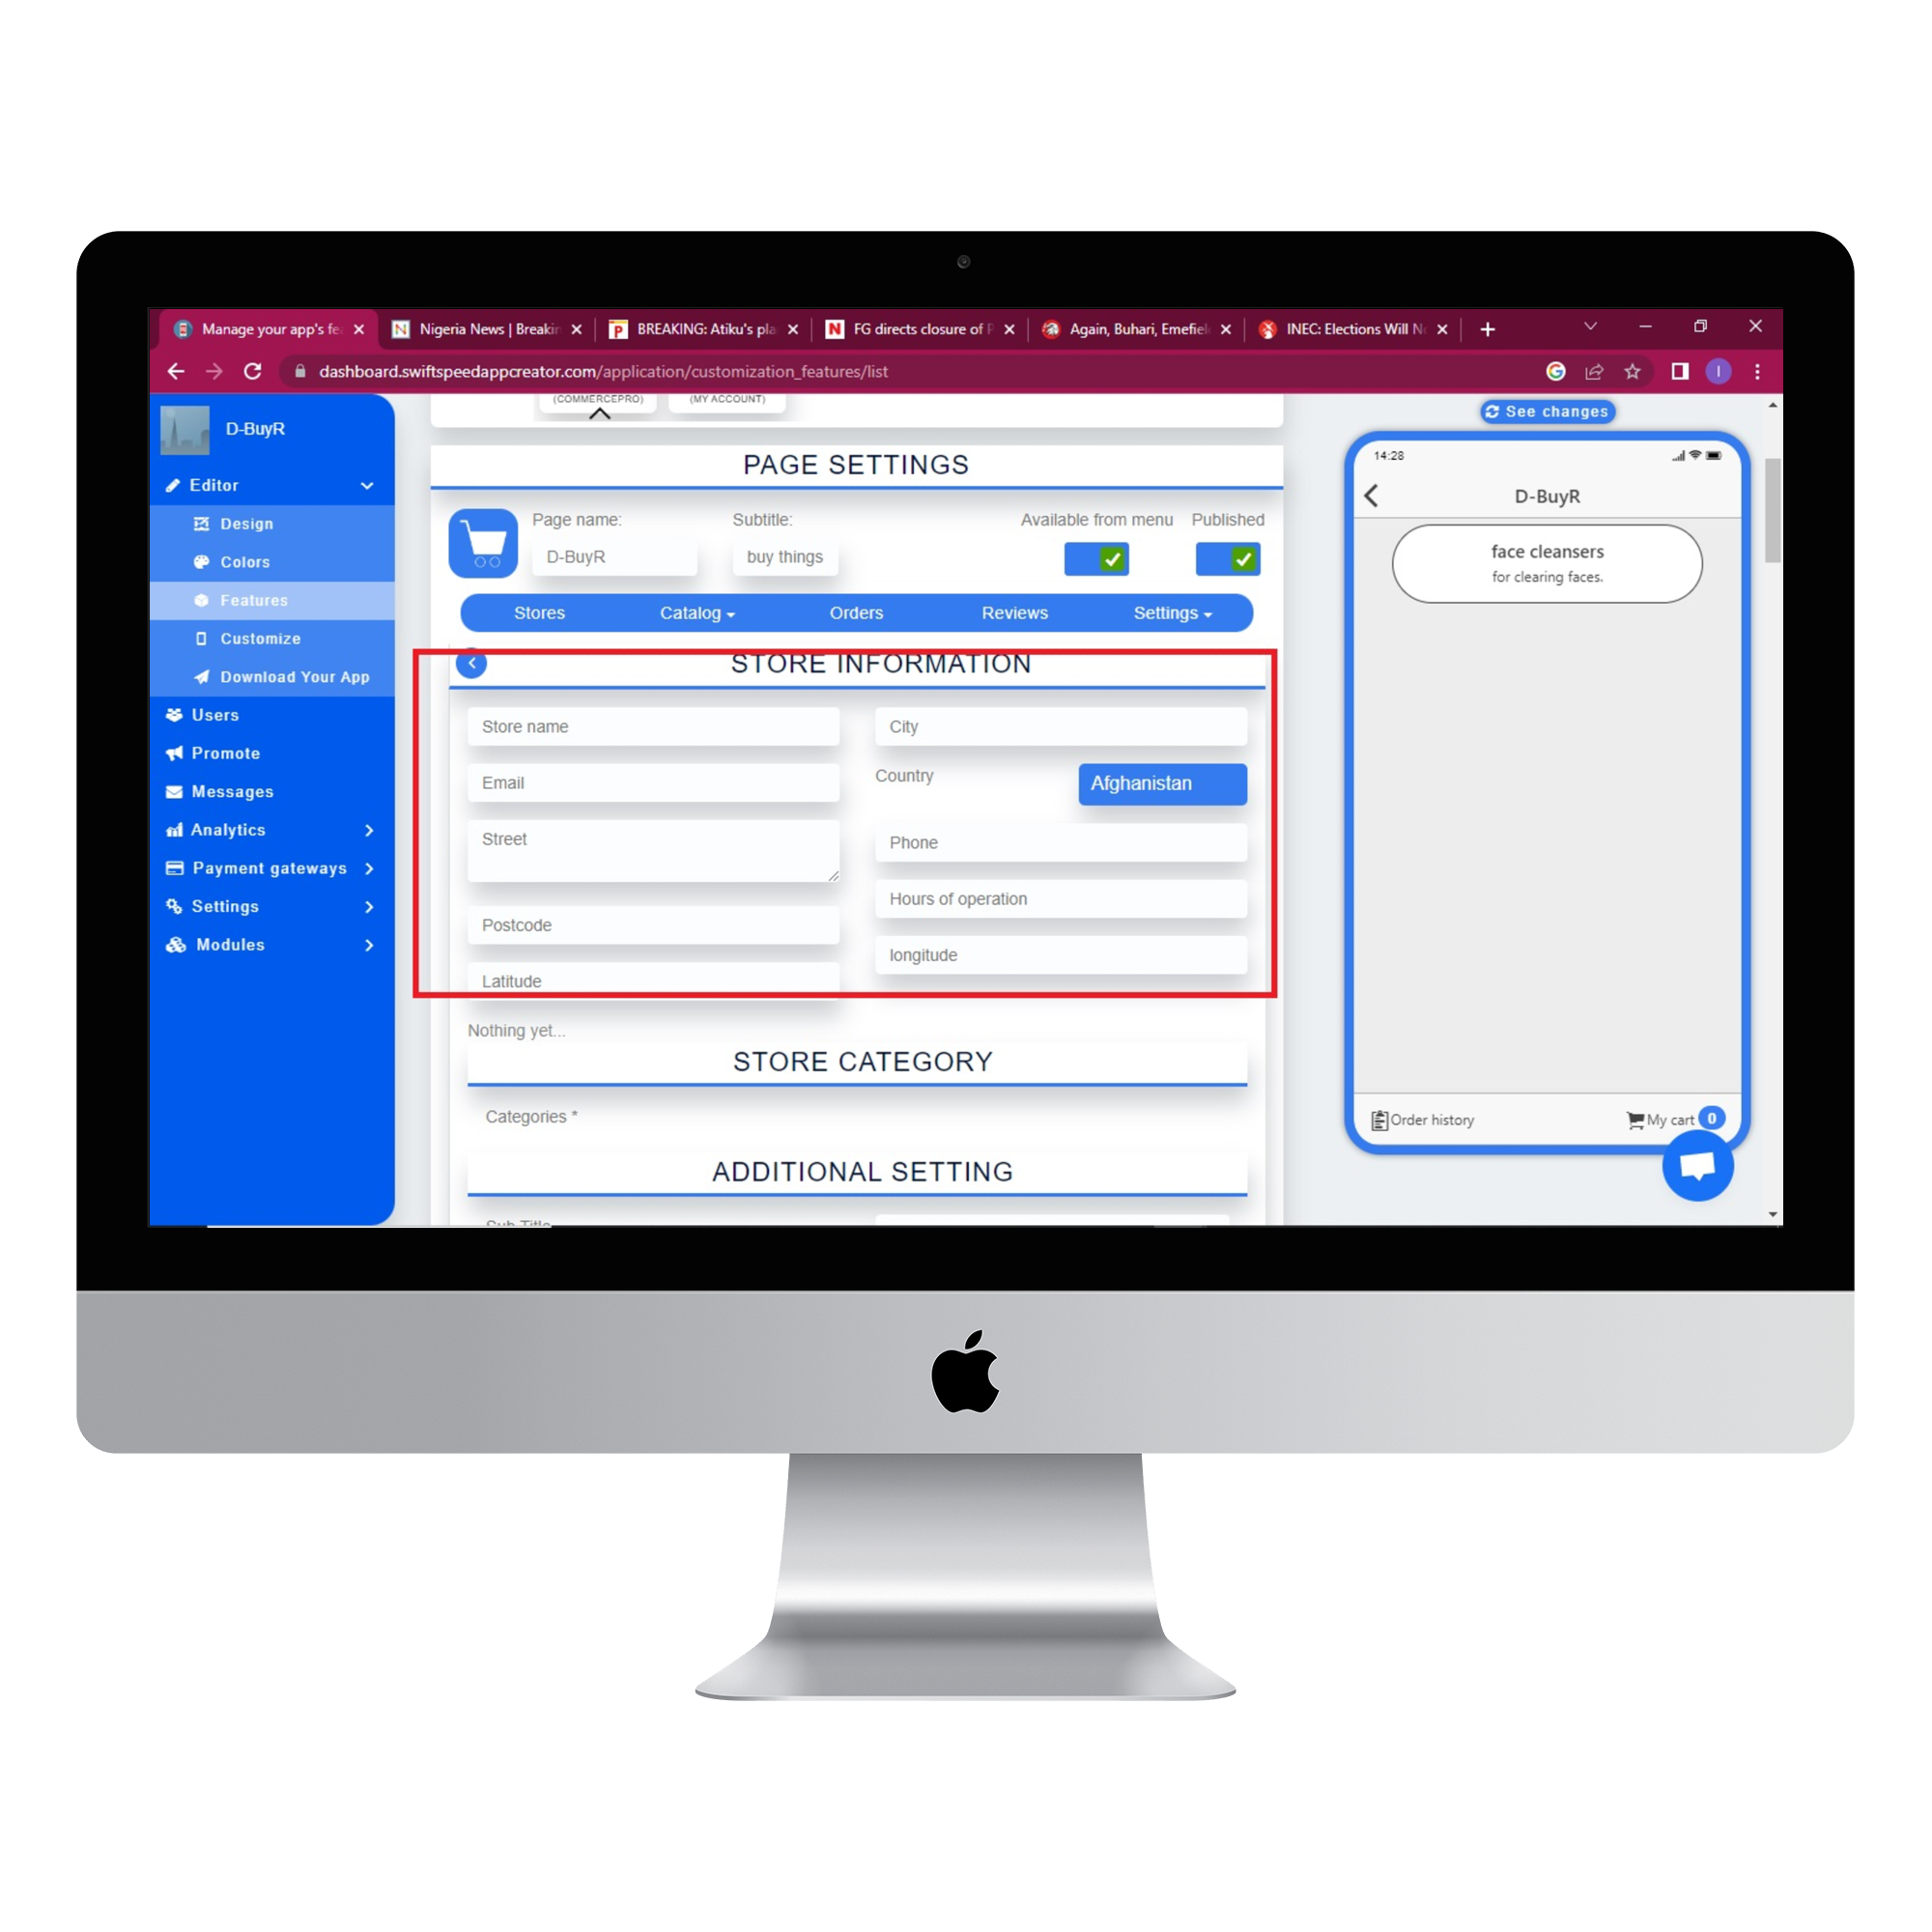
After clicking on the (+) button, the store information, store category, additional settings, delivery, activation form, tax and product sections will become visible. In the “Store information” section, you will be required to fill out some basic information about your store. The information includes name, email, city, postcode, street, country, phone and hours of operations.
Step 4:
When you are done with the Store information section, go to the “Additional settings” section and type in a description for your store. Your store description should include a compelling explanation of your products. It should provide your customers with details of the product, the problems it solves and other benefits to help generate sales.
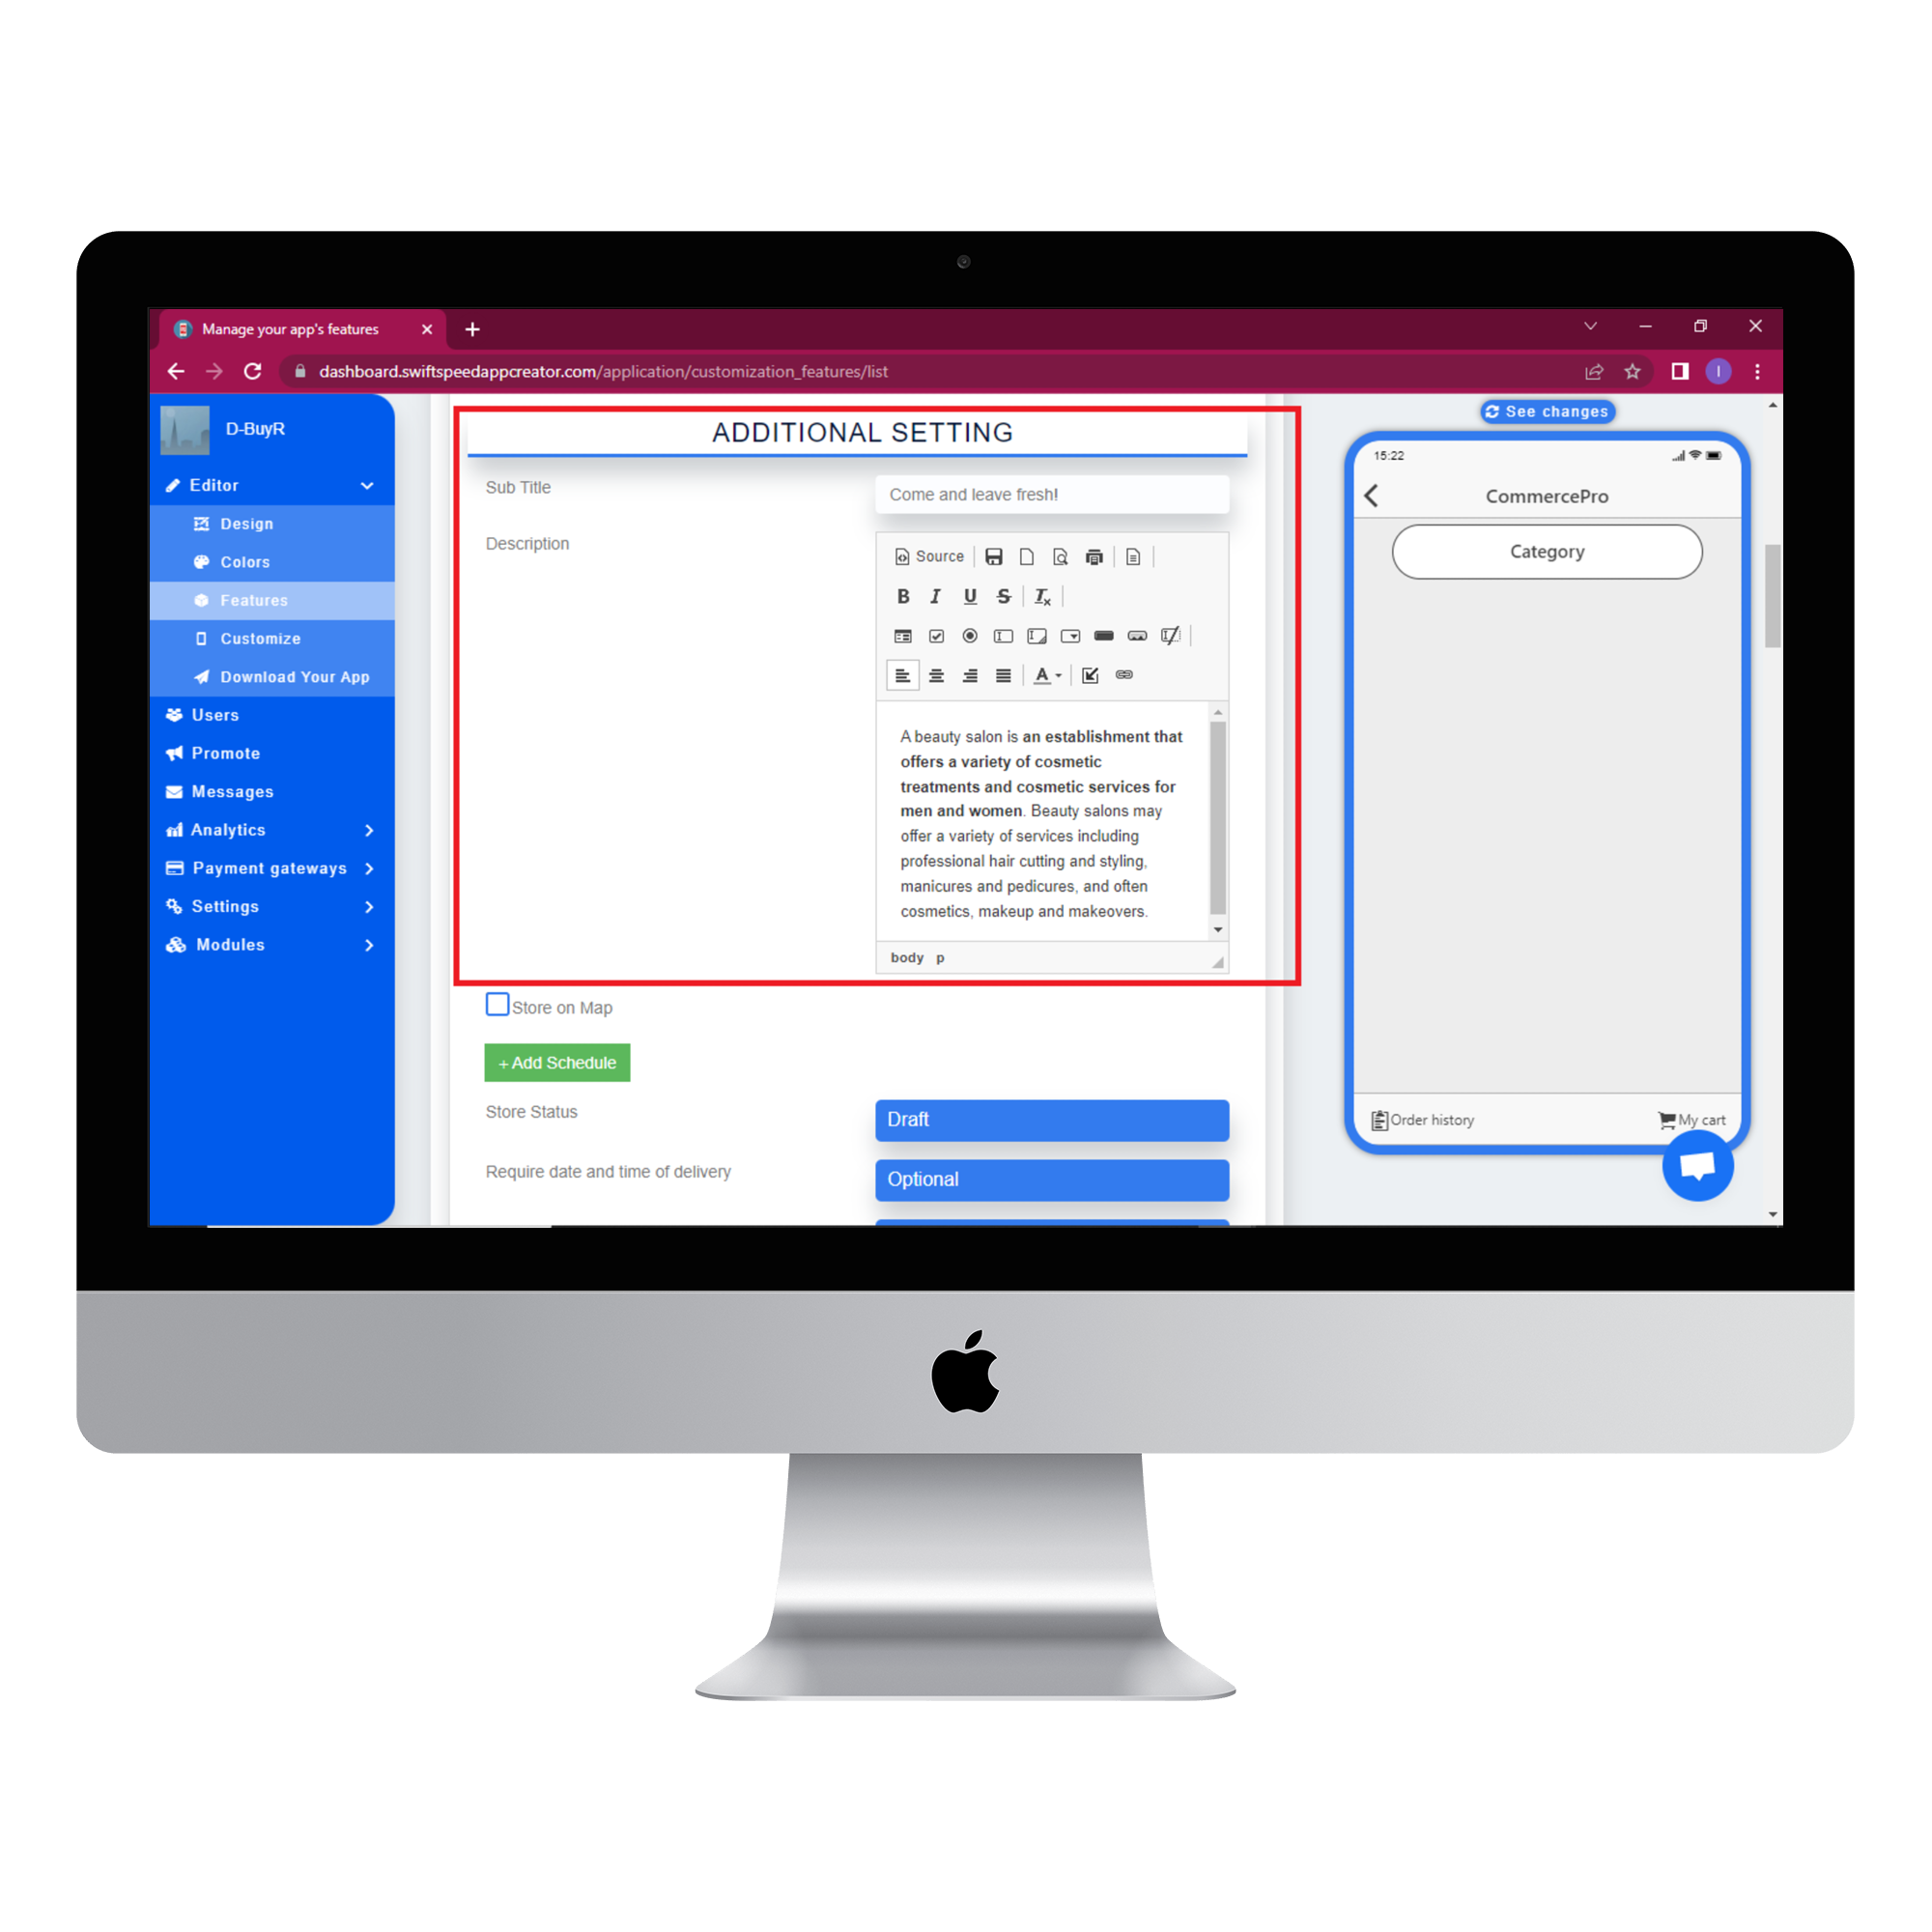
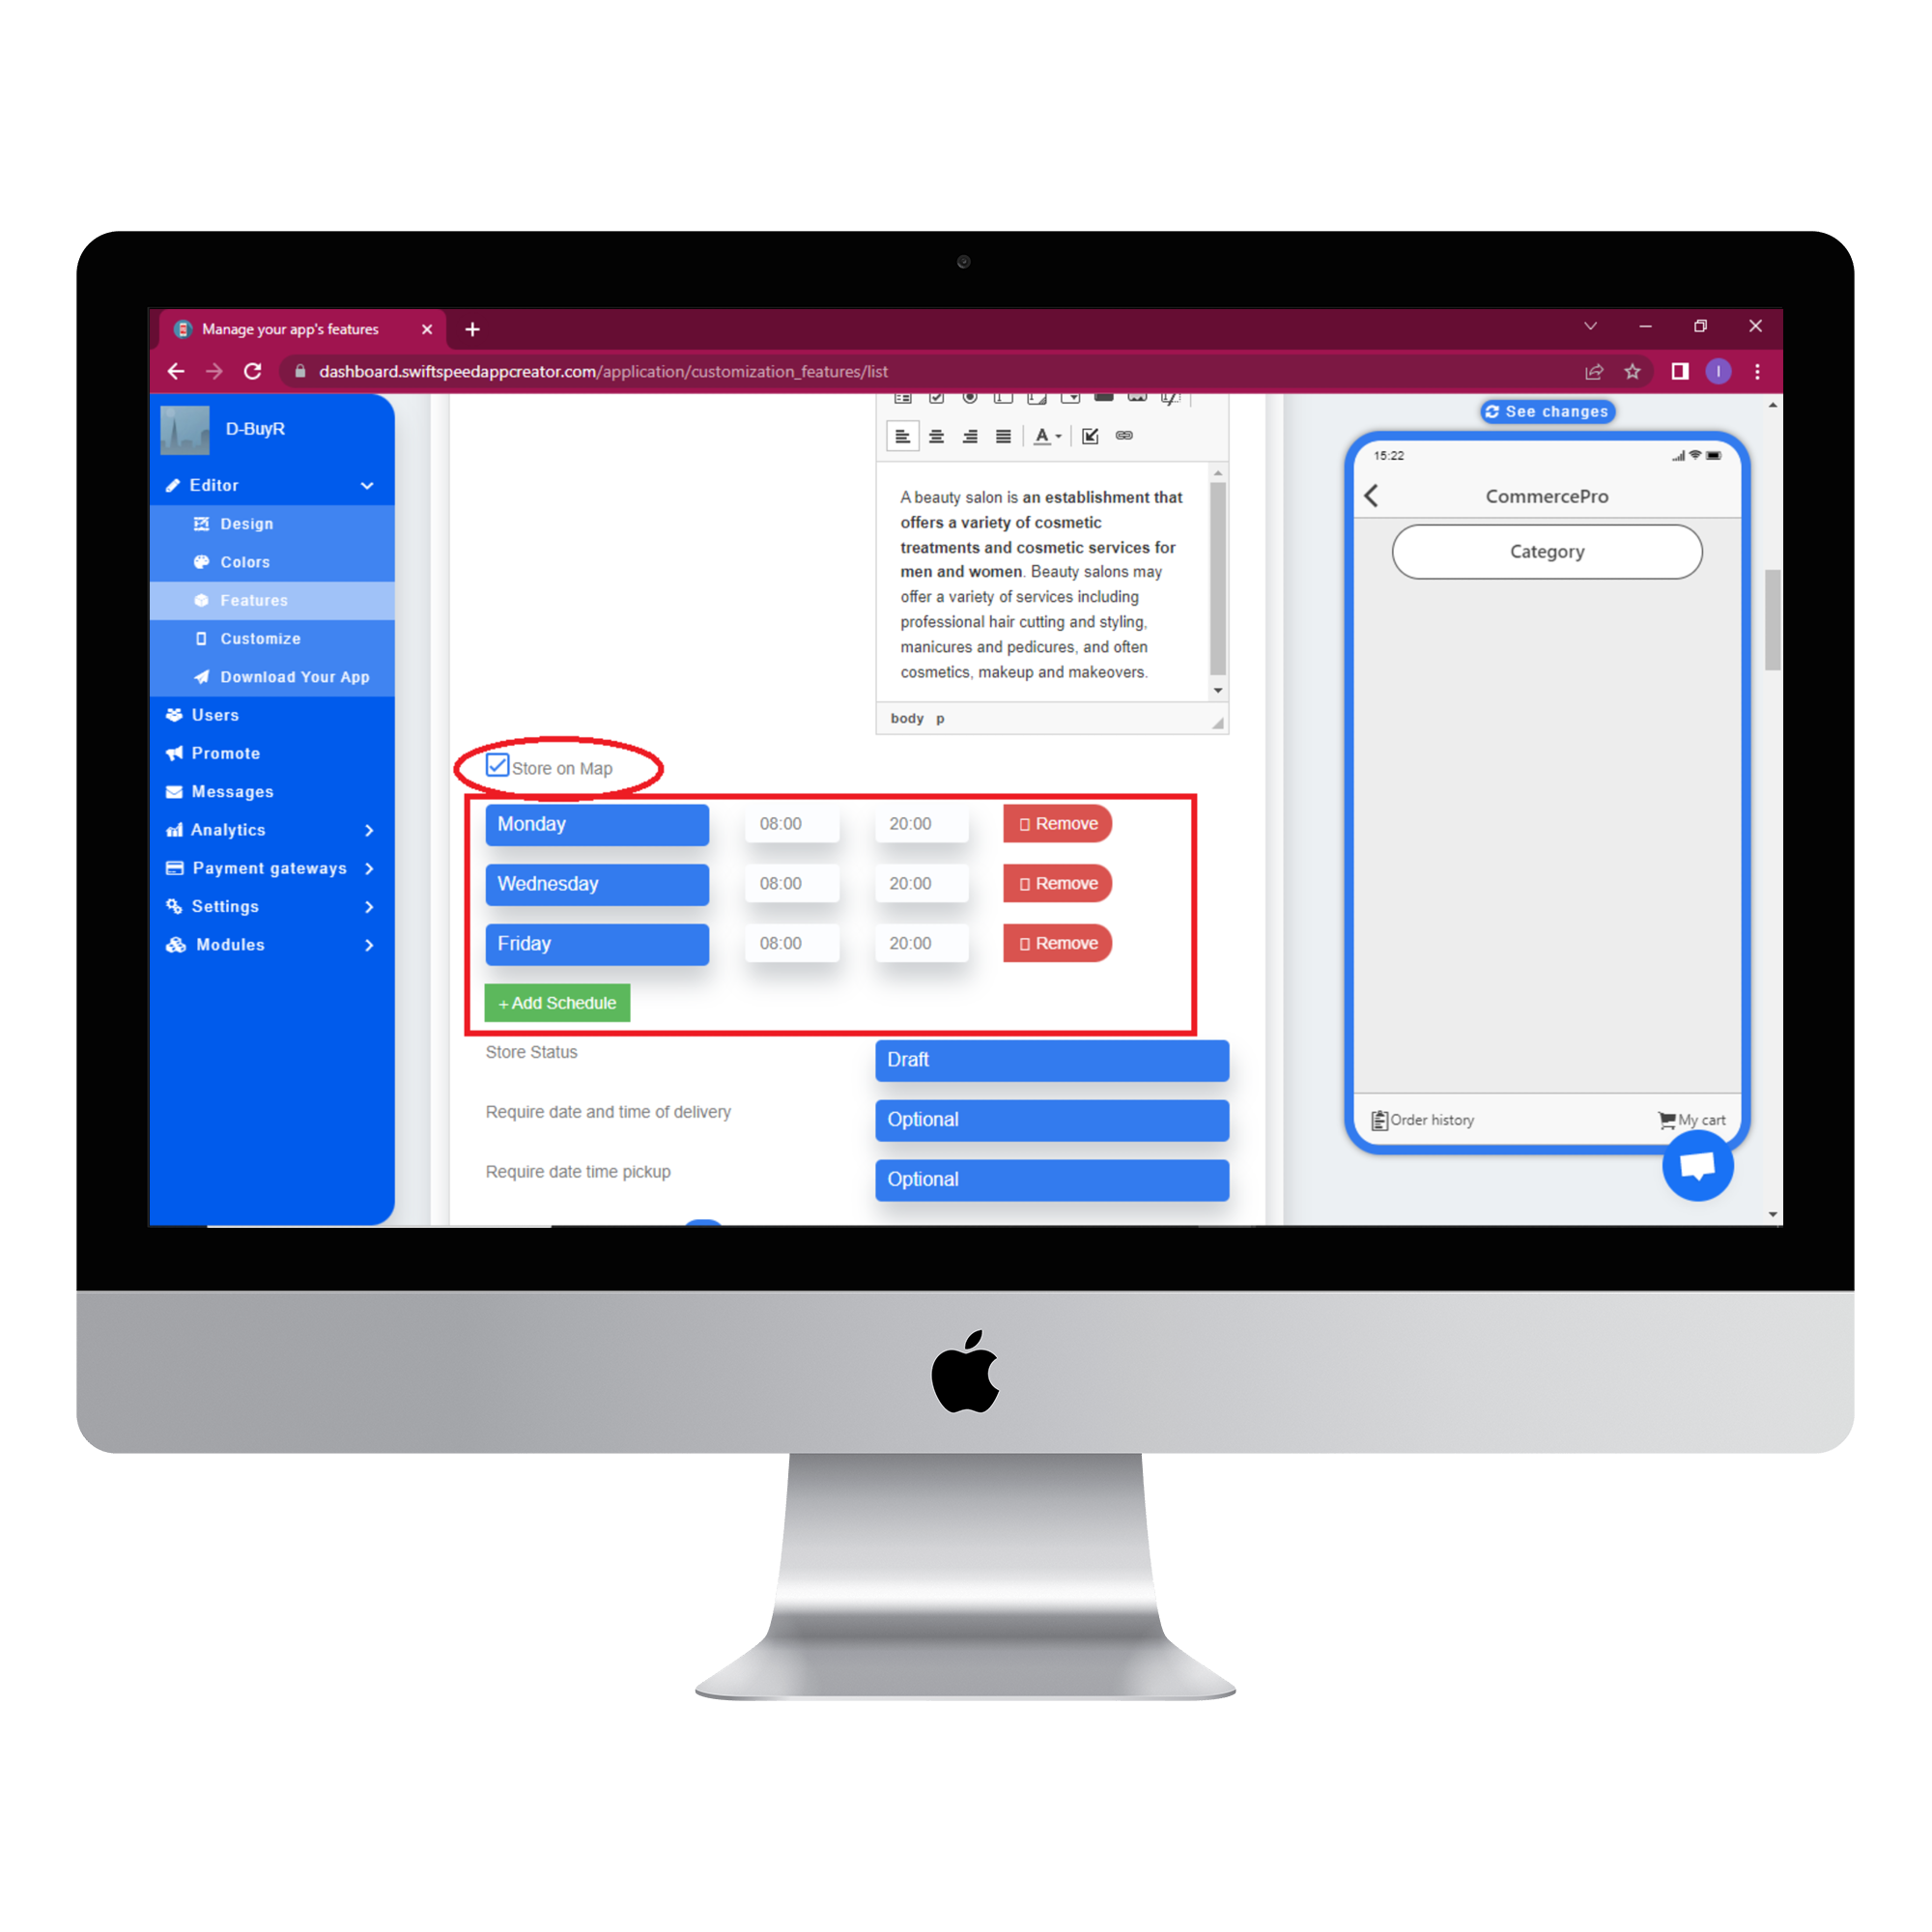
Click on the checkbox below the description box that says “Store on map” if your store can be located on google maps. Just below the checkbox there is an area where you can set opening and closing times for the days you operate so your customers will know when you are available. To add a schedule for a day, click the “Add schedule” button, choose a day then set opening and closing times by clicking on their respective textboxes. You can edit the opening and closing times for any day if your schedule is no longer convenient. Click on the “remove” button to remove a schedule. Below the “Add schedule” button there are options for “Store status”, “Require date and time of delivery” and “Require date and time of pickup”. Choose accordingly then set your store logo as the icon.
Step 5:
When you are done with the “Additional settings” section, go to the Delivery section and select the forms of deliveries that you want to offer your customers. Our Ecommerce pro feature currently has four delivery options. The first option is the “In-store delivery”, the second option is the “Carry out” delivery, the third option is the “Shipping” delivery and the fourth is “Table service”. A brief explanation of each of the delivery methods is given below.
In-store delivery: The In-store delivery option requires your customers to go and pick up the product from a physical store or warehouse after paying for it online. It is common practice for items to drop in price when in-store pickup is selected. The In-store delivery method gives your local customers a cheaper and convenient alternative to shipping.
Carry out delivery: Carry out delivery is when you order in person and get it to go. You actually carry it out.
Shipping delivery: This method is ideal for long-distance deliveries. The product is sent overseas by ship or plane and typically takes a few days to arrive at the customer’s door. This method requires the use of a Google maps API key. To set your API key, select “Settings” from the side menu on the left side of your screen and choose “API key” from the drop list.
Table service: Table service delivery mostly applies to restaurants. The customers come to the restaurant to eat after paying through the app.
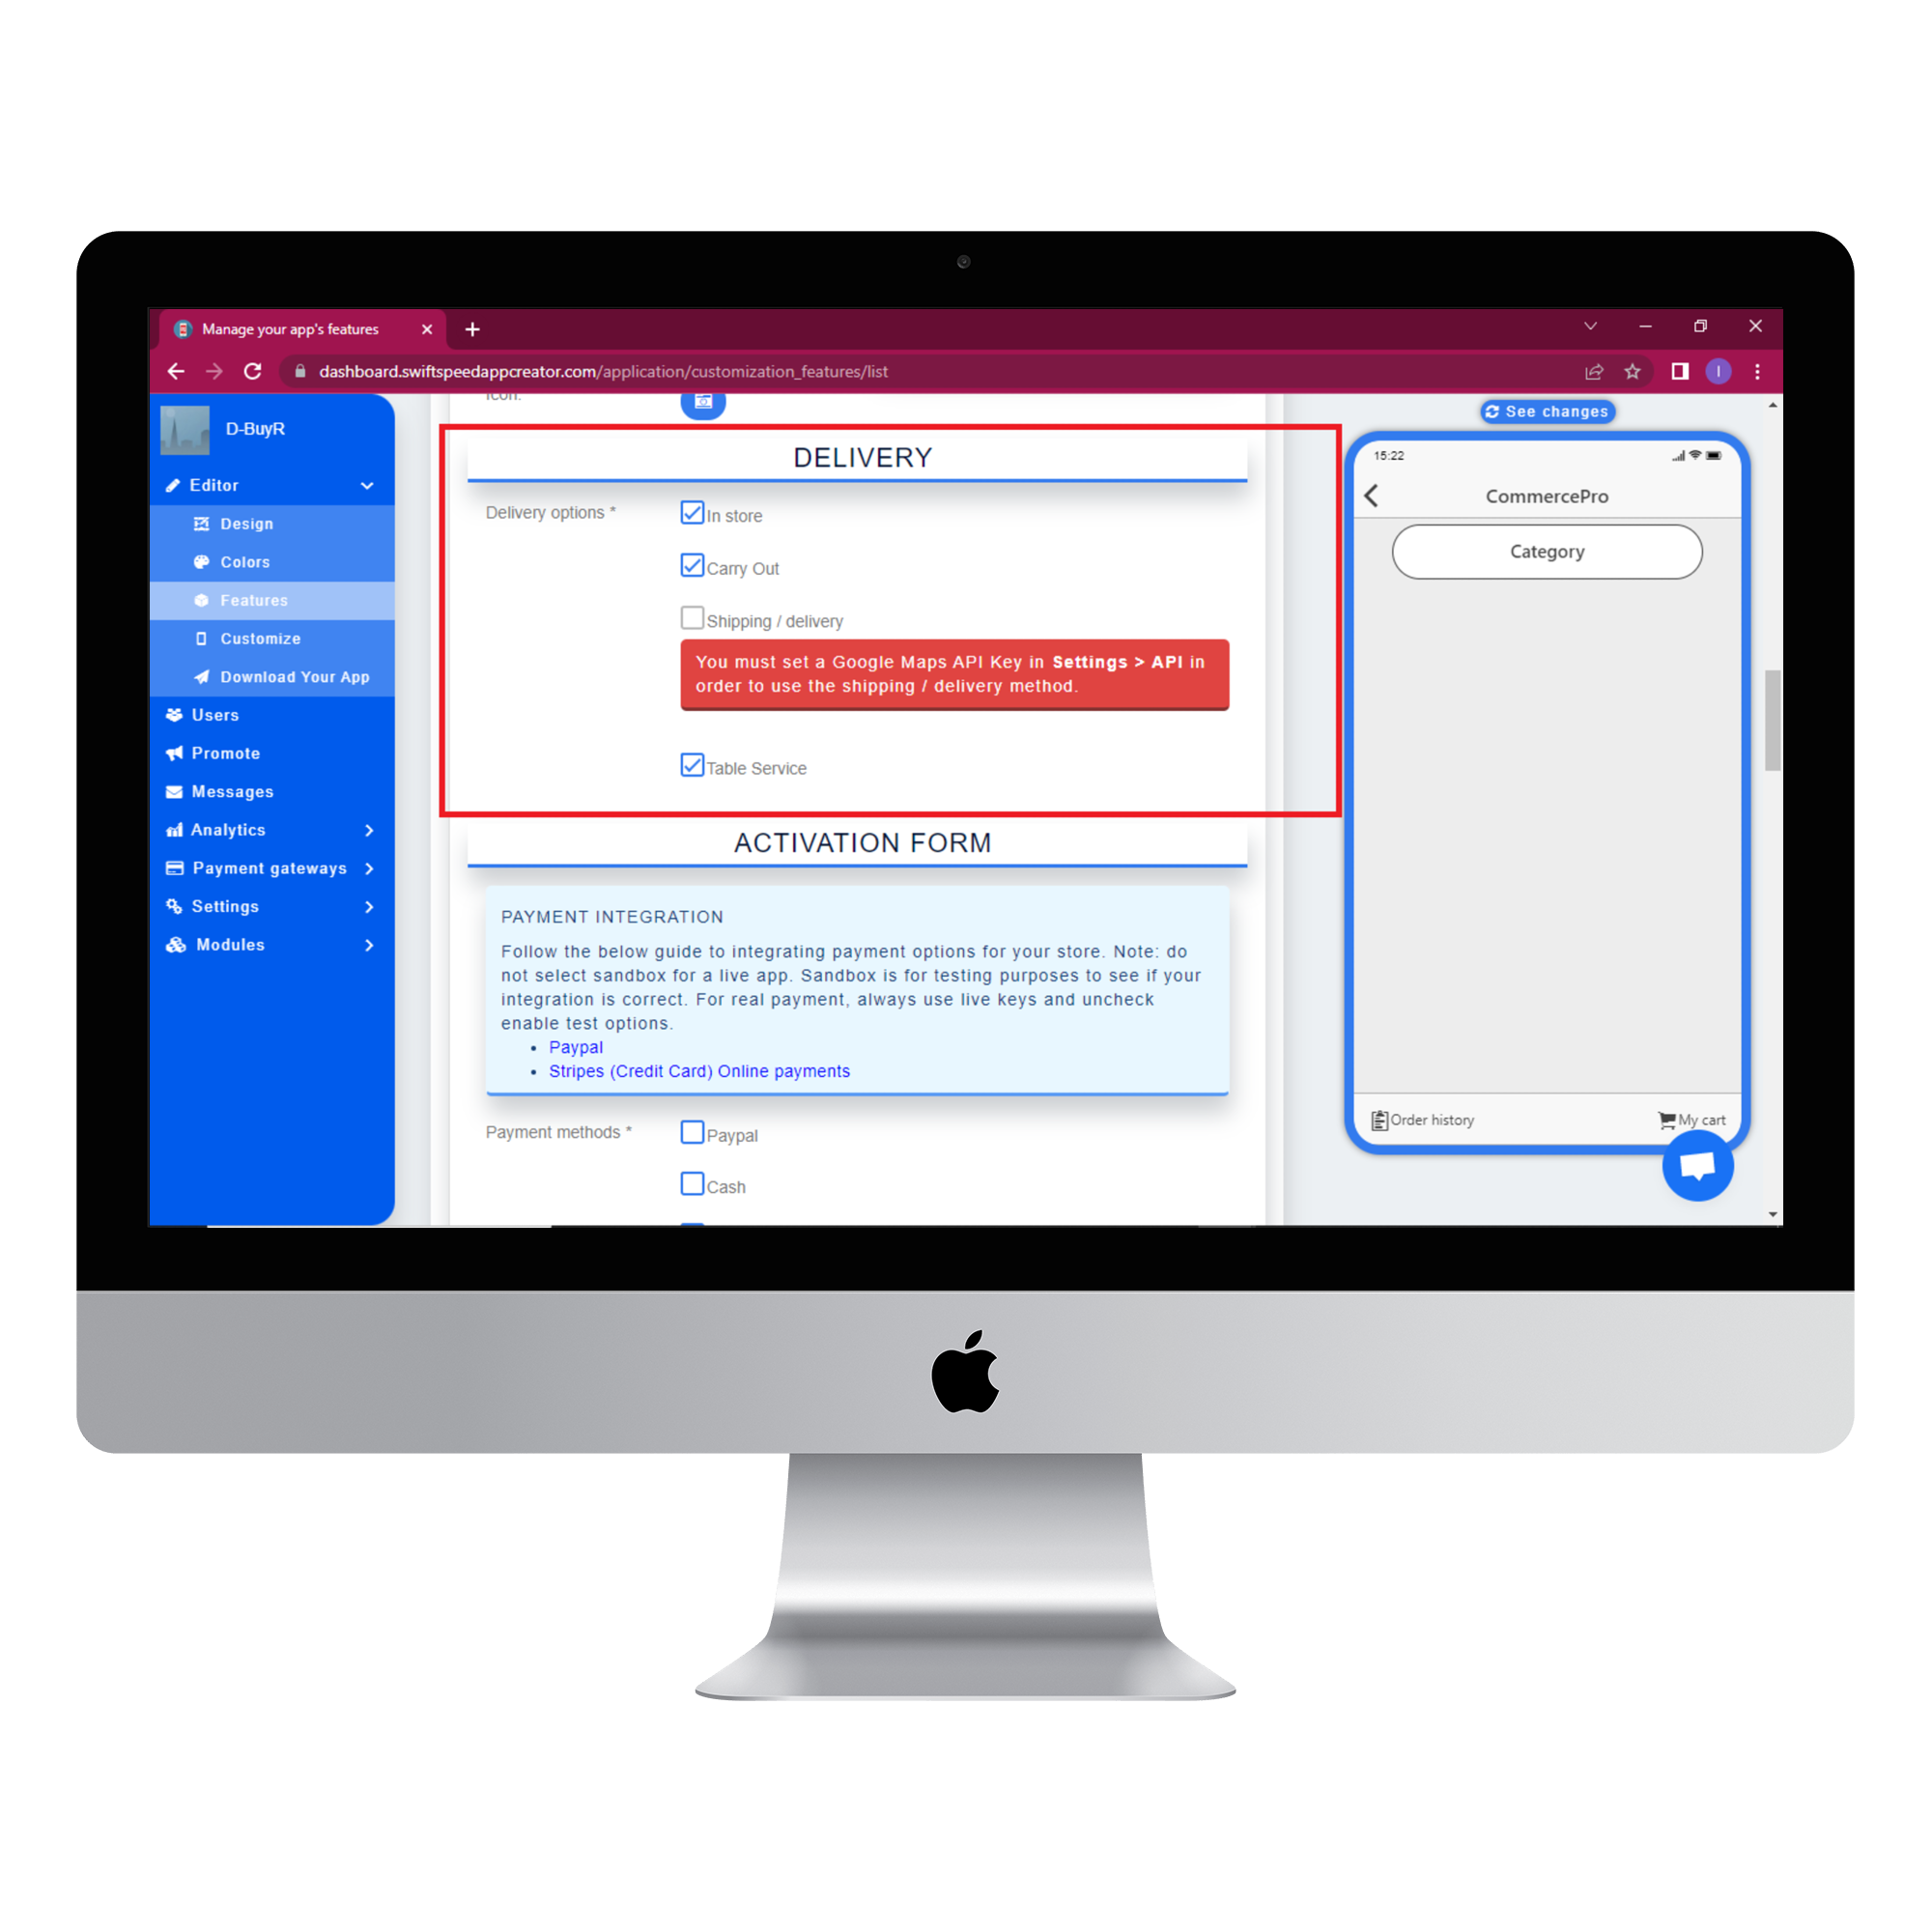
When you are done selecting your delivery methods, go to the “Activation form” section.
Step 6:
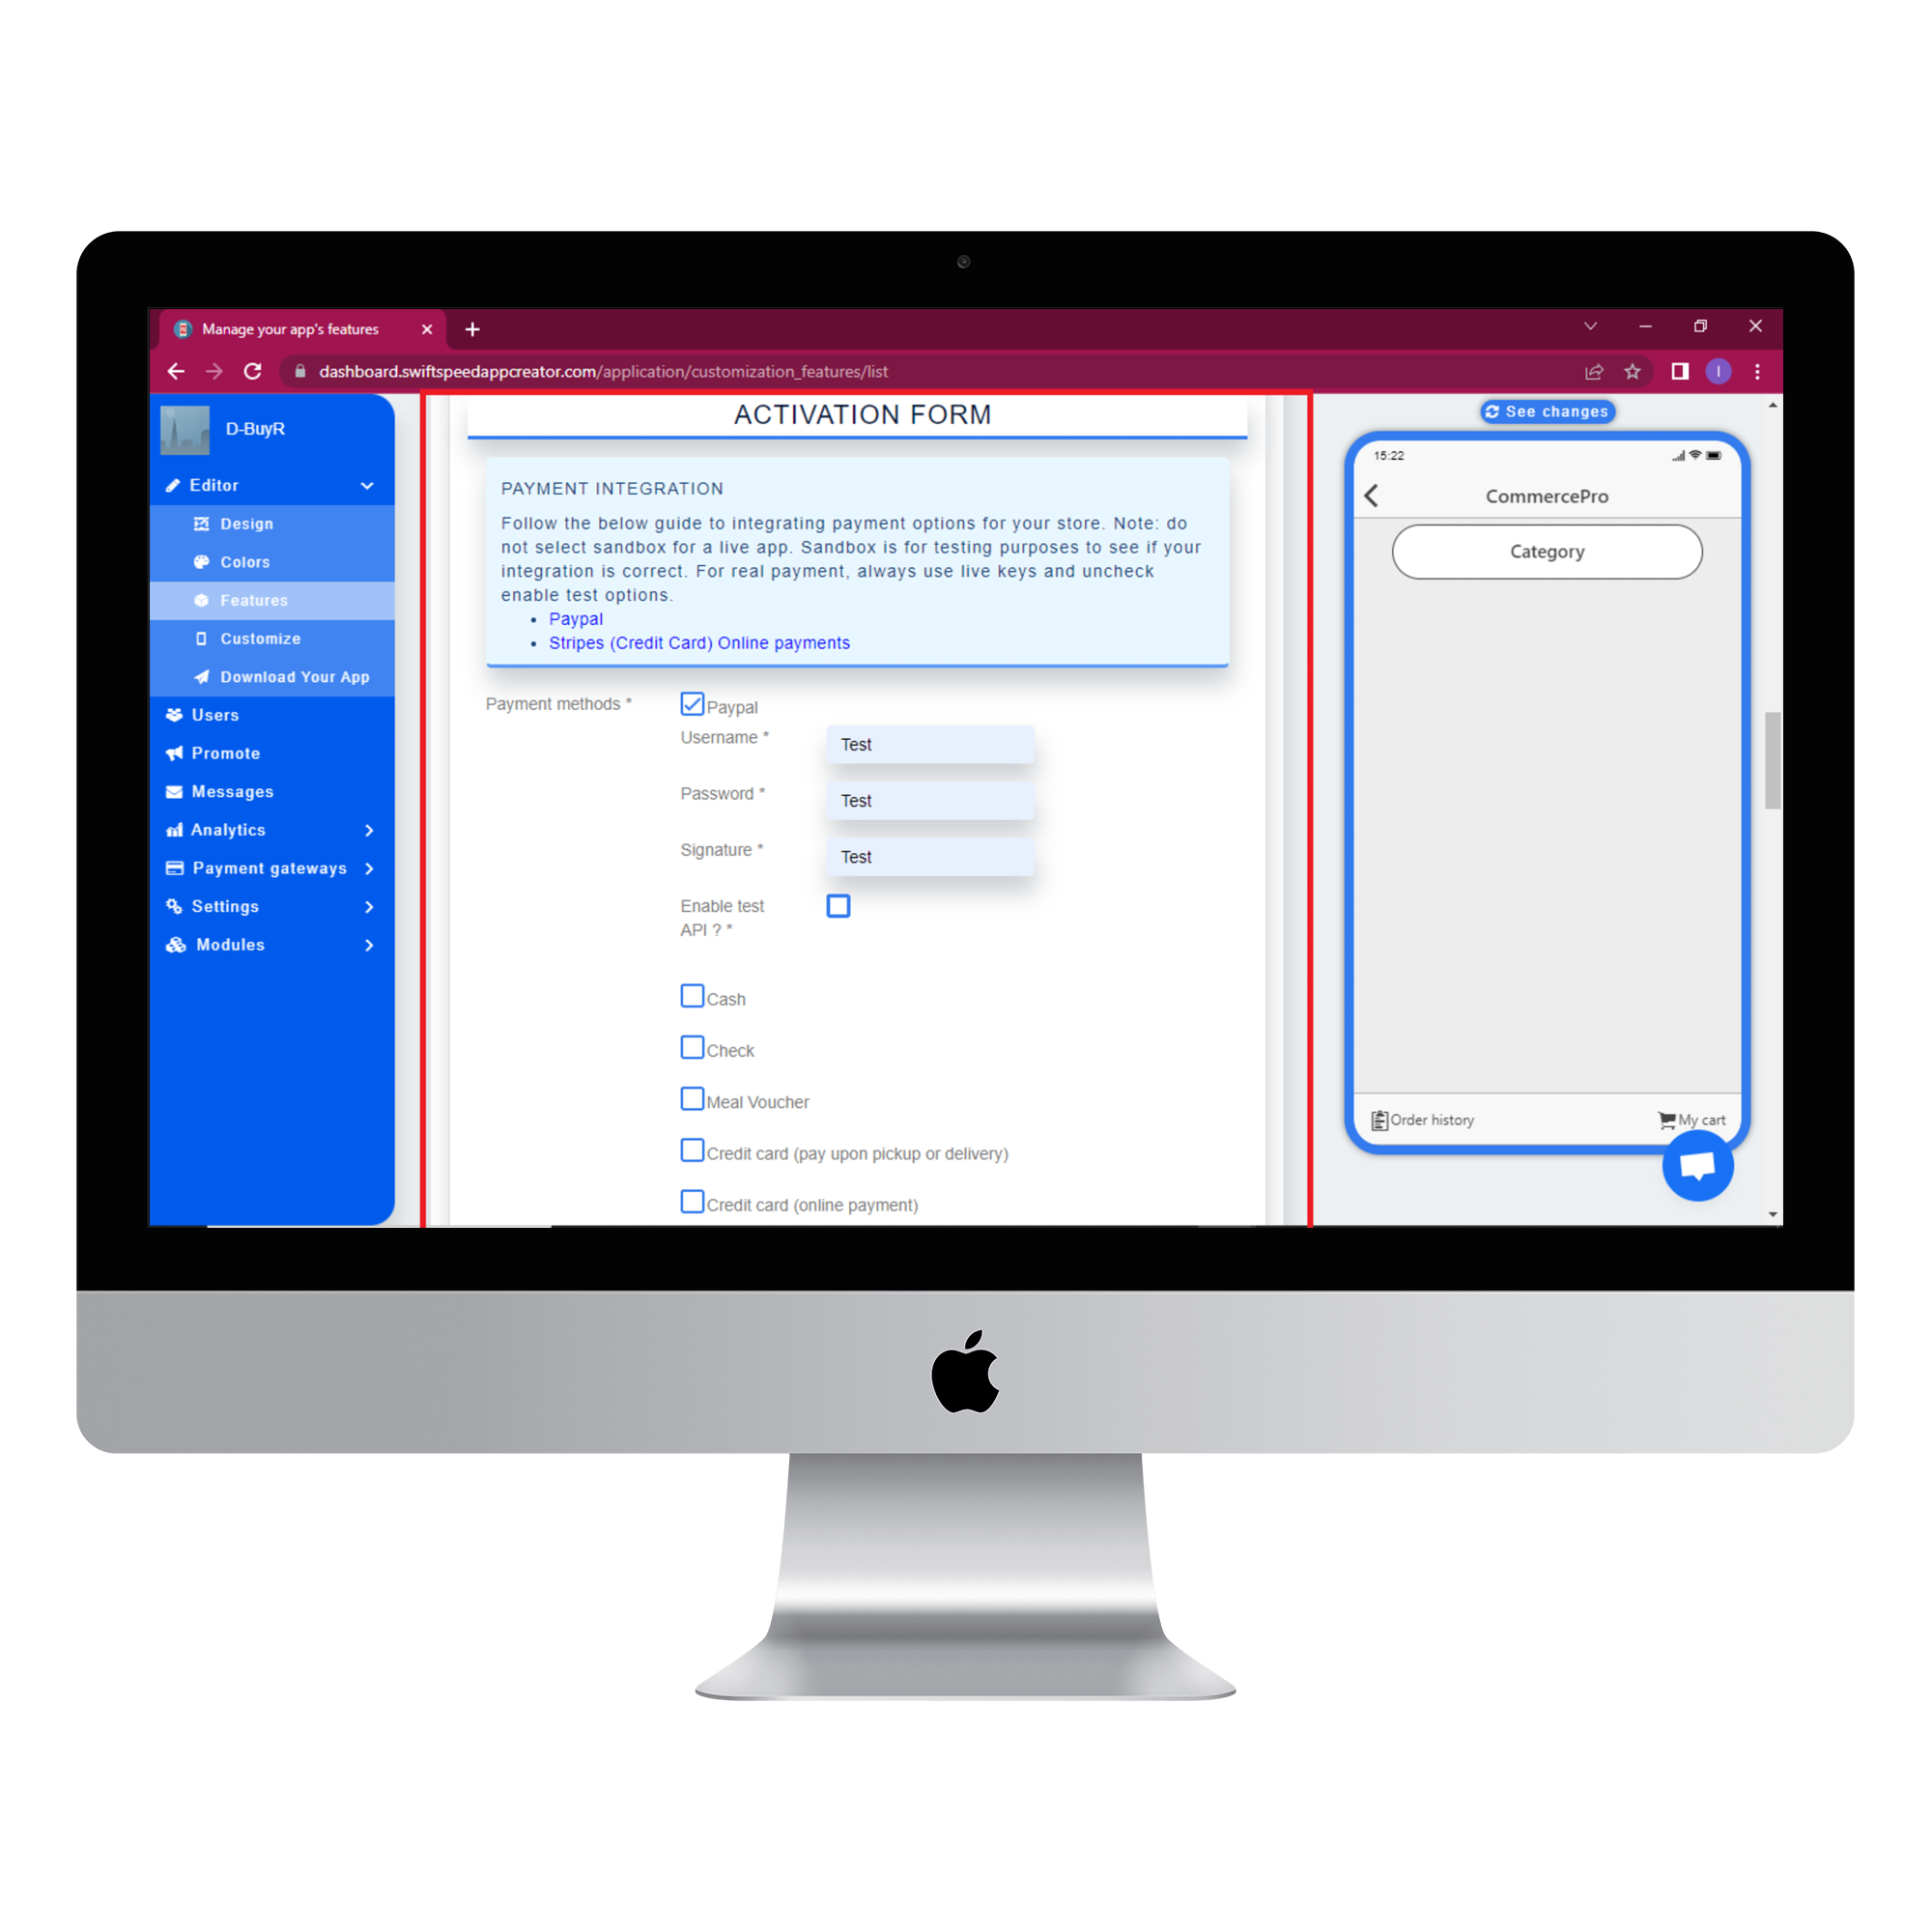
In the “Activation form” section, you can select multiple payment methods for your store. Some payment methods like Paypal and Wallet require some additional information to be filled out. Choose the methods you require for your business and fill out the required information for each payment method. Type a label and confirmation message for when payment is made. Move to the “TAX” section when you are done.
Step 7:
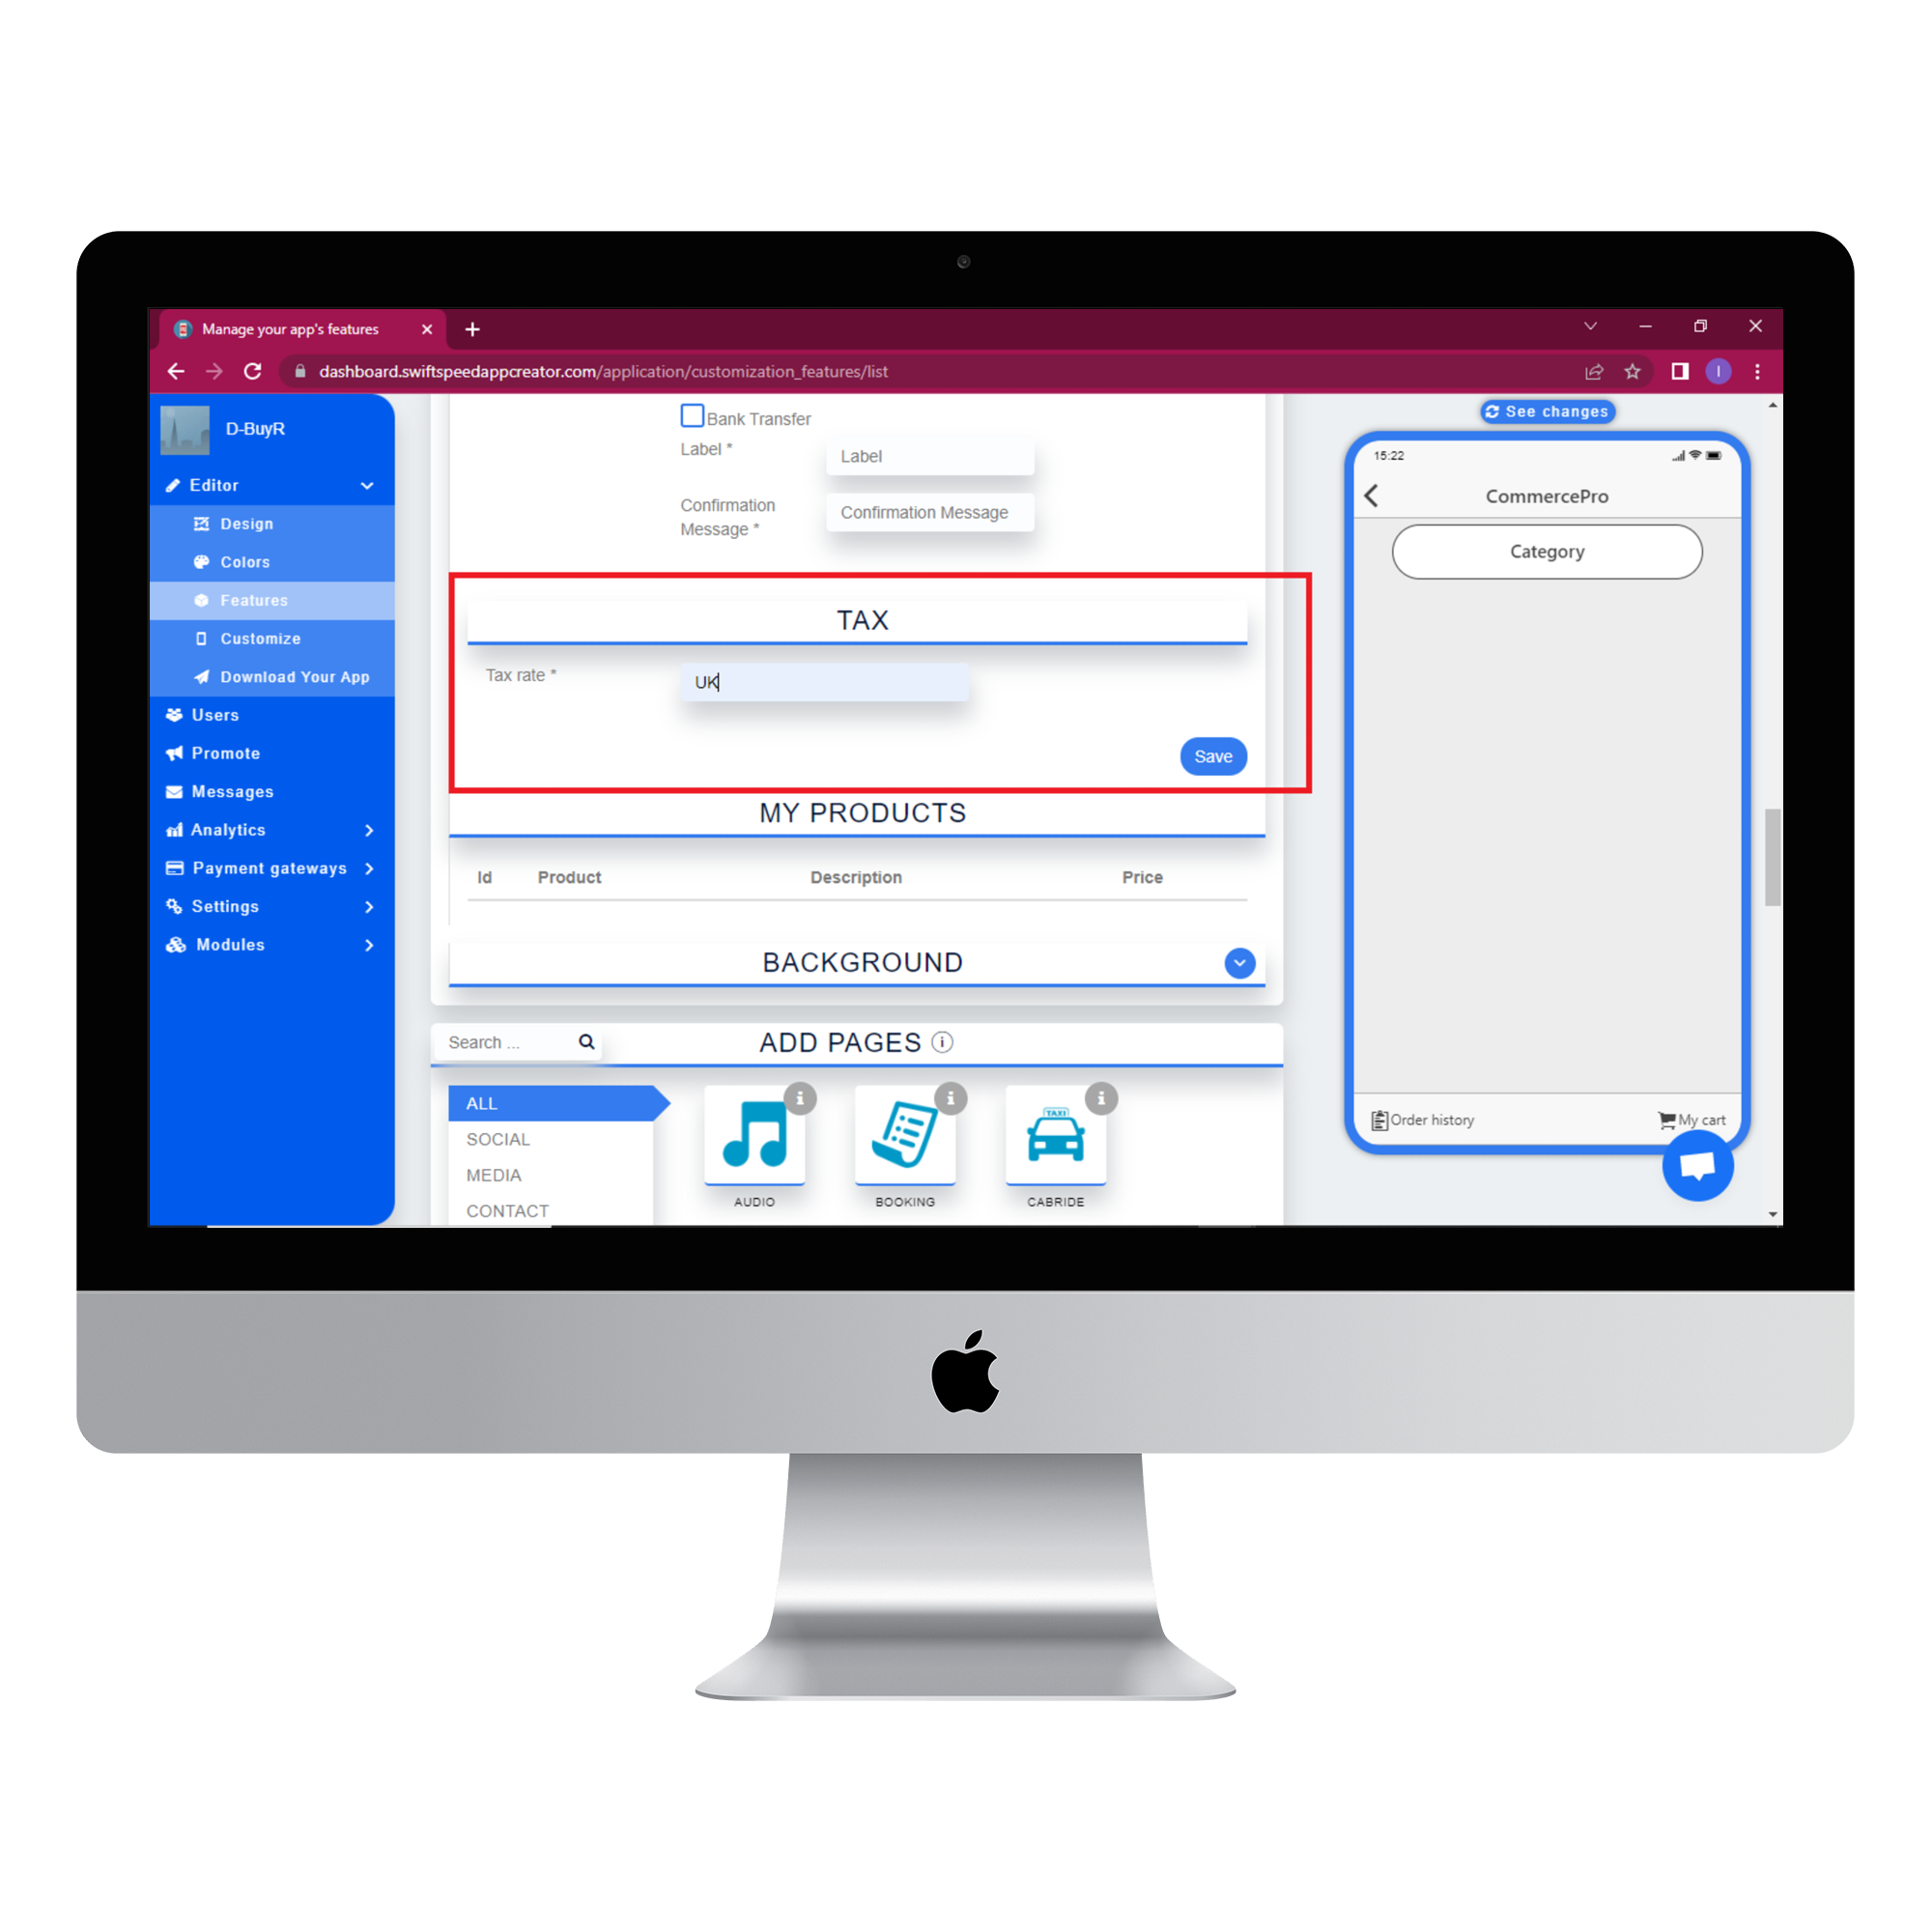
A tax rate is a percentage at which an individual or corporation is taxed. In the Tax rate section, you are required to enter your country’s tax rate ( without the % sign ). Click “save” when you are done.
Step 8:
You can add a background image to your app. You can set an image for portrait and landscape mode. Click “save” when you are done selecting the images.
You can add a new store by clicking on the (+) button next to “My stores” or edit an existing store by clicking on the down arrow next to “Manage content”.
Step 9:
Organize your store and make it easier for your customers to find the products they want by putting your products in categories. Say, for example, you have a store that sells shoes; your products would have categories like men’s shoes, women’s shoes and children’s shoes. To add a category, select the catalog tab and choose “My categories” from the drop list. Click on the (+) button to add a new category. You can add as many categories as you need by simply repeating this step.
Step 10:
A store without products is not of much use to anyone. To add products to your store, select the catalog tab and choose “My products” from the drop list. Click on the (+) button to add a new product to your store.
After clicking the (+) button. You are taken to the “Create a new product” section. Here you are required to fill in some basic information about your product then add a picture of your product.
”More changes can still be made in sections like “My product’s options”, “My product’s kist choice options” and “My product’s categories”. If your products requires any of these sections, just click on the (+) button next to section’s name and fill in the required information.
Step 11:
Click on the settings tab and select settings “setting”. Fill in the fields that are required for your business and click “save” when you are done.
If you have an M-commerce data, you can import it into your app by clicking on the settings tab and selecting “import data”.
Step 12:
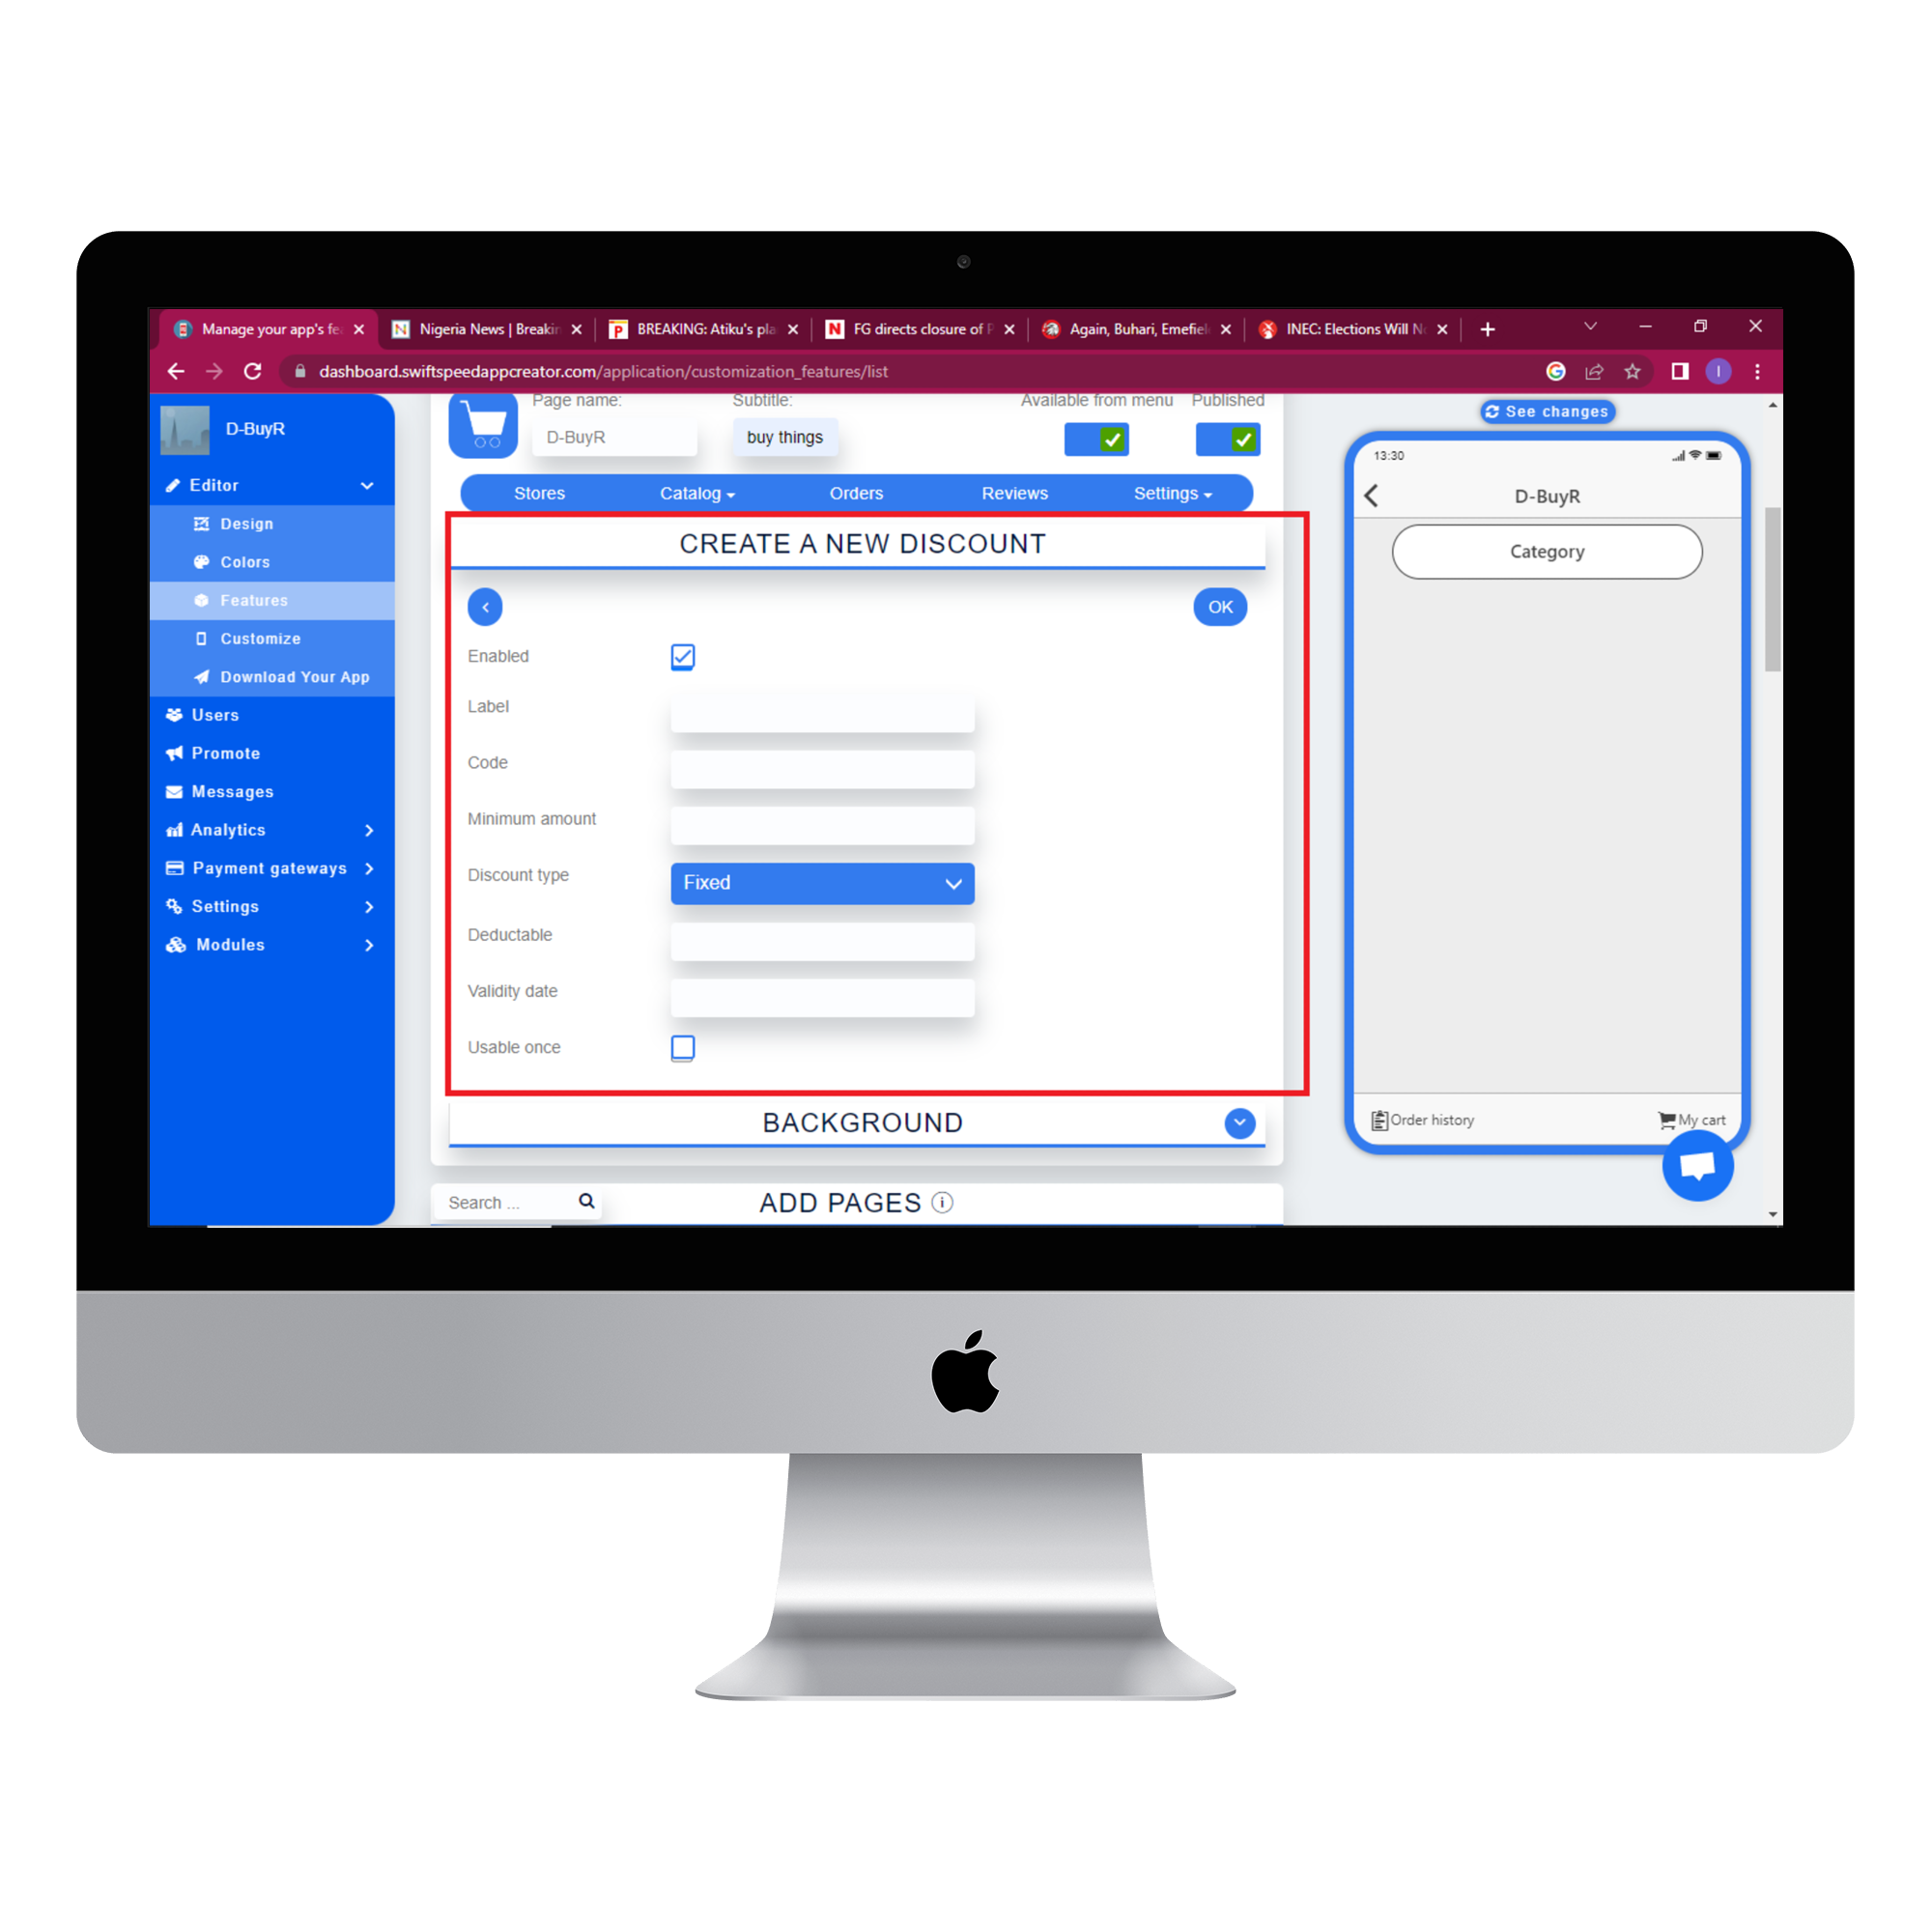
Go to the discount section and click on the (+) button to create a new discount format for your customers. Fill in the required information and click “ok”.
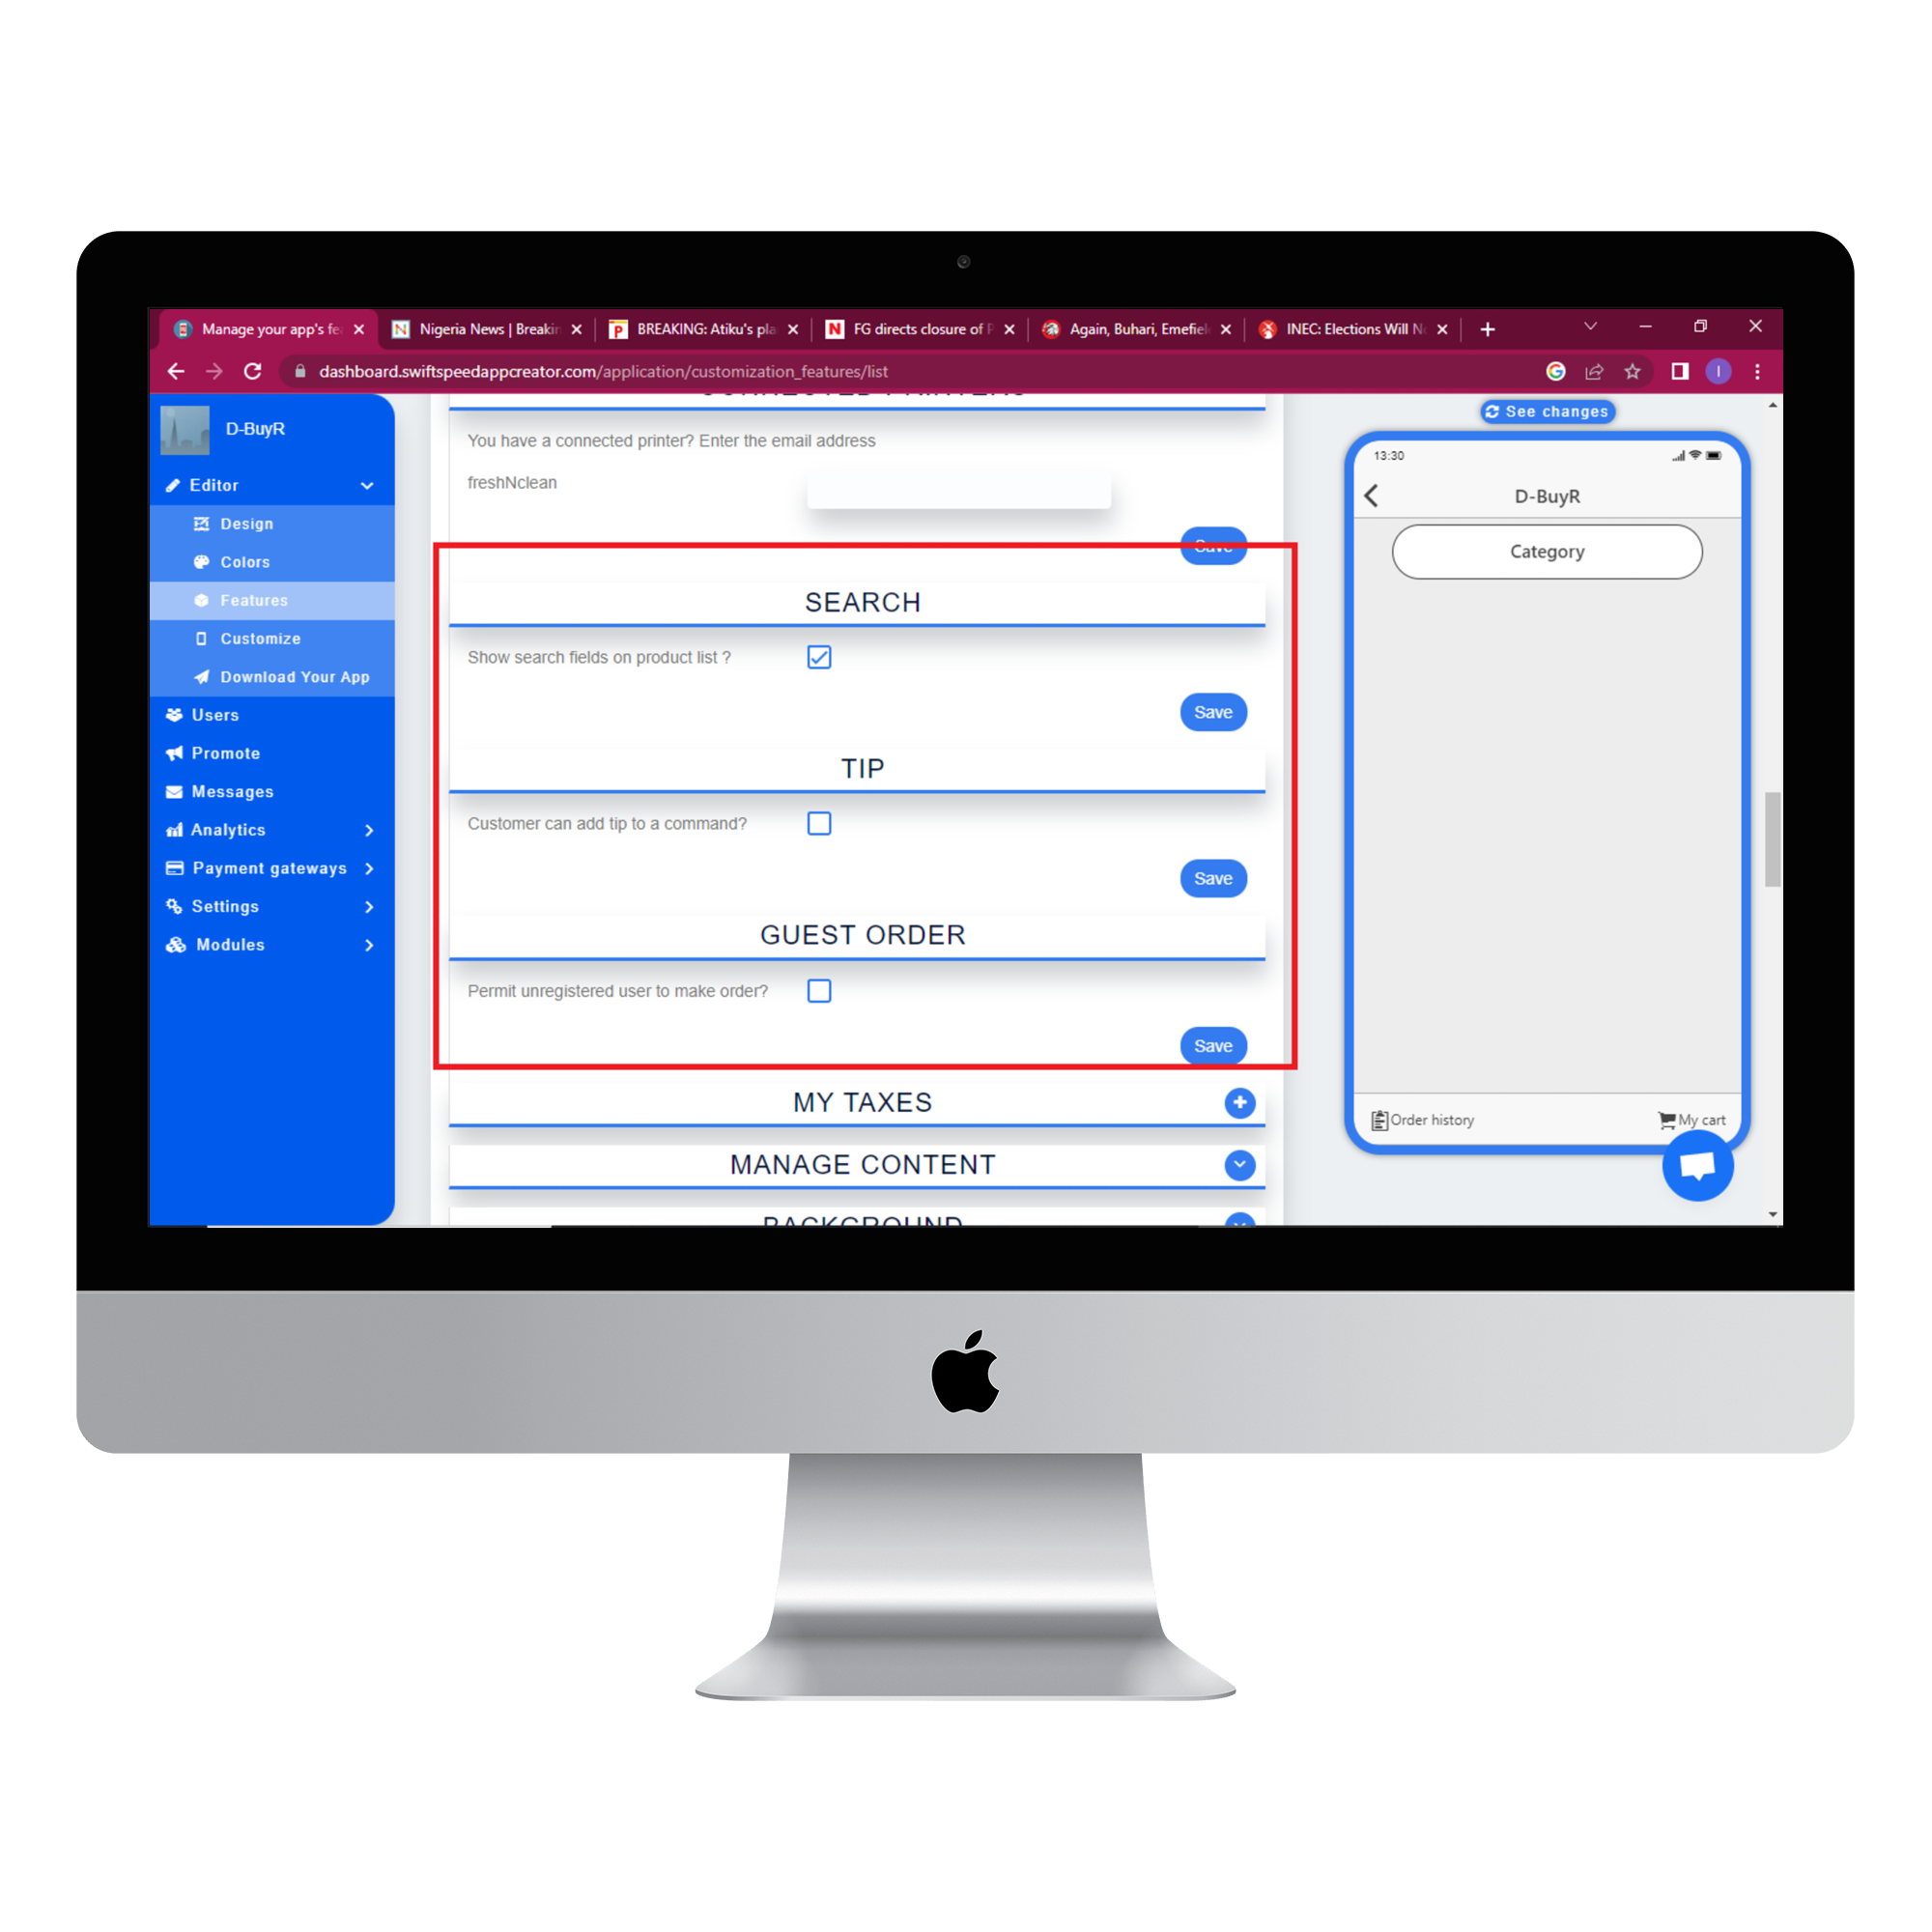
Click on the back button and scroll down to the “Search” section and choose whether to allow search on your products. Go to the “Guest order” section and choose whether unregistered users can make orders or not. Remember to click “Save” at each section.
Step 13:
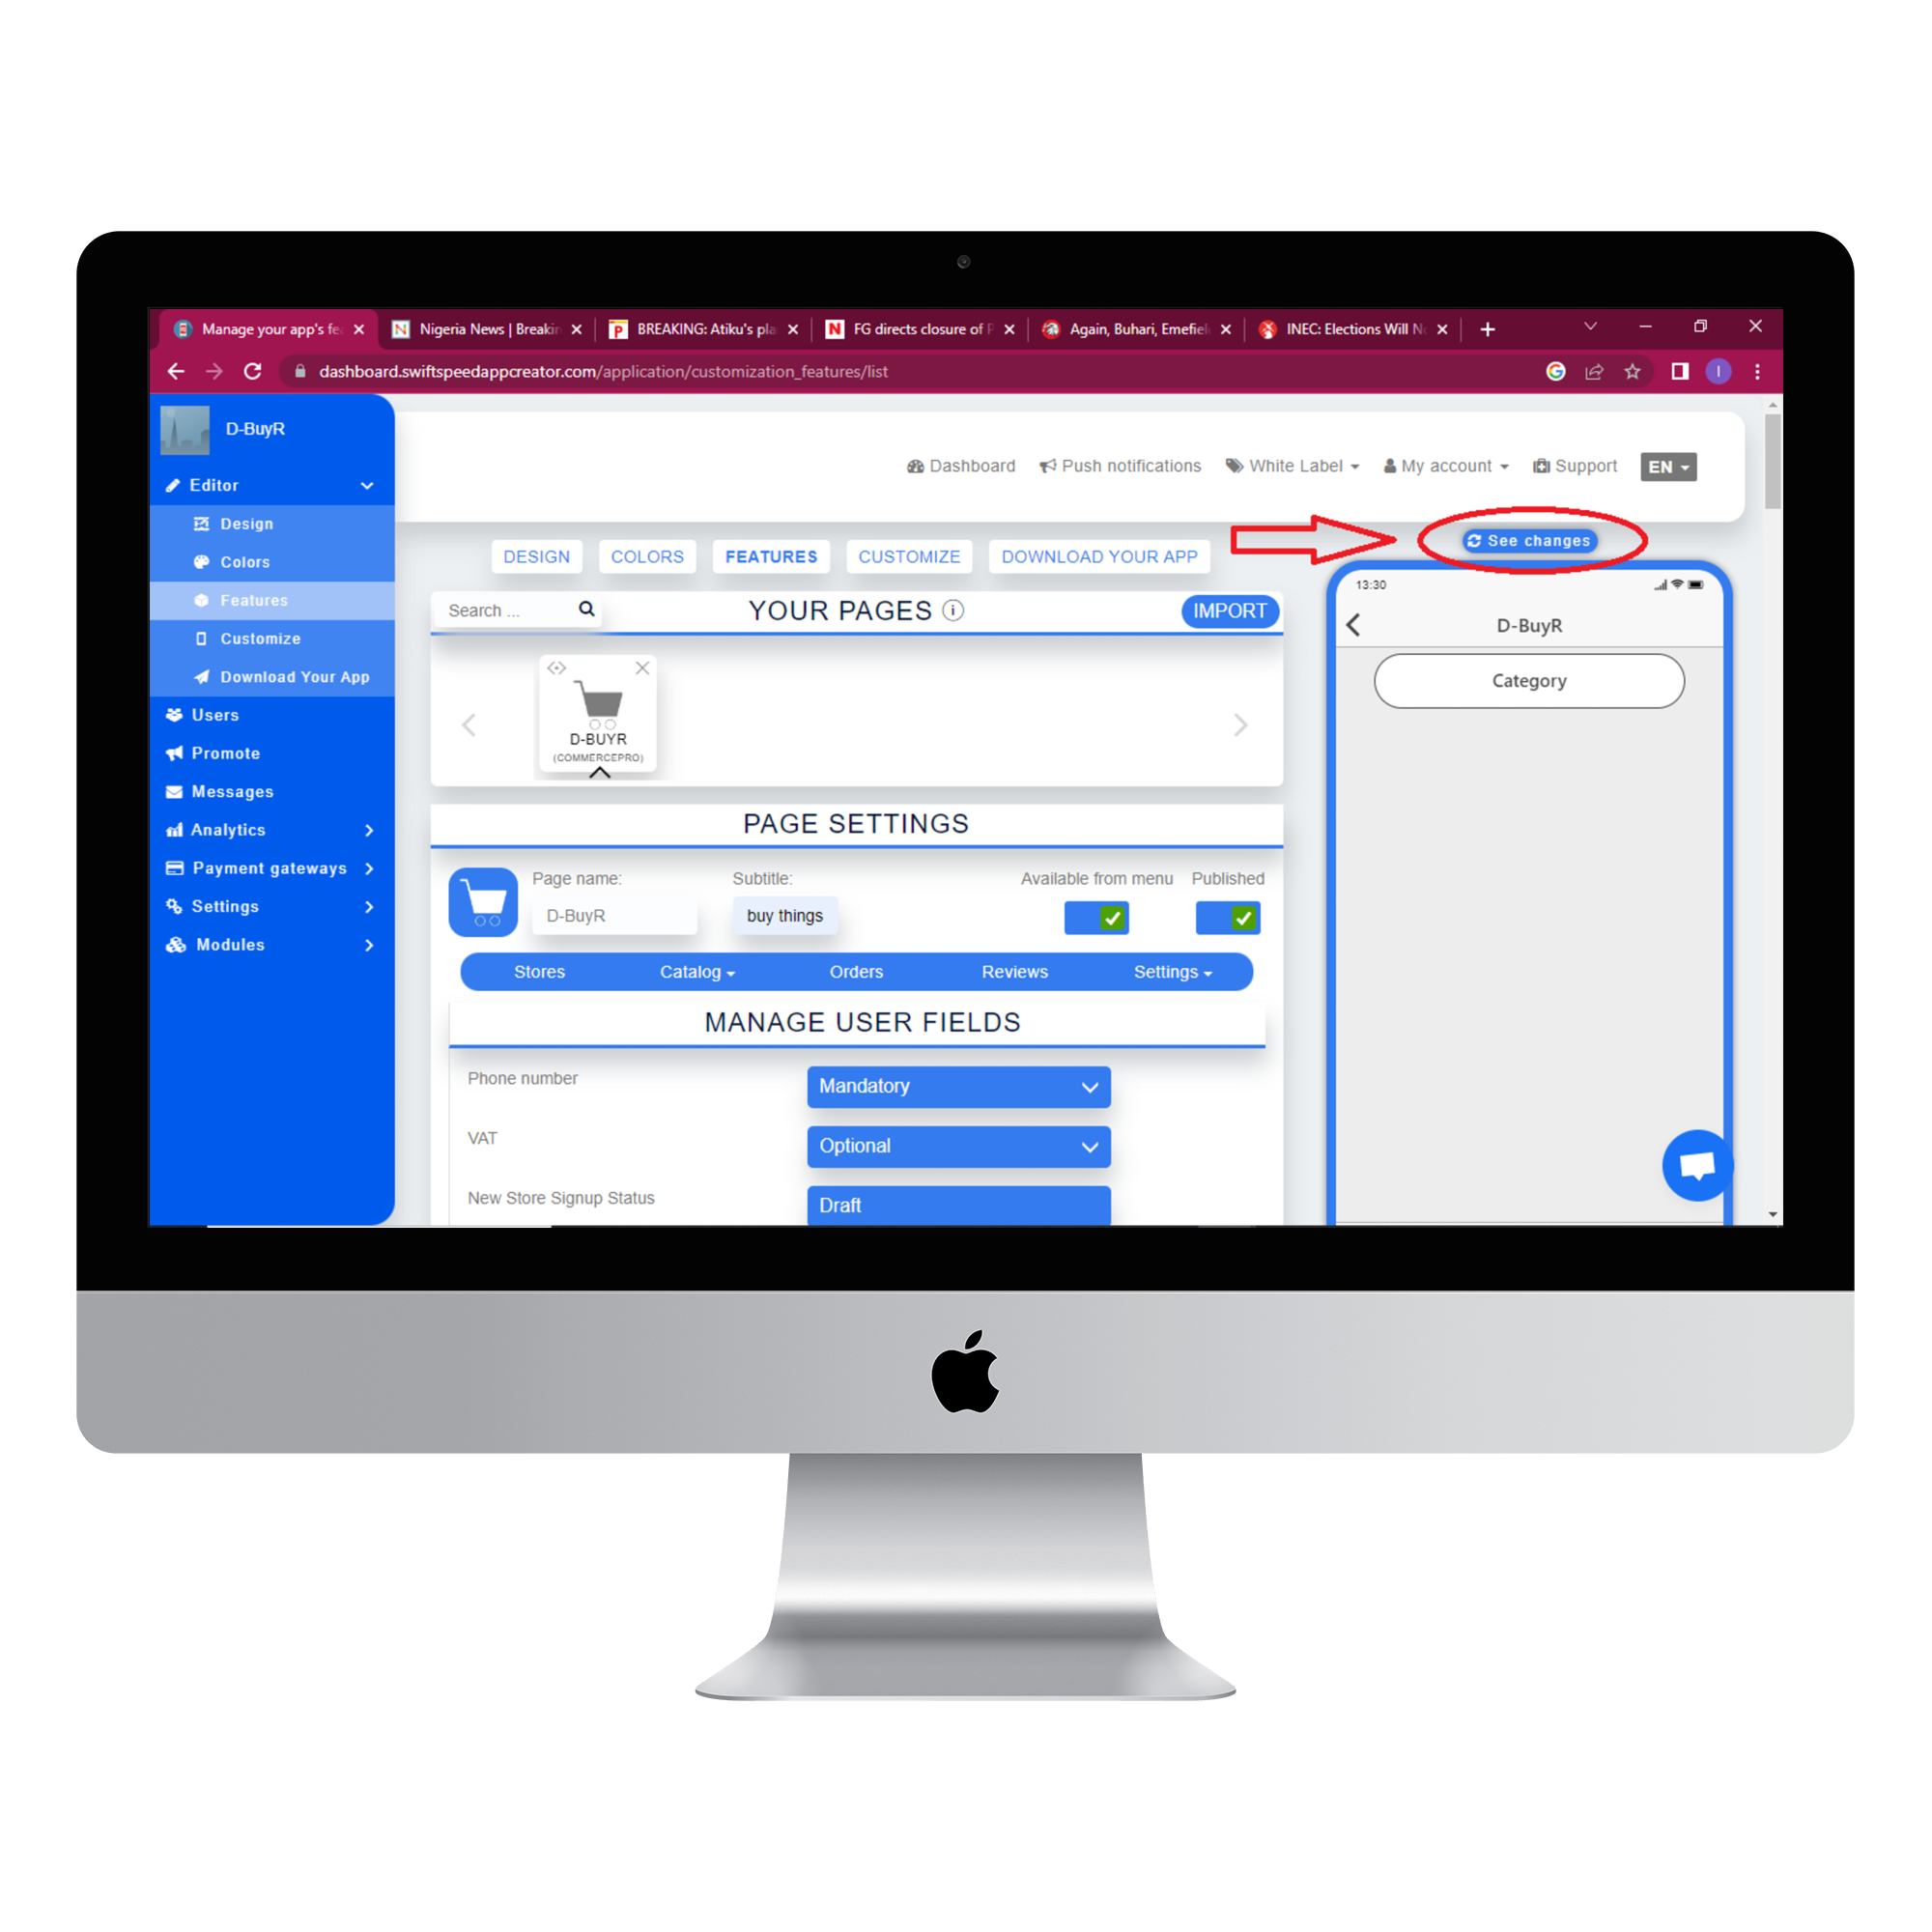
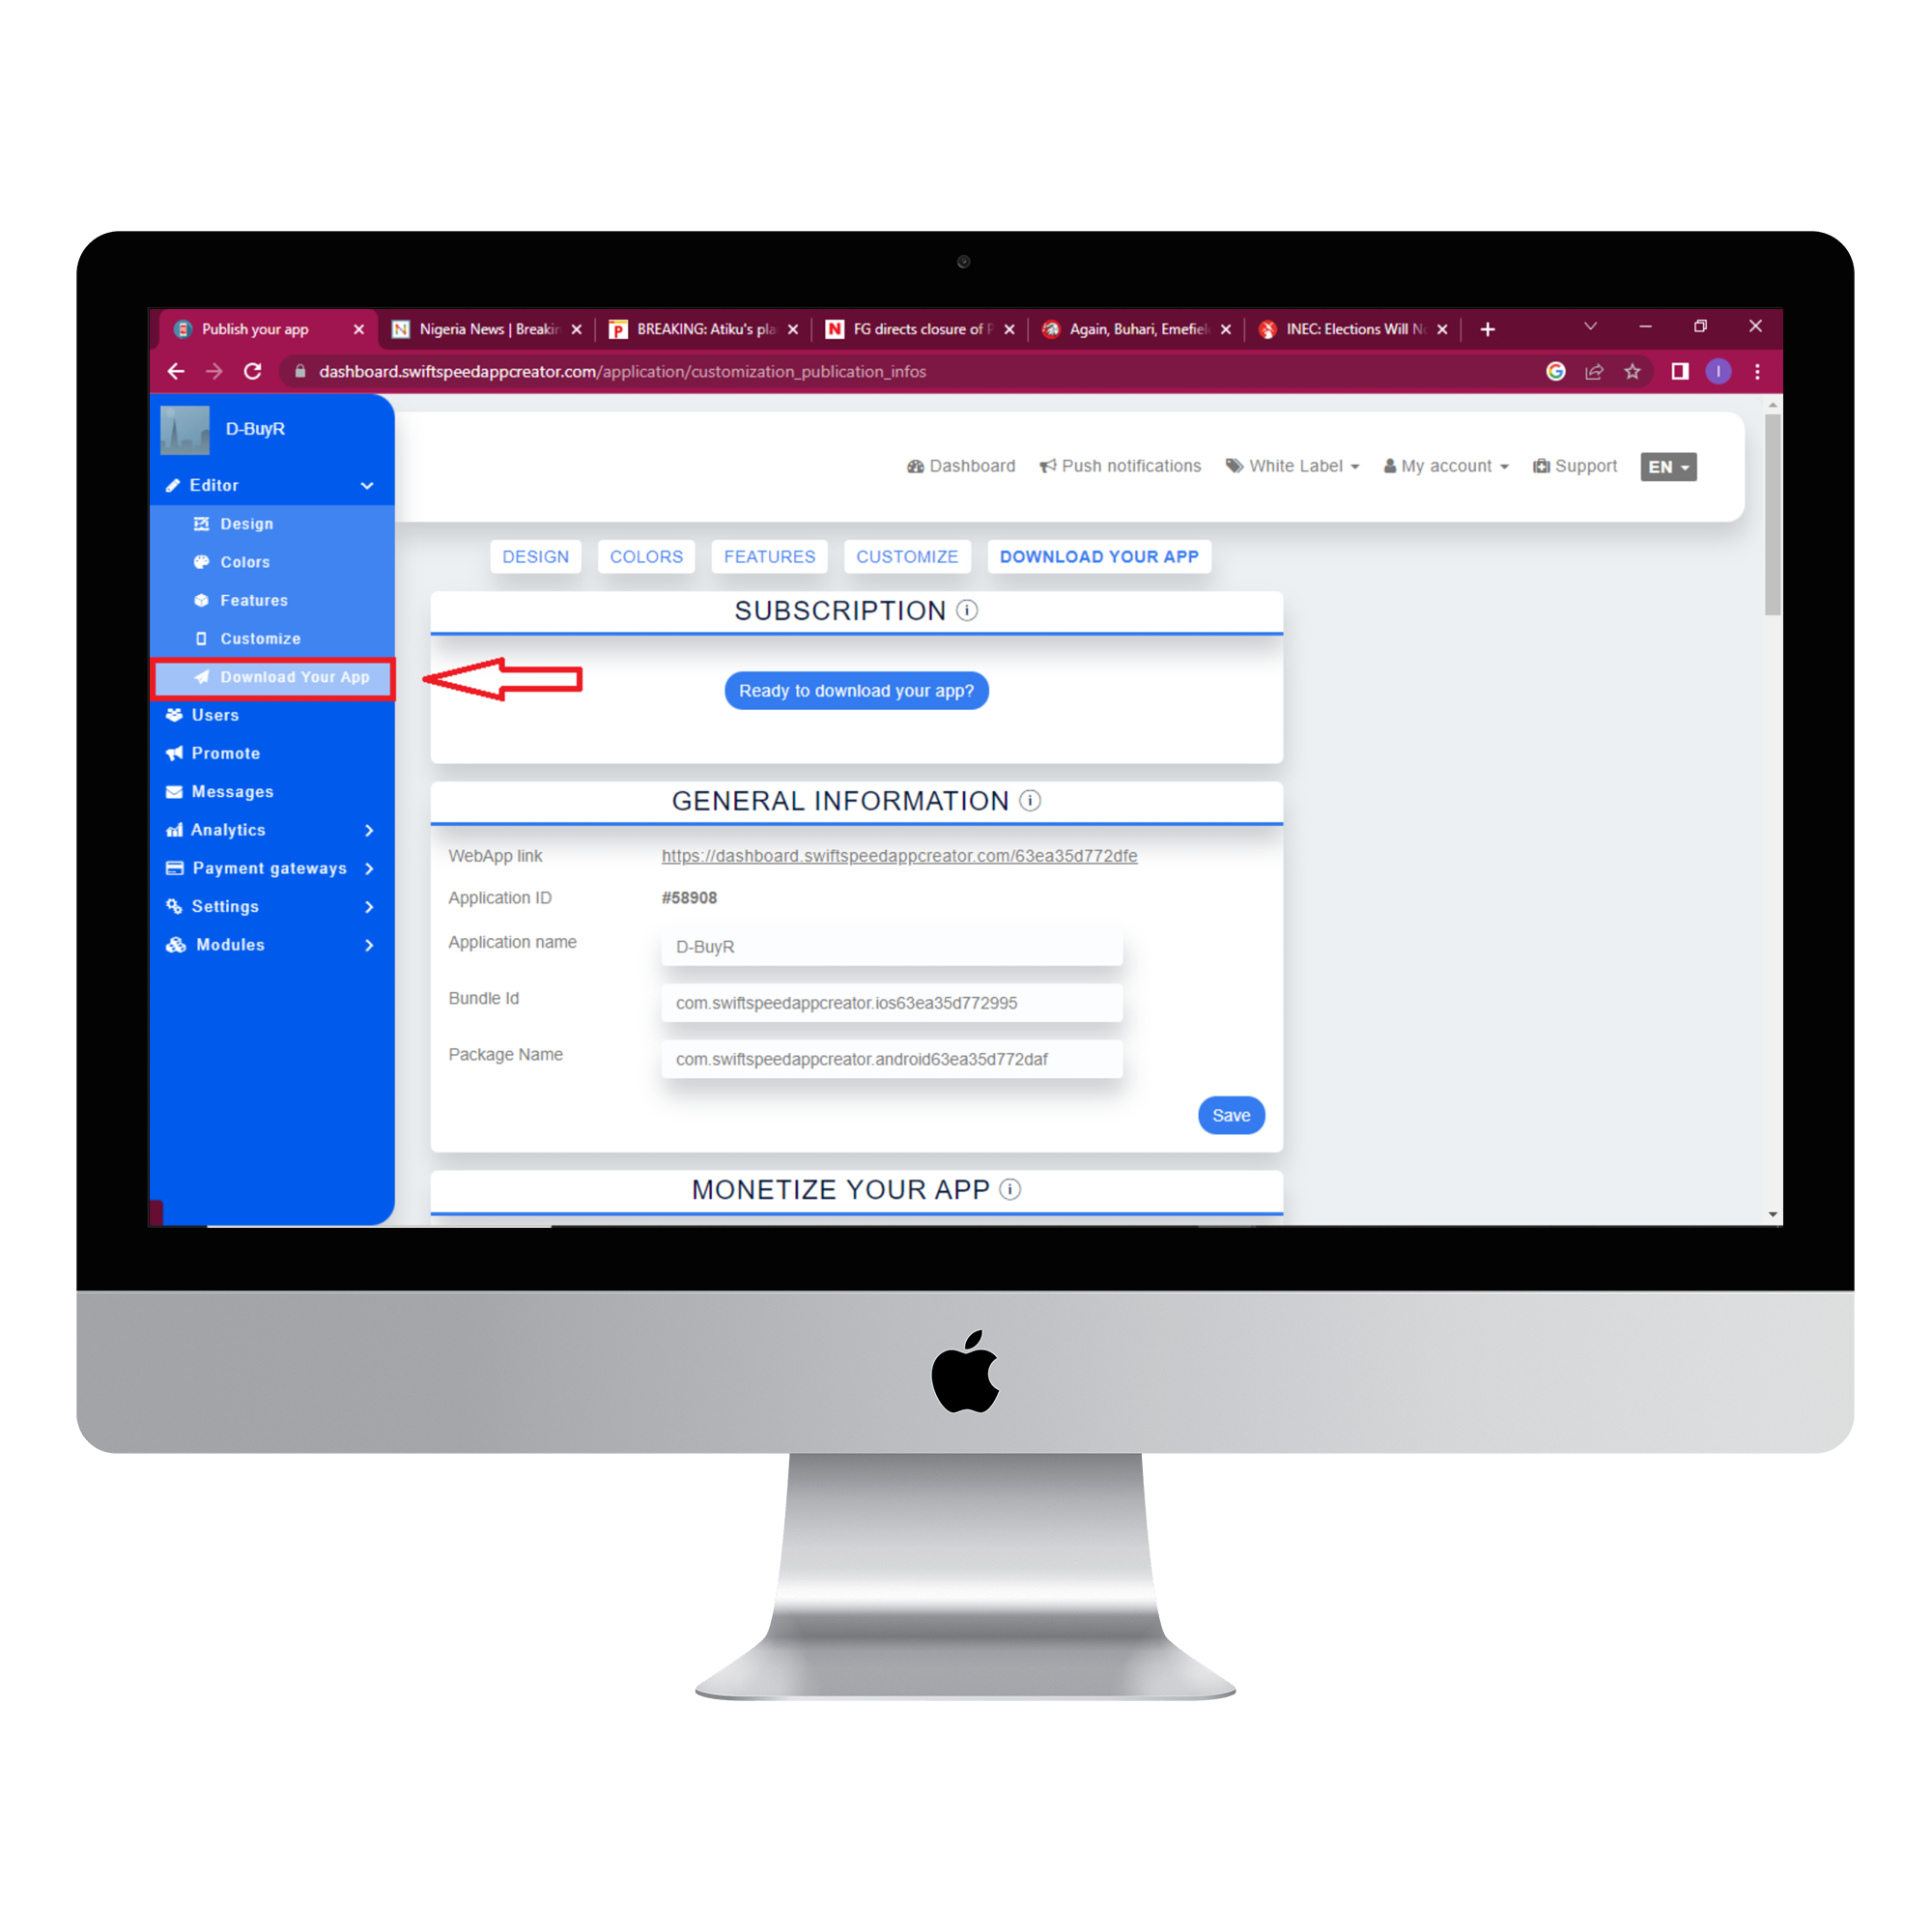
Click on the “see changes” button above the virtual device to see what your app would look like on a real device. To generate an Apk of your app, click on “Download your app” from the side menu, scroll down and click on “Generate Apk.” The Apk will be sent to your email address when the build is complete. Here is an example of what your new Ecommerce pro app would look like.
Congratulations!!! You just created your own eCommerce pro app for your business. Your customers can now buy your products and interact with you from anywhere in the world.
You may want to check our complete app maker features for other important features to integrate into your store.

