Shopify Integration - Convert Shopify to App
What is the Shopify Feature?
The Shopify feature is how Swiftspeed turns any existing Shopify store into a fully native iOS and Android shopping app, without rebuilding anything you already have. Products, collections, prices, variants, inventory, and orders all sync directly with your live Shopify admin, and checkout uses Shopify's own hosted checkout so customers pay through the exact same gateways you already configured (Shopify Payments, Stripe, PayPal, Klarna, Apple Pay, Google Pay, and any others your store accepts).
Customers browse and add to cart through a polished native mobile interface, then complete payment on Shopify's hosted checkout in an in-app browser. Every order, refund, fulfilment, and stock change still flows through the same Shopify admin you use today. Think of the app as a native mobile front-end on top of the storefront you already trust, with zero coding on your end and zero new payment processors to configure.
Before You Start
Three things should be in place before you connect a Shopify store to your mobile app:
- An active Shopify store on any plan (Basic, Shopify, Advanced, Plus). The Storefront API is available on every plan.
- Admin access to that Shopify store so you can generate API tokens.
- Guest checkout enabled in Shopify (default) OR Shopify customer accounts enabled. Either works. Shopify admin: Settings, Checkout, Customer accounts.
That's it. No SSL certificates to provision, no payment gateways to onboard inside our editor, no coding. Shopify already owns all of that on its side.
How to Generate Your Shopify Access Tokens
The mobile app talks to your Shopify store using two different APIs: the public Storefront API (for browsing products and the cart) and the private Admin API (for showing customers their order history inside the app). Both tokens come from the same screen in your Shopify admin.
- Log in to your Shopify admin at
https://yourstore.myshopify.com/admin - Click Settings at the bottom-left, then Apps and sales channels
- Click Develop apps at the top-right (you may need to allow custom app development the first time)
- Click Create an app and give it a name like "Swiftspeed Mobile App"
- On the new app's page, open the Configuration tab
You will configure two API integrations on this app: one Storefront and one Admin. The Storefront token is required, the Admin token is optional but unlocks in-app order tracking + push notifications, so most stores want both.
Storefront API Token (Required)
- Under Storefront API integration, click Configure
- Select these scopes:
unauthenticated_read_product_listings,unauthenticated_read_product_inventory,unauthenticated_write_checkouts - Click Save, then go to the API credentials tab
- Click Install app at the top-right of the page
- The Storefront API access token is now visible. Copy it - you will paste this into the Swiftspeed editor in a moment.
Admin API Token (Recommended for Order Tracking)
- Back on the Configuration tab, under Admin API integration, click Configure
- Select these scopes:
read_orders,read_customers,read_fulfillments,write_webhooks - Click Save, then return to API credentials
- Click Reveal token once next to the Admin API access token (it starts with
shpat_). Copy it before leaving the page - Shopify only shows it one time.
Without the Admin API token, the app still works for browsing, cart, and checkout. You just lose in-app order history (your customers would only see their orders via Shopify's automatic order confirmation emails). Most stores want both tokens.
Adding Shopify to Your Mobile App
Inside the Swiftspeed editor, the Shopify store becomes a feature page in your native mobile app. The flow:
From your Swiftspeed dashboard, click the edit pencil on the mobile app you want to add the Shopify store to.
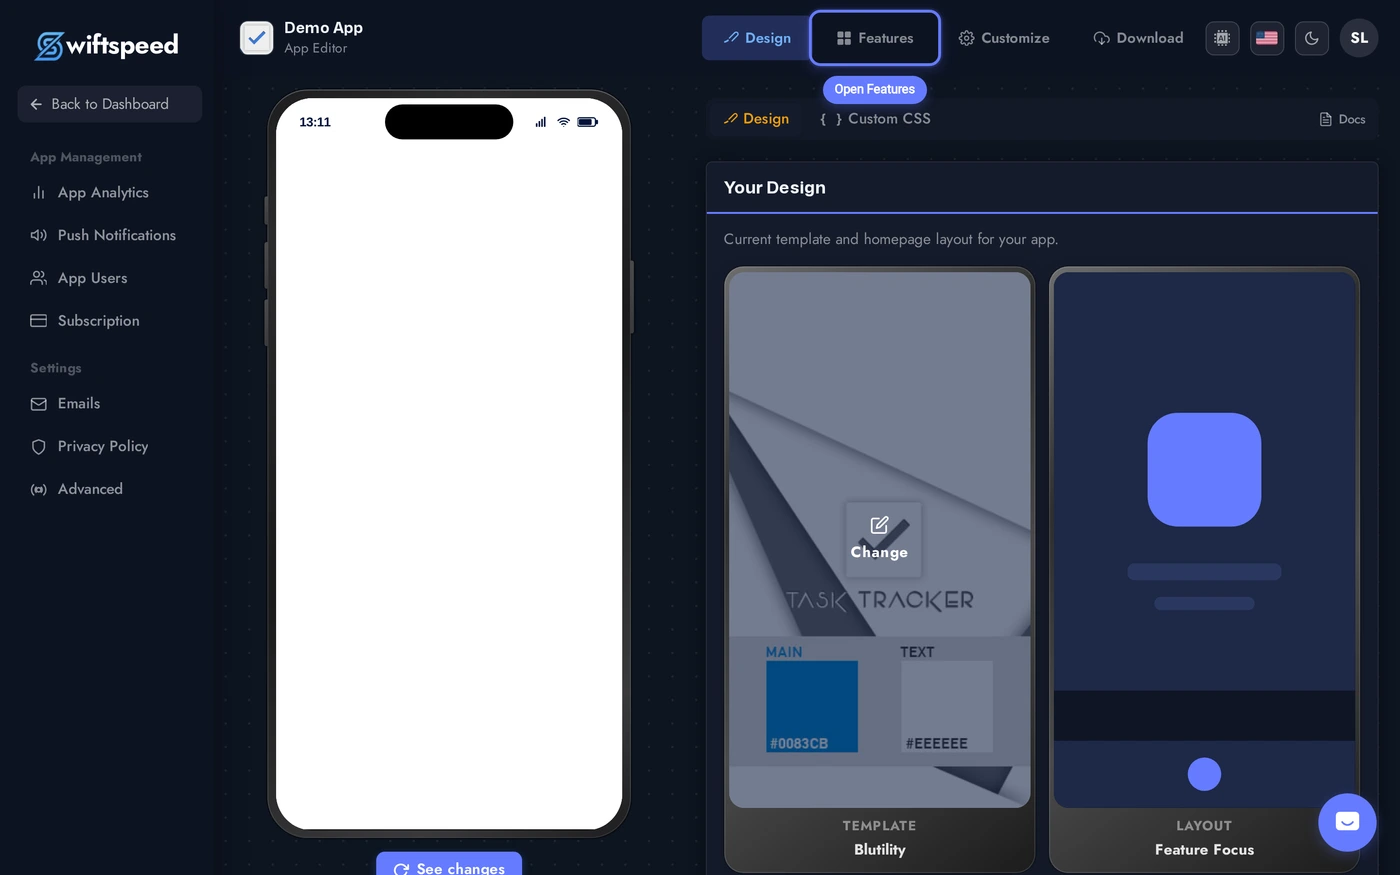
You'll land in the App Editor. Click Features in the top bar - that's where every page in your native mobile app lives, including the Shopify store you're about to add.
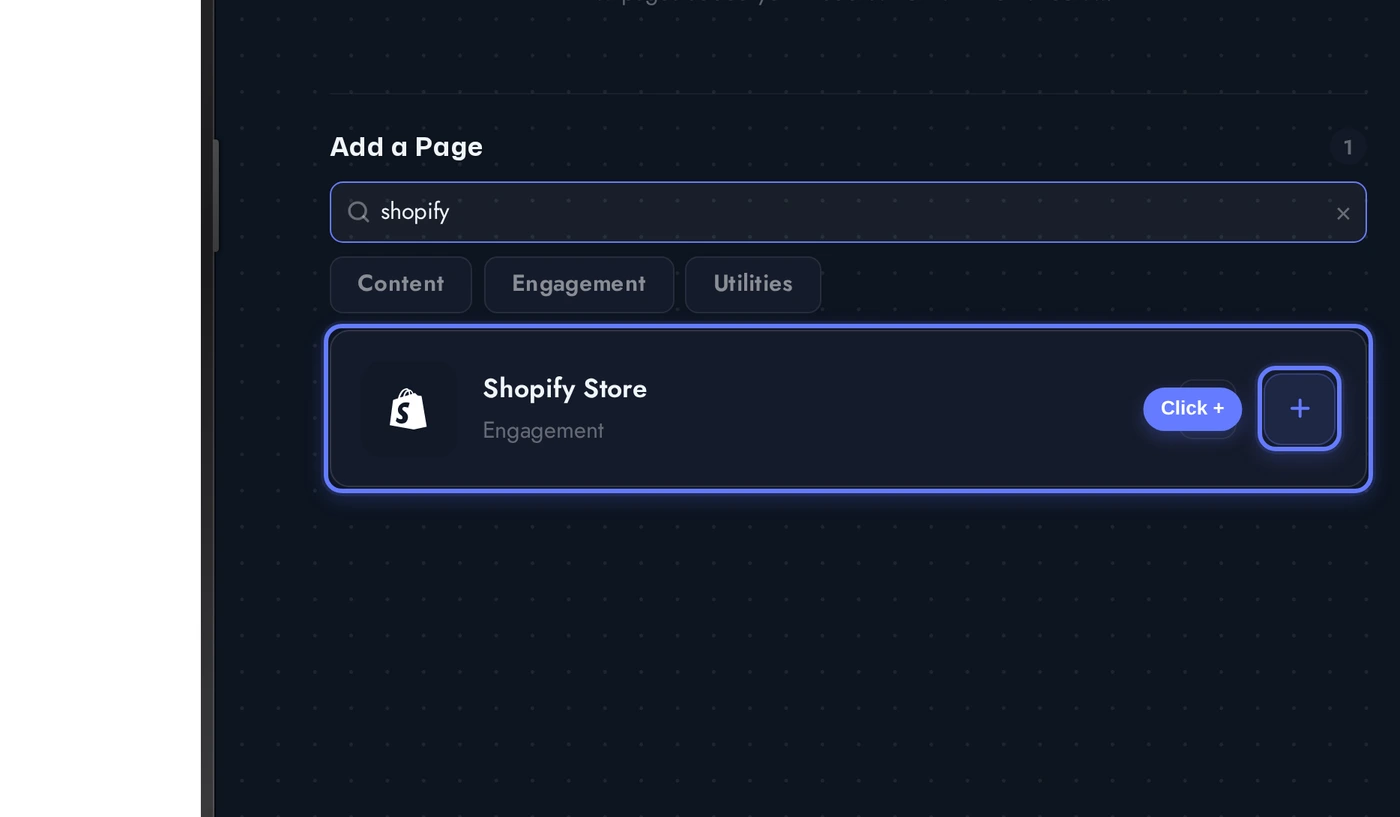
In the Add a Page list, scroll down or search for Shopify and click the + button on the Shopify Store card.
Connecting Your Shopify Store
When the Shopify Store page is added, the editor opens directly on the Connection tab with four fields. This is where the tokens you just generated link your live Shopify store to the native mobile app.
Paste your Shop domain (yourstore.myshopify.com or your custom domain), your Storefront access token, and optionally your Admin API access token and Webhook signing secret. Click Test connection to verify the tokens against Shopify's API without saving, then Connect to persist them and trigger an initial product sync.
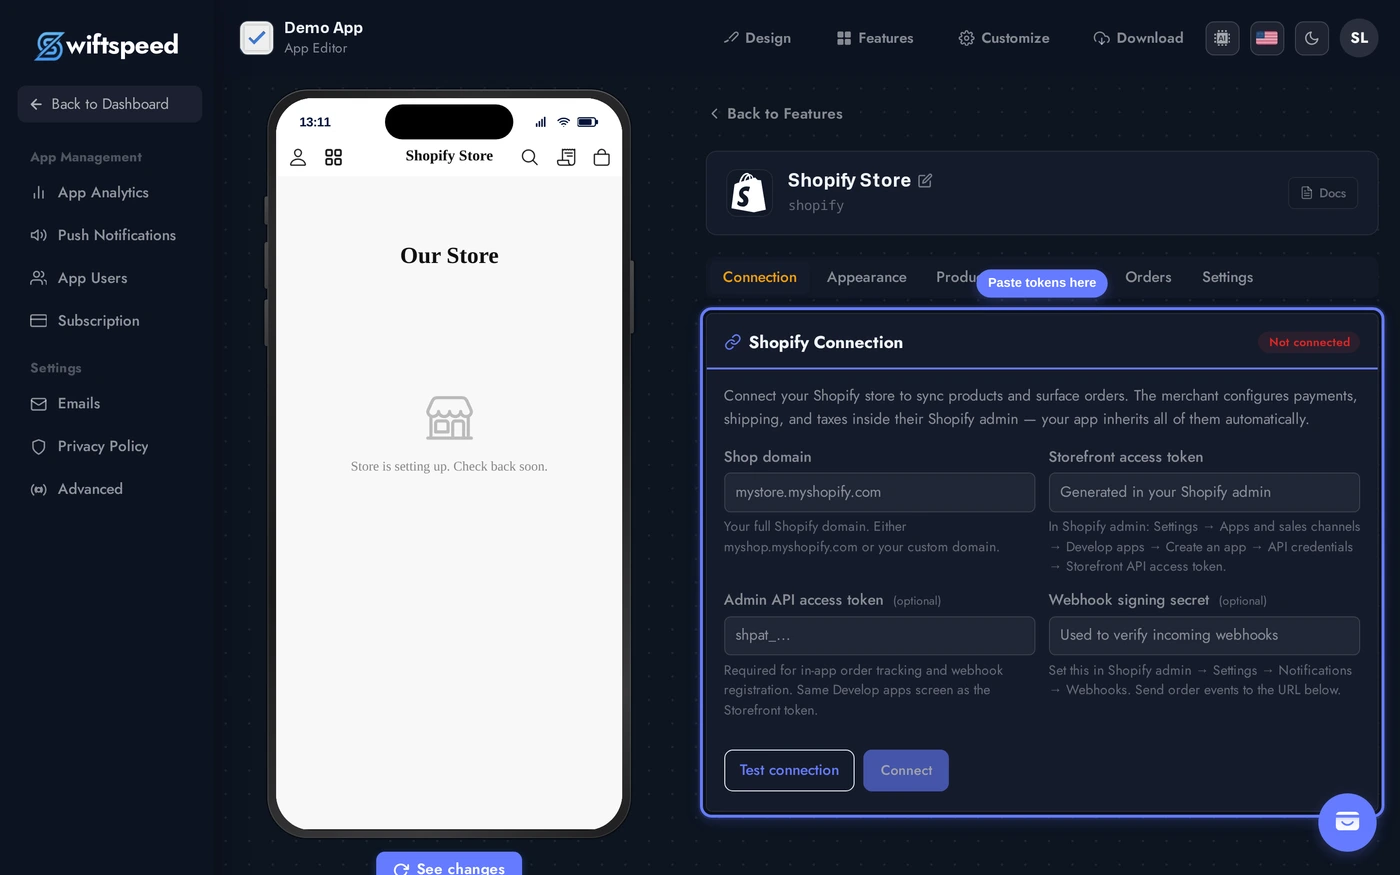
Within a few seconds the page flips to a Connected state showing your store name, currency, and the count of products and collections that synced. The other tabs (Appearance, Products, Categories, Orders, Settings) become fully usable from here on.
Setting Up Push Notifications for Order Events (Optional)
If you want app users to get a push notification when their order is paid, shipped, or cancelled, set up Shopify webhooks pointing to the URL the editor displays right under the Webhook signing secret field after you connect.
- In your Swiftspeed Shopify editor on the Connection tab, copy the Webhook URL shown below the credentials (it looks like
https://swiftspeed.app/webhook/shopify/<feature-id>) - In Shopify admin: Settings → Notifications → scroll to Webhooks at the bottom
- Click Create webhook. Repeat for each of these events: Order paid, Order fulfilled, Order cancelled
- Format: JSON. URL: paste the webhook URL from Swiftspeed
- Once a webhook is created Shopify shows the Webhook signing secret at the top of the Webhooks section. Copy it and paste it into the editor's Webhook signing secret field, then save
Now any time an order moves to one of those statuses on the Shopify side, the app user that placed it gets a real native push notification on their phone - same channel as Direct Message, Loyalty, and other Swiftspeed push notifications.
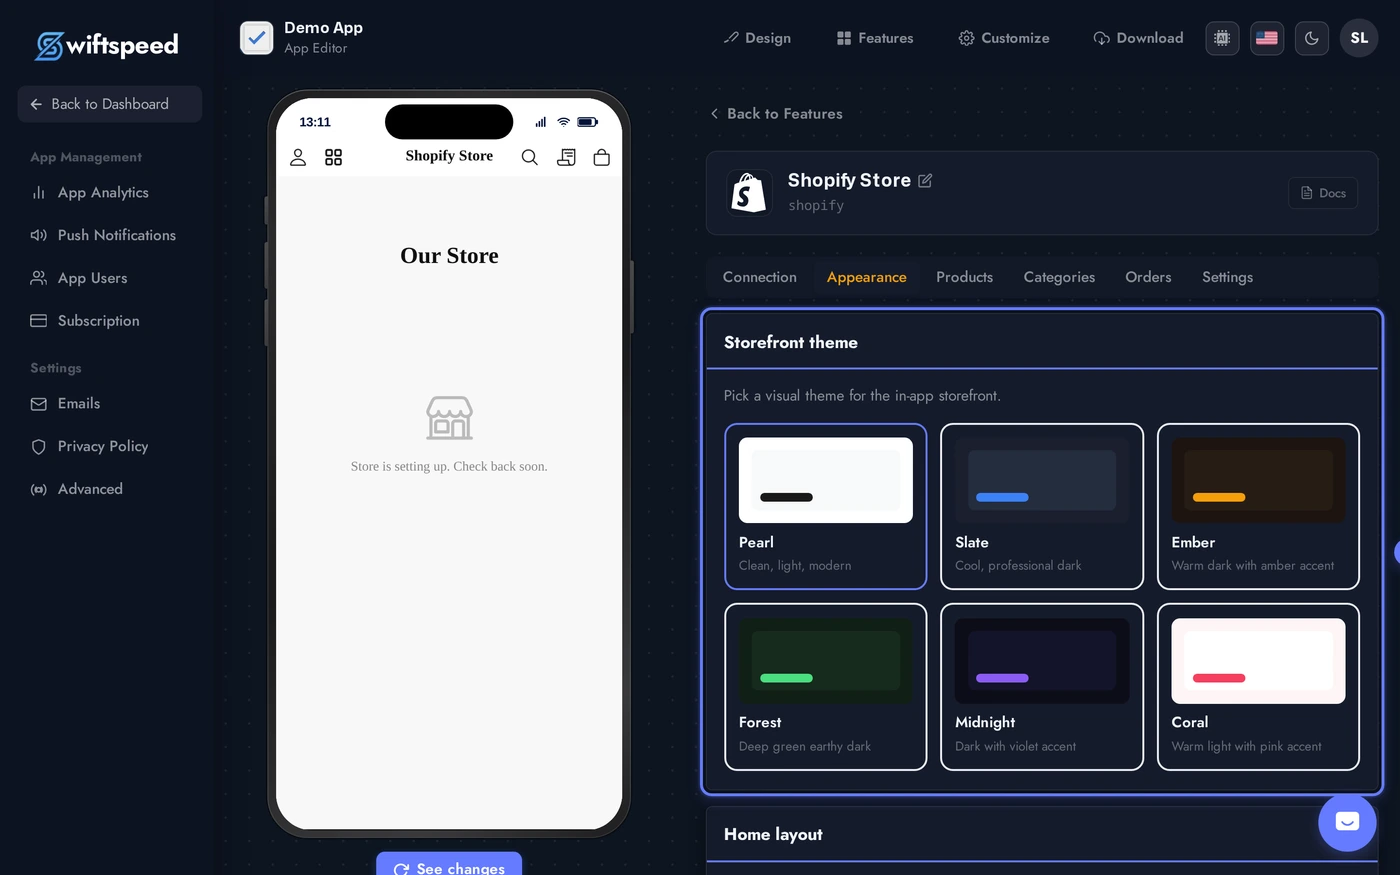
Designing the Mobile Storefront (Theme, Layout, Colors)
Switch to the Appearance tab to control how the Shopify store looks inside the native mobile app. Changes appear instantly in the phone preview.
Pick a theme (each one is a complete visual identity for the storefront), a layout (Classic, Market, or Boutique product arrangement), and override any custom colors if your brand needs more than a preset offers. Store logo, hero banner height, and button size live further down on the same tab.
Curating Products and Collections
The Products and Categories tabs let you override what comes through from Shopify without changing your Shopify catalogue.
- Featured: pin a product to the featured rail on the storefront home, even if it isn't featured in Shopify
- Hidden: temporarily hide a product from the mobile app while keeping it live on your website (useful for app-exclusive merch flows)
- Collection rename: change a collection's display name in the app without changing its name in Shopify
- Pin to home: feature a specific collection as a section on the storefront home with its own product carousel
- Custom icons: override the collection thumbnail with a custom image
All overrides are app-side only - your Shopify admin is never modified.
Order Management
The Orders tab inside the Shopify editor shows the most recent orders pulled live from your Admin API, useful for support and quick checks. For full order management (refunds, fulfilment, customer service, reports), keep using your Shopify admin - that's where every Shopify mobile-app order lands automatically.
- There is no separate orders database to reconcile, mobile-app orders ARE Shopify orders
- Each order row shows the order number, customer email, status (financial + fulfilment), total, and tracking numbers when available
- App users see their own orders inside the app under My Orders, filtered to the email they signed in with
- Refunds, status changes, notes you make in Shopify admin reflect back into the mobile app automatically on next webhook or Sync
Checkout and Payment Gateways
Unlike WooCommerce or our native Sell Online feature, Shopify's terms require checkout to happen on Shopify's hosted checkout page. This is actually a feature, not a limitation:
- Zero payment configuration in our editor. The app inherits every gateway you've configured in Shopify admin, with the same fees, payout schedule, and dispute handling
- Apple Pay, Google Pay, Klarna, Afterpay, Stripe, PayPal all work automatically
- No PCI compliance burden on your side or ours - Shopify owns all card handling
- Shipping rates, taxes, and discount codes calculated by Shopify exactly as on your website
What the user sees: tap Checkout in the app cart → an in-app browser slides up showing the Shopify checkout page (with their email pre-filled if they're signed into the app) → they pay → they tap done → the cart clears and the order appears in their My Orders tab a moment later.
Identity: How the App Knows Each Customer's Orders
App users sign into your app using Swiftspeed's customer accounts (the same accounts shared across Loyalty, Direct Message, and our other features). When they browse and check out, we pre-fill their email on Shopify's checkout, so they don't retype it. Behind the scenes, the app queries Shopify's Admin API filtered by their email to show their full order history right inside My Orders.
This means one identity from the user's perspective: their app account. From Shopify's perspective each order is just a regular guest checkout (or a Shopify customer account if your store has them enabled - the email match still works either way).
Tips and Troubleshooting
- "Storefront token failed" error? Verify the app was installed (Develop apps → your app → Install app), and that the Storefront API integration has all three required scopes:
unauthenticated_read_product_listings,unauthenticated_read_product_inventory,unauthenticated_write_checkouts - "Admin token failed"? Double-check that
read_orders,read_customers, andread_fulfillmentsare in the Admin API integration scope list. Webhooks also requirewrite_webhooks - Product images look soft on the app? Shopify auto-resizes images per request, our app already requests high-density variants. Upload product images at 2048×2048 or larger in Shopify and the app will pull the right size automatically
- Currency mismatch? The mobile app uses your store's default currency from Shopify Payment settings. To switch, change it in Shopify admin and run a Sync from the editor
- Sync interval: every 30 minutes is the default. Drop to 15 minutes if you push frequent stock changes and need them in the app faster. Webhooks (when configured) keep order status realtime regardless of this interval
- Multi-currency / Shopify Markets? Currently the app uses your store's primary currency. Shopify Markets multi-currency support is on the roadmap
- App user reports their order isn't showing in My Orders? Check that their app account email exactly matches the email used at Shopify checkout. If they checked out with a different email, that order won't appear in the app under their account - this is by design (it would otherwise leak orders across customers sharing a device)
- Lost a token? Tokens can be revoked and re-issued from the same Develop apps screen at any time. Paste the new ones into the editor's Connection tab and click Connect - the catalogue stays cached so there's no data loss