AI Image Compressor Feature
What is the AI Image Compressor?
The AI Image Compressor is a Swiftspeed feature that adds a fully functional image compression screen to your mobile app. End-users upload photos, the compressor shrinks them by up to 90 percent without visible quality loss, and they download or re-share. Supports HEIC, JPG, PNG, WebP, and AVIF.
Everything is no-code. You add the feature, customise the look and behaviour in the editor, save. End-users open your app and use it immediately.
Adding the Image Compressor to Your App
From your Swiftspeed dashboard, the flow is identical to every other feature: open the app, go to Features, find the card, click add.
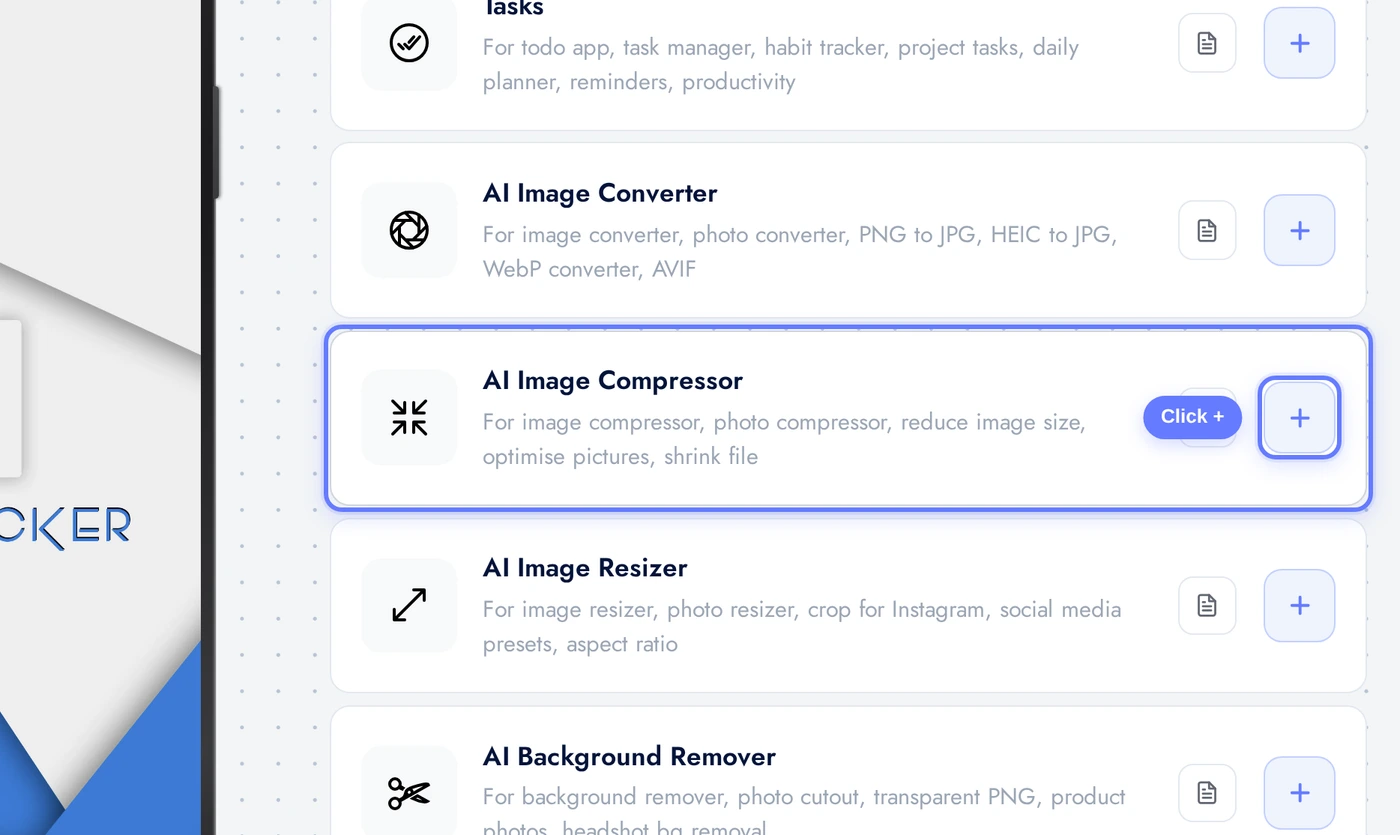
In the App editor, click Features in the top bar. This page lists every feature available, grouped by category.
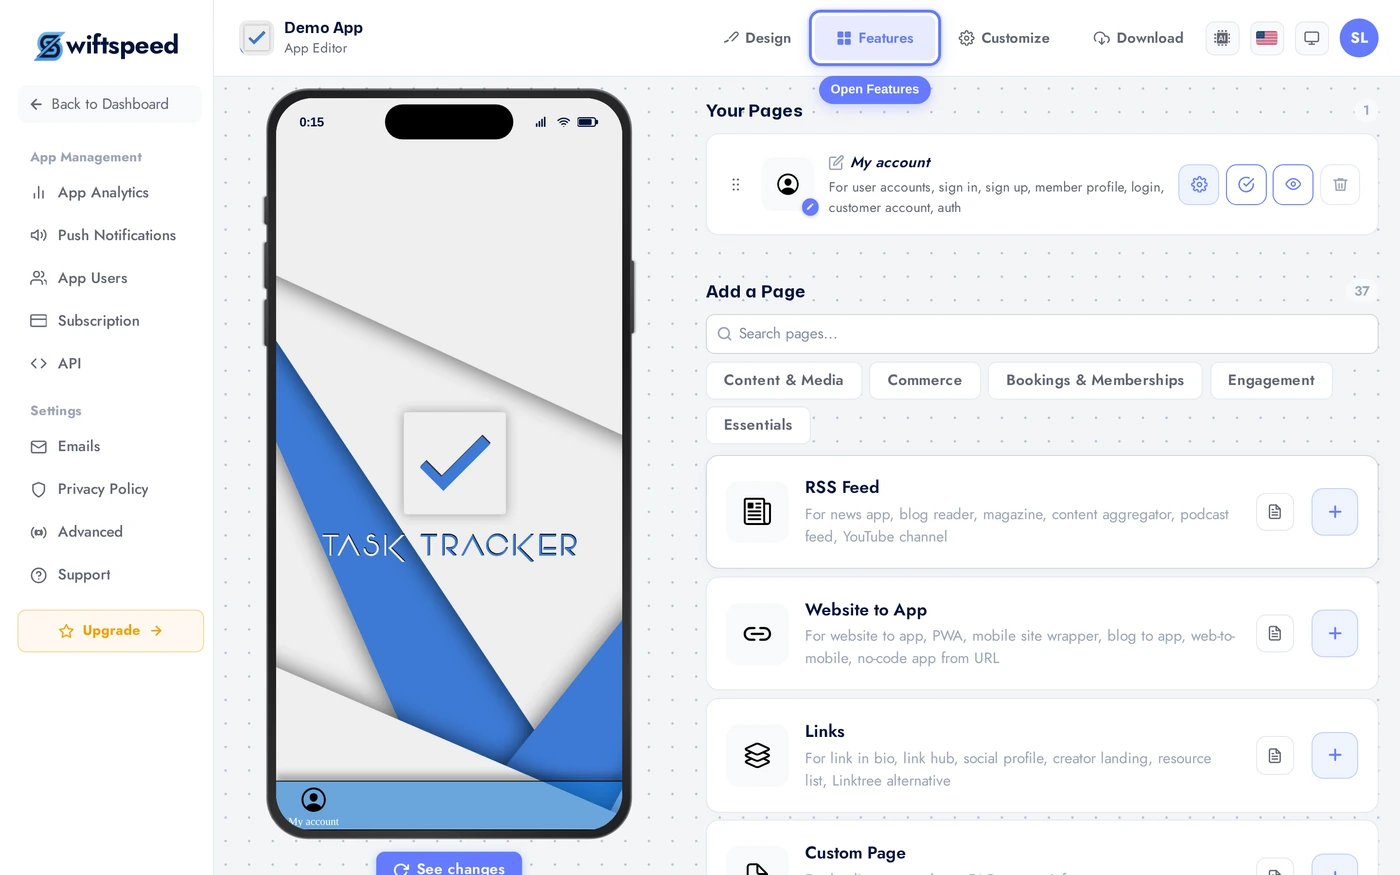
Find the AI Image Compressor card. The fastest way is to type "Compressor" in the search box. Click the + button on the right of the card to add it.
The Appearance Tab
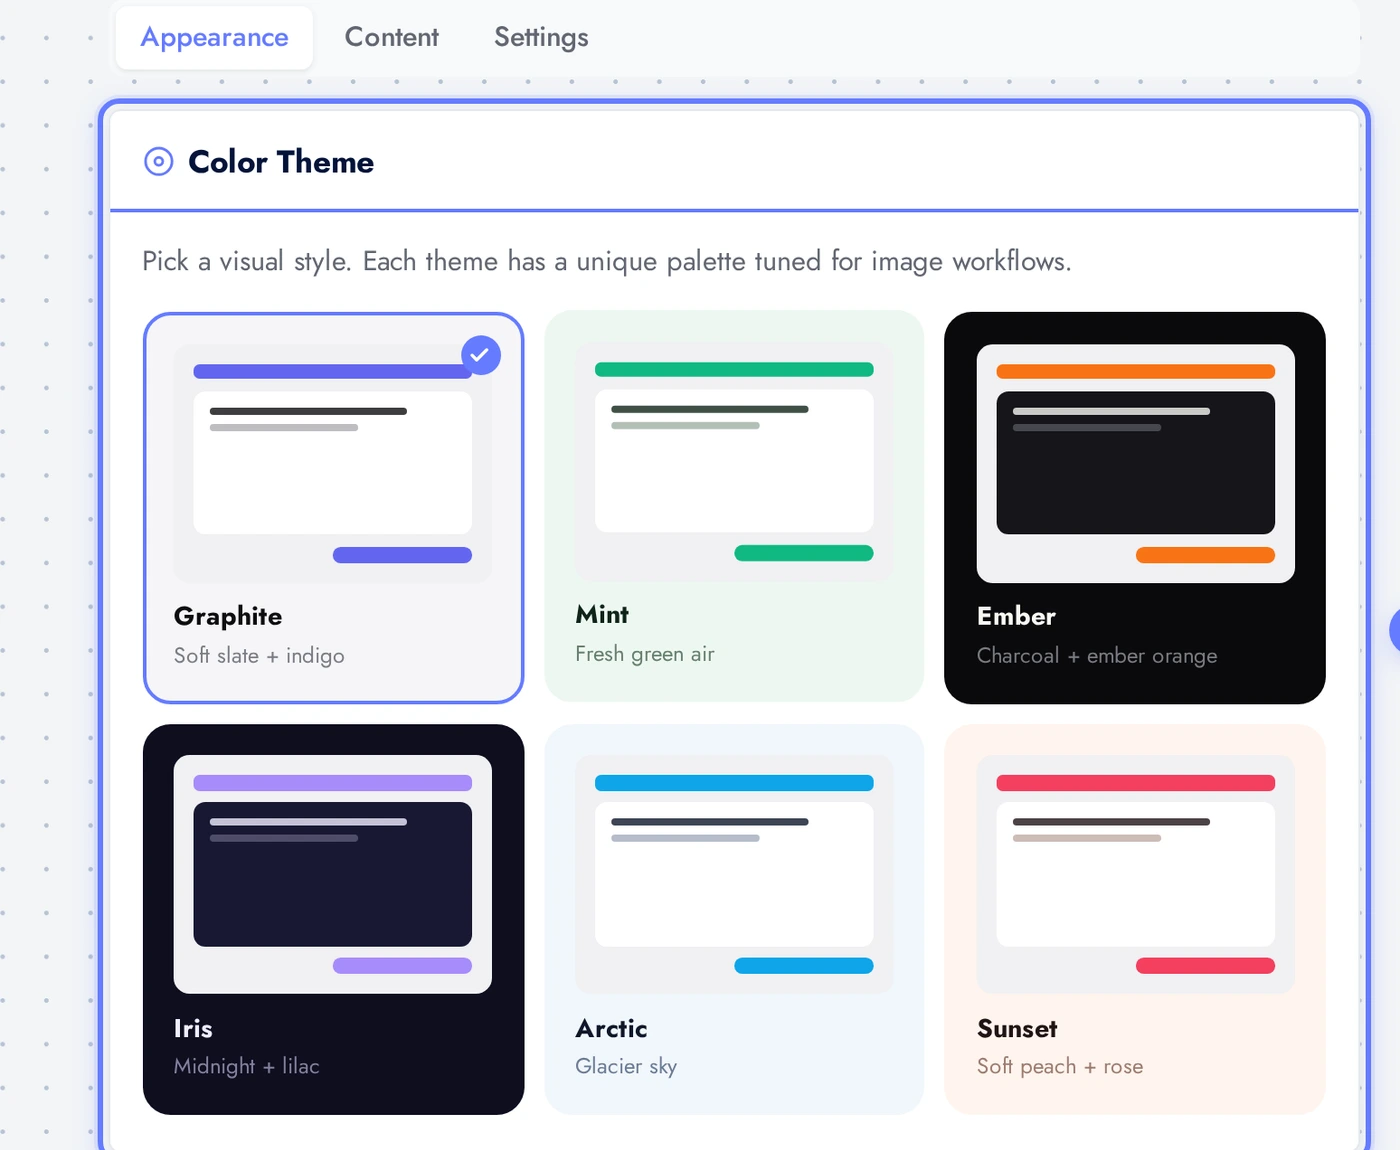
The Appearance tab controls how the compressor screen looks inside your app. Three controls: theme, layout, custom colors.
Six pre-tuned themes available. Each theme adjusts background, surface, text, accent, and CTA colors together so the result always looks deliberate. The phone preview on the right updates the moment you click a theme card.
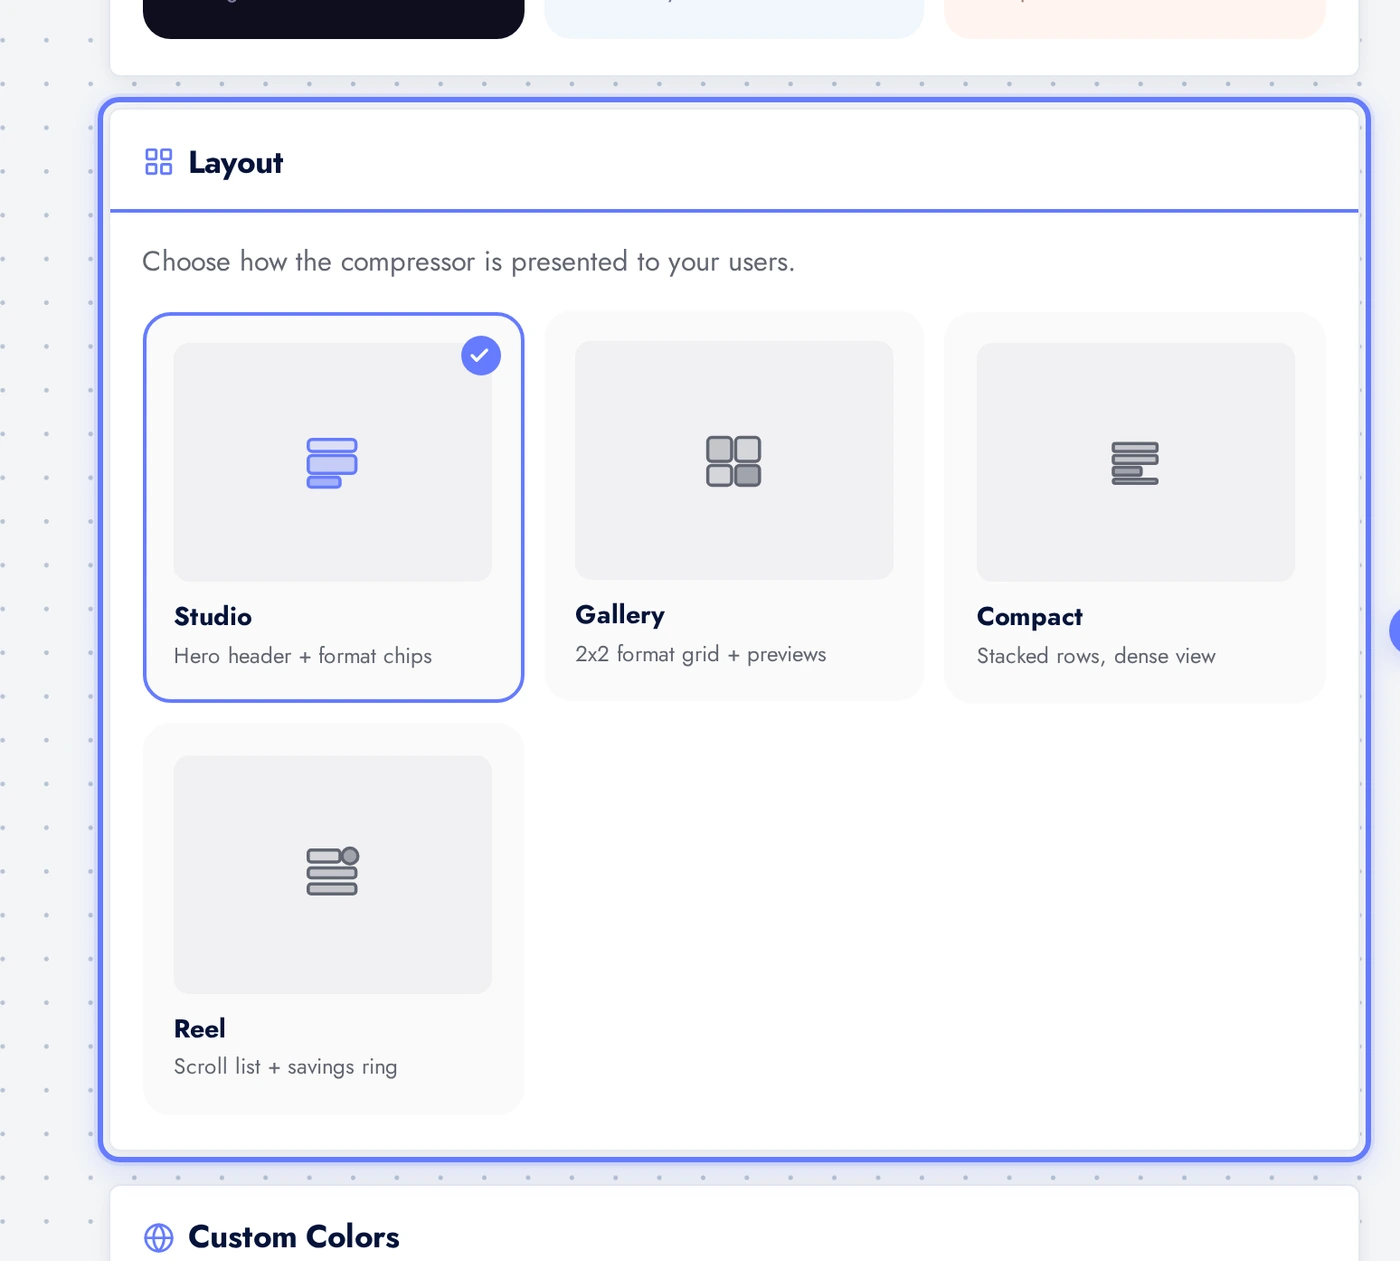
Below the theme grid, the Layout card offers four arrangements: Studio (hero header plus format chips), Gallery (2x2 format grid with preview tiles), Compact (dense stacked rows), and Reel (vertical scroll list with savings ring per image, unique to the compressor).
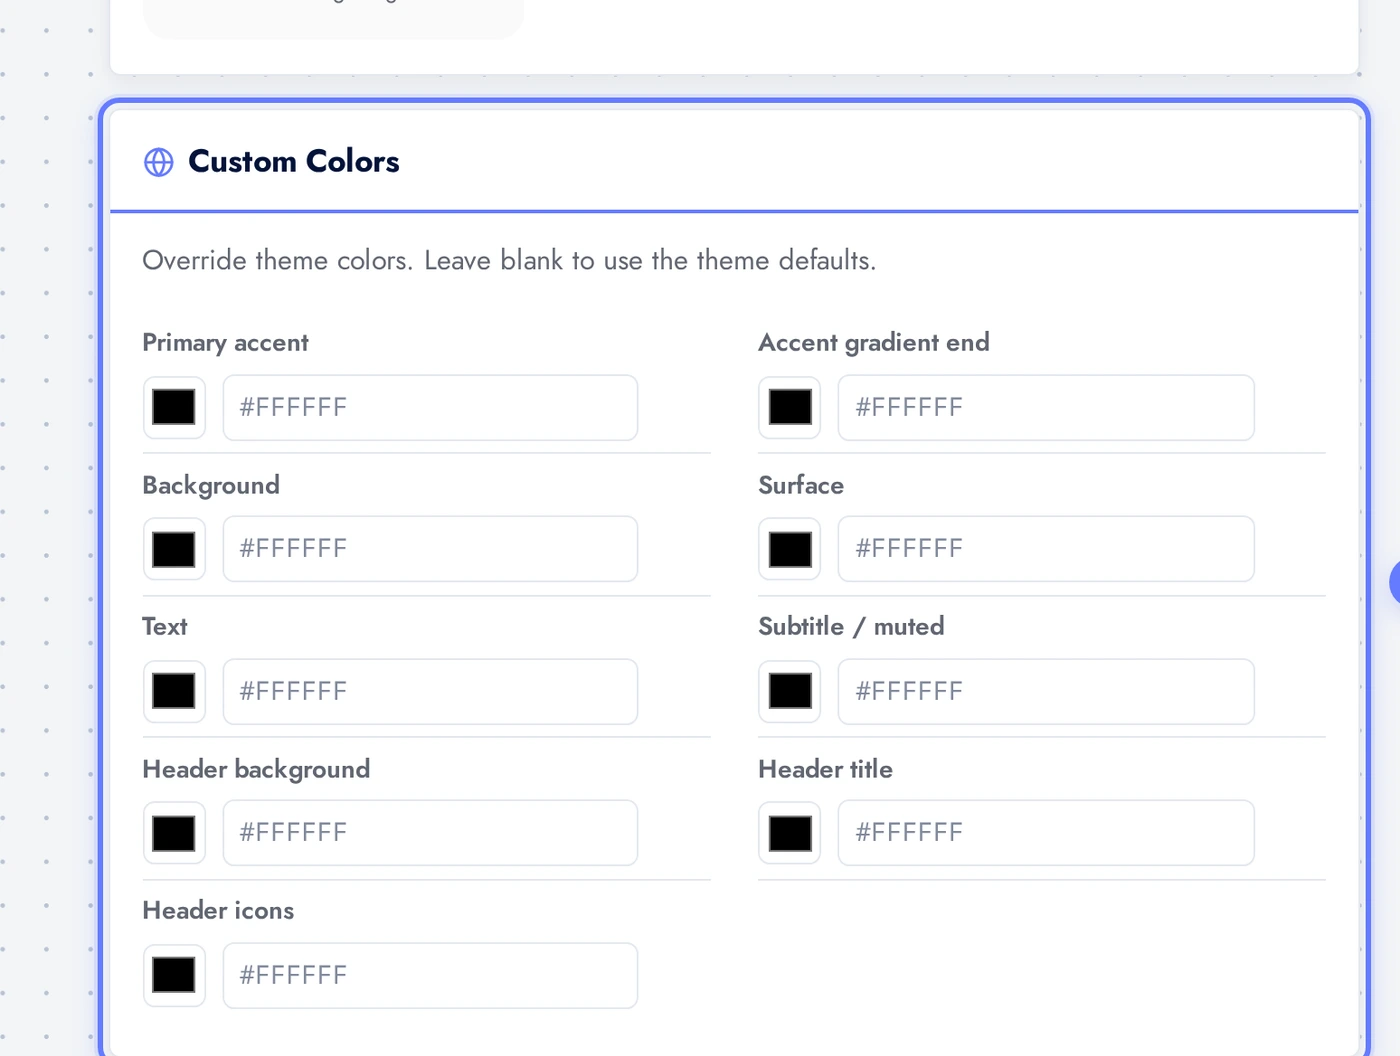
The Custom Colors card lets you override individual colours from the theme. Useful when you want the compressor to match your brand exactly while keeping the rest of the theme.
The Content Tab
The Content tab is where you write the user-facing copy and decide which UI elements appear inside the compressor.
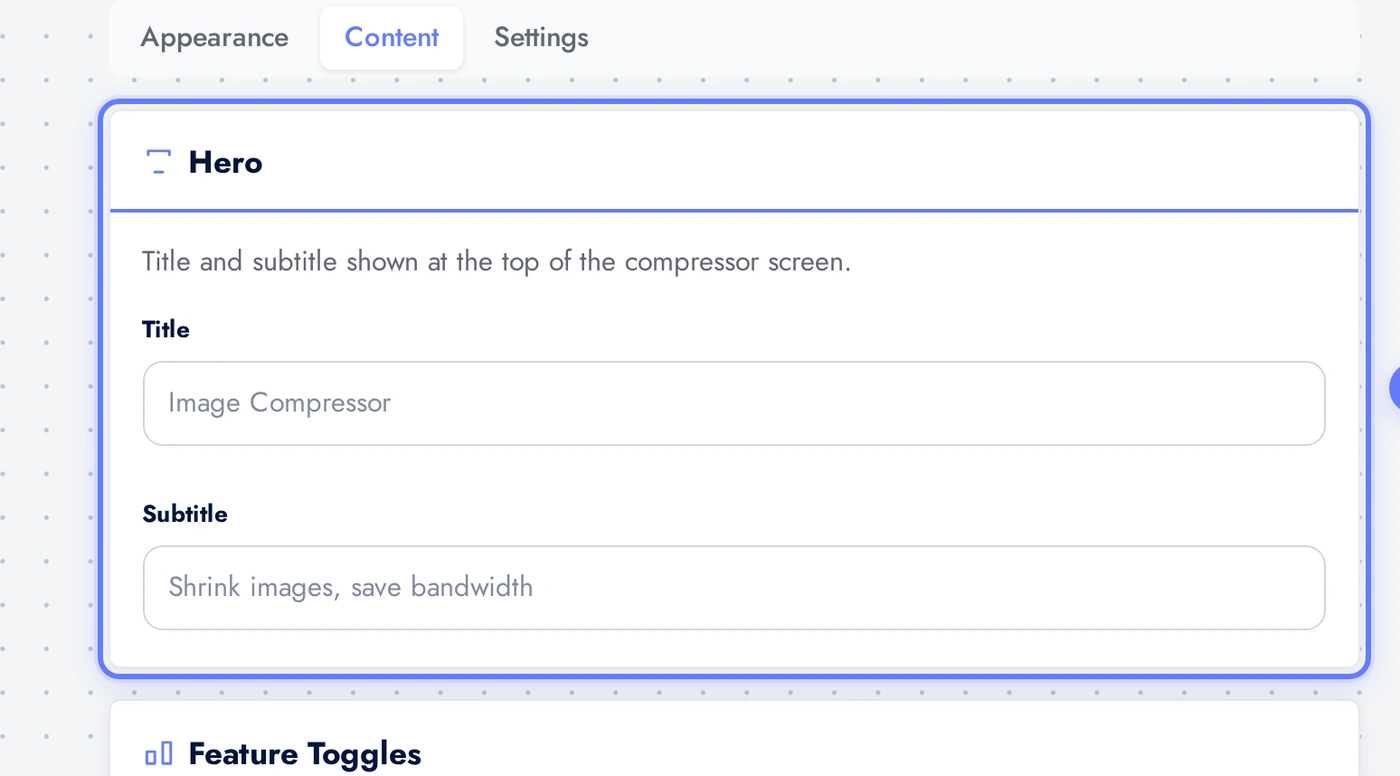
The Hero card holds the title and subtitle shown at the top of the compressor screen. Title is 60 chars max, subtitle 120. Defaults are sensible ("Image Compressor" / "Shrink images, save bandwidth") but customise them to match your brand voice.
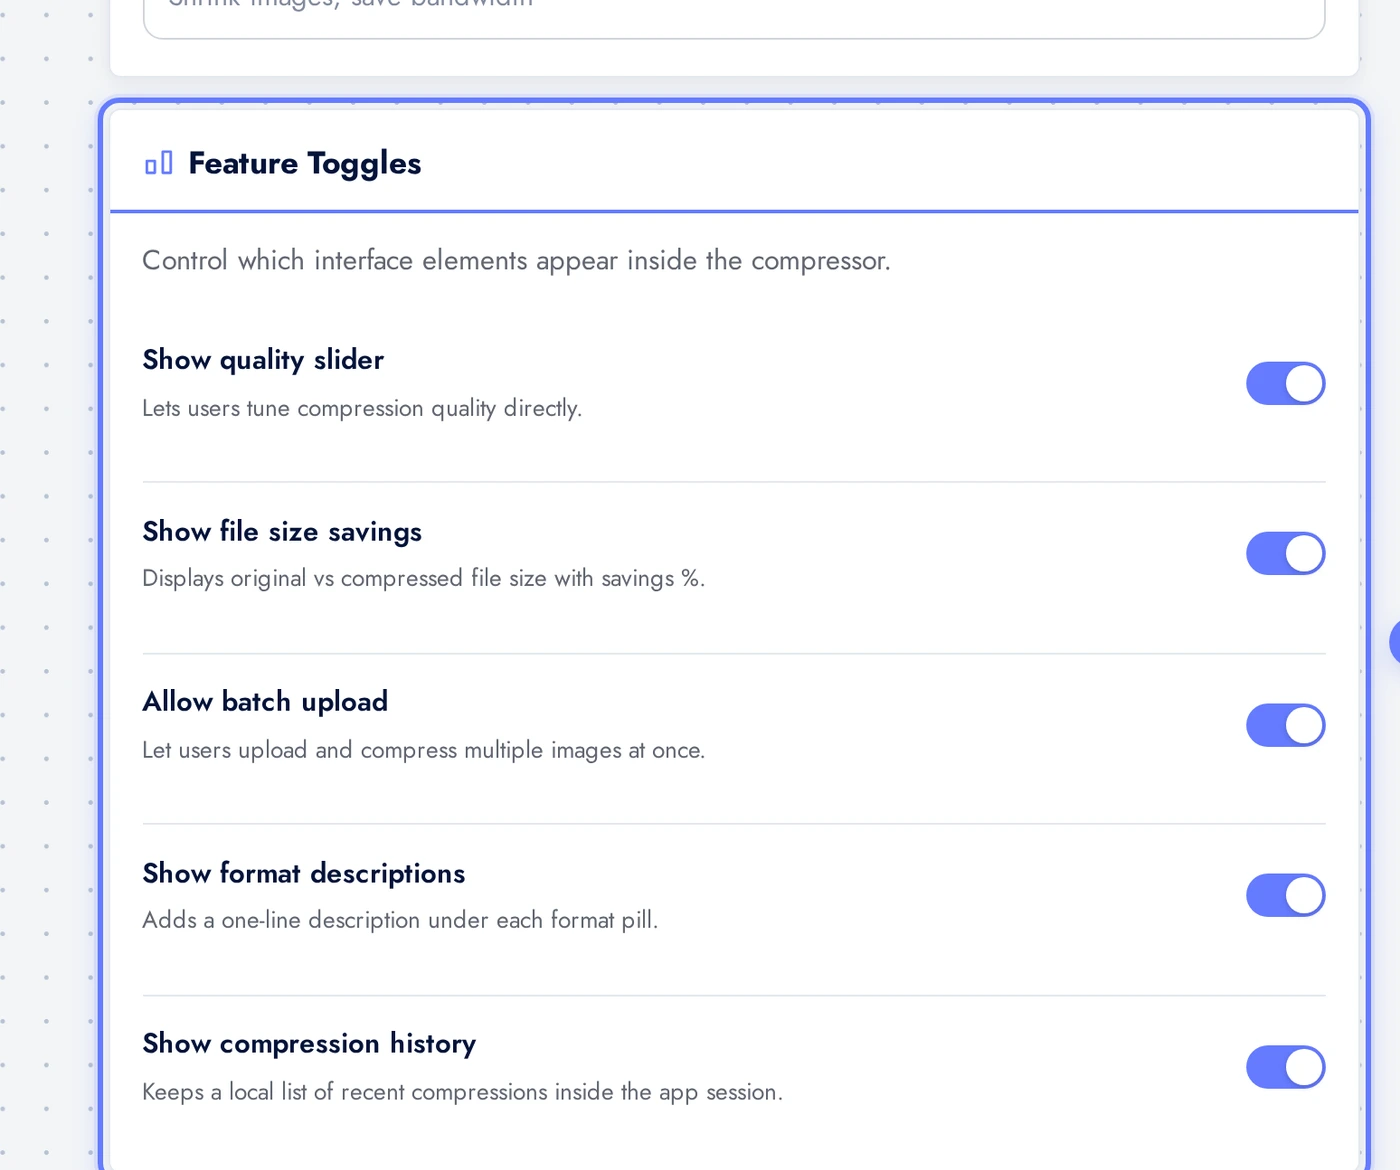
The Feature Toggles card decides which UI elements appear. Quality slider lets users tune compression directly. Size comparison shows the savings percentage on each result. Batch upload lets users compress multiple images at once. Compression history keeps a session-local list of recent compressions.
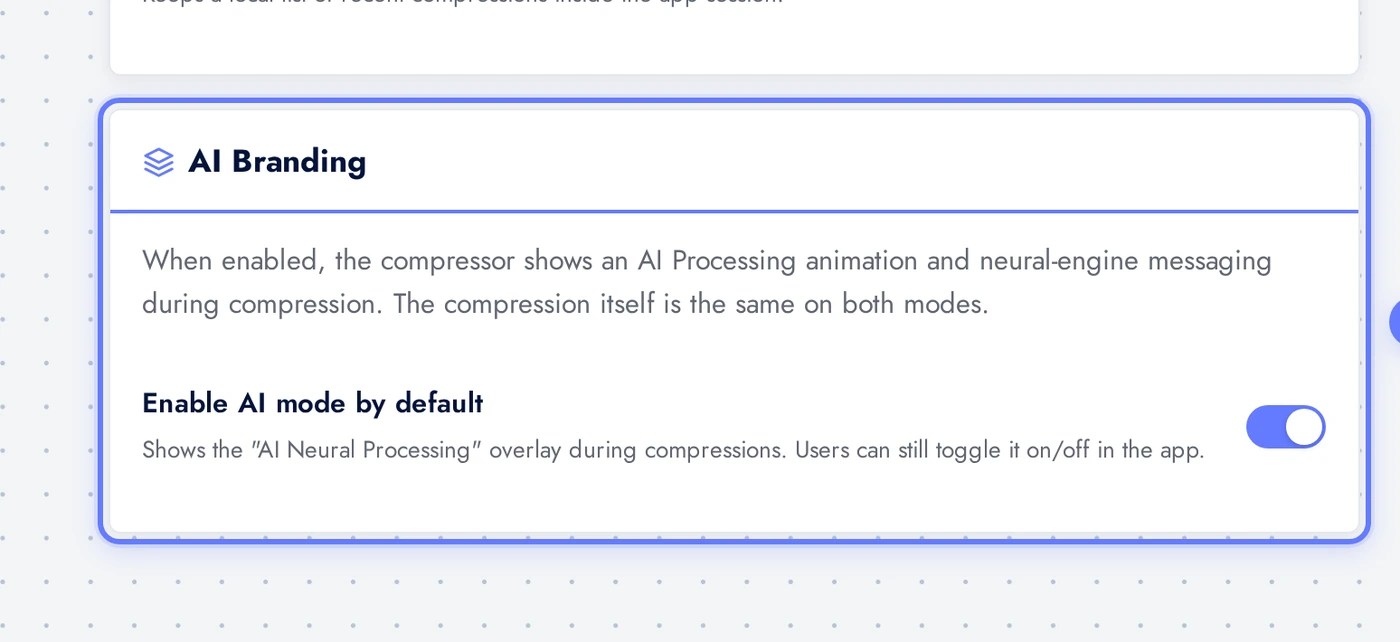
The AI Branding card controls whether the compressor shows the AI Neural Processing animation during compression. The compression itself is the same on both modes; this toggle only changes presentation. AI mode on feels premium, AI mode off is a quieter utility look.
The Settings Tab
The Settings tab controls limits and output behaviour.
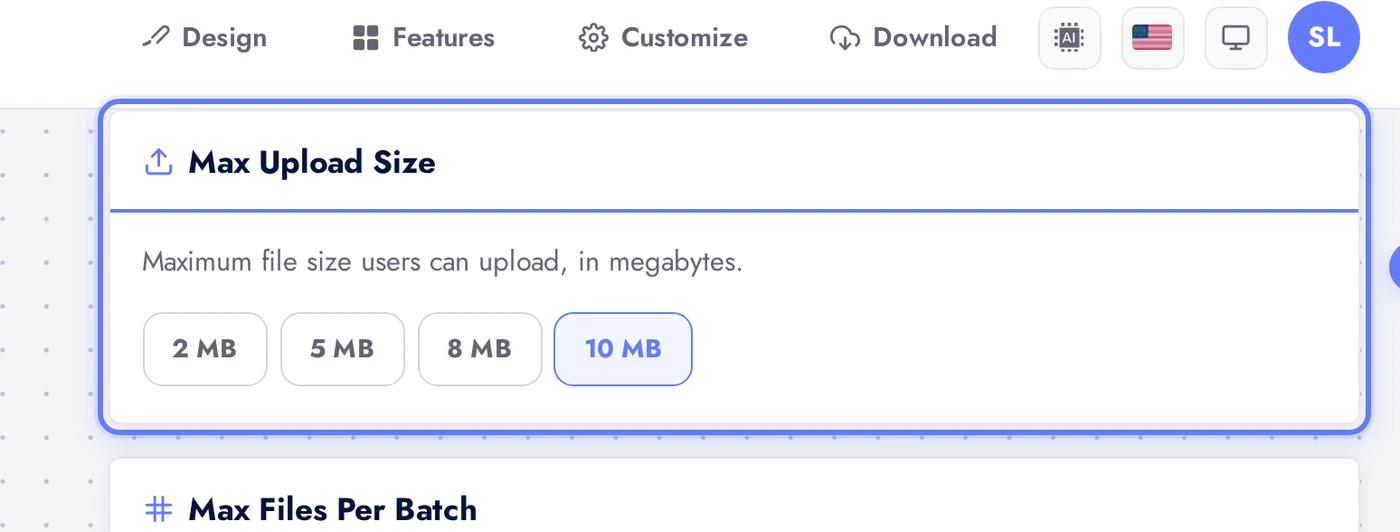
The Max Upload Size card decides the largest file users can submit. Pick from 2, 5, 8, or 10 MB. Larger limits mean more bandwidth and slower processing. Default is 10 MB which is the sweet spot for most photo apps.
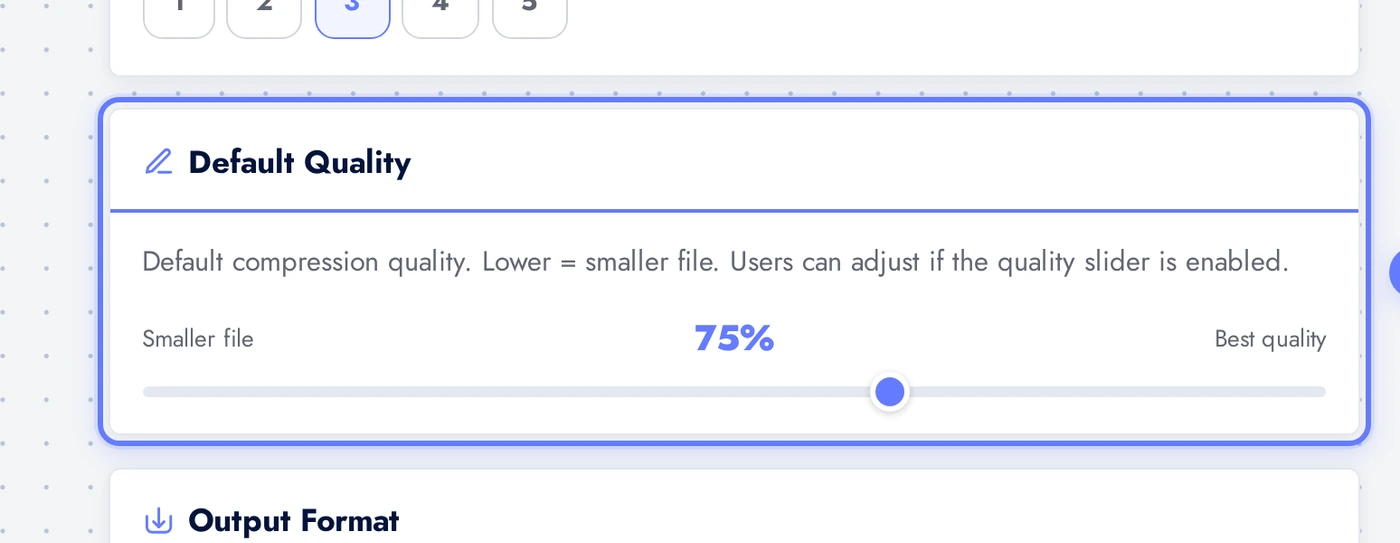
The Default Quality slider sets the compression starting point. Lower means smaller file. Range is 40 to 95, default is 75 (sweet spot for photos). If the Quality slider toggle is on in the Content tab, users can adjust at compress time; if off, every compression uses this default.
Live Preview
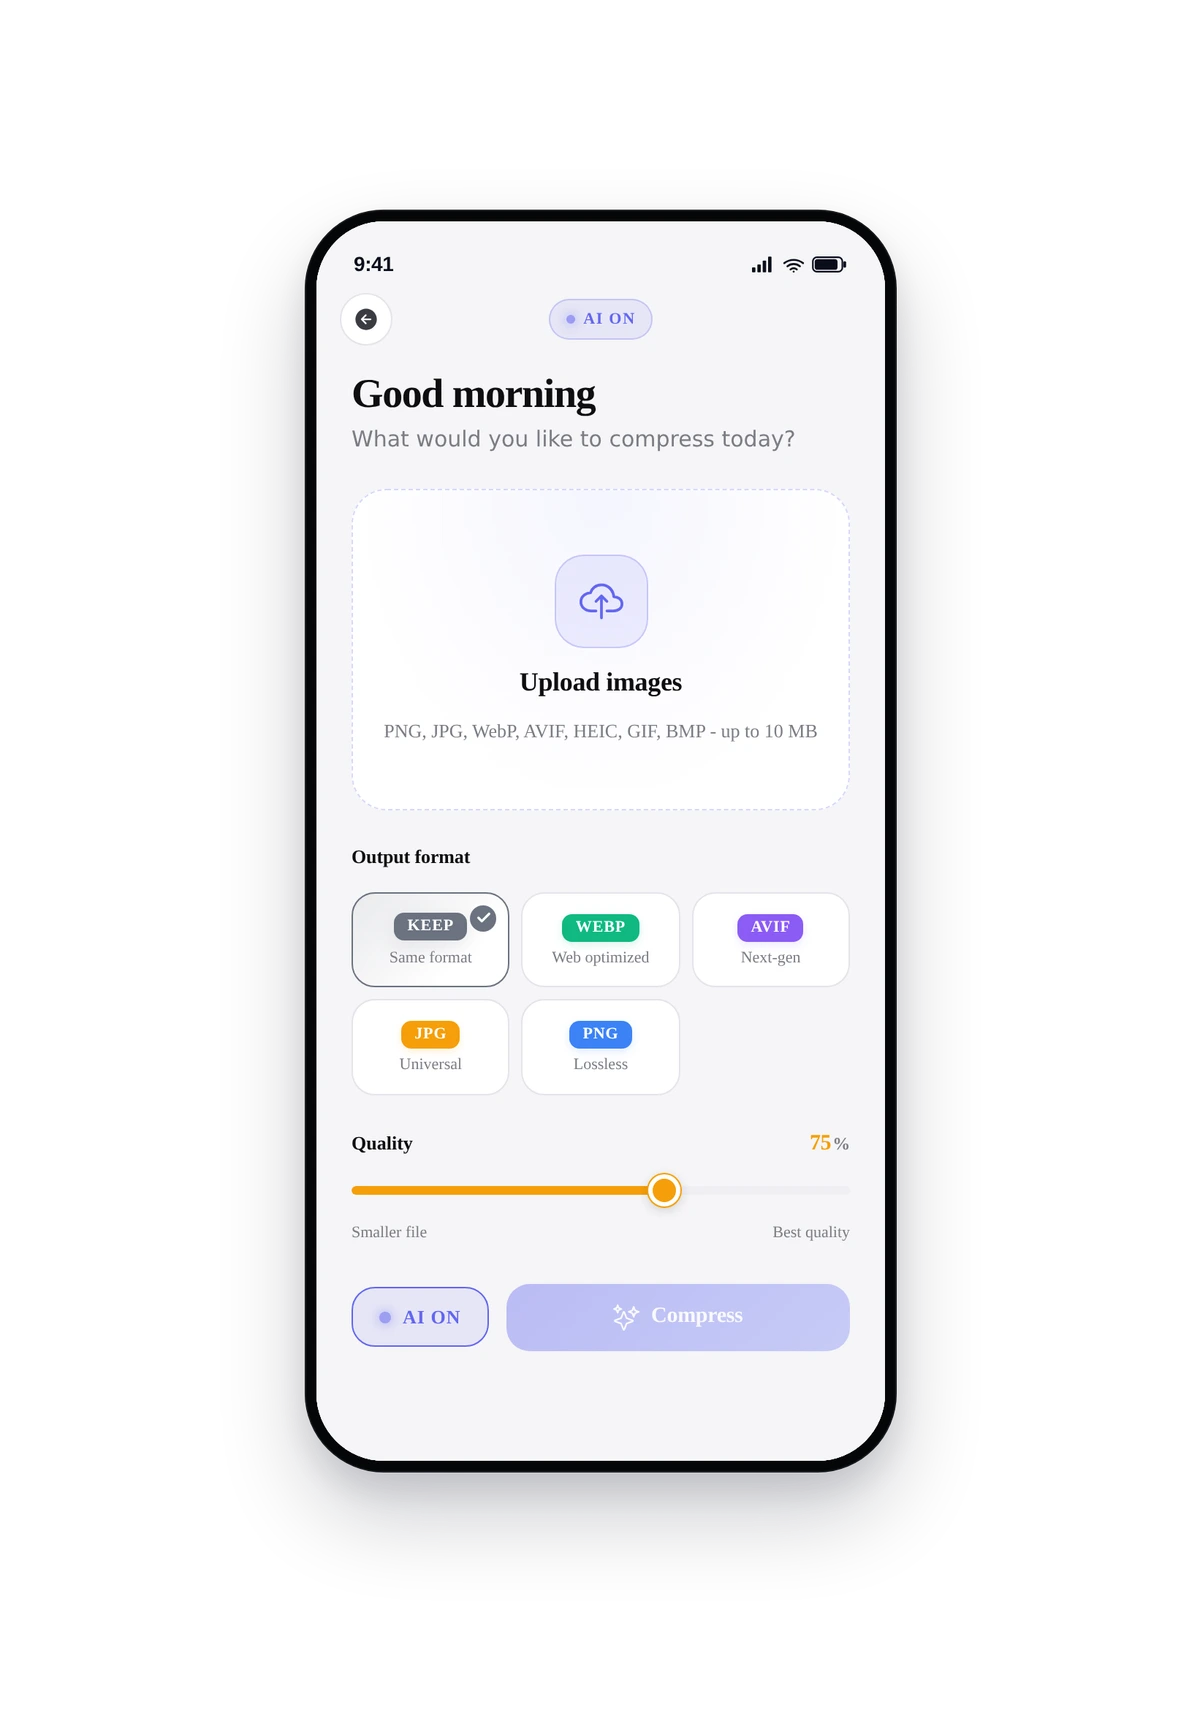
Here is the running compressor rendered inside a real phone frame, exactly as your end-users see it:
This is the actual native UI, not a mockup. Tap upload, pick a photo, watch it shrink. The exact look depends on the theme, layout, custom colors, and toggle choices you made in the editor.
Tips
- Keep default quality at 75. Going below 60 introduces visible artifacts in photos with skin tones or fine gradients.
- If you only want one output format (e.g. always WebP), turn Allow format override off. Forces every compressed file to come out as the format you want.
- For social-media apps, turn Show file size savings on. Watching the "saved 73 percent" badge is satisfying and increases re-use.
- For privacy apps, turn Show compression history off so previous images do not stay in the session.
- The Reel layout is unique to the compressor and works great for batch processing. Users scroll through results like a feed.
- Pair with the AI Image Converter if your users will likely want to switch format while compressing.
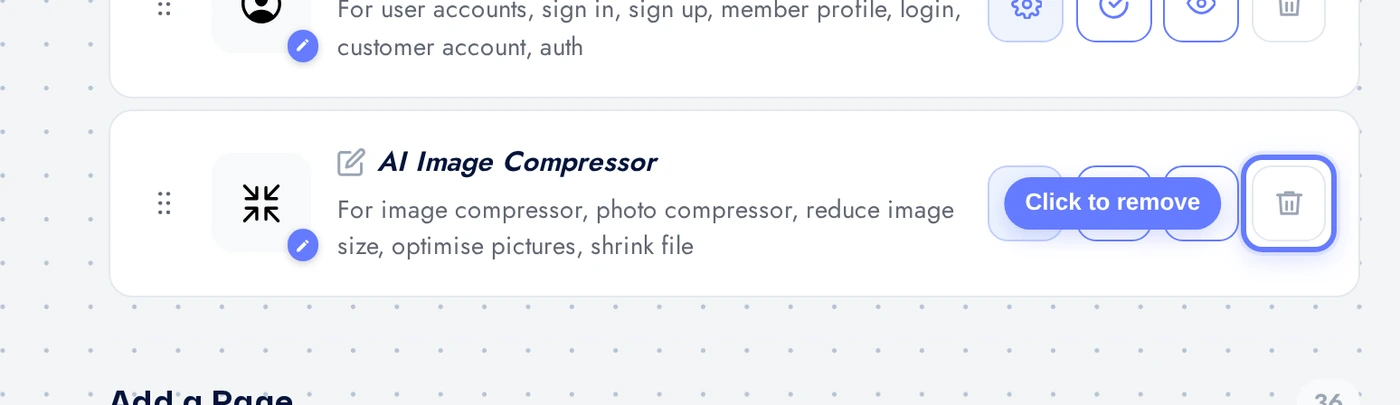
Removing the Feature
If you change your mind, remove the compressor as easily as you added it.
Back on the Features page, find the AI Image Compressor row in the Active list. Click the red trash icon on the right to remove. Confirm in the dialog. The feature is gone from the app instantly.